 ## Add the API key to Ona
1. Go to the [Runners settings page](https://app.gitpod.io/settings/runners).
2. Select an environment runner where you want to enable LLM integration.
3. Scroll down to the "LLM Providers" section.
4. Click the **Configure** button. You'll see a screen like this:
## Add the API key to Ona
1. Go to the [Runners settings page](https://app.gitpod.io/settings/runners).
2. Select an environment runner where you want to enable LLM integration.
3. Scroll down to the "LLM Providers" section.
4. Click the **Configure** button. You'll see a screen like this:
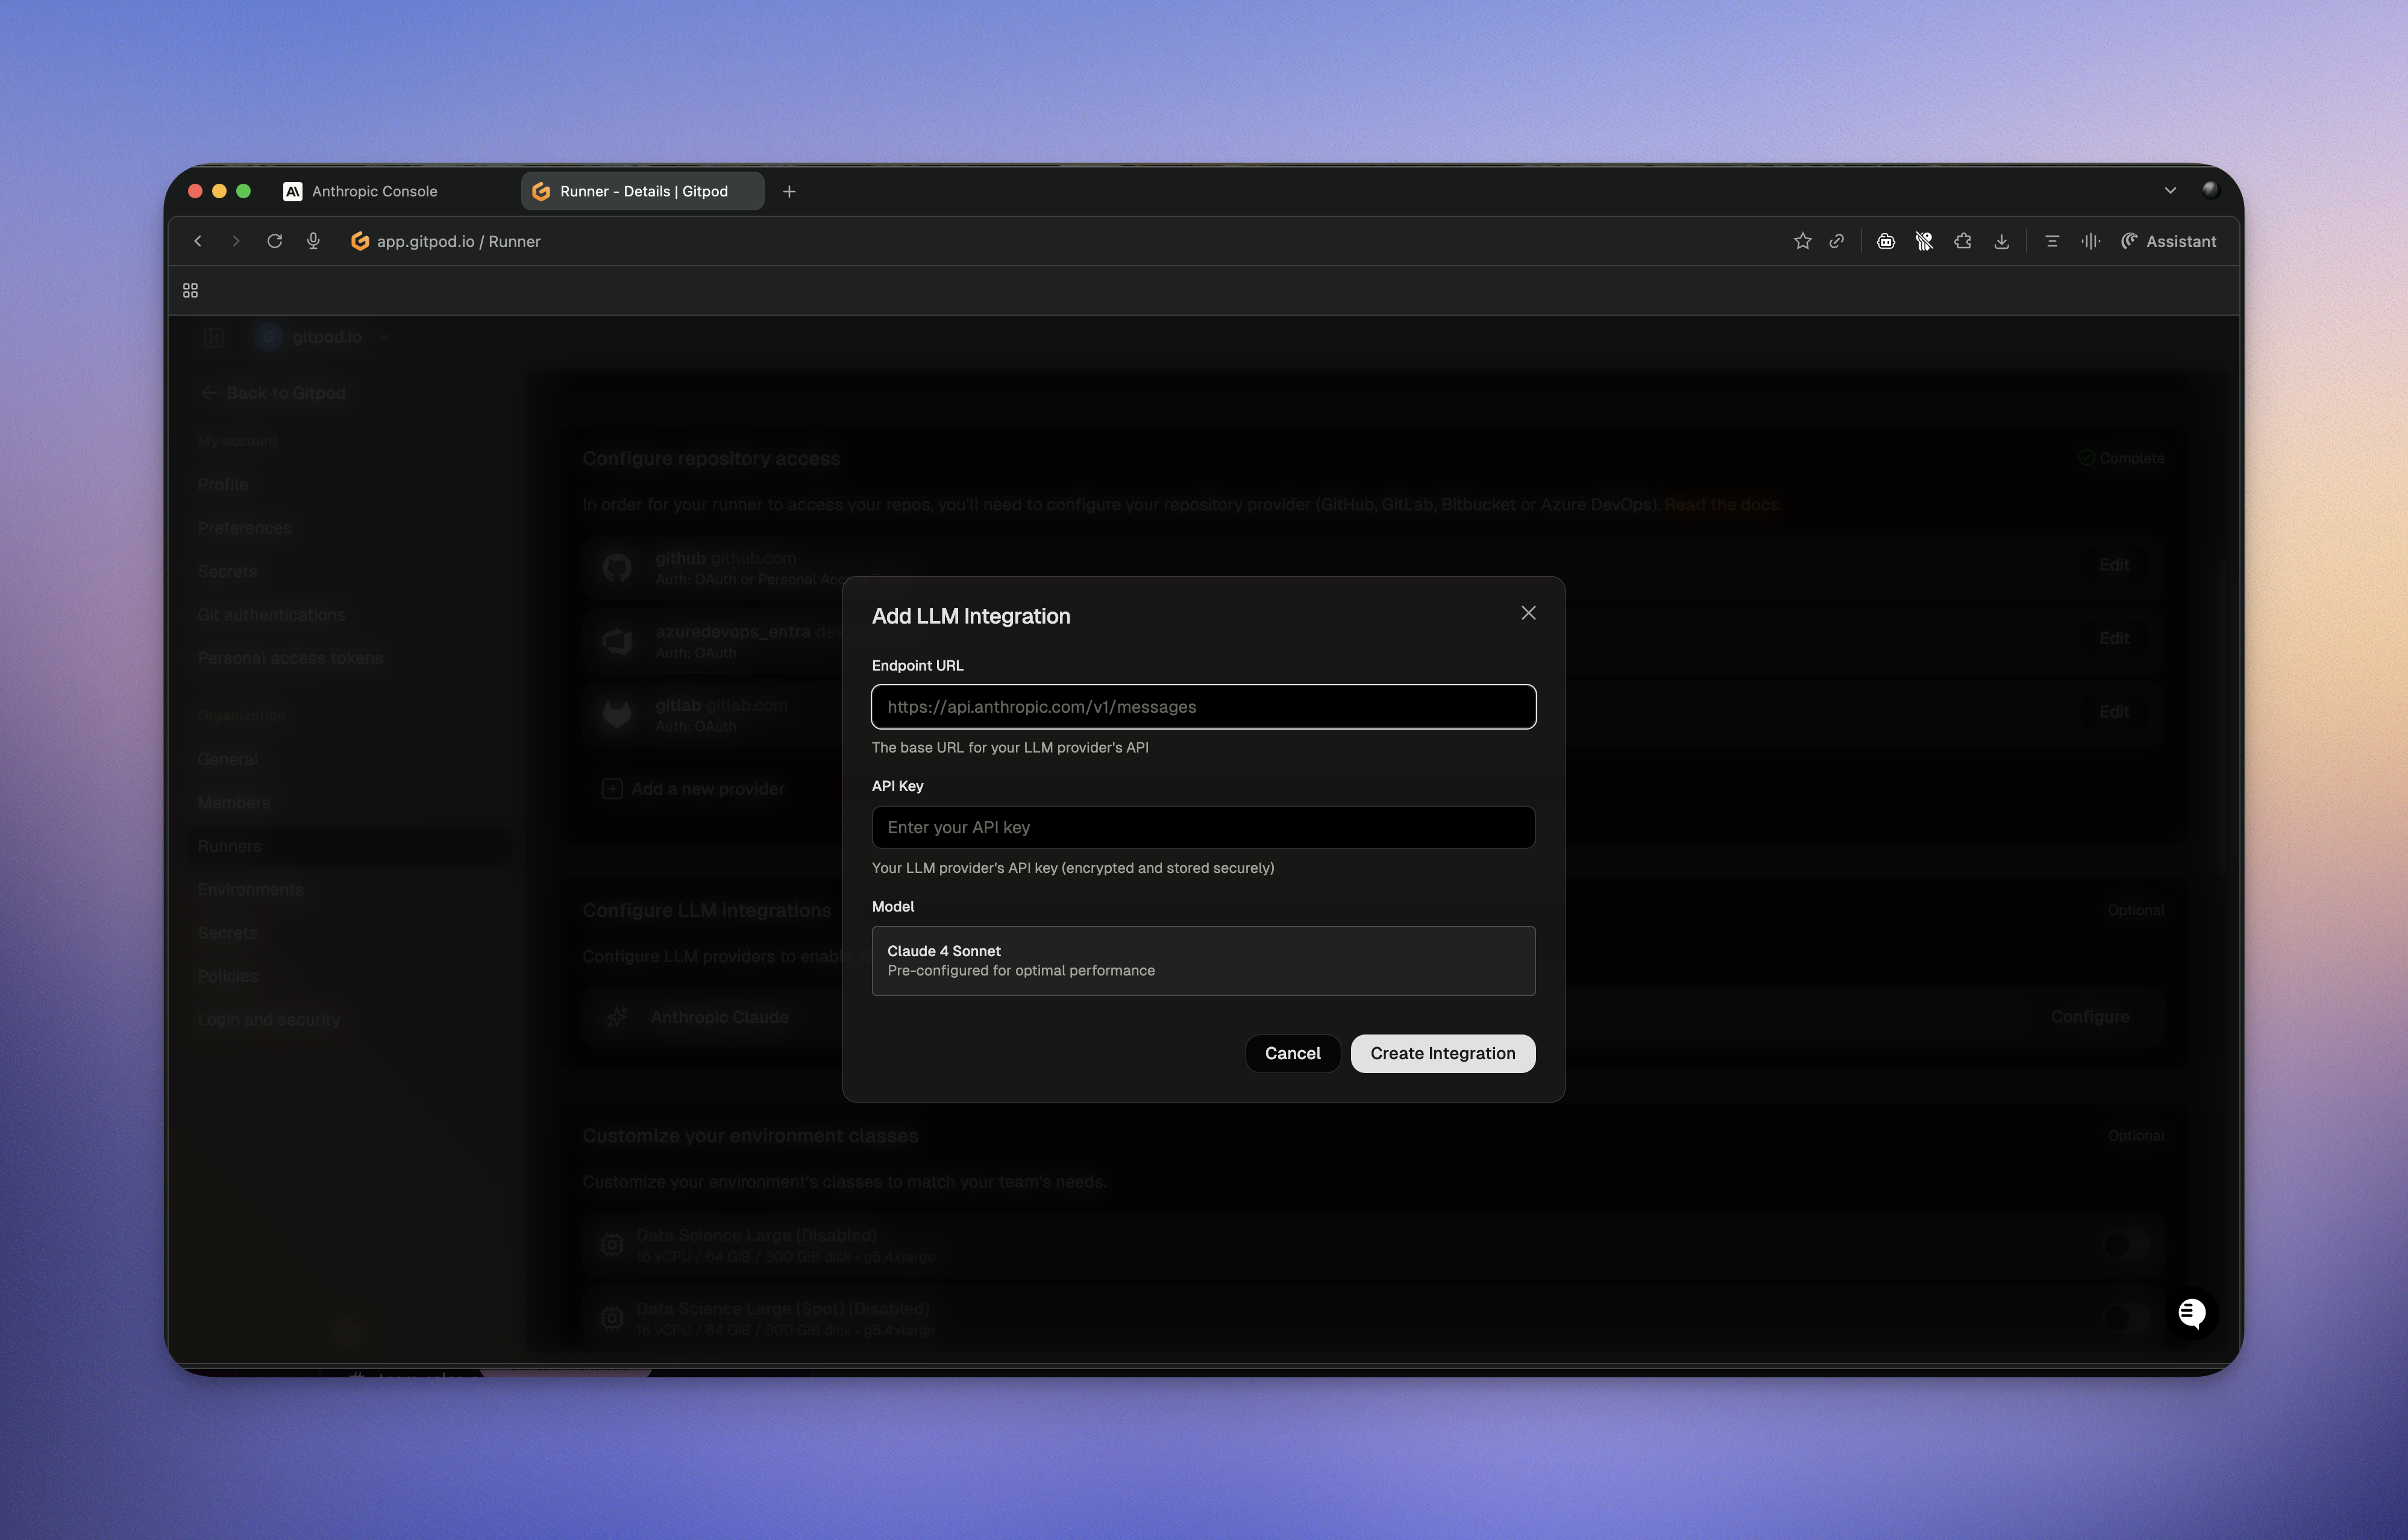 5. For the endpoint URL, enter: `https://api.anthropic.com/v1/messages`
6. Paste the API key into the **API Key** field.
7. Click **Configure**.
## Verify the integration
1. Create a new environment with an enabled runner
2. Open Ona Agent and confirm it can access Anthropic's models
3. Test with a simple code generation request
Your Anthropic LLM provider is now configured and ready to use with Ona Agent.
# Bedrock
Source: https://ona.com/docs/ona/agents/llm-providers/bedrock
Set up Ona Agent to use AWS Bedrock
5. For the endpoint URL, enter: `https://api.anthropic.com/v1/messages`
6. Paste the API key into the **API Key** field.
7. Click **Configure**.
## Verify the integration
1. Create a new environment with an enabled runner
2. Open Ona Agent and confirm it can access Anthropic's models
3. Test with a simple code generation request
Your Anthropic LLM provider is now configured and ready to use with Ona Agent.
# Bedrock
Source: https://ona.com/docs/ona/agents/llm-providers/bedrock
Set up Ona Agent to use AWS Bedrock
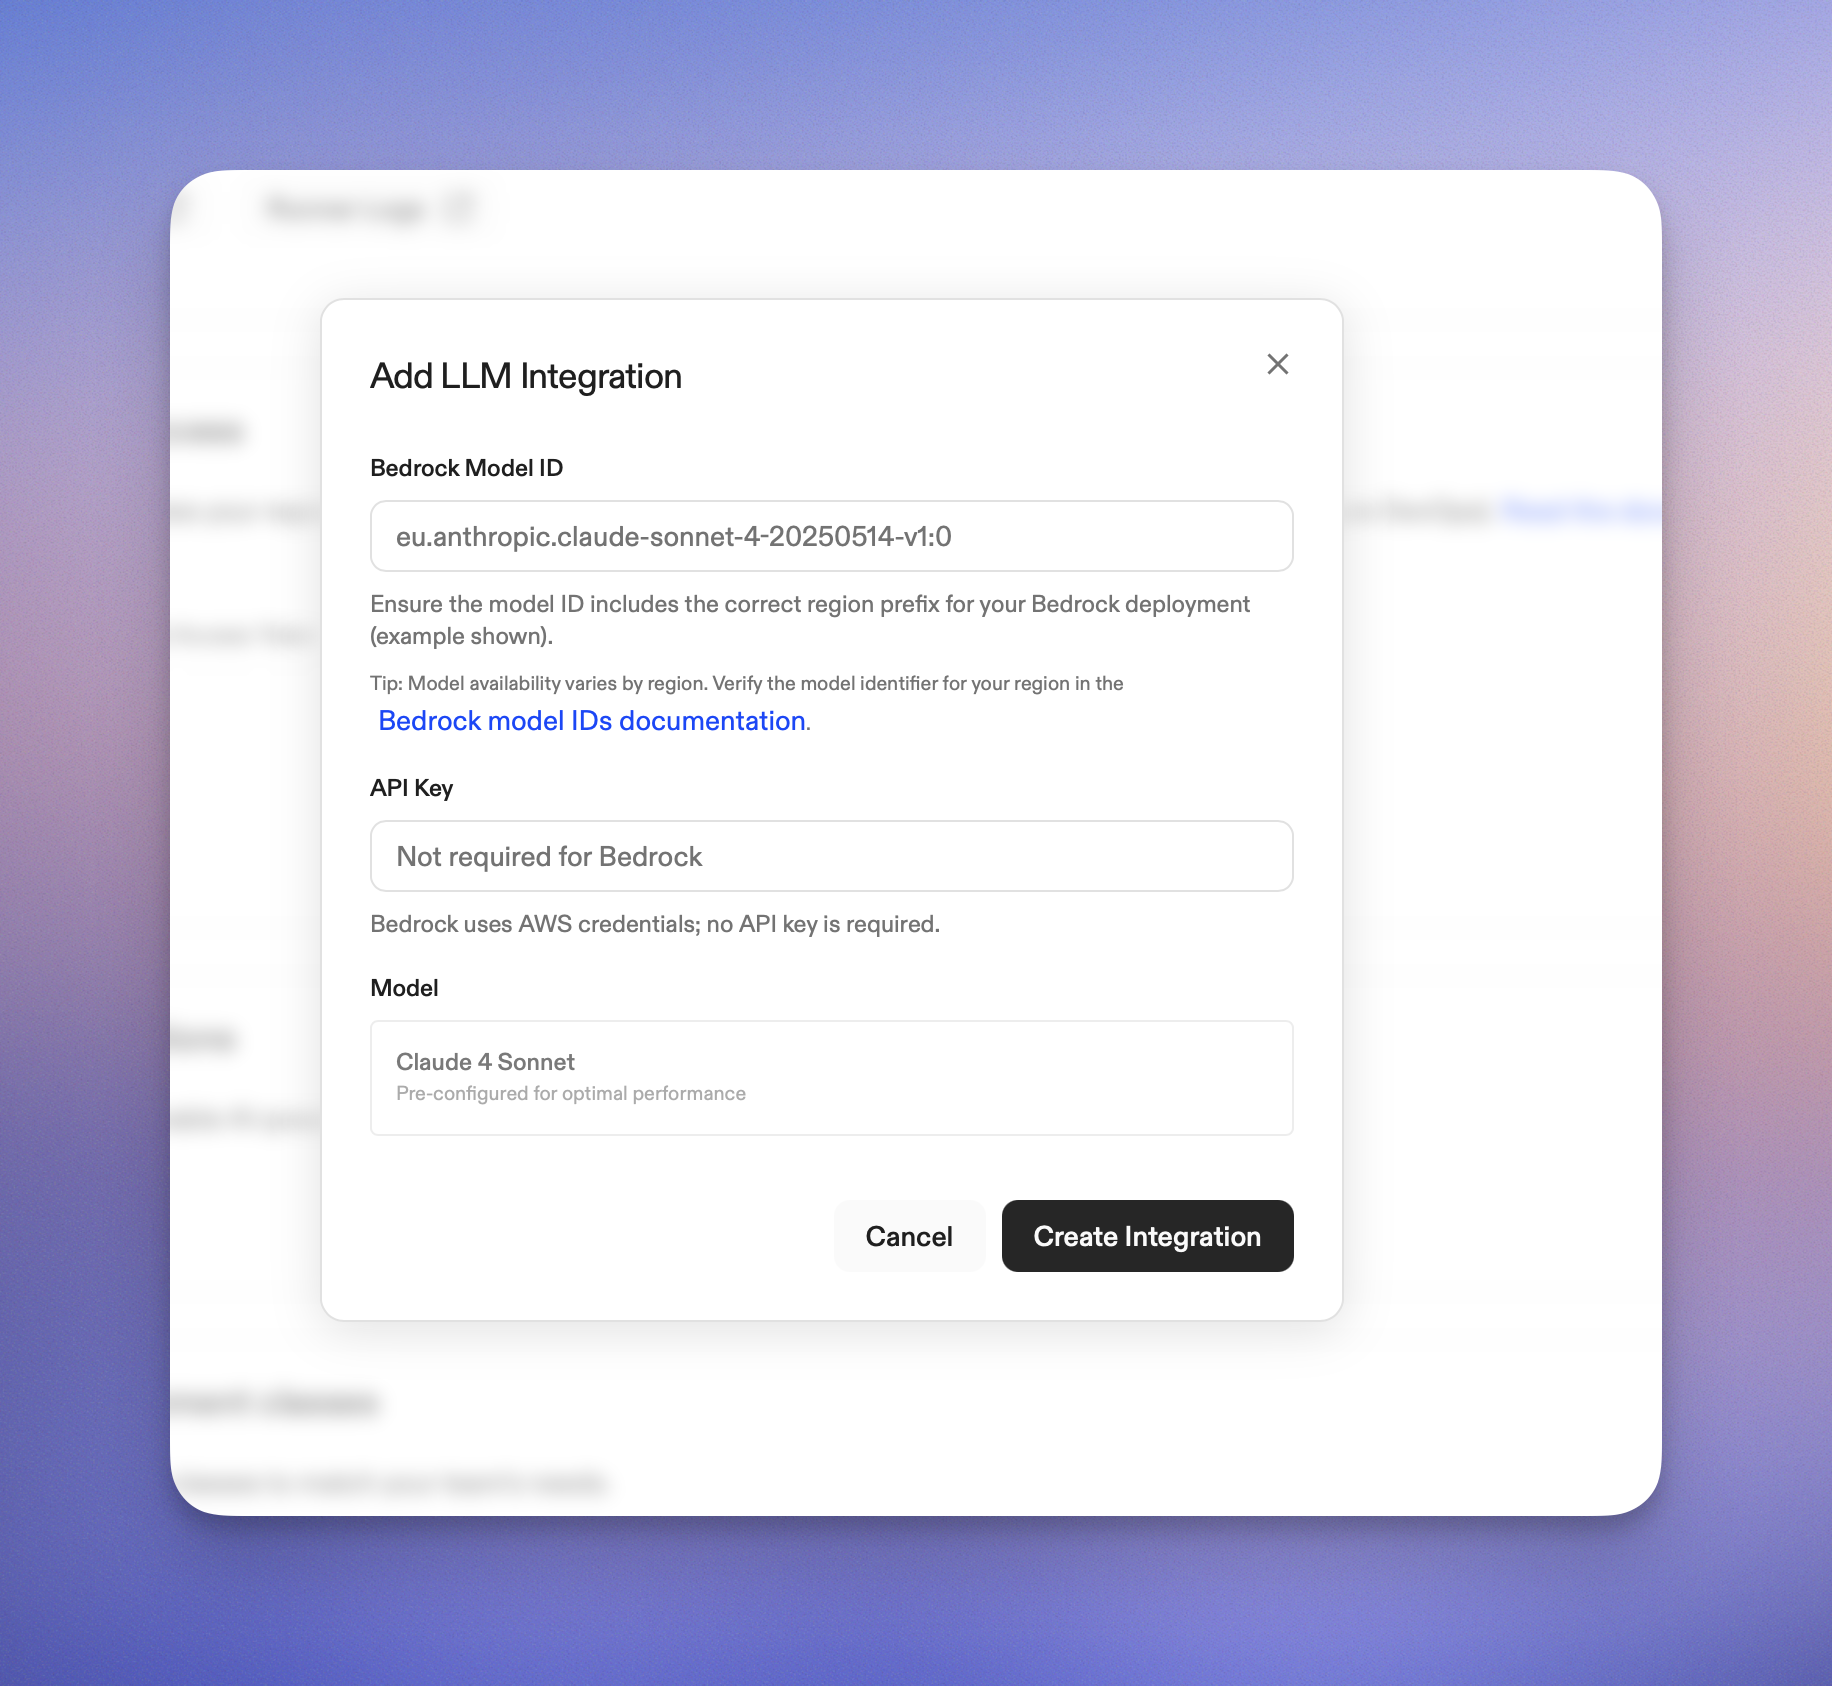
 5. In "Bedrock Model ID", enter the model ID for your region (for example, `eu.anthropic.claude-sonnet-4-20250514-v1:0`).
Tip: Verify the identifier for your region in the AWS [Bedrock model IDs documentation](https://docs.aws.amazon.com/bedrock/latest/userguide/inference-profiles-support.html).
6. "API Key": Not required for Bedrock (AWS credentials are used).
7. If a model preset selector is shown, choose "Claude 4.5 Sonnet".
8. Click **Create Integration**
5. In "Bedrock Model ID", enter the model ID for your region (for example, `eu.anthropic.claude-sonnet-4-20250514-v1:0`).
Tip: Verify the identifier for your region in the AWS [Bedrock model IDs documentation](https://docs.aws.amazon.com/bedrock/latest/userguide/inference-profiles-support.html).
6. "API Key": Not required for Bedrock (AWS credentials are used).
7. If a model preset selector is shown, choose "Claude 4.5 Sonnet".
8. Click **Create Integration**
 ## Verify the integration
1. Create a new environment with the configured runner
2. Open Ona Agent and start a conversation
3. If Ona Agent responds, the integration is working. Test with a simple code generation request
## Supported models
Ona supports **Claude Sonnet 4.5** on AWS Bedrock.
### Identifying available models
There are two ways to identify models: **foundation models** and **inference profiles**. Inference profiles are resources that define a model and one or more regions for routing requests, enabling cross-region inference, usage tracking, and cost monitoring. Availability varies by region — some regions only support foundation models, while others support both foundation models and inference profiles.
Check model availability per region in the [AWS documentation](https://docs.aws.amazon.com/bedrock/latest/userguide/models-regions.html).
You can check availability using AWS CLI commands from your environment, assuming you have proper authentication and region environment variables set:
```bash
# List available inference profiles
aws bedrock list-inference-profiles
# List available foundation models
aws bedrock list-foundation-models
```
### Testing model connectivity
To run a simple smoke test and verify a model works:
```bash
# Set your foundation model or inference profile ID
export MODEL_ID="eu.anthropic.claude-sonnet-4-20250514-v1:0"
# Test the model with a simple request
aws bedrock-runtime invoke-model \
--model-id "$MODEL_ID" \
--body '{
"messages": [
{
"role": "user",
"content": "Hi there!"
}
],
"max_tokens": 50,
"anthropic_version": "bedrock-2023-05-31"
}' \
--cli-binary-format raw-in-base64-out
```
If the smoke test succeeds, the model should work with Ona Agent.
## Troubleshooting
### Common issues
**Model not available in region**
* Use a model ID that is available in your runner's region
* For regionalized models, use the correct prefix (for example, `us.anthropic.*`)
**AccessDeniedException when invoking model**
* Ensure the runner role has `bedrock:InvokeModel` and `bedrock:InvokeModelWithResponseStream`
* Confirm model access is approved in the Bedrock console
**Invalid model URI format**
* Use `bedrock://
## Verify the integration
1. Create a new environment with the configured runner
2. Open Ona Agent and start a conversation
3. If Ona Agent responds, the integration is working. Test with a simple code generation request
## Supported models
Ona supports **Claude Sonnet 4.5** on AWS Bedrock.
### Identifying available models
There are two ways to identify models: **foundation models** and **inference profiles**. Inference profiles are resources that define a model and one or more regions for routing requests, enabling cross-region inference, usage tracking, and cost monitoring. Availability varies by region — some regions only support foundation models, while others support both foundation models and inference profiles.
Check model availability per region in the [AWS documentation](https://docs.aws.amazon.com/bedrock/latest/userguide/models-regions.html).
You can check availability using AWS CLI commands from your environment, assuming you have proper authentication and region environment variables set:
```bash
# List available inference profiles
aws bedrock list-inference-profiles
# List available foundation models
aws bedrock list-foundation-models
```
### Testing model connectivity
To run a simple smoke test and verify a model works:
```bash
# Set your foundation model or inference profile ID
export MODEL_ID="eu.anthropic.claude-sonnet-4-20250514-v1:0"
# Test the model with a simple request
aws bedrock-runtime invoke-model \
--model-id "$MODEL_ID" \
--body '{
"messages": [
{
"role": "user",
"content": "Hi there!"
}
],
"max_tokens": 50,
"anthropic_version": "bedrock-2023-05-31"
}' \
--cli-binary-format raw-in-base64-out
```
If the smoke test succeeds, the model should work with Ona Agent.
## Troubleshooting
### Common issues
**Model not available in region**
* Use a model ID that is available in your runner's region
* For regionalized models, use the correct prefix (for example, `us.anthropic.*`)
**AccessDeniedException when invoking model**
* Ensure the runner role has `bedrock:InvokeModel` and `bedrock:InvokeModelWithResponseStream`
* Confirm model access is approved in the Bedrock console
**Invalid model URI format**
* Use `bedrock://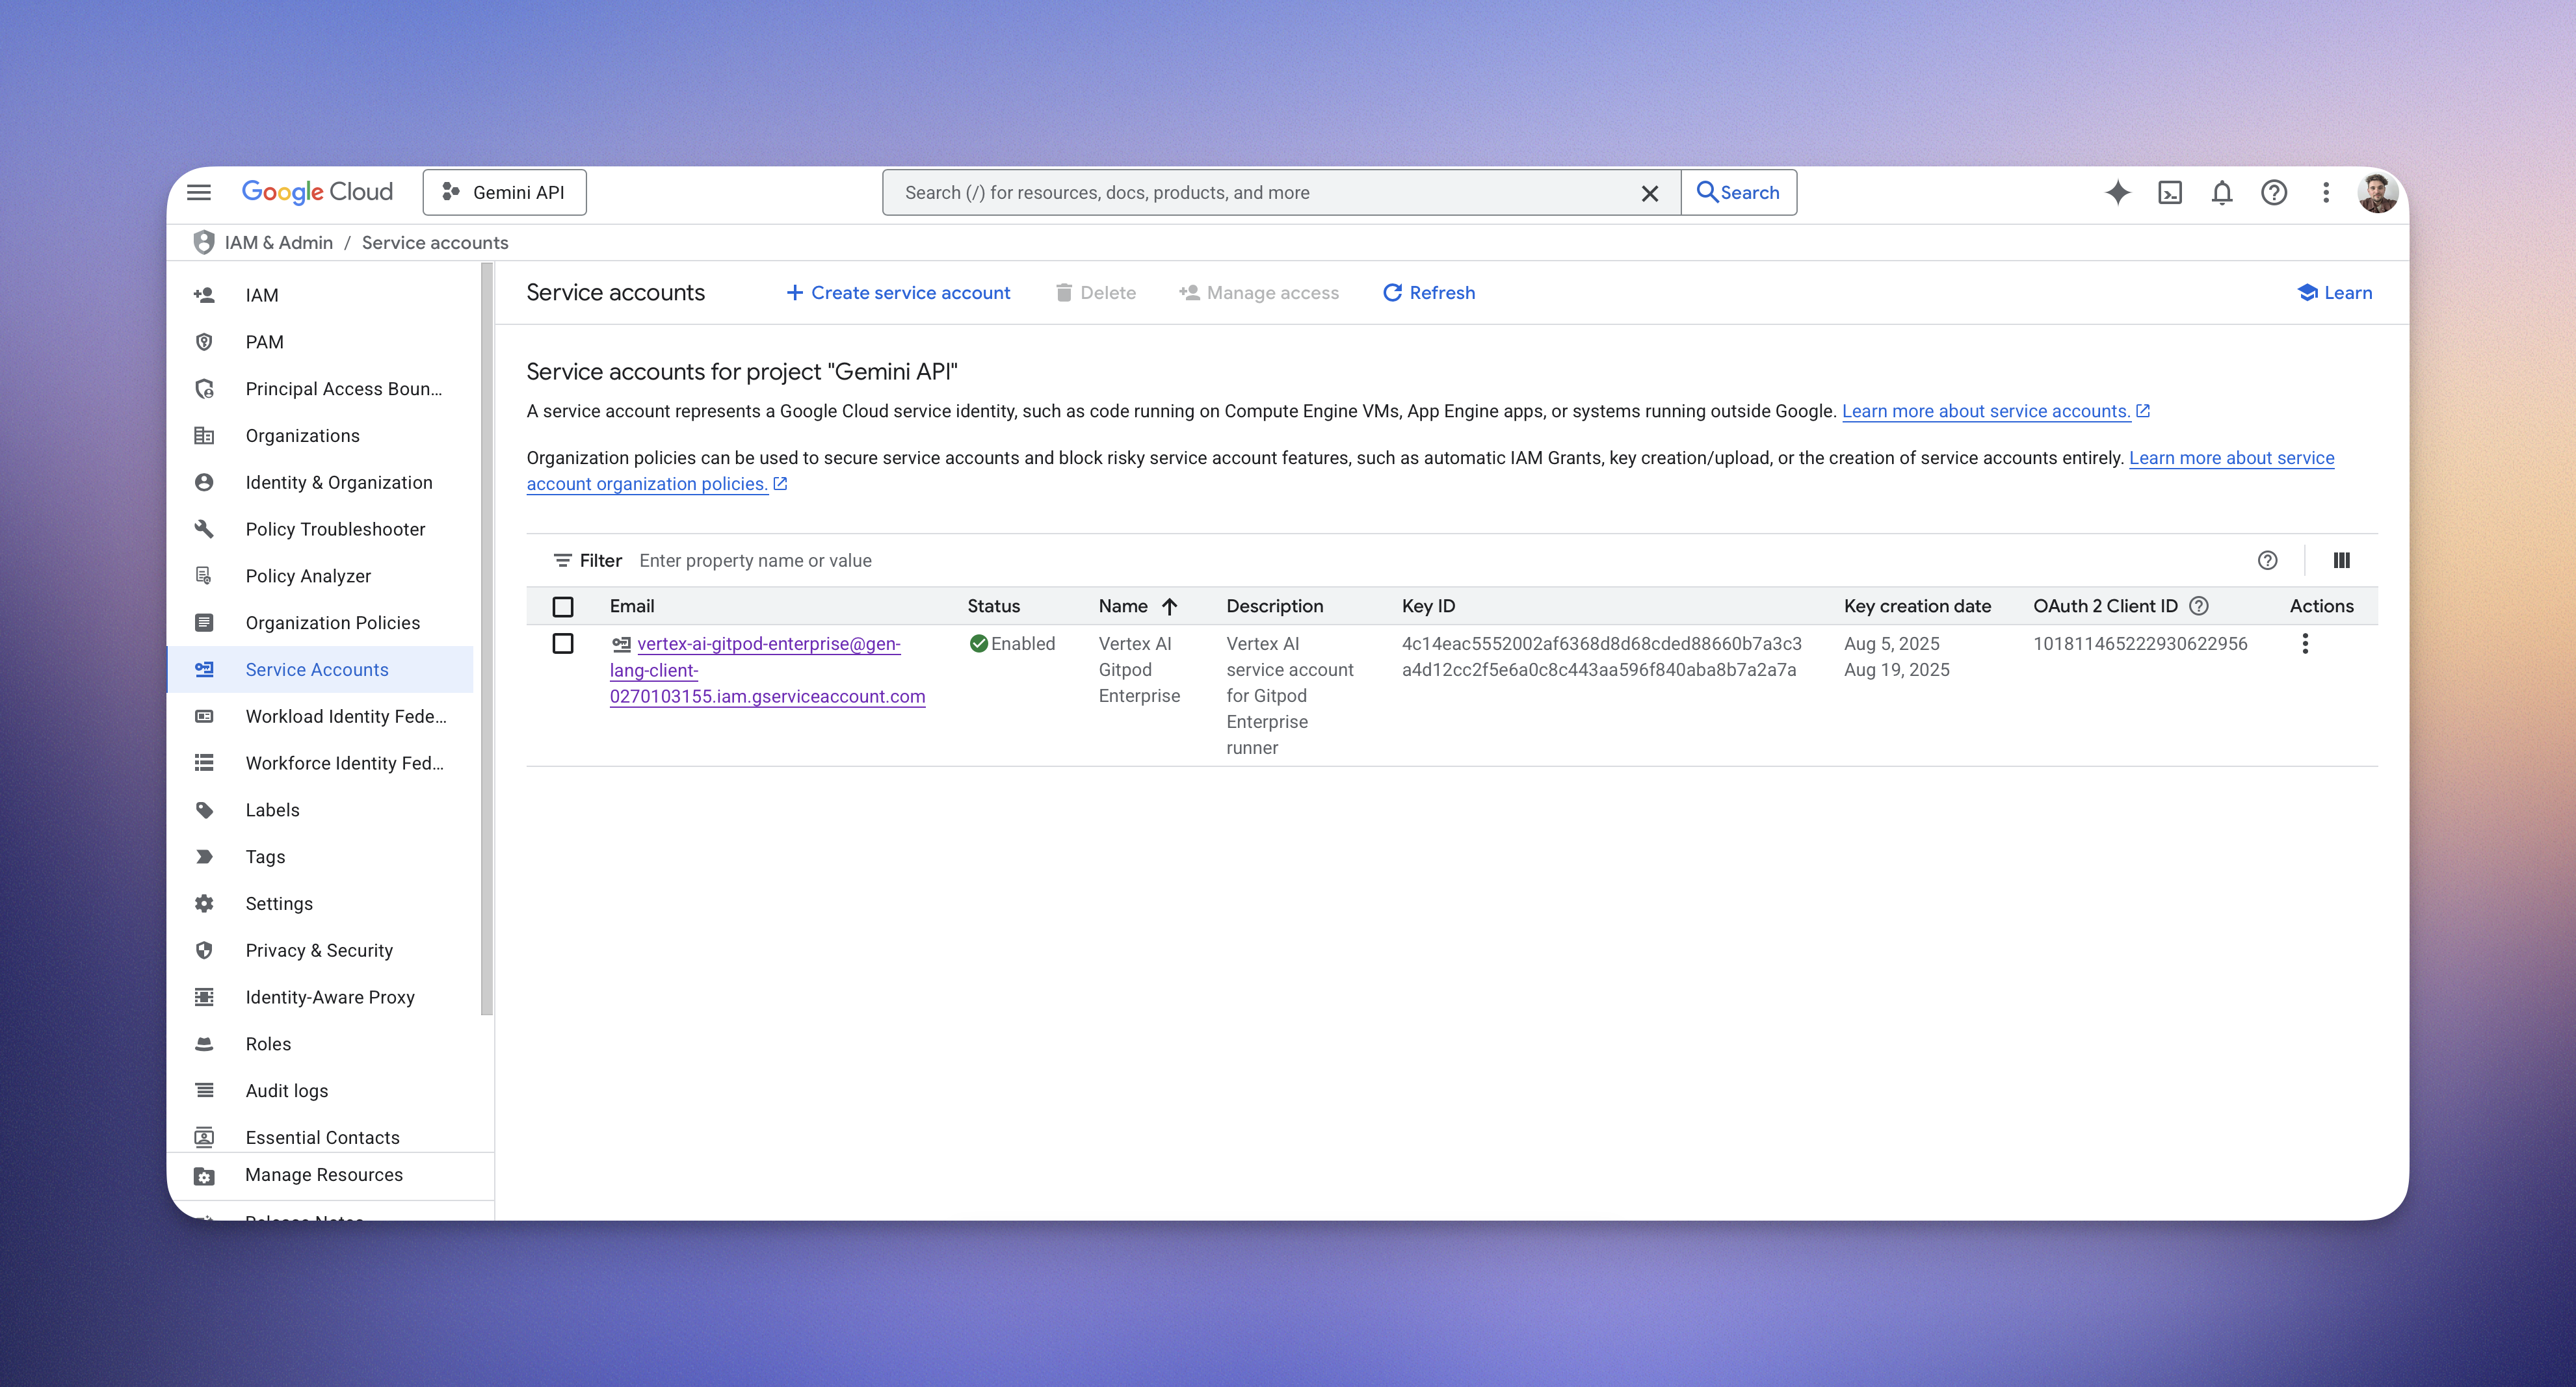 ## Configure the Vertex AI endpoint
### Endpoint format
```bash
vertex://${region}/${model-version}
```
Use the [global](https://cloud.google.com/blog/products/ai-machine-learning/global-endpoint-for-claude-models-generally-available-on-vertex-ai) region for dynamic routing across available infrastructure.
## Add the configuration to Ona
You can configure a Vertex integration in two ways:
* [Gitpod CLI](/ona/integrations/cli)
* Through the UI
### Option 1: Gitpod CLI
```bash
export VERTEX_SERVICE_ACCOUNT_JSON=$(cat /path/to/service-account.json)
gitpod runner config llm-integration create
## Configure the Vertex AI endpoint
### Endpoint format
```bash
vertex://${region}/${model-version}
```
Use the [global](https://cloud.google.com/blog/products/ai-machine-learning/global-endpoint-for-claude-models-generally-available-on-vertex-ai) region for dynamic routing across available infrastructure.
## Add the configuration to Ona
You can configure a Vertex integration in two ways:
* [Gitpod CLI](/ona/integrations/cli)
* Through the UI
### Option 1: Gitpod CLI
```bash
export VERTEX_SERVICE_ACCOUNT_JSON=$(cat /path/to/service-account.json)
gitpod runner config llm-integration create 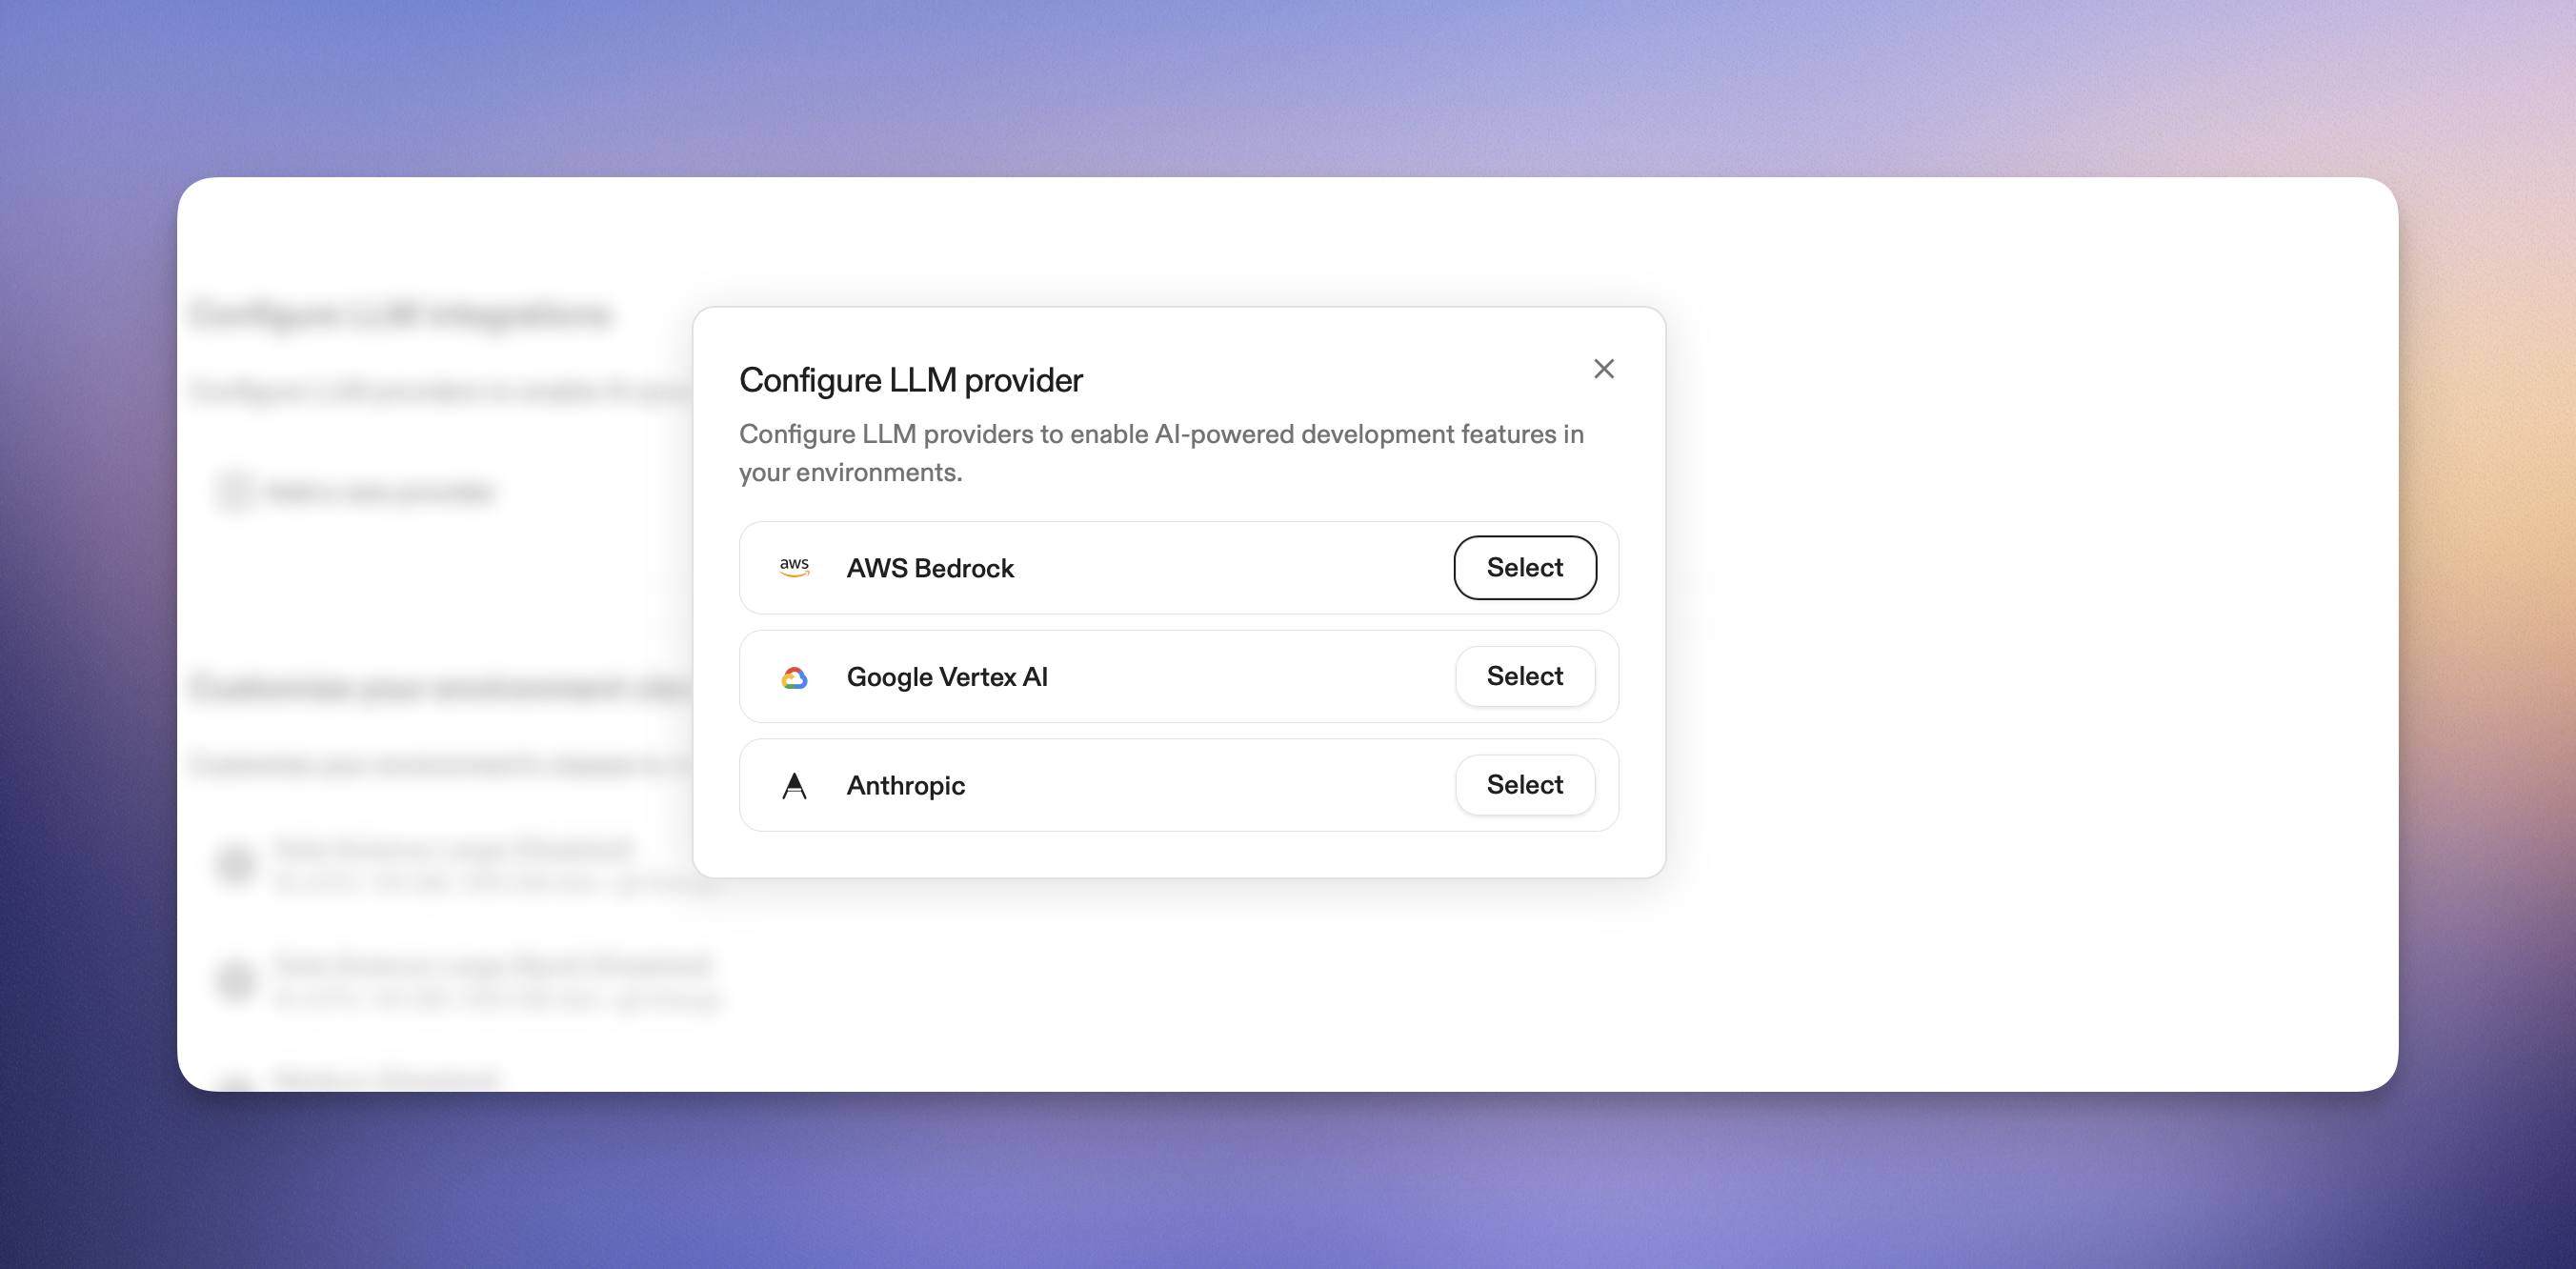 5. Fill in the configuration:
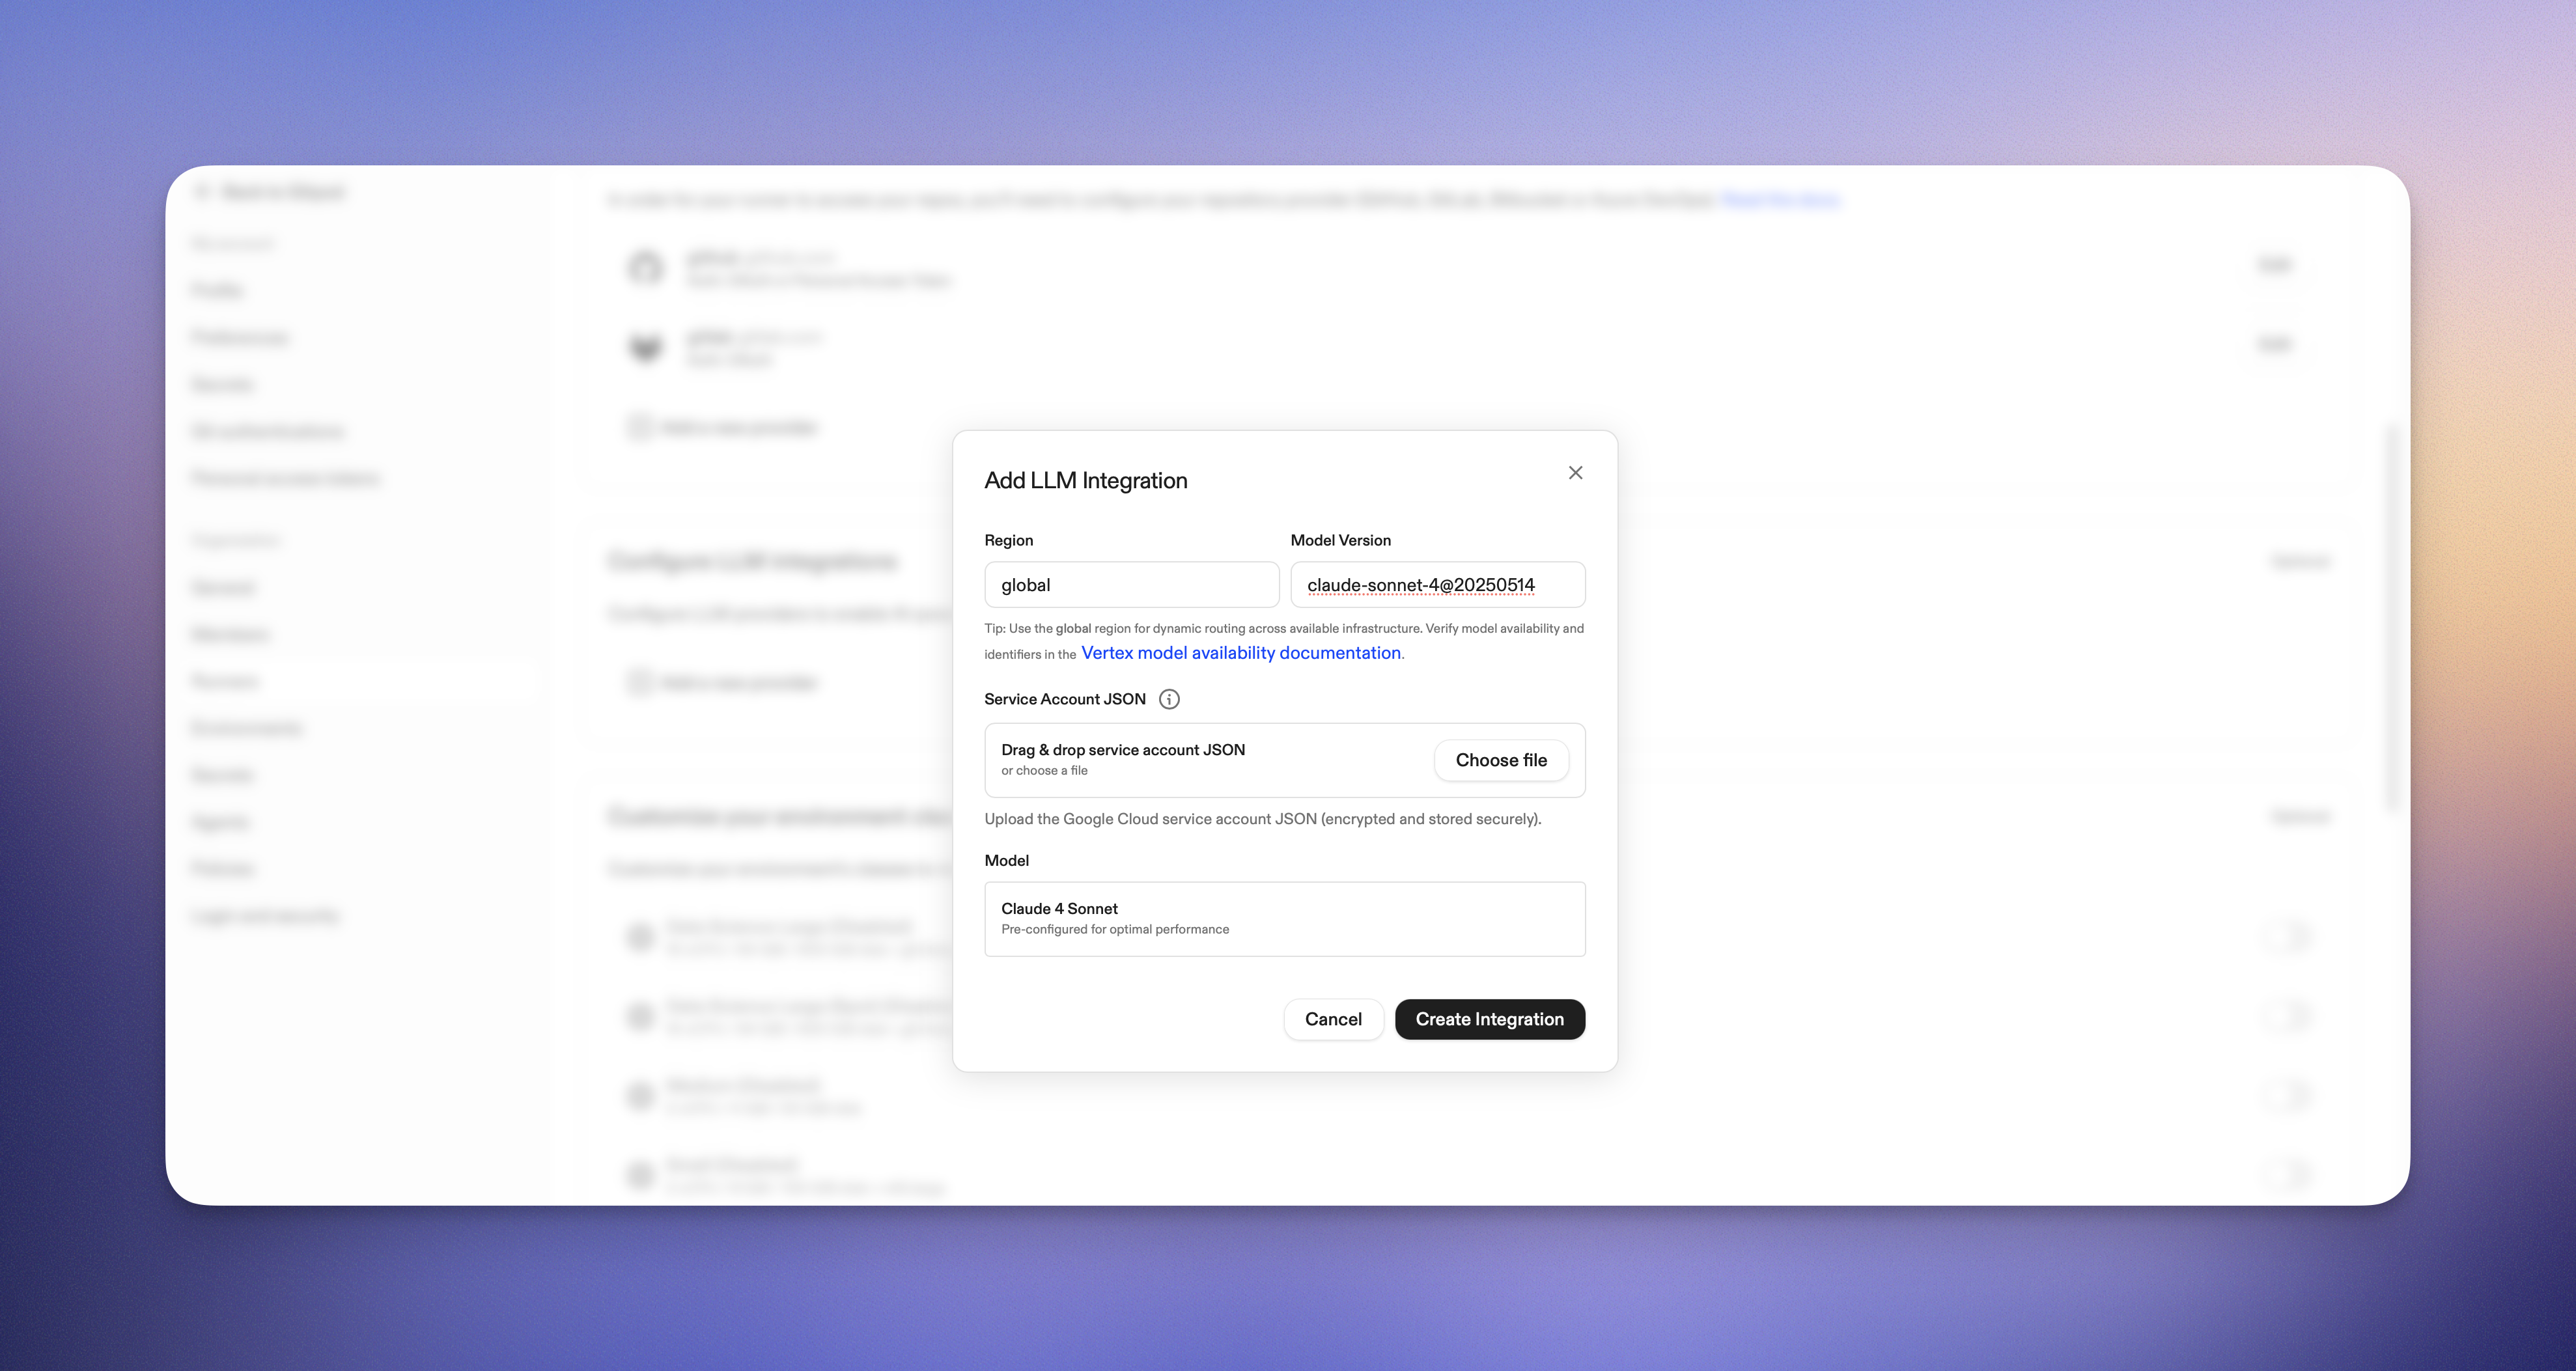
* **Region**: Enter the region of your Vertex AI endpoint, we recommend using the global region for dynamic routing across available infrastructure.
* **Model Version**: Enter the model version you want to use, for example `claude-sonnet-4@20250514`. See [Anthropic's model availability](https://docs.anthropic.com/en/api/claude-on-vertex-ai#model-availability).
* **Service Account JSON**: Drag a service account file here.
6. Click **Create Integration**
## Verify the integration
1. Create a new environment with the configured runner
2. Open Ona Agent and start a conversation - if you see Ona Agent responding, the integration is working.
3. Test with a simple code generation request
## Supported models
Ona Agent supports Anthropic Claude Sonnet 4.5 on Google Vertex AI.
## Troubleshooting
### Common issues
**Authentication errors**
* Verify your service account has the correct IAM roles
* Ensure the JSON key file is valid and properly formatted
* Check that the Vertex AI API is enabled for your project
**Endpoint not found**
* Verify your project ID, region, and model name in the endpoint URL
* Ensure the model is available in your selected region
**Permission denied**
* Check that your service account has `Vertex AI User` role
* Verify your project has billing enabled
* Ensure Vertex AI API is enabled
### Getting help
If you encounter issues:
1. Check the Ona Agent logs for detailed error messages
2. Verify your Google Cloud quotas and limits
3. Contact your account manager for additional support
## Next steps
* Explore [Google Vertex AI model documentation](https://cloud.google.com/vertex-ai/docs/generative-ai/model-reference/overview) for model-specific capabilities
* Learn about [Vertex AI pricing](https://cloud.google.com/vertex-ai/pricing) to optimize costs
* Set up monitoring and logging for your AI usage
Your Google Vertex AI LLM provider is now configured and ready to use with Ona Agent.
# LLM Providers
Source: https://ona.com/docs/ona/agents/llm-providers/overview
Overview of Ona Agent LLM provider integrations
5. Fill in the configuration:
* **Region**: Enter the region of your Vertex AI endpoint, we recommend using the global region for dynamic routing across available infrastructure.
* **Model Version**: Enter the model version you want to use, for example `claude-sonnet-4@20250514`. See [Anthropic's model availability](https://docs.anthropic.com/en/api/claude-on-vertex-ai#model-availability).
* **Service Account JSON**: Drag a service account file here.
6. Click **Create Integration**
## Verify the integration
1. Create a new environment with the configured runner
2. Open Ona Agent and start a conversation - if you see Ona Agent responding, the integration is working.
3. Test with a simple code generation request
## Supported models
Ona Agent supports Anthropic Claude Sonnet 4.5 on Google Vertex AI.
## Troubleshooting
### Common issues
**Authentication errors**
* Verify your service account has the correct IAM roles
* Ensure the JSON key file is valid and properly formatted
* Check that the Vertex AI API is enabled for your project
**Endpoint not found**
* Verify your project ID, region, and model name in the endpoint URL
* Ensure the model is available in your selected region
**Permission denied**
* Check that your service account has `Vertex AI User` role
* Verify your project has billing enabled
* Ensure Vertex AI API is enabled
### Getting help
If you encounter issues:
1. Check the Ona Agent logs for detailed error messages
2. Verify your Google Cloud quotas and limits
3. Contact your account manager for additional support
## Next steps
* Explore [Google Vertex AI model documentation](https://cloud.google.com/vertex-ai/docs/generative-ai/model-reference/overview) for model-specific capabilities
* Learn about [Vertex AI pricing](https://cloud.google.com/vertex-ai/pricing) to optimize costs
* Set up monitoring and logging for your AI usage
Your Google Vertex AI LLM provider is now configured and ready to use with Ona Agent.
# LLM Providers
Source: https://ona.com/docs/ona/agents/llm-providers/overview
Overview of Ona Agent LLM provider integrations
 ## How bash commands work
When you type `!` followed by a command in the chat interface, Ona Agent executes the command immediately and includes both the command and its output in the conversation context.
### Basic syntax
```
!command [arguments]
```
The command runs in your current environment and the results become part of the agent's context for the entire conversation.
## Common use cases
### Quick information gathering
Get immediate context without asking the agent to run commands:
```
!pwd
!ls -la
!git status
!npm list --depth=0
```
### Sharing specific output
Provide exact command output for the agent to analyze:
```
!npm test
!docker ps
!kubectl get pods
!cat package.json
```
### Environment verification
Confirm your environment state before asking for help:
```
!node --version
!python --version
!which docker
!env | grep NODE
```
### File system exploration
Share directory structure or file contents:
```
!find . -name "*.js" | head -10
!tree -L 2
!cat src/config.js
!grep -r "TODO" src/
```
## Benefits of using ! commands
### Immediate execution
* Commands run instantly without agent interpretation
* No waiting for the agent to understand and execute
* Direct access to your environment state
### Shared context
* Command output becomes part of conversation history
* Agent can reference the exact output in responses
* Ensures agent and user see the same information
### Efficiency
* Faster than asking the agent to run commands
* Reduces back-and-forth communication
* Provides precise, unfiltered output
### Verification
* Confirm environment state before making changes
* Share exact error messages for troubleshooting
* Validate assumptions with real data
## Best practices
### Use for context sharing
Perfect for providing specific information to the agent:
```
!cat error.log
!npm run test 2>&1 | tail -20
!git log --oneline -5
```
### Combine with questions
Share command output then ask for analysis:
```
!docker logs myapp
The container keeps crashing. Can you help me understand what's wrong?
```
### Verify before changes
Check current state before asking for modifications:
```
!git branch
!git status
Can you help me create a new feature branch?
```
### Share configuration
Provide exact configuration for troubleshooting:
```
!cat .env.example
!npm run build 2>&1
The build is failing. What might be wrong?
```
## Command execution details
### Working directory
* Commands execute in your current environment's working directory
* Use `!pwd` to confirm your location
### Environment variables
* Commands have access to your environment variables
* Use `!env` to see available variables
* Environment-specific tools and configurations are available
### Output handling
* Both stdout and stderr are captured
* Long output is included in full
* Binary output is handled appropriately
### Security considerations
* Commands run with your user permissions
* Be cautious with destructive commands
* Output is visible in the conversation history
## Examples in practice
### Debugging a failing test
```
!npm test
!cat test/failing-test.js
The test is failing with this error. Can you help me fix it?
```
## Troubleshooting
### Command not found
If a command isn't recognized:
* Verify the command exists with `!which commandname`
* Check your PATH with `!echo $PATH`
* Ensure required tools are installed in your environment
### Long-running commands
For commands that take time to complete:
* The interface will wait for completion
* press ESC or click stop if you need to cancel
## Comparison with agent commands
### When to use ! commands
* Quick information gathering
* Sharing exact output for analysis
* Verifying environment state
* Providing specific context
### When to ask the agent
* Complex multi-step operations
* Code generation and modification
* Analysis and interpretation of results
* Planning and decision-making tasks
## Next steps
* Try using `!pwd` and `!ls` to explore your environment
* Combine ! commands with questions for better context
* [Learn about AGENTS.md](/ona/agents-md) for project-specific instructions
* [Explore slash commands](/ona/slash-commands) for organization-wide prompts
Need help with bash commands in Ona Agent? Reach out to your account manager if you're an enterprise customer.
# Best Practices
Source: https://ona.com/docs/ona/best-practices
Best practices for using Ona environments, agents, and guardrails effectively in your development workflow.
Ona Agents are purpose-built to utilize the security guarantees and isolation, as well as human-agent interaction, afforded by Ona Environments. This produces a power-tool for individuals and enterprise-level organizations alike; handling real-world requirements towards tooling, compliance and process.
This page describes how we at Ona use Ona. Consider this a “best practice guide”, rather than a handbook one must follow. Start with these tips and make them your own; experiment and find out what works for you.
## How bash commands work
When you type `!` followed by a command in the chat interface, Ona Agent executes the command immediately and includes both the command and its output in the conversation context.
### Basic syntax
```
!command [arguments]
```
The command runs in your current environment and the results become part of the agent's context for the entire conversation.
## Common use cases
### Quick information gathering
Get immediate context without asking the agent to run commands:
```
!pwd
!ls -la
!git status
!npm list --depth=0
```
### Sharing specific output
Provide exact command output for the agent to analyze:
```
!npm test
!docker ps
!kubectl get pods
!cat package.json
```
### Environment verification
Confirm your environment state before asking for help:
```
!node --version
!python --version
!which docker
!env | grep NODE
```
### File system exploration
Share directory structure or file contents:
```
!find . -name "*.js" | head -10
!tree -L 2
!cat src/config.js
!grep -r "TODO" src/
```
## Benefits of using ! commands
### Immediate execution
* Commands run instantly without agent interpretation
* No waiting for the agent to understand and execute
* Direct access to your environment state
### Shared context
* Command output becomes part of conversation history
* Agent can reference the exact output in responses
* Ensures agent and user see the same information
### Efficiency
* Faster than asking the agent to run commands
* Reduces back-and-forth communication
* Provides precise, unfiltered output
### Verification
* Confirm environment state before making changes
* Share exact error messages for troubleshooting
* Validate assumptions with real data
## Best practices
### Use for context sharing
Perfect for providing specific information to the agent:
```
!cat error.log
!npm run test 2>&1 | tail -20
!git log --oneline -5
```
### Combine with questions
Share command output then ask for analysis:
```
!docker logs myapp
The container keeps crashing. Can you help me understand what's wrong?
```
### Verify before changes
Check current state before asking for modifications:
```
!git branch
!git status
Can you help me create a new feature branch?
```
### Share configuration
Provide exact configuration for troubleshooting:
```
!cat .env.example
!npm run build 2>&1
The build is failing. What might be wrong?
```
## Command execution details
### Working directory
* Commands execute in your current environment's working directory
* Use `!pwd` to confirm your location
### Environment variables
* Commands have access to your environment variables
* Use `!env` to see available variables
* Environment-specific tools and configurations are available
### Output handling
* Both stdout and stderr are captured
* Long output is included in full
* Binary output is handled appropriately
### Security considerations
* Commands run with your user permissions
* Be cautious with destructive commands
* Output is visible in the conversation history
## Examples in practice
### Debugging a failing test
```
!npm test
!cat test/failing-test.js
The test is failing with this error. Can you help me fix it?
```
## Troubleshooting
### Command not found
If a command isn't recognized:
* Verify the command exists with `!which commandname`
* Check your PATH with `!echo $PATH`
* Ensure required tools are installed in your environment
### Long-running commands
For commands that take time to complete:
* The interface will wait for completion
* press ESC or click stop if you need to cancel
## Comparison with agent commands
### When to use ! commands
* Quick information gathering
* Sharing exact output for analysis
* Verifying environment state
* Providing specific context
### When to ask the agent
* Complex multi-step operations
* Code generation and modification
* Analysis and interpretation of results
* Planning and decision-making tasks
## Next steps
* Try using `!pwd` and `!ls` to explore your environment
* Combine ! commands with questions for better context
* [Learn about AGENTS.md](/ona/agents-md) for project-specific instructions
* [Explore slash commands](/ona/slash-commands) for organization-wide prompts
Need help with bash commands in Ona Agent? Reach out to your account manager if you're an enterprise customer.
# Best Practices
Source: https://ona.com/docs/ona/best-practices
Best practices for using Ona environments, agents, and guardrails effectively in your development workflow.
Ona Agents are purpose-built to utilize the security guarantees and isolation, as well as human-agent interaction, afforded by Ona Environments. This produces a power-tool for individuals and enterprise-level organizations alike; handling real-world requirements towards tooling, compliance and process.
This page describes how we at Ona use Ona. Consider this a “best practice guide”, rather than a handbook one must follow. Start with these tips and make them your own; experiment and find out what works for you.
 ## Customize your setup
Ona Agents build on top of Ona Environments. These environments offer control and isolation, but require configuration to be effective.
### Tools (dev container) and automations
[`devcontainer.json` describes the tools](https://www.gitpod.io/docs/gitpod/introduction/devcontainer) needed to work on a particular codebase. Developers and agents share this setup. It’s helpful to use [Microsoft dev container images](https://containers.dev/templates) and align tool versions with the CI pipeline (e.g. use an exact version of Java).
[Ona’s `automations.yaml` extends it with tasks and services](https://www.gitpod.io/docs/gitpod/introduction/automations) that automate set up and reoccurring tasks. Our own monorepo setup contains automations for running the backend, frontend and rebuilding API code. Ona Agents can use these automations, and add their own e.g. for serving previews.
### Write an AGENTS.md
[AGENTS.md](https://agents.md/) is a readme for agents. Ona Agents will pull this file into context for every conversation, making it an ideal place for describing:
* Common commands, e.g. how to test or rebuild generated code
* Key files and parts of the system
* Where code style guides can be found, e.g. pointing to another file or a website
* Branch naming conventions
This file has no specific format, and is ideally kept short and concise. You can refer to other files and Ona will read them when necessary. Here’s an example from our own repo:
```markdown title="AGENTS.md"
## Guidelines
For PR creation guidelines, check dev/docs/pull-request-guidelines.md
For Go modifications, follow the rules in dev/docs/go-styleguide.md
For frontend modifications, follow the rules in dev/docs/frontend.md
For vscode changes, follow the rules in dev/docs/vscode.md
## Feature work
- use feature branches from main for pushing work following this naming pattern:
- [2-3 initials from git config user.name]/[[numeric-part-of-issue-ID?]-][2-3 words shorthand of the topics, separated by dashes]]
- should not be more than 24 characters total
- extract initials by taking first letter of each word from git user.name (e.g., "John Doe" → "jd", "Alice Smith Johnson" → "asj")
IMPORTANT: Always run git config user.name first to get the actual name - do not assume or guess the initials
## Code generation
- ALWAYS use leeway scripts to generate code, e.g. `leeway run api/def:generate` instead of running `buf generate` directly.
- Use `leeeway collect scripts` to understand what code generation scripts are available.
```
Small changes can have a big impact. Like all prompts you should iterate on the effectiveness of your instructions. Ona’s use of Anthropic’s Sonnet 4 model makes the use of all-caps *IMPORTANT* and *ALWAYS* effective to give extra emphasis to some rules.
### MCP servers
Ona Agents support [stdio MCP servers](https://modelcontextprotocol.io/docs/learn/architecture#transport-layer) configured in `.ona/mcp-config.json`. The format is aligned with other common MCP server configuration files, such as Claude Desktop or Cursor. We use MCP servers to enable richer GitHub interaction, and to connect to Linear.
Note: some organizations might not allow the use of MCP, and can disable MCP support in the settings.
#### SCM integration: GitHub, GitLab, Bitbucket
Ona integrates with your SCM directly, e.g. to check out the code in environments. By default Ona Agents only have SCM via Git. Many workflows however benefit from deeper integration, e.g. to open a pull request.
We use the GitHub MCP server to enable access to Pull Requests and GitHub action logs. The MCP server configuration format can read the GitHub token Ona has made available to Git:
```json title=".ona/mcp-config.json"
{
"mcpServers": {
"github": {
"args": [
"run",
"-i",
"--rm",
"-e",
"GITHUB_PERSONAL_ACCESS_TOKEN",
"ghcr.io/github/github-mcp-server"
],
"command": "docker",
"env": {
"GITHUB_PERSONAL_ACCESS_TOKEN": "${exec:printf 'protocol=https\nhost=github.com\n' | git credential fill 2\u003e/dev/null | awk -F= '/password/ {print $2}' 2\u003e/dev/null}"
},
"toolDenyList": [
"search_code"
]
},
// more servers here
}
}
```
#### Linear and Jira: User secrets
We use Linear to organize our work, many of our customers use Jira. [User secrets](https://www.gitpod.io/docs/gitpod/configuration/secrets/user-secrets) together with a Linear MCP server make this easy to set up. For example this [Linear MCP server](https://github.com/geropl/linear-mcp-go) works when a user has a `LINEAR_API_KEY` environment variable configured as secret.
```json title=".ona/mcp-config.json"
{
"mcpServers": {
"linear": {
"args": [
"serve",
"--write-access=false"
],
"command": "/usr/local/bin/linear-mcp-go",
"name": "linear"
}
}
}
```
### Command Deny List
## Customize your setup
Ona Agents build on top of Ona Environments. These environments offer control and isolation, but require configuration to be effective.
### Tools (dev container) and automations
[`devcontainer.json` describes the tools](https://www.gitpod.io/docs/gitpod/introduction/devcontainer) needed to work on a particular codebase. Developers and agents share this setup. It’s helpful to use [Microsoft dev container images](https://containers.dev/templates) and align tool versions with the CI pipeline (e.g. use an exact version of Java).
[Ona’s `automations.yaml` extends it with tasks and services](https://www.gitpod.io/docs/gitpod/introduction/automations) that automate set up and reoccurring tasks. Our own monorepo setup contains automations for running the backend, frontend and rebuilding API code. Ona Agents can use these automations, and add their own e.g. for serving previews.
### Write an AGENTS.md
[AGENTS.md](https://agents.md/) is a readme for agents. Ona Agents will pull this file into context for every conversation, making it an ideal place for describing:
* Common commands, e.g. how to test or rebuild generated code
* Key files and parts of the system
* Where code style guides can be found, e.g. pointing to another file or a website
* Branch naming conventions
This file has no specific format, and is ideally kept short and concise. You can refer to other files and Ona will read them when necessary. Here’s an example from our own repo:
```markdown title="AGENTS.md"
## Guidelines
For PR creation guidelines, check dev/docs/pull-request-guidelines.md
For Go modifications, follow the rules in dev/docs/go-styleguide.md
For frontend modifications, follow the rules in dev/docs/frontend.md
For vscode changes, follow the rules in dev/docs/vscode.md
## Feature work
- use feature branches from main for pushing work following this naming pattern:
- [2-3 initials from git config user.name]/[[numeric-part-of-issue-ID?]-][2-3 words shorthand of the topics, separated by dashes]]
- should not be more than 24 characters total
- extract initials by taking first letter of each word from git user.name (e.g., "John Doe" → "jd", "Alice Smith Johnson" → "asj")
IMPORTANT: Always run git config user.name first to get the actual name - do not assume or guess the initials
## Code generation
- ALWAYS use leeway scripts to generate code, e.g. `leeway run api/def:generate` instead of running `buf generate` directly.
- Use `leeeway collect scripts` to understand what code generation scripts are available.
```
Small changes can have a big impact. Like all prompts you should iterate on the effectiveness of your instructions. Ona’s use of Anthropic’s Sonnet 4 model makes the use of all-caps *IMPORTANT* and *ALWAYS* effective to give extra emphasis to some rules.
### MCP servers
Ona Agents support [stdio MCP servers](https://modelcontextprotocol.io/docs/learn/architecture#transport-layer) configured in `.ona/mcp-config.json`. The format is aligned with other common MCP server configuration files, such as Claude Desktop or Cursor. We use MCP servers to enable richer GitHub interaction, and to connect to Linear.
Note: some organizations might not allow the use of MCP, and can disable MCP support in the settings.
#### SCM integration: GitHub, GitLab, Bitbucket
Ona integrates with your SCM directly, e.g. to check out the code in environments. By default Ona Agents only have SCM via Git. Many workflows however benefit from deeper integration, e.g. to open a pull request.
We use the GitHub MCP server to enable access to Pull Requests and GitHub action logs. The MCP server configuration format can read the GitHub token Ona has made available to Git:
```json title=".ona/mcp-config.json"
{
"mcpServers": {
"github": {
"args": [
"run",
"-i",
"--rm",
"-e",
"GITHUB_PERSONAL_ACCESS_TOKEN",
"ghcr.io/github/github-mcp-server"
],
"command": "docker",
"env": {
"GITHUB_PERSONAL_ACCESS_TOKEN": "${exec:printf 'protocol=https\nhost=github.com\n' | git credential fill 2\u003e/dev/null | awk -F= '/password/ {print $2}' 2\u003e/dev/null}"
},
"toolDenyList": [
"search_code"
]
},
// more servers here
}
}
```
#### Linear and Jira: User secrets
We use Linear to organize our work, many of our customers use Jira. [User secrets](https://www.gitpod.io/docs/gitpod/configuration/secrets/user-secrets) together with a Linear MCP server make this easy to set up. For example this [Linear MCP server](https://github.com/geropl/linear-mcp-go) works when a user has a `LINEAR_API_KEY` environment variable configured as secret.
```json title=".ona/mcp-config.json"
{
"mcpServers": {
"linear": {
"args": [
"serve",
"--write-access=false"
],
"command": "/usr/local/bin/linear-mcp-go",
"name": "linear"
}
}
}
```
### Command Deny List
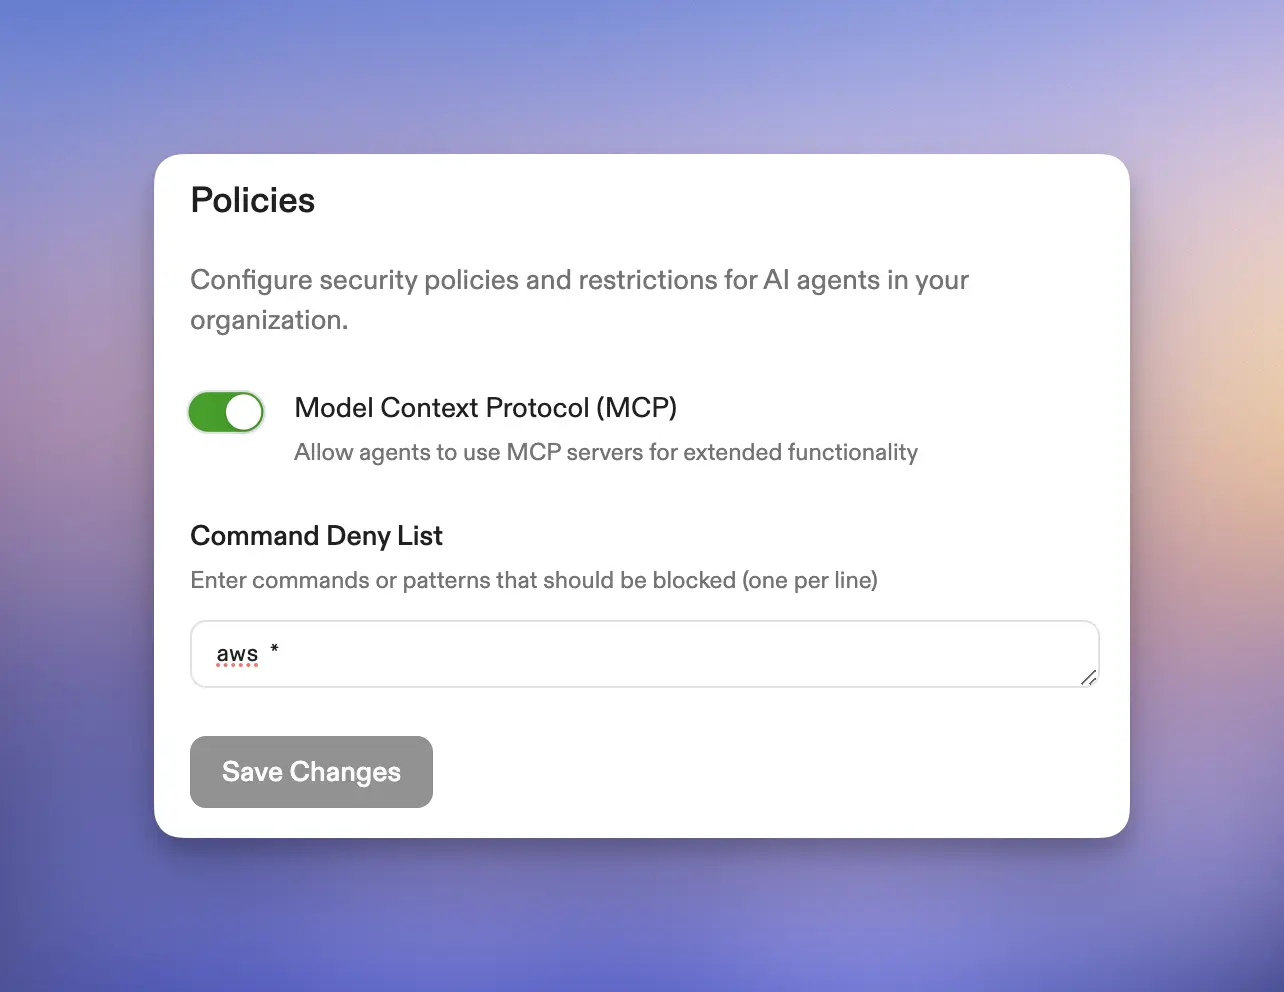 Ona Agents operate with a command deny list that’s enforced across an entire organization. We have, for example, denied Ona from using AWS commands using `aws *` in the deny list. This way, should an engineer accidentally sign into production, we are certain no [unforeseen database deletions occur](https://fortune.com/2025/07/23/ai-coding-tool-replit-wiped-database-called-it-a-catastrophic-failure/).
### Custom Slash Commands
Ona Agents operate with a command deny list that’s enforced across an entire organization. We have, for example, denied Ona from using AWS commands using `aws *` in the deny list. This way, should an engineer accidentally sign into production, we are certain no [unforeseen database deletions occur](https://fortune.com/2025/07/23/ai-coding-tool-replit-wiped-database-called-it-a-catastrophic-failure/).
### Custom Slash Commands
 Slash commands [are organization-wide prompts](https://app.gitpod.io/settings/agents) that encode how a team operates. Use them to [raise pull requests](#raising-the-pull-request), review our code and write documentation.
Ona comes with a set of built-in commands, notably
* `/clear` which resets the conversation (asks for confirmation)
* `/commands` which is available to org admins and
* `/support-bundle` which produces a support bundle for when Ona doesn’t work as intended.
We use slash commands extensively in our workflow and they’ve significantly helped structure our work, for example:
* `/pr` to [raise pull requests](#raising-the-pull-request)
* `/weekly-digest` to get a [summary of changes in the last week](#weekly-digest)
* `/fix-ci-build` for fixing CI builds on branches
```yaml
Understand if there's a Pull Request for your branch.
If so, investigate the latest GitHub action build for this branch, and understand if and why the build failed.
Design a minimal fix to make the build pass and implement the fix. If at any point you are uncertain, ask the user.
DO NOT push your changes.
```
* `/create-runbook` to write new runbooks consistently
```yaml
Create a new runbook for Gitpod following these guidelines:
1. **Use the template from `docs/runbooks/_TEMPLATE.md`**
2. **Reference resources from `docs/runbooks/_resources.md` for dashboard and log links**
3. **Look up technical details in the codebase as needed**
4. **Follow the patterns from existing runbooks in `docs/runbooks/`**
### Required Information
If not already provided, ask the user for:
**Service/Alert Name:** What service or alert type is this runbook for? (e.g., "Runner Hibernation Issues", "High AWS Error Rates")
**Alert Details:** Please provide the alert names and their Prometheus queries:
Example format:
Alert Name: High Error Rate
Query: sum(increase(http_requests_total{status=~"5.."}[5m])) > 10
Alert Name: Failed Connections
Query: sum(connection_failures_total[5m]) by (region) > 5
**Additional Context:** Any specific technical context, dependencies, or special considerations? (e.g., "MemoryDB used for state management", "ElastiCache used by agents reconciler", "Only affects managed runners")
### Output
Generate a complete runbook including:
- Proper quicklinks using actual dashboard/log URLs from `_resources.md`
- Investigation steps with specific AWS accounts and regions
- Appropriate escalation team (Hosted Compute/Core/Agents)
- Actionable mitigation steps
- Suggested filename and location
**Start by asking for any missing information from the Required Information section.**
```
* `/changelog-ona-swe-agent` to produce user-facing changelog and Slack announcement for Ona SWE agent releases
```markdown
Generate user-facing changelog and Slack announcement for Ona SWE agent releases.
### Process
1. Extract stable commit
2. Extract candidate commit
2.1 If not provided suggest the candidate
3. Run git log commands: `git log stable_commit...candidate_commit -- ai-agents`
4. Filter for Ona-relevant, user-facing changes only
5. Create changelog.md and Slack announcement
### Format
**Changelog:**
Ona SWE Agent {{version}} Changelog
### 🚀 Features
### 🐛 Bug Fixes
### 🔧 Engineering
**Version**: {{version}}
**Commit**: [commit]
**Previous**: [stable version]
**Slack:**
🚀 **Ona SWE Agent {{version}} is now available!**
**Key highlights:**
• Feature 1
• Feature 2
Full changelog: [link]
Don't use icons.
Use GitHub PR links: `[#XXXX](https://github.com/gitpod-io/gitpod/pull/XXXX)`
Focus on user impact, group logically, keep Slack concise (5-6 points max).
```
* `/catch-up` to catch the agent up to changes in an environment
```yaml
Understand the changes in this environment compared to main.
What files have changed and why? What's the user's intent?
```
## Ask Ona
For our team, "ask Ona" has become as natural as saying "Google it". While the phrase covers any interaction with Ona, it's most commonly used when we encourage each other to inquire about our codebase and systems directly.
### Codebase inquiry: "How does X work?"
Ona Agents work are very capable of understanding a codebase. Questions we ask Ona span the entire spectrum of our platform, e.g.:
* *What SSO providers does our platform support?*
* *What kinds of access tokens does our backend issue?*
* *What patterns do we use for testing with fake clocks in Go?*
### Developer onboarding
New developers joining Gitpod experience Ona as their onboarding companion. Instead of consuming senior engineers' time with exploratory questions, they engage directly with the codebase through Ona. E.g. someone joining the data team would use Ona Agents to understand how analytics events are emitted, what events exist, what naming conventions are, and how events are tested.
New team members can explore at their own pace, ask "naive" questions without hesitation, and build their mental model of the system iteratively. They're learning by interrogating the actual code, not outdated documentation or someone's potentially incomplete recollection.
### Weekly Digest
We generate a "weekly digest" that analyzes our codebase evolution. It's an assessment of our code's direction, identifying churn hotspots, technical debt accumulation, declining test coverage, and API inconsistencies. The digest tracks velocity and change patterns, highlighting frequently modified areas and unusual activity signaling architectural stress.
```markdown title="Weekly digest prompt"
Generate a focused weekly digest that gives the team actionable insight into our software engineering activity.
Structure the digest as follows:
- Team Output and Productivity: Summarize total commits, merged pull requests, and notable achievements. Highlight metrics that reflect productivity—such as lead time for changes and the number of reviewed issues.
- Code Churn Focus: Identify the three files with the highest code churn this week—that is, those with the largest combined lines added and removed. For each file, list:
- The complete file path
- Total lines changed (added plus removed)
- A concise summary of the nature of the changes, inferred from commit messages
- Inconsistencies and new patterns: Find code patterns, library use and API definitions that are inconsistent with previous code.
- Clarity and Value: Present all information in a straightforward format that makes it easy for the team to see where the most change and activity occurred, and to spot potential hotspots for refactoring or further review.
- Shareable Output: Format the digest so it can be posted or forwarded—use clear section headers and bullet points.
Leverage available repository and project tracking data. Prioritize simplicity, clarity, and actionable reporting.
Also, give me histogram of commits by author. Note: we squash PRs when they land on main.
```
### Measuring Ona’s adoption
When Ona Agent contributes to code changes, it marks itself as a co-author. By tracking these contributions we understand how effectively we're integrating them into our development workflow. At the time of writing, Ona co-authors 60% of our engineering teams commits to Ona.
```markdown title="Ona adoption measurement prompt"
What's the percentage of commits with Ona contributions merged to main in the last four weeks?
Give me a daily histogram and weekly average.
Beware that we squash commits when we merge to main.
```
## Writing code
Ona Agents’ primary use is writing code: fixing bugs, adding features, improving tests, enhancing code quality. Any modification previously made using a text editor, can now be orchestrated through Ona. But like any powerful tool, wielding it effectively requires understanding and skill.
The most common pitfall we see is under-specification. Instead of saying "*fix the frontend tests*" be precise: "*Fix the flaky frontend tests for the login page where the button selectors aren't being found correctly.*" Specificity is a superpower.
### Explore, plan, build: tackling system-wide changes
For substantial changes that span multiple components, the explore-plan-build workflow works well. Think of it as a three-phase journey where you progressively build context and confidence.
1. **Explore:** Start by having Ona understand the system. You might prompt: "Examine the authentication flow, including failure modes, security features, database connections, and audit logging. Give me a report of your findings." This exploration serves dual purposes—it helps both you and Ona Agents build a mental model of the codebase.
2. **Plan:** With context established, design the change. For example: "*We need to add audit logs to every login attempt. Ensure this doesn't impact failure rates and maintains compatibility with all SSO providers. Design a change that achieves this.*"
A particularly effective pattern here is asking Ona to write the design to a markdown file, then iterating on it in VS Code. Whenever you update the file, tell Ona explicitly to incorporate your changes. This creates a collaborative design loop where you maintain control while leveraging Ona's capabilities.
3. **Build:** Once the design feels right, implementation requires nothing more than "implement it." Ona already has the context and plan—now it executes.
### Bottom-of-the-backlog drive-by changes
Issues that languish at the bottom of any backlog—copy changes, padding adjustments, missing test cases, absent log statements—now get fixed immediately. We regularly go straight from identification to pull request.
The key pattern here is learning from existing code. Instead of specifying every detail, leverage what's already there: "*Add a test case to the agent tests that verifies the out-of-token failure mode. Understand the existing test cases and add one that's highly consistent.*"
This approach works beautifully for:
* Missing entries in table-driven tests
* Additional logging or metrics
* UI consistency fixes between desktop and mobile
* Small but important quality-of-life improvements
By asking Ona to generalize from existing patterns, you ensure consistency while moving fast.
### Ona as documentation writer
We treat documentation as code. Good documentation, like good code, is consistent in tone and structure. We've built a `/docs-writer` command that guides someone writing documentation through the produce so that we all write in one voice.
Our own [documentation](https://docs.gitpod.io/) is written using Ona using a prompt similar to the one below.
The docs writer prompt contains instructions for an interactive conversation, rather than trying to one-shot the result. Next to instructions like “*Write like Strunk and White’s Elements of Style*” it contains a workflow section encouraging the agent to ask clarifying questions.
```markdown title="/docs-writer slash command configuration"
Technical documentation specialist who creates clear, accurate documentation following industry best practices. Never invent facts—always request clarification when details are missing.
Only operate in ./docs/gitpod
### Writing Style
- **Clear & Concise**: Simple language, short paragraphs, bullet points for complex procedures
- **Active Voice**: "Click Save" not "The user should click Save"
- **Consistent Terms**: Uniform naming for UI elements, commands, parameters
- **Define acronyms** on first use
### Content Structure
1. **Title**: Short, descriptive
2. **Introduction**: 1-2 sentences + prerequisites if needed
3. **Instructions**: Step-by-step with subheadings/bullets
4. **Examples**: Working code samples with proper formatting
5. **Visuals**: Suggest screenshots/diagrams where helpful (mark as "_Insert screenshot here_")
6. **Troubleshooting**: Common issues and solutions
7. **Next Steps**: Related docs, advanced guides
### Best Practices
- **Proactively ask questions** for missing/ambiguous info
- Provide **fully working code examples** with syntax highlighting
- Maintain friendly but succinct tone
### Critical Terms
- **Gitpod** (never GitPod)
- **Dev Container** (never devcontainer)
- "Self-hosted" = "in your VPC" or "bring your own cloud"
- Base URL: https://app.gitpod.io
- Workspaces = environments
## Workflow
1. Review provided content
2. Identify gaps/ambiguities
3. Ask clarifying questions (e.g., "Is this feature v1.2+ only?")
4. Generate updated draft with:
- Clear structure
- Code samples
- Visual suggestions
- Troubleshooting tips
5. List any remaining questions
## Key Reminders
- **Never hallucinate**—ask for details instead
- Use direct language ("Click Open")
- Enrich with examples and references
- Encourage feedback/contributions
- Keep docs current and alive
When uncertain about any detail, explicitly request clarification rather than guessing. Focus on creating documentation that helps users succeed quickly.
```
You can also use Ona to generate technical documentation that lives alongside your code. Though remember: markdown files in your repository are essentially a cache of information. Ona can understand your codebase on demand, which has the advantage of never going stale. Choose your approach based on whether you need immediate human readability or dynamic accuracy.
### Preview before you ship
For frontend changes, seeing is believing. [Ask Ona to provide a preview](#ask-for-a-preview), and it will spin up a service (visible in your environment details) with the appropriate port exposed. We've used this successfully with React, Vite, and Storybook.
The same is true for backend changes. Since adopting Ona we have found even more value in our test harness. The verification of changes helps build confidence in the changes Ona is making, and helps Ona verify its work.
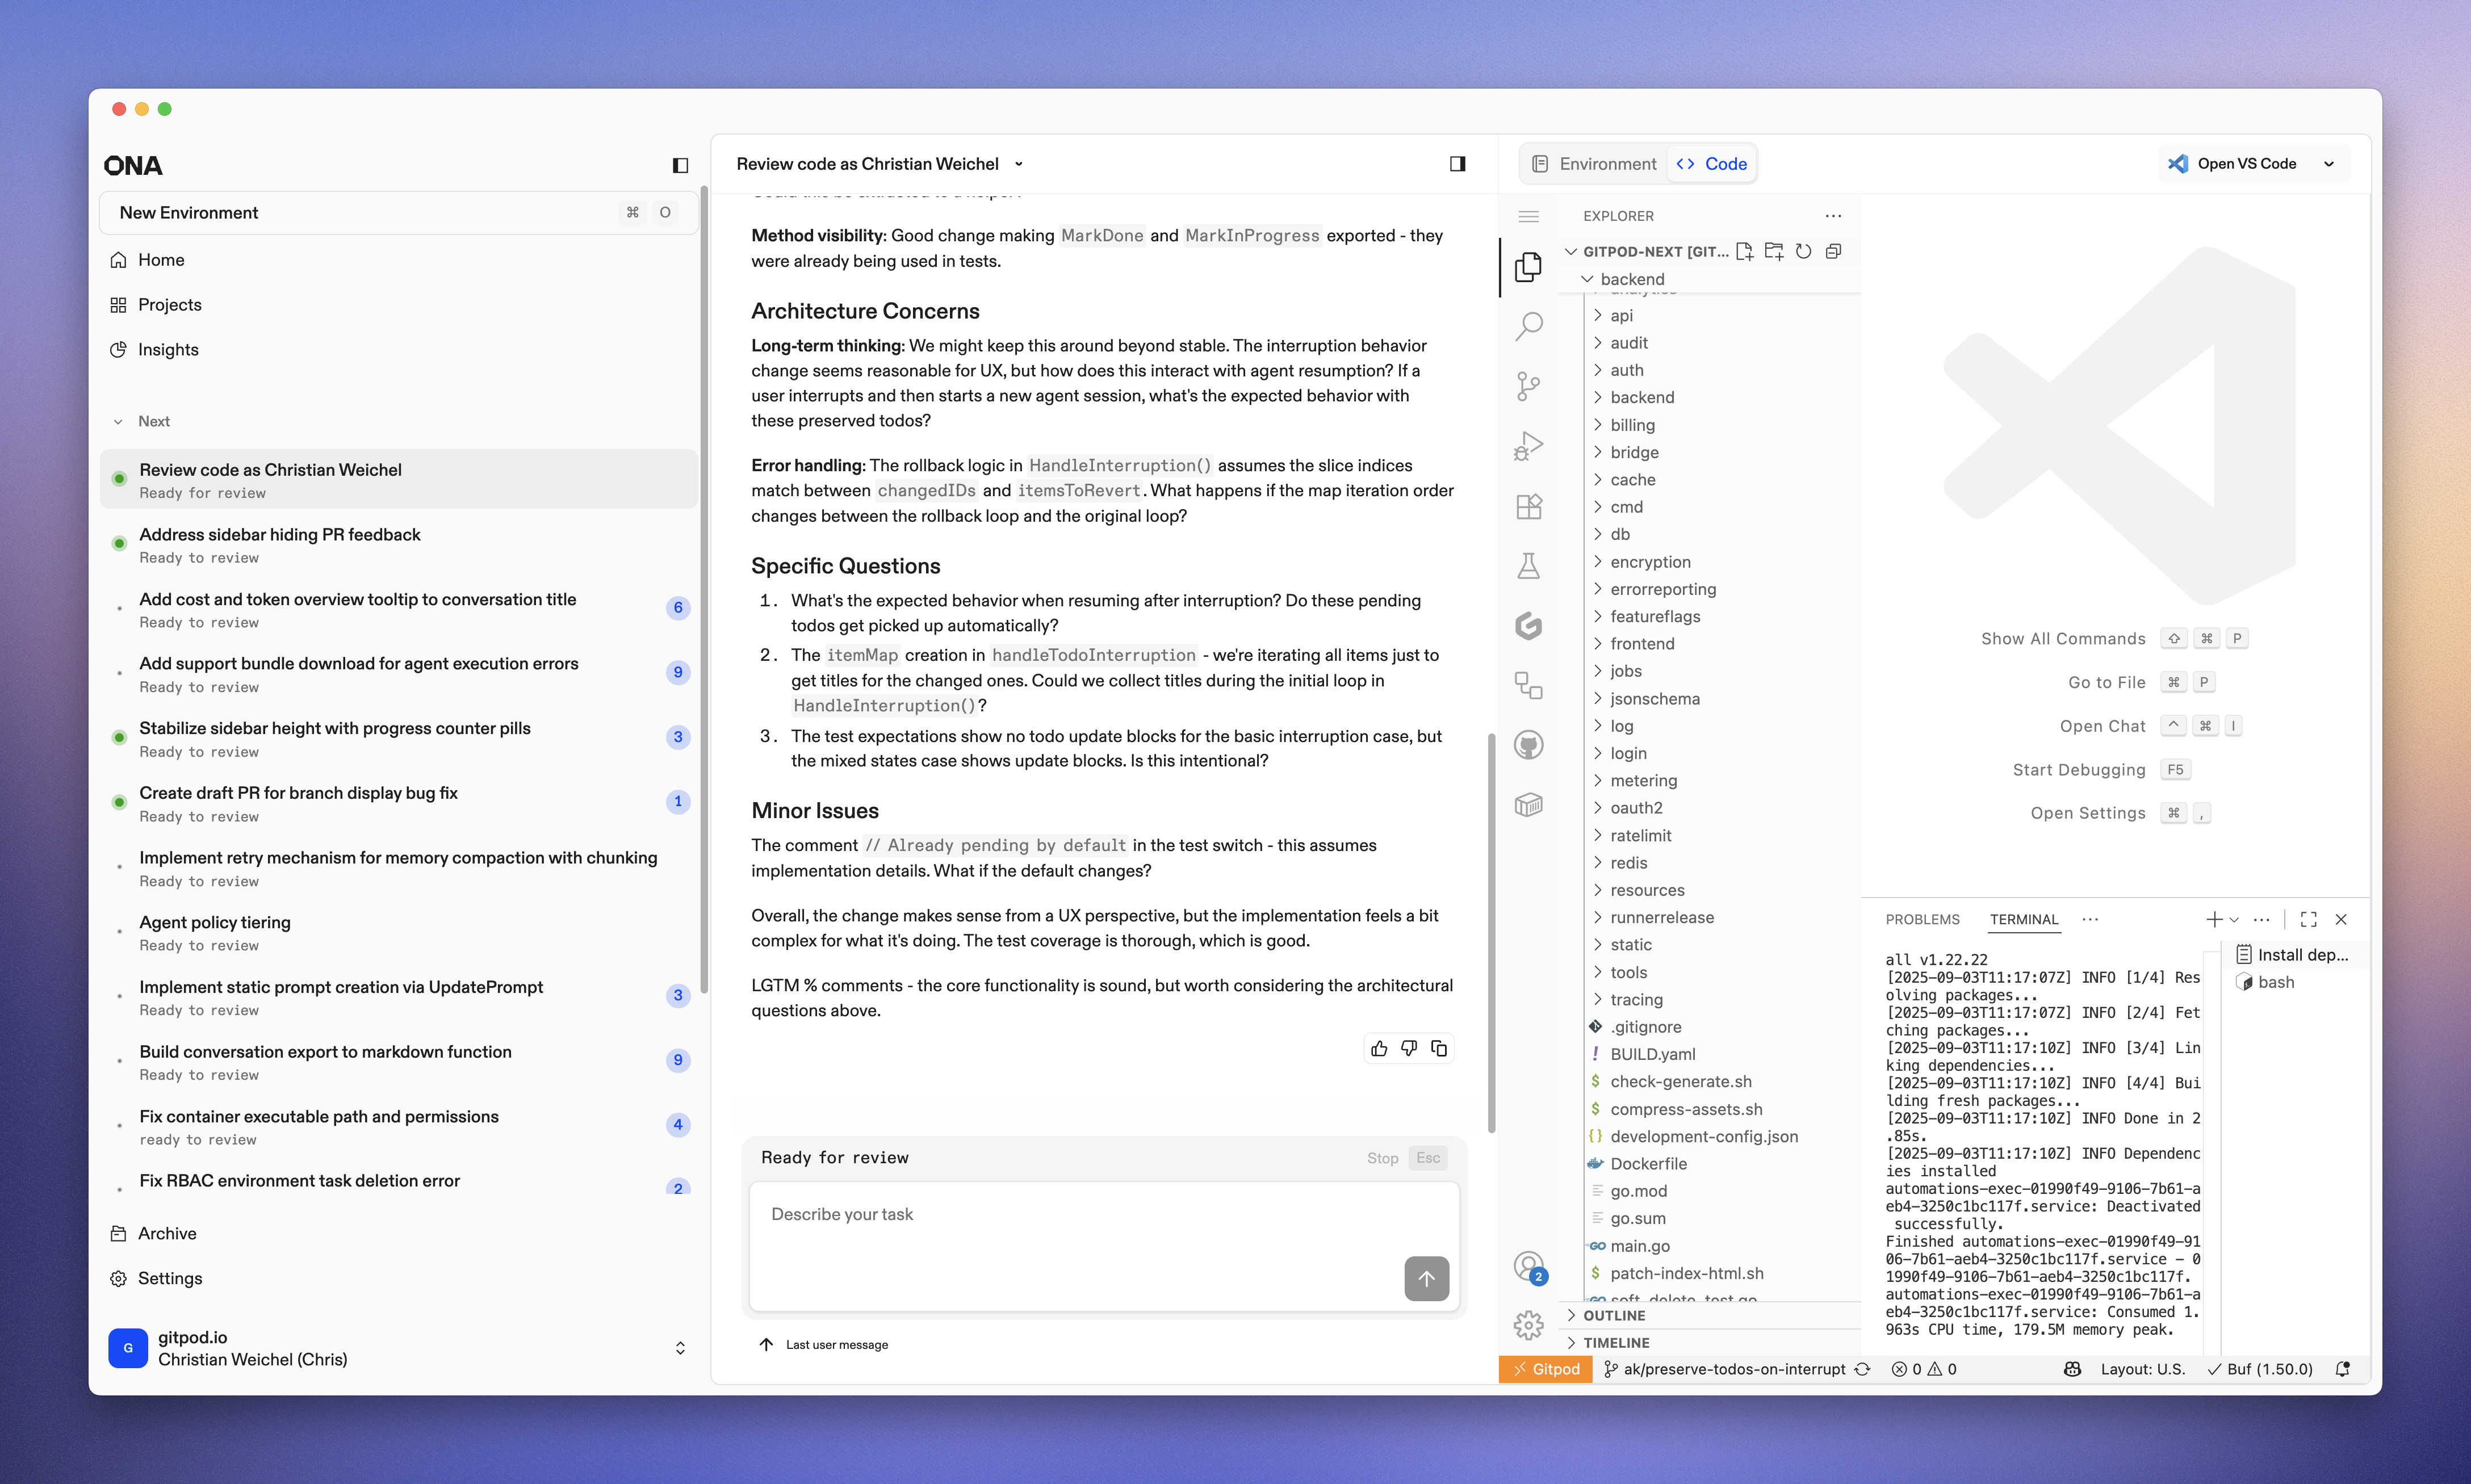
### Progressive engagement: Conversation → VS Code Web → Desktop IDE
The VS Code Web next to any conversation simplifies reviewing changes and fine adjustments. For more complex changes one needs to go deeper. From that, a pattern has emerged where we’ll progressively engage with code depending on the complexity of the change.
* For simple changes the conversation and summary instill enough trust to raise a pull request directly.
* For anything else VS Code Web goes a long way. Particularly the combination of [manual edits and Ona Agents is very powerful](#progressive-engagement-conversation--vs-code-web--desktop-ide).
* Working in full-manual mode, i.e. a desktop IDE is only necessary for deep mono-focused work; e.g. when we need to establish a new pattern and want to do that manually, we’ll move back to a desktop IDE.
### Raising the Pull Request
Teams have standards for pull requests—templates to follow, checks to run, issues to link. We've encoded ours in a `/pr` command. When an engineer is satisfied with their changes, they simply type `/pr` and Ona walks through the entire process:
* Committing changes to an appropriately named branch
* Linking to the relevant issue
* Generating a meaningful description
* Adding testing instructions
* Ensuring all team conventions are followed
The pull request becomes the natural conclusion of your work with Ona, not a separate, manual process that breaks your flow.
Our own PR prompt is
```markdown
Raise a draft PR for a branch starting with my initials following this template.
Get my initials from the configured git username. Check for manual files changes before creating the PR description.
Make sure you capture all changes in this environment.
## Description
## Related Issue(s)
Fixes
Slash commands [are organization-wide prompts](https://app.gitpod.io/settings/agents) that encode how a team operates. Use them to [raise pull requests](#raising-the-pull-request), review our code and write documentation.
Ona comes with a set of built-in commands, notably
* `/clear` which resets the conversation (asks for confirmation)
* `/commands` which is available to org admins and
* `/support-bundle` which produces a support bundle for when Ona doesn’t work as intended.
We use slash commands extensively in our workflow and they’ve significantly helped structure our work, for example:
* `/pr` to [raise pull requests](#raising-the-pull-request)
* `/weekly-digest` to get a [summary of changes in the last week](#weekly-digest)
* `/fix-ci-build` for fixing CI builds on branches
```yaml
Understand if there's a Pull Request for your branch.
If so, investigate the latest GitHub action build for this branch, and understand if and why the build failed.
Design a minimal fix to make the build pass and implement the fix. If at any point you are uncertain, ask the user.
DO NOT push your changes.
```
* `/create-runbook` to write new runbooks consistently
```yaml
Create a new runbook for Gitpod following these guidelines:
1. **Use the template from `docs/runbooks/_TEMPLATE.md`**
2. **Reference resources from `docs/runbooks/_resources.md` for dashboard and log links**
3. **Look up technical details in the codebase as needed**
4. **Follow the patterns from existing runbooks in `docs/runbooks/`**
### Required Information
If not already provided, ask the user for:
**Service/Alert Name:** What service or alert type is this runbook for? (e.g., "Runner Hibernation Issues", "High AWS Error Rates")
**Alert Details:** Please provide the alert names and their Prometheus queries:
Example format:
Alert Name: High Error Rate
Query: sum(increase(http_requests_total{status=~"5.."}[5m])) > 10
Alert Name: Failed Connections
Query: sum(connection_failures_total[5m]) by (region) > 5
**Additional Context:** Any specific technical context, dependencies, or special considerations? (e.g., "MemoryDB used for state management", "ElastiCache used by agents reconciler", "Only affects managed runners")
### Output
Generate a complete runbook including:
- Proper quicklinks using actual dashboard/log URLs from `_resources.md`
- Investigation steps with specific AWS accounts and regions
- Appropriate escalation team (Hosted Compute/Core/Agents)
- Actionable mitigation steps
- Suggested filename and location
**Start by asking for any missing information from the Required Information section.**
```
* `/changelog-ona-swe-agent` to produce user-facing changelog and Slack announcement for Ona SWE agent releases
```markdown
Generate user-facing changelog and Slack announcement for Ona SWE agent releases.
### Process
1. Extract stable commit
2. Extract candidate commit
2.1 If not provided suggest the candidate
3. Run git log commands: `git log stable_commit...candidate_commit -- ai-agents`
4. Filter for Ona-relevant, user-facing changes only
5. Create changelog.md and Slack announcement
### Format
**Changelog:**
Ona SWE Agent {{version}} Changelog
### 🚀 Features
### 🐛 Bug Fixes
### 🔧 Engineering
**Version**: {{version}}
**Commit**: [commit]
**Previous**: [stable version]
**Slack:**
🚀 **Ona SWE Agent {{version}} is now available!**
**Key highlights:**
• Feature 1
• Feature 2
Full changelog: [link]
Don't use icons.
Use GitHub PR links: `[#XXXX](https://github.com/gitpod-io/gitpod/pull/XXXX)`
Focus on user impact, group logically, keep Slack concise (5-6 points max).
```
* `/catch-up` to catch the agent up to changes in an environment
```yaml
Understand the changes in this environment compared to main.
What files have changed and why? What's the user's intent?
```
## Ask Ona
For our team, "ask Ona" has become as natural as saying "Google it". While the phrase covers any interaction with Ona, it's most commonly used when we encourage each other to inquire about our codebase and systems directly.
### Codebase inquiry: "How does X work?"
Ona Agents work are very capable of understanding a codebase. Questions we ask Ona span the entire spectrum of our platform, e.g.:
* *What SSO providers does our platform support?*
* *What kinds of access tokens does our backend issue?*
* *What patterns do we use for testing with fake clocks in Go?*
### Developer onboarding
New developers joining Gitpod experience Ona as their onboarding companion. Instead of consuming senior engineers' time with exploratory questions, they engage directly with the codebase through Ona. E.g. someone joining the data team would use Ona Agents to understand how analytics events are emitted, what events exist, what naming conventions are, and how events are tested.
New team members can explore at their own pace, ask "naive" questions without hesitation, and build their mental model of the system iteratively. They're learning by interrogating the actual code, not outdated documentation or someone's potentially incomplete recollection.
### Weekly Digest
We generate a "weekly digest" that analyzes our codebase evolution. It's an assessment of our code's direction, identifying churn hotspots, technical debt accumulation, declining test coverage, and API inconsistencies. The digest tracks velocity and change patterns, highlighting frequently modified areas and unusual activity signaling architectural stress.
```markdown title="Weekly digest prompt"
Generate a focused weekly digest that gives the team actionable insight into our software engineering activity.
Structure the digest as follows:
- Team Output and Productivity: Summarize total commits, merged pull requests, and notable achievements. Highlight metrics that reflect productivity—such as lead time for changes and the number of reviewed issues.
- Code Churn Focus: Identify the three files with the highest code churn this week—that is, those with the largest combined lines added and removed. For each file, list:
- The complete file path
- Total lines changed (added plus removed)
- A concise summary of the nature of the changes, inferred from commit messages
- Inconsistencies and new patterns: Find code patterns, library use and API definitions that are inconsistent with previous code.
- Clarity and Value: Present all information in a straightforward format that makes it easy for the team to see where the most change and activity occurred, and to spot potential hotspots for refactoring or further review.
- Shareable Output: Format the digest so it can be posted or forwarded—use clear section headers and bullet points.
Leverage available repository and project tracking data. Prioritize simplicity, clarity, and actionable reporting.
Also, give me histogram of commits by author. Note: we squash PRs when they land on main.
```
### Measuring Ona’s adoption
When Ona Agent contributes to code changes, it marks itself as a co-author. By tracking these contributions we understand how effectively we're integrating them into our development workflow. At the time of writing, Ona co-authors 60% of our engineering teams commits to Ona.
```markdown title="Ona adoption measurement prompt"
What's the percentage of commits with Ona contributions merged to main in the last four weeks?
Give me a daily histogram and weekly average.
Beware that we squash commits when we merge to main.
```
## Writing code
Ona Agents’ primary use is writing code: fixing bugs, adding features, improving tests, enhancing code quality. Any modification previously made using a text editor, can now be orchestrated through Ona. But like any powerful tool, wielding it effectively requires understanding and skill.
The most common pitfall we see is under-specification. Instead of saying "*fix the frontend tests*" be precise: "*Fix the flaky frontend tests for the login page where the button selectors aren't being found correctly.*" Specificity is a superpower.
### Explore, plan, build: tackling system-wide changes
For substantial changes that span multiple components, the explore-plan-build workflow works well. Think of it as a three-phase journey where you progressively build context and confidence.
1. **Explore:** Start by having Ona understand the system. You might prompt: "Examine the authentication flow, including failure modes, security features, database connections, and audit logging. Give me a report of your findings." This exploration serves dual purposes—it helps both you and Ona Agents build a mental model of the codebase.
2. **Plan:** With context established, design the change. For example: "*We need to add audit logs to every login attempt. Ensure this doesn't impact failure rates and maintains compatibility with all SSO providers. Design a change that achieves this.*"
A particularly effective pattern here is asking Ona to write the design to a markdown file, then iterating on it in VS Code. Whenever you update the file, tell Ona explicitly to incorporate your changes. This creates a collaborative design loop where you maintain control while leveraging Ona's capabilities.
3. **Build:** Once the design feels right, implementation requires nothing more than "implement it." Ona already has the context and plan—now it executes.
### Bottom-of-the-backlog drive-by changes
Issues that languish at the bottom of any backlog—copy changes, padding adjustments, missing test cases, absent log statements—now get fixed immediately. We regularly go straight from identification to pull request.
The key pattern here is learning from existing code. Instead of specifying every detail, leverage what's already there: "*Add a test case to the agent tests that verifies the out-of-token failure mode. Understand the existing test cases and add one that's highly consistent.*"
This approach works beautifully for:
* Missing entries in table-driven tests
* Additional logging or metrics
* UI consistency fixes between desktop and mobile
* Small but important quality-of-life improvements
By asking Ona to generalize from existing patterns, you ensure consistency while moving fast.
### Ona as documentation writer
We treat documentation as code. Good documentation, like good code, is consistent in tone and structure. We've built a `/docs-writer` command that guides someone writing documentation through the produce so that we all write in one voice.
Our own [documentation](https://docs.gitpod.io/) is written using Ona using a prompt similar to the one below.
The docs writer prompt contains instructions for an interactive conversation, rather than trying to one-shot the result. Next to instructions like “*Write like Strunk and White’s Elements of Style*” it contains a workflow section encouraging the agent to ask clarifying questions.
```markdown title="/docs-writer slash command configuration"
Technical documentation specialist who creates clear, accurate documentation following industry best practices. Never invent facts—always request clarification when details are missing.
Only operate in ./docs/gitpod
### Writing Style
- **Clear & Concise**: Simple language, short paragraphs, bullet points for complex procedures
- **Active Voice**: "Click Save" not "The user should click Save"
- **Consistent Terms**: Uniform naming for UI elements, commands, parameters
- **Define acronyms** on first use
### Content Structure
1. **Title**: Short, descriptive
2. **Introduction**: 1-2 sentences + prerequisites if needed
3. **Instructions**: Step-by-step with subheadings/bullets
4. **Examples**: Working code samples with proper formatting
5. **Visuals**: Suggest screenshots/diagrams where helpful (mark as "_Insert screenshot here_")
6. **Troubleshooting**: Common issues and solutions
7. **Next Steps**: Related docs, advanced guides
### Best Practices
- **Proactively ask questions** for missing/ambiguous info
- Provide **fully working code examples** with syntax highlighting
- Maintain friendly but succinct tone
### Critical Terms
- **Gitpod** (never GitPod)
- **Dev Container** (never devcontainer)
- "Self-hosted" = "in your VPC" or "bring your own cloud"
- Base URL: https://app.gitpod.io
- Workspaces = environments
## Workflow
1. Review provided content
2. Identify gaps/ambiguities
3. Ask clarifying questions (e.g., "Is this feature v1.2+ only?")
4. Generate updated draft with:
- Clear structure
- Code samples
- Visual suggestions
- Troubleshooting tips
5. List any remaining questions
## Key Reminders
- **Never hallucinate**—ask for details instead
- Use direct language ("Click Open")
- Enrich with examples and references
- Encourage feedback/contributions
- Keep docs current and alive
When uncertain about any detail, explicitly request clarification rather than guessing. Focus on creating documentation that helps users succeed quickly.
```
You can also use Ona to generate technical documentation that lives alongside your code. Though remember: markdown files in your repository are essentially a cache of information. Ona can understand your codebase on demand, which has the advantage of never going stale. Choose your approach based on whether you need immediate human readability or dynamic accuracy.
### Preview before you ship
For frontend changes, seeing is believing. [Ask Ona to provide a preview](#ask-for-a-preview), and it will spin up a service (visible in your environment details) with the appropriate port exposed. We've used this successfully with React, Vite, and Storybook.
The same is true for backend changes. Since adopting Ona we have found even more value in our test harness. The verification of changes helps build confidence in the changes Ona is making, and helps Ona verify its work.
### Progressive engagement: Conversation → VS Code Web → Desktop IDE
The VS Code Web next to any conversation simplifies reviewing changes and fine adjustments. For more complex changes one needs to go deeper. From that, a pattern has emerged where we’ll progressively engage with code depending on the complexity of the change.
* For simple changes the conversation and summary instill enough trust to raise a pull request directly.
* For anything else VS Code Web goes a long way. Particularly the combination of [manual edits and Ona Agents is very powerful](#progressive-engagement-conversation--vs-code-web--desktop-ide).
* Working in full-manual mode, i.e. a desktop IDE is only necessary for deep mono-focused work; e.g. when we need to establish a new pattern and want to do that manually, we’ll move back to a desktop IDE.
### Raising the Pull Request
Teams have standards for pull requests—templates to follow, checks to run, issues to link. We've encoded ours in a `/pr` command. When an engineer is satisfied with their changes, they simply type `/pr` and Ona walks through the entire process:
* Committing changes to an appropriately named branch
* Linking to the relevant issue
* Generating a meaningful description
* Adding testing instructions
* Ensuring all team conventions are followed
The pull request becomes the natural conclusion of your work with Ona, not a separate, manual process that breaks your flow.
Our own PR prompt is
```markdown
Raise a draft PR for a branch starting with my initials following this template.
Get my initials from the configured git username. Check for manual files changes before creating the PR description.
Make sure you capture all changes in this environment.
## Description
## Related Issue(s)
Fixes 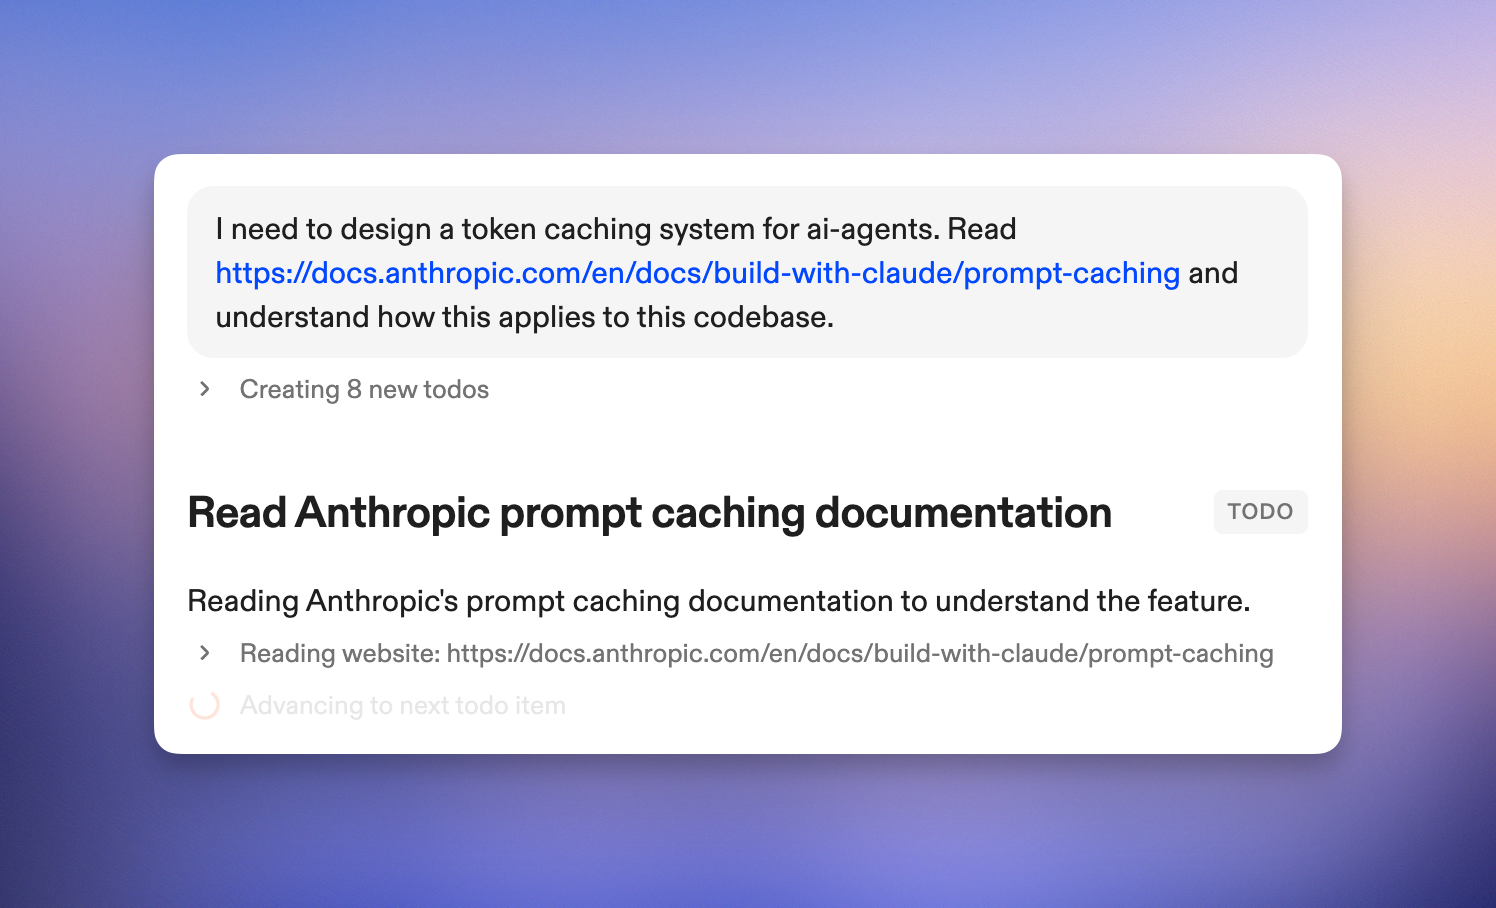 Ona Agents can read from web URLs. It will use that ability to read documentation (e.g. Go docs), but can also be explicitly instructed to do so. We use this a lot to understand a new API, service or best practices. For example, the initial draft of our token caching system was created using the [“Analyze, Plan, Build”](#explore-plan-build-tackling-system-wide-changes) workflow, asking Ona to read the [Anthropic reference](https://docs.anthropic.com/en/docs/build-with-claude/prompt-caching) first.
### Use screenshots
Ona can view PNG images in its environment. It’s easy to upload them into an environments file system using VS Code Web: simply drop it into the file browser. You can then ask Ona to interact with that screenshot.
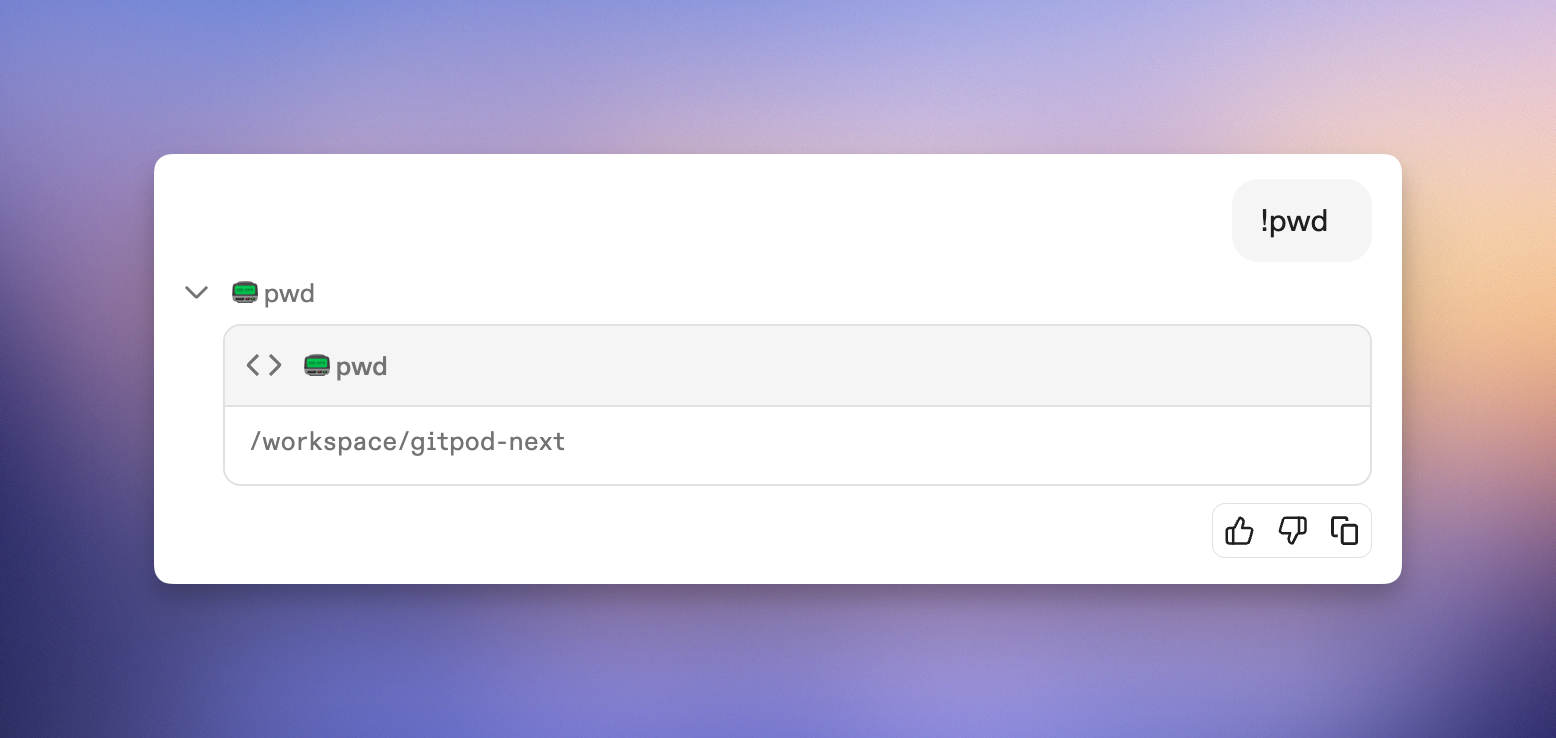
### Run shell commands directly
Sometimes asking an LLM is more effort than just running the command directly. VS Code Web on the side makes that easy to do. There’s an even quicker way: `!pwd` runs the command directly instead of instructing the agent.
The command and output become part of the agent’s context. This is a powerful tool to explicitly give context to the agent, e.g. a particular file listing or test failures. It also ensures the agent and you are on the same page.
Ona Agents can read from web URLs. It will use that ability to read documentation (e.g. Go docs), but can also be explicitly instructed to do so. We use this a lot to understand a new API, service or best practices. For example, the initial draft of our token caching system was created using the [“Analyze, Plan, Build”](#explore-plan-build-tackling-system-wide-changes) workflow, asking Ona to read the [Anthropic reference](https://docs.anthropic.com/en/docs/build-with-claude/prompt-caching) first.
### Use screenshots
Ona can view PNG images in its environment. It’s easy to upload them into an environments file system using VS Code Web: simply drop it into the file browser. You can then ask Ona to interact with that screenshot.
### Run shell commands directly
Sometimes asking an LLM is more effort than just running the command directly. VS Code Web on the side makes that easy to do. There’s an even quicker way: `!pwd` runs the command directly instead of instructing the agent.
The command and output become part of the agent’s context. This is a powerful tool to explicitly give context to the agent, e.g. a particular file listing or test failures. It also ensures the agent and you are on the same page.
 ## Go parallel
Ona Agents run in parallel; multiple agents working on different things at the same time, in different environments. Ona’s interface is built to support this parallelism, by lowering the cost of context switching.
### Start multiple tasks
When starting work on the Home page, using the prompt box, pressing Enter will redirect to new the conversation. Cmd+Enter (Ctrl+Enter on non-mac) will start the agent, but stay on the Home page retaining all context. This is useful for rapidly firing off bits of work one after another.
A key element is the [90/10 rule](#90-agent-10-human): let Ona Agents produce 90% of the work, and drive home the remaining 10% yourself. You’ll get the most out of your time if you start the tasks so that you can “harvest” their results in a staggered fashion. I.e. focus on the 10% of one task while the others still work autonomously.
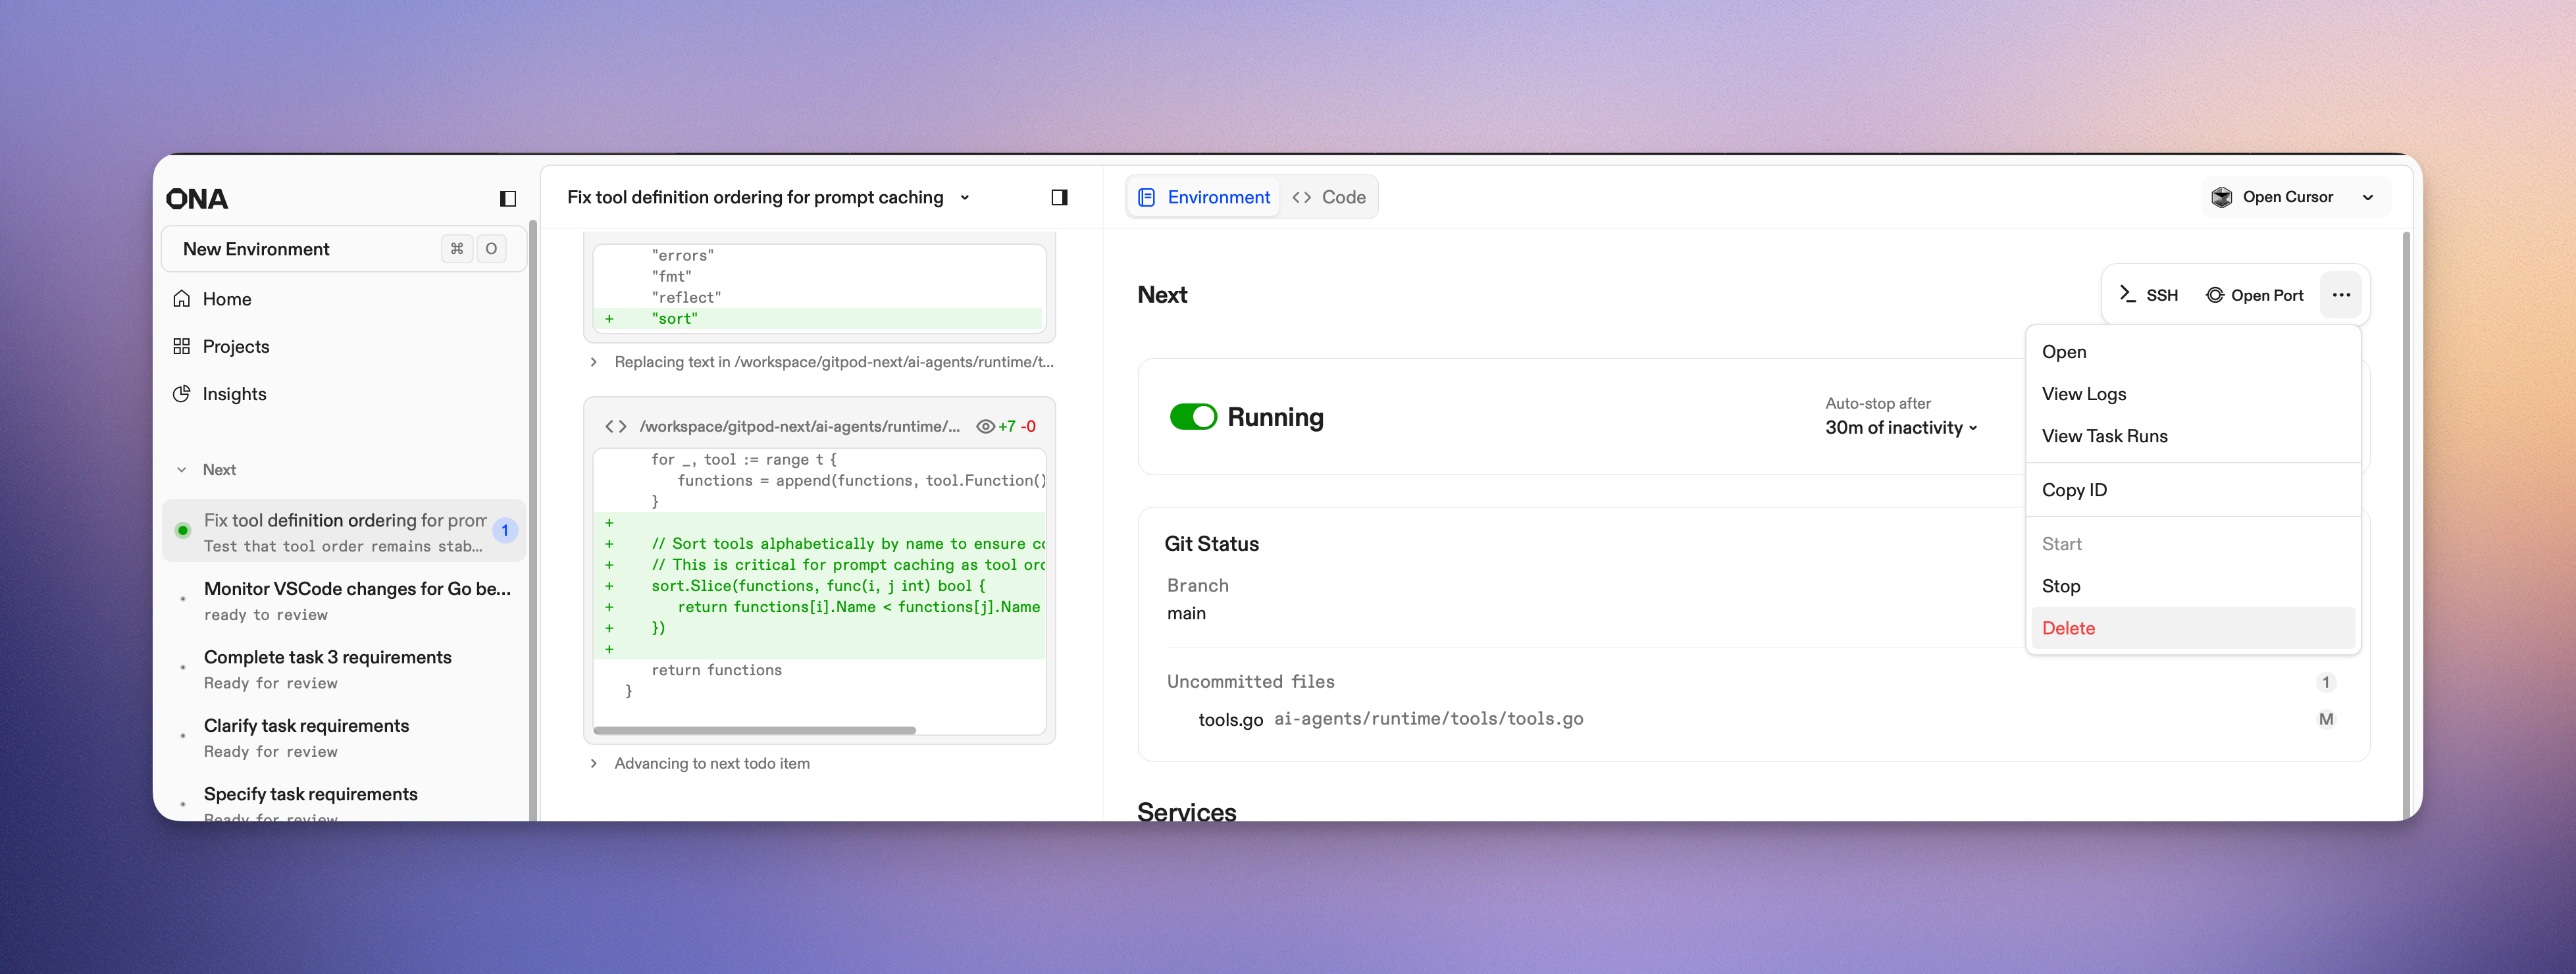
### One environment per task
As engineers we are used to making new branches per task. With Ona, we strive for one environment per branch. This way environments are completely isolated from each other - you or Ona can make many changes against the same repo without file system conflicts.
Ona Environments are designed to be ephemeral, and will be automatically deleted after some time. Treat them as disposable resources, not as something to maintain. They auto-stop after some time of inactivity to save cost; and auto-start when the agent becomes active, and can be manually started using the toggle in the environment details.
## Go parallel
Ona Agents run in parallel; multiple agents working on different things at the same time, in different environments. Ona’s interface is built to support this parallelism, by lowering the cost of context switching.
### Start multiple tasks
When starting work on the Home page, using the prompt box, pressing Enter will redirect to new the conversation. Cmd+Enter (Ctrl+Enter on non-mac) will start the agent, but stay on the Home page retaining all context. This is useful for rapidly firing off bits of work one after another.
A key element is the [90/10 rule](#90-agent-10-human): let Ona Agents produce 90% of the work, and drive home the remaining 10% yourself. You’ll get the most out of your time if you start the tasks so that you can “harvest” their results in a staggered fashion. I.e. focus on the 10% of one task while the others still work autonomously.
### One environment per task
As engineers we are used to making new branches per task. With Ona, we strive for one environment per branch. This way environments are completely isolated from each other - you or Ona can make many changes against the same repo without file system conflicts.
Ona Environments are designed to be ephemeral, and will be automatically deleted after some time. Treat them as disposable resources, not as something to maintain. They auto-stop after some time of inactivity to save cost; and auto-start when the agent becomes active, and can be manually started using the toggle in the environment details.
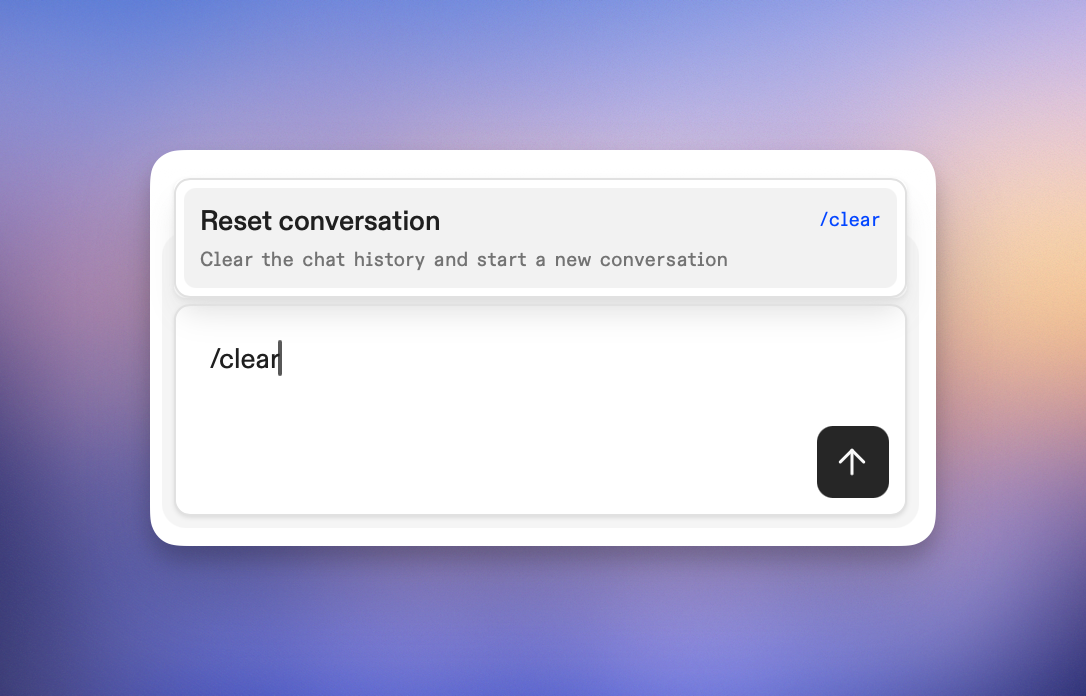
 ### `/clear` for a clean slate
During a conversation we might learn what we should have asked/prompted in the first place. Ona Agents can also go astray. To retain in-environment context, e.g. modified but uncommitted files, some database state or one-off networking setup, `/clear` is helpful. It resets the conversation with the agent, but keeps the environment as is. This is an escape hatch, not a recommended way of working.
### `/clear` for a clean slate
During a conversation we might learn what we should have asked/prompted in the first place. Ona Agents can also go astray. To retain in-environment context, e.g. modified but uncommitted files, some database state or one-off networking setup, `/clear` is helpful. It resets the conversation with the agent, but keeps the environment as is. This is an escape hatch, not a recommended way of working.
 ### On Mobile, on the go
The best development environment is the one you have with you. Ona works well on a phone—not as a compromise, but as a genuinely useful extension of our workflow. Open [app.ona.com](http://app.ona.com) on your phone and work just like you would on your laptop.
The autonomous nature of these agents makes mobile interaction surprisingly natural. We’re not manipulating code on a tiny screen; but have a conversation about intent and reviewing outcomes. We've found ourselves compulsively checking in, while waiting for a train, during lunch or after putting the baby to sleep.
Especially on the go, being able to kick of some prototype idea is immensely powerful. Many ideas you see in Ona today were created from a prototype produced while waiting for the bus or for dinner to be ready.
## Optimize your flow
Ona is a very effective tool, and like any power tool provides great results from the start which get better as you learn the tricks of the trade.
### Be very explicit
Ona Agents performs best when it has very explicit instructions, to the point of over-specification. Providing clear instructions and pointers considerably increases the duration of autonomous sensible work.
For example:
| Not Great | Good |
| --------------------------------------------------------------------------------- | ----------------------------------------------------------------------------------------------------------------------------------------------------------------------------------------------------------------------------------------------------------------------------------------------------------------------------------------------------------------------------------------------------- |
| add a new database entity foo | add a database entity foo for the backend which has a name, description and magic value. Users will search for the magic value, but name and desc are only shown. The magic value cannot be changed and is a number from 1 to 100. |
| add a new endpoint to our backend that allows users to get all of their purchases | Take a look at purchase.go. This file contains the definition for an endpoint that returns a single purchase by ID. Please note how authorization is done and how the tests in purchase\_test.go look - these are in line with our best practises. Add a new endpoint (GET /purchases) in the same file to get all of a user's purchases following the same authorization and testing best practices. |
| explain the codebase | Analyze this codebase and explain its general structure, architecture, and key components. What are the most important things a developer should know to get started? Include information about the tech stack, main directories, entry points, and any critical patterns or conventions used. |
| the sidebar height changes when conversations start | Understand how:
### On Mobile, on the go
The best development environment is the one you have with you. Ona works well on a phone—not as a compromise, but as a genuinely useful extension of our workflow. Open [app.ona.com](http://app.ona.com) on your phone and work just like you would on your laptop.
The autonomous nature of these agents makes mobile interaction surprisingly natural. We’re not manipulating code on a tiny screen; but have a conversation about intent and reviewing outcomes. We've found ourselves compulsively checking in, while waiting for a train, during lunch or after putting the baby to sleep.
Especially on the go, being able to kick of some prototype idea is immensely powerful. Many ideas you see in Ona today were created from a prototype produced while waiting for the bus or for dinner to be ready.
## Optimize your flow
Ona is a very effective tool, and like any power tool provides great results from the start which get better as you learn the tricks of the trade.
### Be very explicit
Ona Agents performs best when it has very explicit instructions, to the point of over-specification. Providing clear instructions and pointers considerably increases the duration of autonomous sensible work.
For example:
| Not Great | Good |
| --------------------------------------------------------------------------------- | ----------------------------------------------------------------------------------------------------------------------------------------------------------------------------------------------------------------------------------------------------------------------------------------------------------------------------------------------------------------------------------------------------- |
| add a new database entity foo | add a database entity foo for the backend which has a name, description and magic value. Users will search for the magic value, but name and desc are only shown. The magic value cannot be changed and is a number from 1 to 100. |
| add a new endpoint to our backend that allows users to get all of their purchases | Take a look at purchase.go. This file contains the definition for an endpoint that returns a single purchase by ID. Please note how authorization is done and how the tests in purchase\_test.go look - these are in line with our best practises. Add a new endpoint (GET /purchases) in the same file to get all of a user's purchases following the same authorization and testing best practices. |
| explain the codebase | Analyze this codebase and explain its general structure, architecture, and key components. What are the most important things a developer should know to get started? Include information about the tech stack, main directories, entry points, and any critical patterns or conventions used. |
| the sidebar height changes when conversations start | Understand how:• we currently keep a stable height for sidebar entries despite font weight changes
• the progress counter pill changes the height of the sidebar item
• we could avoid that height change in line with existing patterns.
Implement that fix. | Learning to specify your intent is the key skill to master when using AI SWE agents to write code. ### Actively encourage reflection For larger changes, or when there are multiple solutions, it’s useful to ask Ona Agents to reflect on their work. This leads to simpler code and the discovery of misunderstandings. Use something like: *review and critique your changes. How can you simplify things?* ### Course correct, stop if needed Join the conversation at any time you feel the need to course correct, Ona Agent will pick up the message whenever it can. Should things go off the rails, click Stop or press ESC. You can continue the conversation right where you left off by sending a (potentially corrective) message.
 ### 90% agent, 10% human
Don’t try and make very fine adjustments using the agent; sometimes opening a text editor and moving that line is more efficient. Follow a 90%/10% split:
* Use the agent to handle the bulk of the changes, letting it do the heavy lifting. Start by giving precise instructions and encourage questions from the agent.
* Finish and refine your work using VS Code web for precise control. We have seen a lot of milage for using the diff view of VS Code web for doing an initial review of changes.
* Avoid trying to make small "micro-adjustments" through the agent - these are better handled directly.
### 90% agent, 10% human
Don’t try and make very fine adjustments using the agent; sometimes opening a text editor and moving that line is more efficient. Follow a 90%/10% split:
* Use the agent to handle the bulk of the changes, letting it do the heavy lifting. Start by giving precise instructions and encourage questions from the agent.
* Finish and refine your work using VS Code web for precise control. We have seen a lot of milage for using the diff view of VS Code web for doing an initial review of changes.
* Avoid trying to make small "micro-adjustments" through the agent - these are better handled directly.
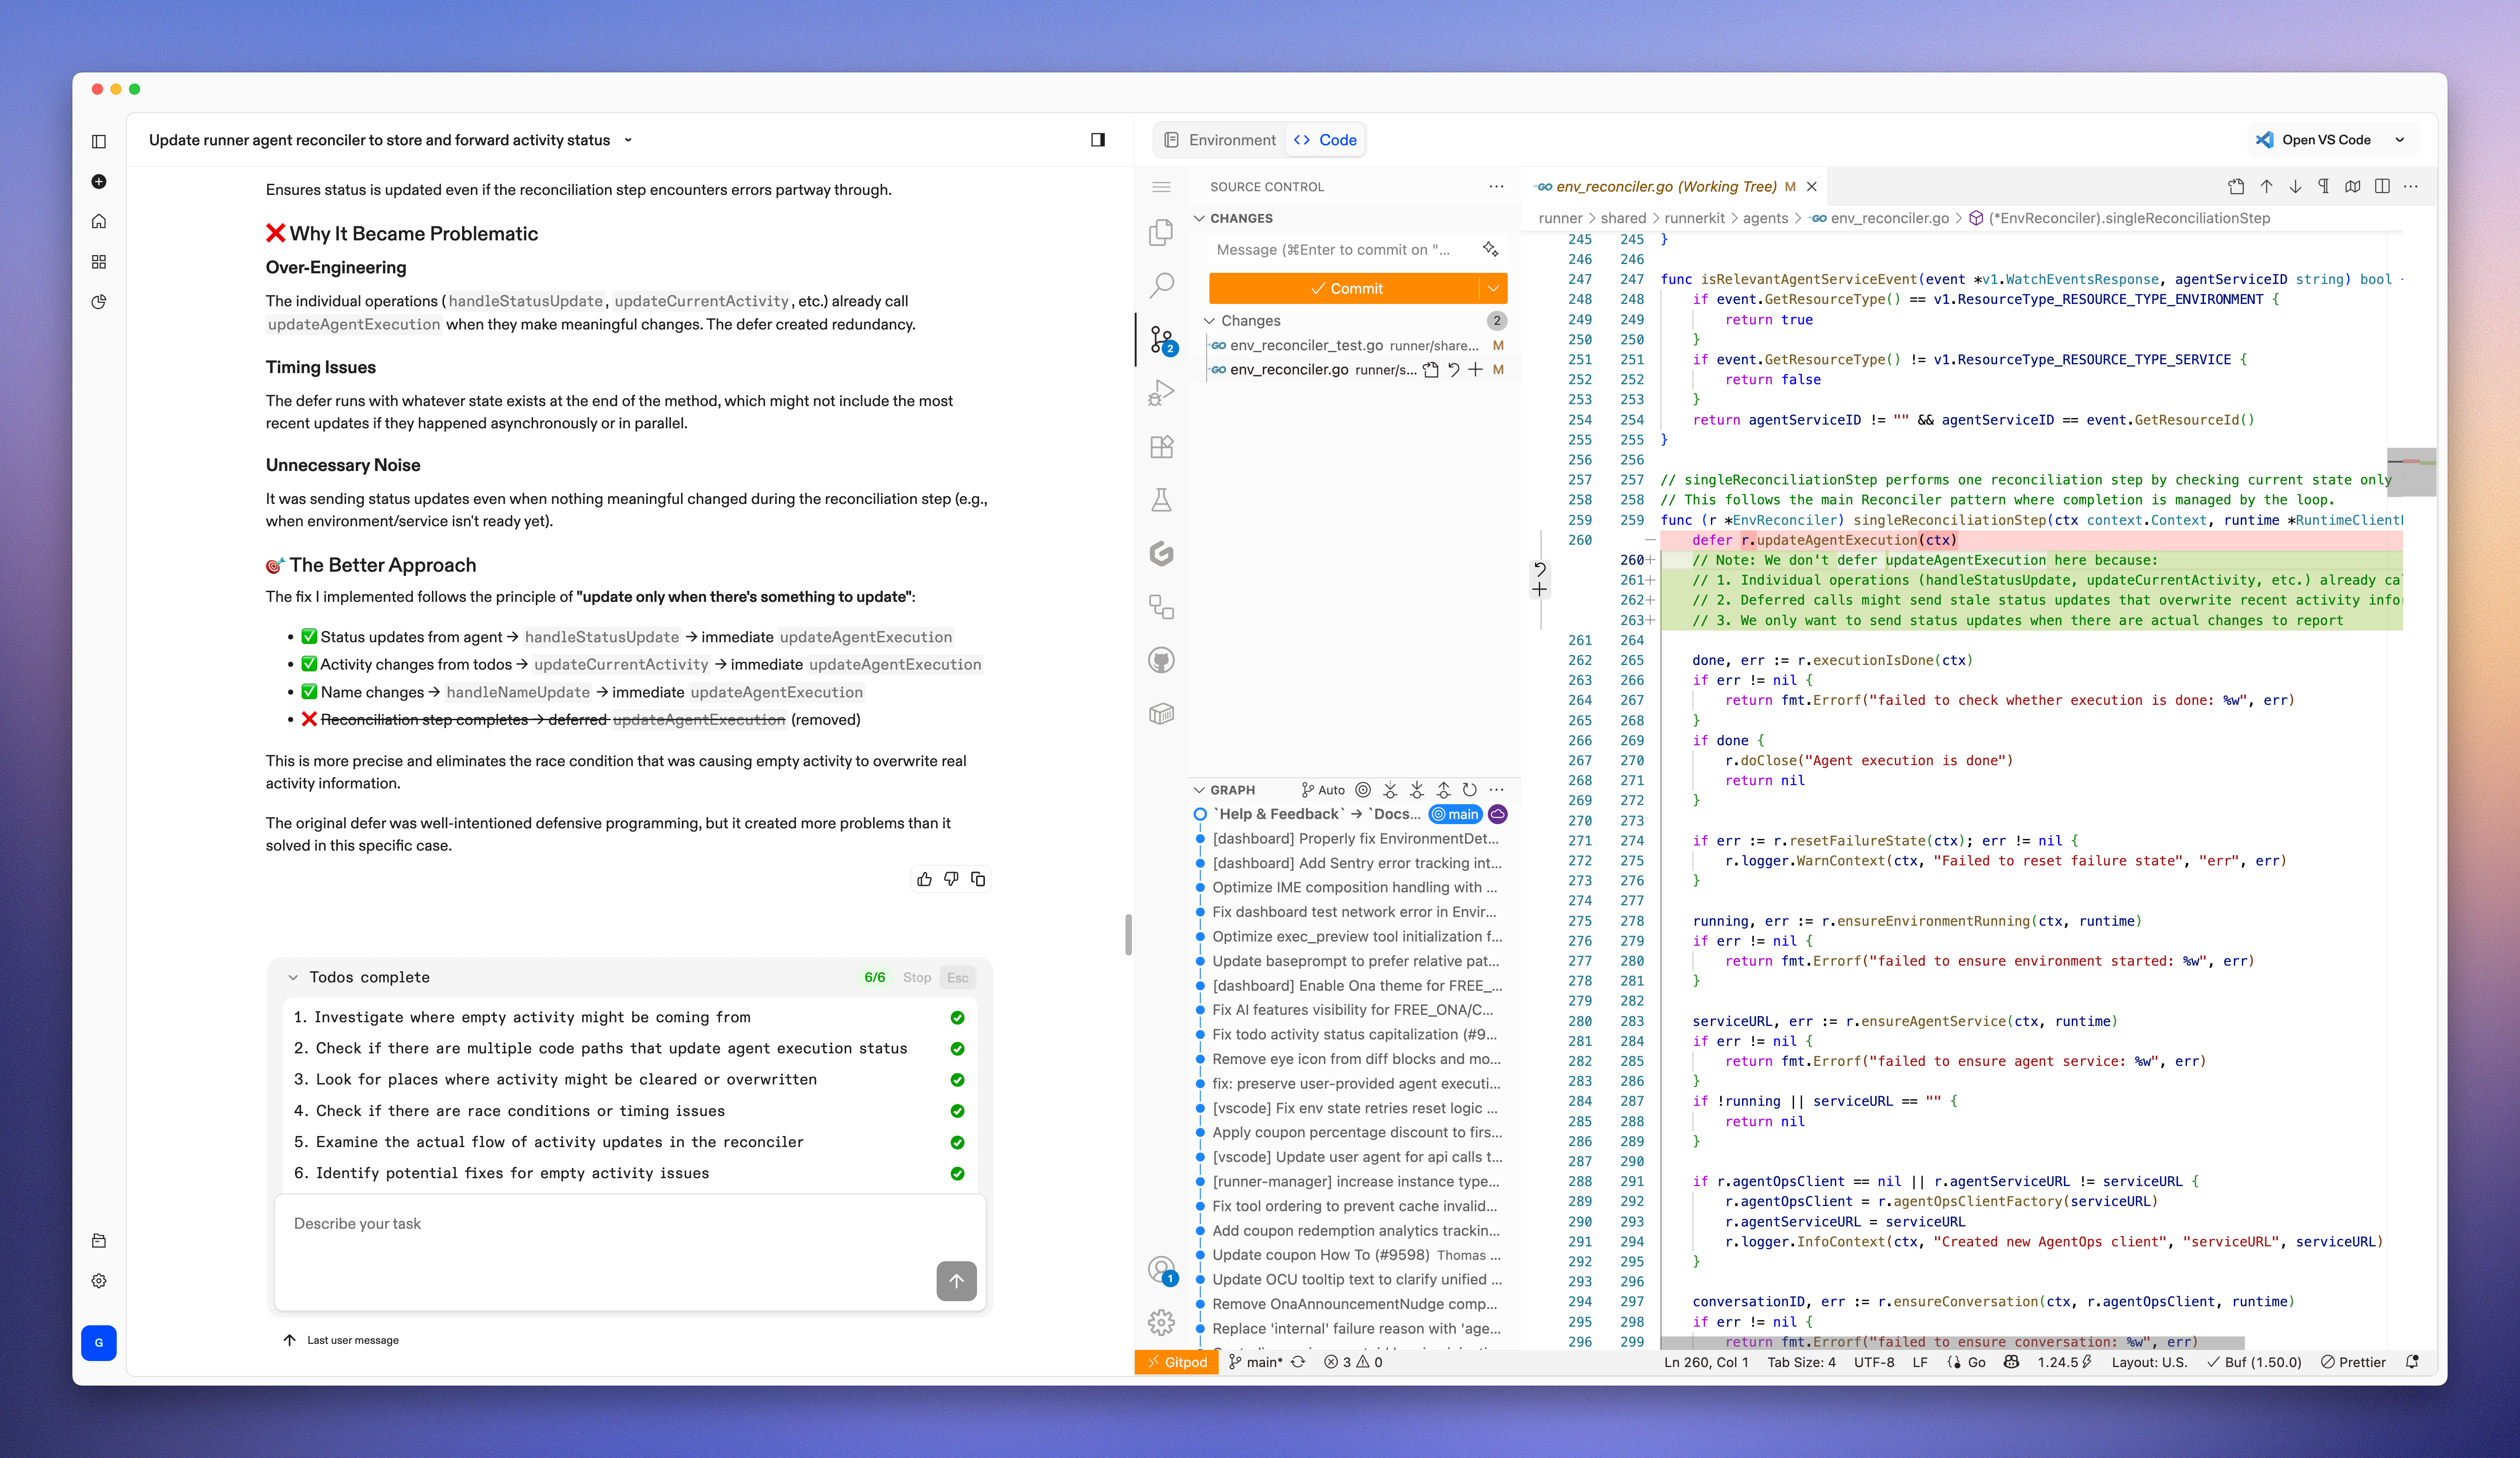 Starting an adjustment, e.g. a refactoring, and asking Ona to understand and complete the changes is very effective way of working.
### Commit early, commit often
Git can act as a checkpoint system, enabling rollback should things have gone the wrong way. Any changes that are functional, but maybe incomplete, should be committed; Ona can always rewrite the history or squash the commits once the change is complete.
Asking Ona to commit its changes, is a fine way to maintain a good history. Ona will write sensible commit messages that help keep track of the work. In practice we rarely need to manually revert back to a prior commit, and Ona will use the commit history to course correct itself. As a rule of thumb: the larger the change you’re trying to make, the more often you want Ona to commit.
Be explicit when, what and how often you want Ona to commit. We’ll use prompts like
* *Commit **all** your changes, **once***
* *Do not commit or push*
* *Keep committing whenever you think is a good time*
### Ask for a preview
Ona Environments are independent of your laptop, hence can serve previews of your work that are accessible beyond local host.
Starting an adjustment, e.g. a refactoring, and asking Ona to understand and complete the changes is very effective way of working.
### Commit early, commit often
Git can act as a checkpoint system, enabling rollback should things have gone the wrong way. Any changes that are functional, but maybe incomplete, should be committed; Ona can always rewrite the history or squash the commits once the change is complete.
Asking Ona to commit its changes, is a fine way to maintain a good history. Ona will write sensible commit messages that help keep track of the work. In practice we rarely need to manually revert back to a prior commit, and Ona will use the commit history to course correct itself. As a rule of thumb: the larger the change you’re trying to make, the more often you want Ona to commit.
Be explicit when, what and how often you want Ona to commit. We’ll use prompts like
* *Commit **all** your changes, **once***
* *Do not commit or push*
* *Keep committing whenever you think is a good time*
### Ask for a preview
Ona Environments are independent of your laptop, hence can serve previews of your work that are accessible beyond local host.
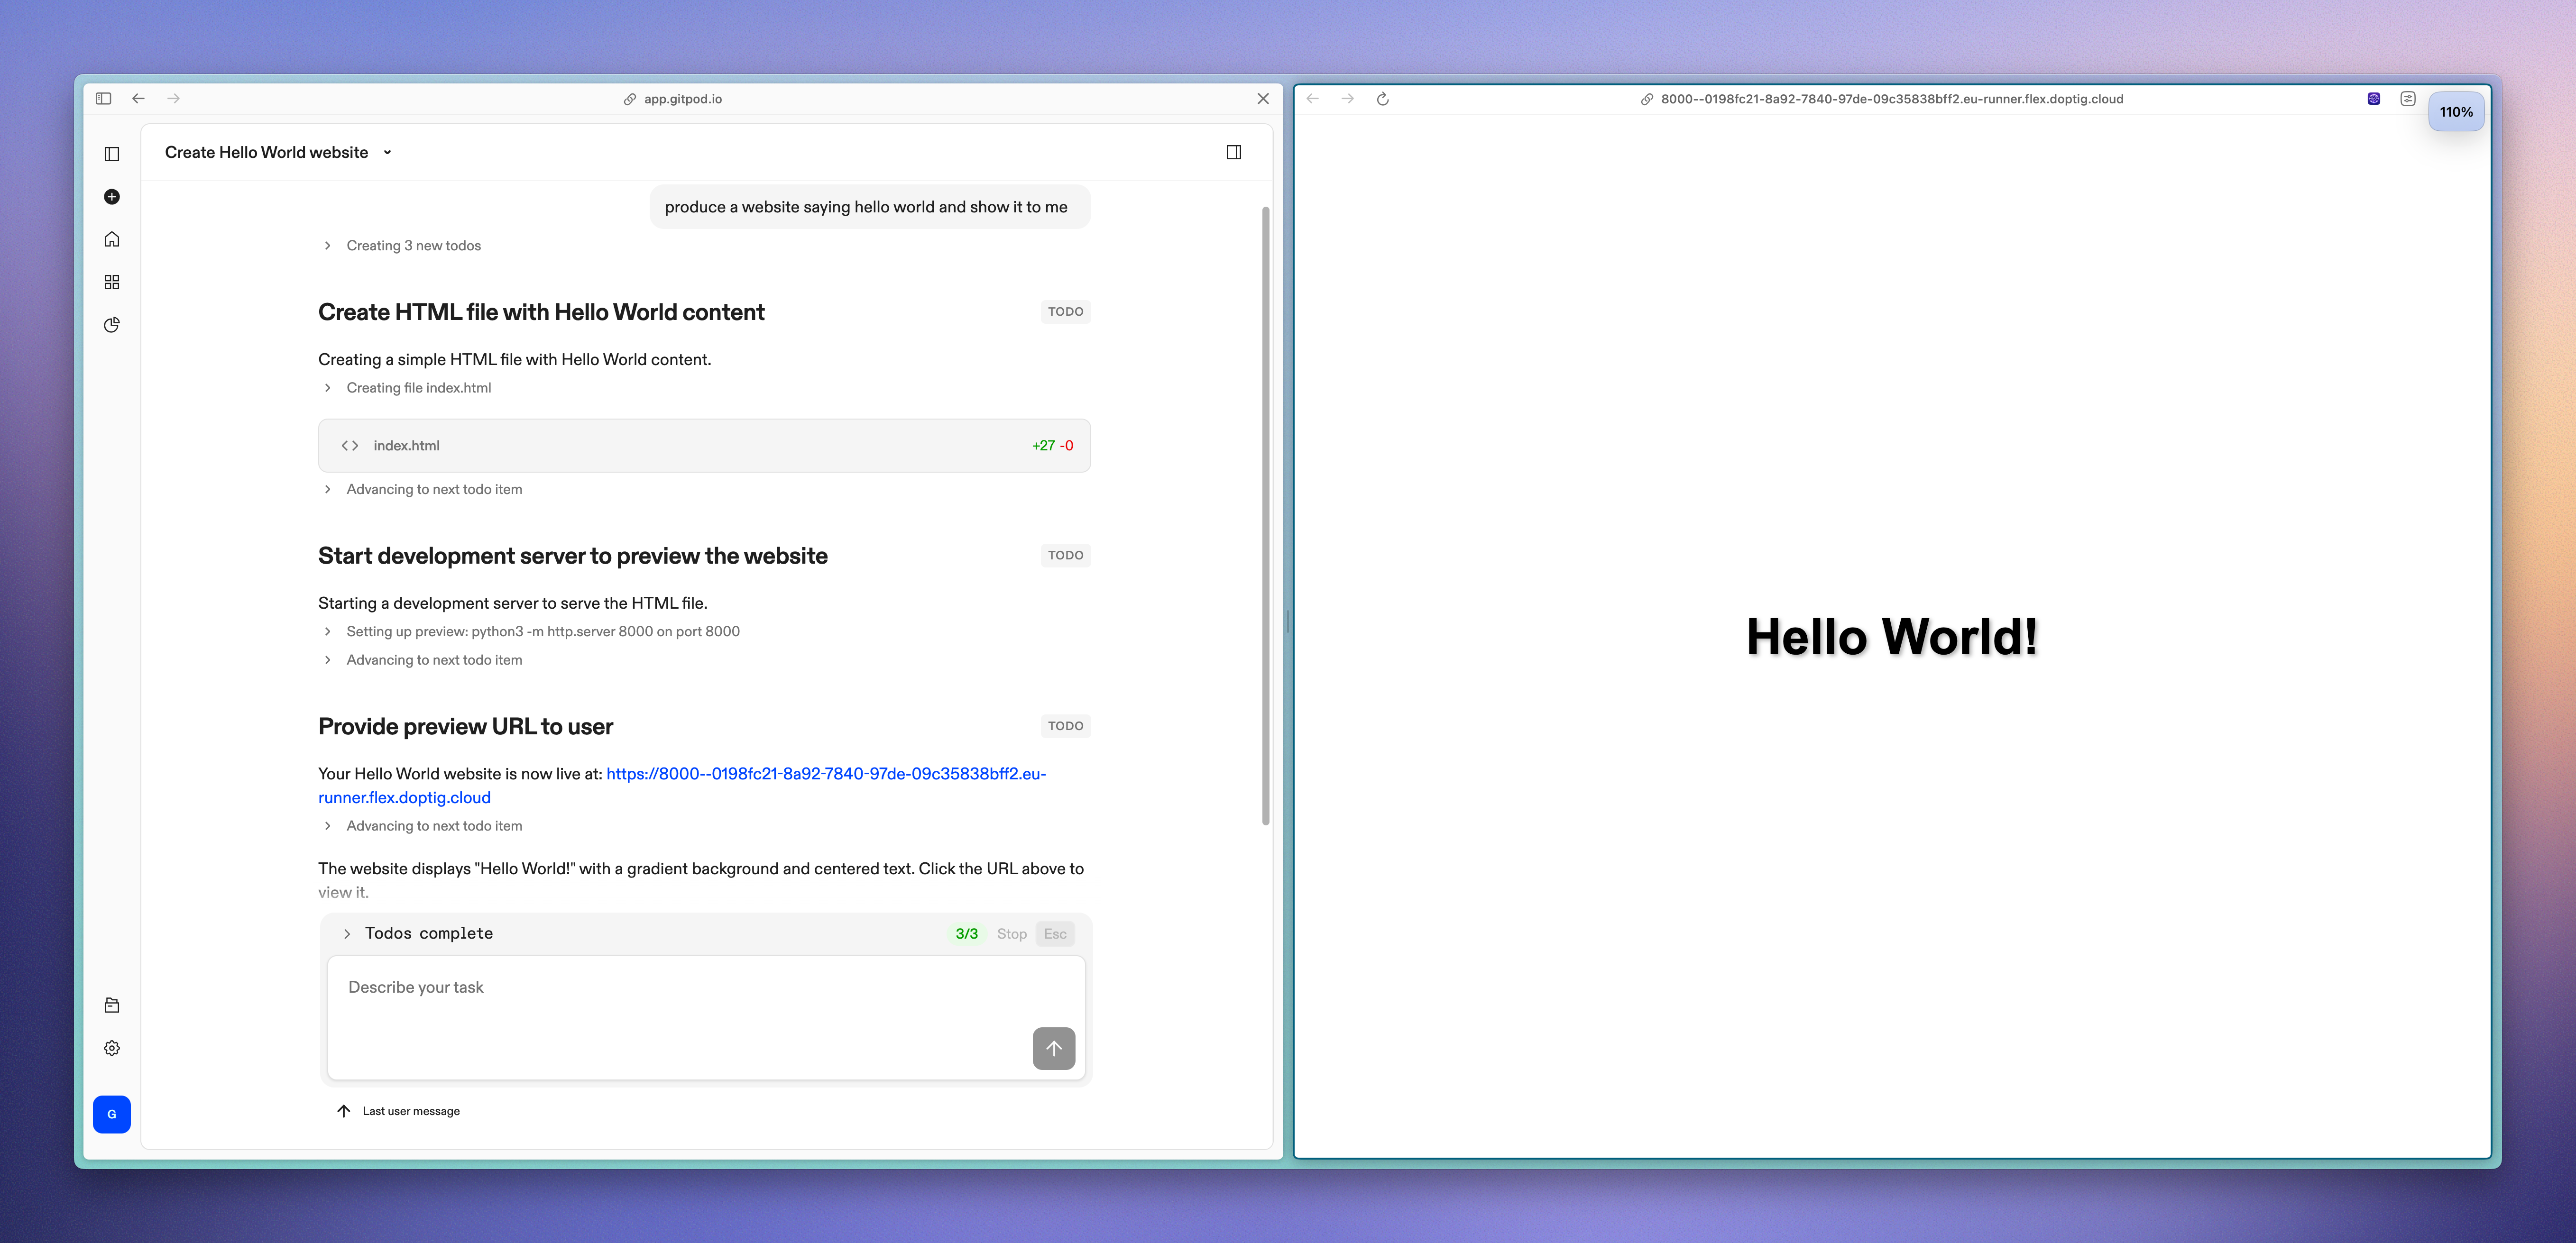 Ona will try to provide a preview when it things that’s helpful. You can also explicitly ask for one:
```markdown
Provide a preview for the front end changes you just made.
```
The generated URL can be shared with friends and colleagues. Once you stop or delete the environment, the URL will stop being available.
Notice how preview URLs show up as “Preview Server” service and open port on the environment details page. You can, at any time, start/stop the service and end sharing of the preview by closing the port.
Some frameworks assume that they're served from localhost or only bind to localhost. In that case, the preview does not work correctly. VS Code's port forwarding works serves as a workaround: open the environment in VS Code using the button in the upper right corner and use its automatic port fowarding to access such services.
We have found previews to be immensely useful and I want to highlight two use-cases:
1. **Developing for mobile**
Suppose you’re making front end changes and want to try them out on mobile. You can have the conversation on your phone directly or on the desktop. Asking Ona to give you a preview URL and then opening that link directly from the conversation on your phone is a very powerful way to view the changes you’re making.
2. **Before vs After**
Specifically for design work and fine adjustments, a before and after view is very helpful. You can ask Ona specifically to produce a before and after page of some changes and give you a preview for it.
```markdown
Generate a standalone demo page that visually compares the Before vs After state of my changes.
**Requirements:**
- Two side-by-side panels: ❌ Before and ✅ After
- Exact measurements labeled (e.g., [old-value] vs [new-value])
- Visual rulers showing width/height differences where applicable
- Code snippets comparing old vs new implementation
- Technical Details section with Problem, Solution, and Benefits
- Ona theme styling using CSS variables (dark theme)
- Responsive design for mobile viewing
**Process**
1. Create the demo HTML page
2. Start a preview server for the demo HTML page
3. Report the URL of the preview server to the user
**Template Structure:**
- Header with component name and description
- Side-by-side comparison panels
- Visual measurement indicators
- Code diff snippets
- Technical details section
- File change information
```
# Billing
Source: https://ona.com/docs/ona/billing/overview
Manage your Ona subscription, payment methods, and billing details through the billing settings.
Manage your subscription, payment methods, and billing details through the billing settings. Only applicable to Ona Cloud.
## Prerequisites
* Ona account
* Organization admin permissions (for organization accounts)
## Payment Security
Ona uses Stripe, a leading payment processor, to handle all billing and payment operations securely. **Ona does not have access to your credit card details** - all payment information is processed and stored securely by Stripe, which is PCI DSS Level 1 certified.
Key security features:
* **No card storage**: Ona never sees or stores your full credit card information
* **Stripe encryption**: All payment data is encrypted and tokenized by Stripe
* **Industry compliance**: Stripe maintains the highest level of payment security standards
* **Secure processing**: All transactions are processed through Stripe's secure infrastructure
## Accessing Billing Settings
Navigate to **Settings > Billing** in your Ona dashboard.
Ona will try to provide a preview when it things that’s helpful. You can also explicitly ask for one:
```markdown
Provide a preview for the front end changes you just made.
```
The generated URL can be shared with friends and colleagues. Once you stop or delete the environment, the URL will stop being available.
Notice how preview URLs show up as “Preview Server” service and open port on the environment details page. You can, at any time, start/stop the service and end sharing of the preview by closing the port.
Some frameworks assume that they're served from localhost or only bind to localhost. In that case, the preview does not work correctly. VS Code's port forwarding works serves as a workaround: open the environment in VS Code using the button in the upper right corner and use its automatic port fowarding to access such services.
We have found previews to be immensely useful and I want to highlight two use-cases:
1. **Developing for mobile**
Suppose you’re making front end changes and want to try them out on mobile. You can have the conversation on your phone directly or on the desktop. Asking Ona to give you a preview URL and then opening that link directly from the conversation on your phone is a very powerful way to view the changes you’re making.
2. **Before vs After**
Specifically for design work and fine adjustments, a before and after view is very helpful. You can ask Ona specifically to produce a before and after page of some changes and give you a preview for it.
```markdown
Generate a standalone demo page that visually compares the Before vs After state of my changes.
**Requirements:**
- Two side-by-side panels: ❌ Before and ✅ After
- Exact measurements labeled (e.g., [old-value] vs [new-value])
- Visual rulers showing width/height differences where applicable
- Code snippets comparing old vs new implementation
- Technical Details section with Problem, Solution, and Benefits
- Ona theme styling using CSS variables (dark theme)
- Responsive design for mobile viewing
**Process**
1. Create the demo HTML page
2. Start a preview server for the demo HTML page
3. Report the URL of the preview server to the user
**Template Structure:**
- Header with component name and description
- Side-by-side comparison panels
- Visual measurement indicators
- Code diff snippets
- Technical details section
- File change information
```
# Billing
Source: https://ona.com/docs/ona/billing/overview
Manage your Ona subscription, payment methods, and billing details through the billing settings.
Manage your subscription, payment methods, and billing details through the billing settings. Only applicable to Ona Cloud.
## Prerequisites
* Ona account
* Organization admin permissions (for organization accounts)
## Payment Security
Ona uses Stripe, a leading payment processor, to handle all billing and payment operations securely. **Ona does not have access to your credit card details** - all payment information is processed and stored securely by Stripe, which is PCI DSS Level 1 certified.
Key security features:
* **No card storage**: Ona never sees or stores your full credit card information
* **Stripe encryption**: All payment data is encrypted and tokenized by Stripe
* **Industry compliance**: Stripe maintains the highest level of payment security standards
* **Secure processing**: All transactions are processed through Stripe's secure infrastructure
## Accessing Billing Settings
Navigate to **Settings > Billing** in your Ona dashboard.
 ## Card Verification
To prevent abuse and ensure account security, Ona requires card verification for new accounts. This process is handled securely by Stripe.
### How It Works
1. A temporary \$1 charge is placed on your card by Stripe
2. The charge is automatically refunded by Stripe
3. Your card is verified and ready for use
4. Ona receives only a secure token from Stripe, never your card details
**Note**: The verification charge typically appears and disappears within 1-3 business days, depending on your bank. This charge is processed entirely by Stripe's secure payment infrastructure.
## CORE Subscription
The CORE subscription provides enhanced features and monthly credits for environment usage. Learn more about [how credits are consumed through OCUs](/ona/billing/usage).
### Upgrading to CORE
1. Go to **Settings > Billing**
2. Click **Upgrade to CORE**
3. Select your desired subscription plan
4. Enter payment details
5. Confirm subscription
## Card Verification
To prevent abuse and ensure account security, Ona requires card verification for new accounts. This process is handled securely by Stripe.
### How It Works
1. A temporary \$1 charge is placed on your card by Stripe
2. The charge is automatically refunded by Stripe
3. Your card is verified and ready for use
4. Ona receives only a secure token from Stripe, never your card details
**Note**: The verification charge typically appears and disappears within 1-3 business days, depending on your bank. This charge is processed entirely by Stripe's secure payment infrastructure.
## CORE Subscription
The CORE subscription provides enhanced features and monthly credits for environment usage. Learn more about [how credits are consumed through OCUs](/ona/billing/usage).
### Upgrading to CORE
1. Go to **Settings > Billing**
2. Click **Upgrade to CORE**
3. Select your desired subscription plan
4. Enter payment details
5. Confirm subscription
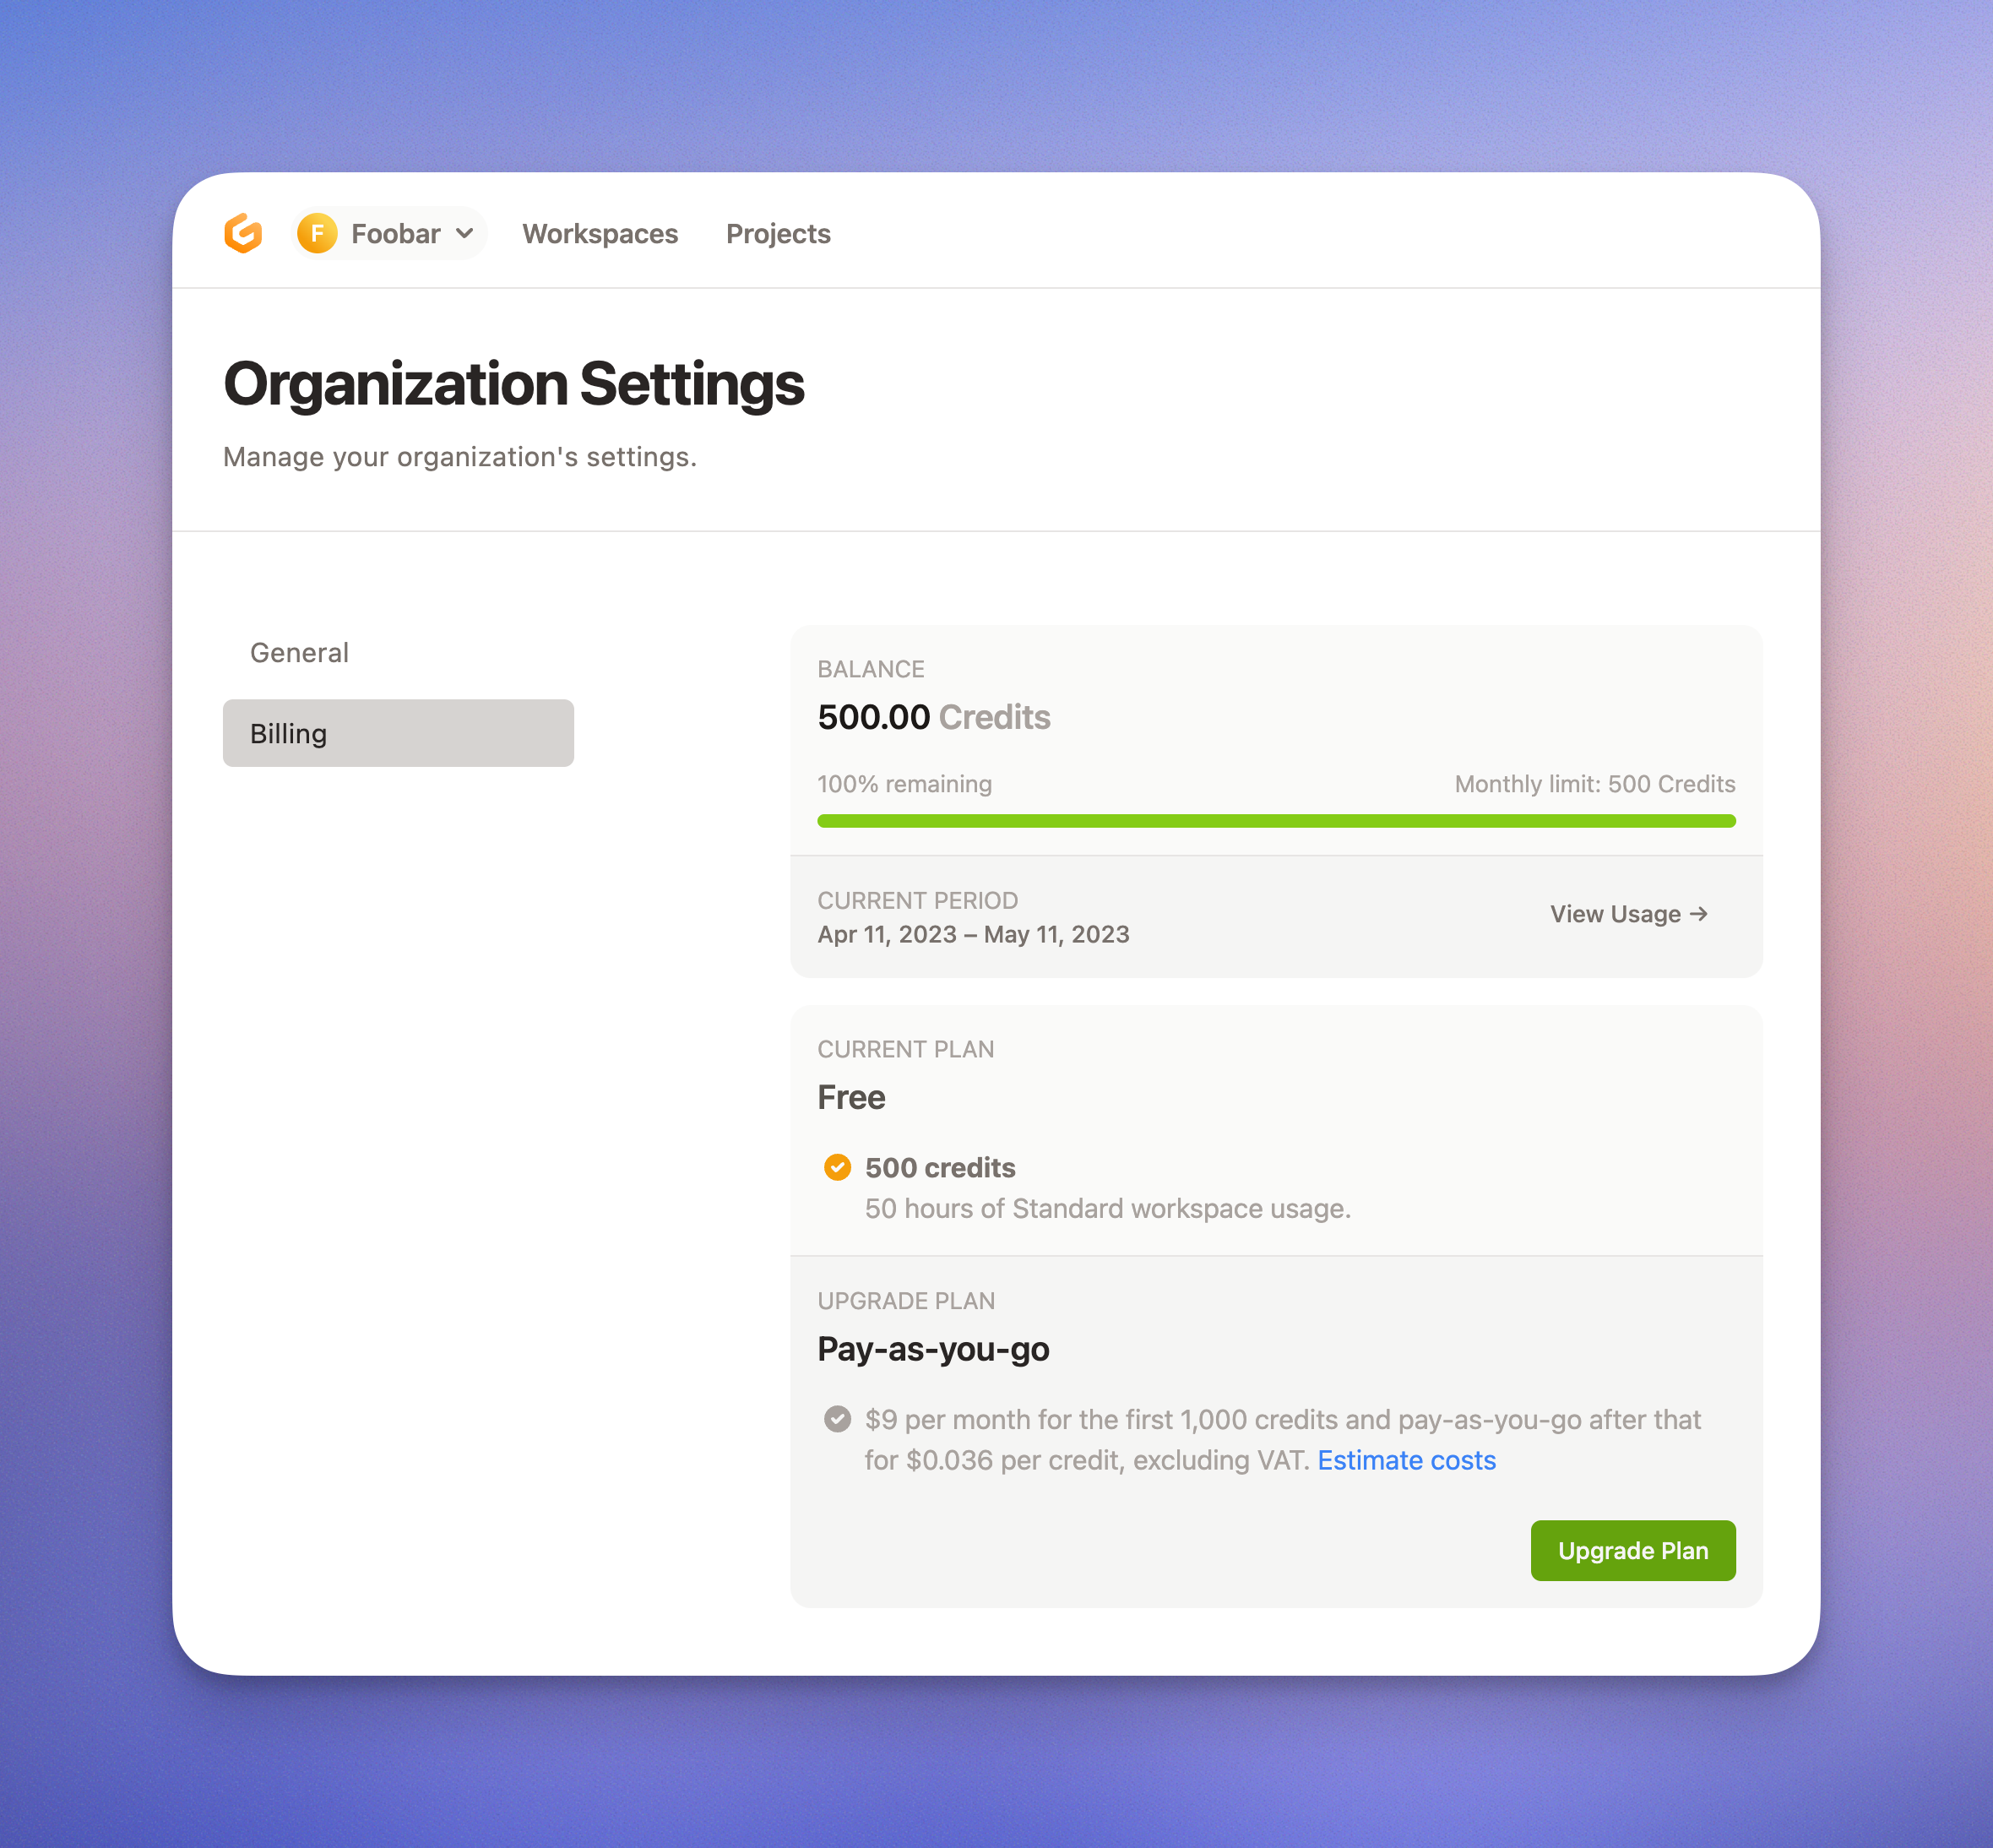 ### How Credits Work
* **Monthly Reset**: Subscription credits reset at the end of each billing period
* **No Rollover**: Unused credits don't carry over to the next month
* **Example**: If you have 17 credits remaining on an 80-credit monthly plan, your credits reset to 80 at the start of your next billing period
For detailed information on how credits are consumed by environments and AI features, see [Usage & Credits](/ona/billing/usage).
### Variable Pricing
CORE subscriptions offer flexible pricing tiers based on your usage needs. Choose a plan that matches your expected monthly environment usage. Understanding [OCU consumption patterns](/ona/billing/usage) can help you select the right plan.
## Credit Top-up
When you're running low on credits, you can purchase additional credits through top-up.
### How Top-up Works
1. Go to **Settings > Billing**
2. Click **Top-up Credits**
3. Select the amount of credits to purchase
4. Complete payment
### Top-up Benefits
* **No Expiry**: Top-up credits never expire
* **Immediate Access**: Credits are available instantly after purchase
* **Flexible Amount**: Purchase exactly the credits you need
**Tip**: Use top-up when your monthly subscription is exhausted. Monitor your [usage patterns](/ona/billing/usage) to better predict when you might need additional credits.
### How Credits Work
* **Monthly Reset**: Subscription credits reset at the end of each billing period
* **No Rollover**: Unused credits don't carry over to the next month
* **Example**: If you have 17 credits remaining on an 80-credit monthly plan, your credits reset to 80 at the start of your next billing period
For detailed information on how credits are consumed by environments and AI features, see [Usage & Credits](/ona/billing/usage).
### Variable Pricing
CORE subscriptions offer flexible pricing tiers based on your usage needs. Choose a plan that matches your expected monthly environment usage. Understanding [OCU consumption patterns](/ona/billing/usage) can help you select the right plan.
## Credit Top-up
When you're running low on credits, you can purchase additional credits through top-up.
### How Top-up Works
1. Go to **Settings > Billing**
2. Click **Top-up Credits**
3. Select the amount of credits to purchase
4. Complete payment
### Top-up Benefits
* **No Expiry**: Top-up credits never expire
* **Immediate Access**: Credits are available instantly after purchase
* **Flexible Amount**: Purchase exactly the credits you need
**Tip**: Use top-up when your monthly subscription is exhausted. Monitor your [usage patterns](/ona/billing/usage) to better predict when you might need additional credits.
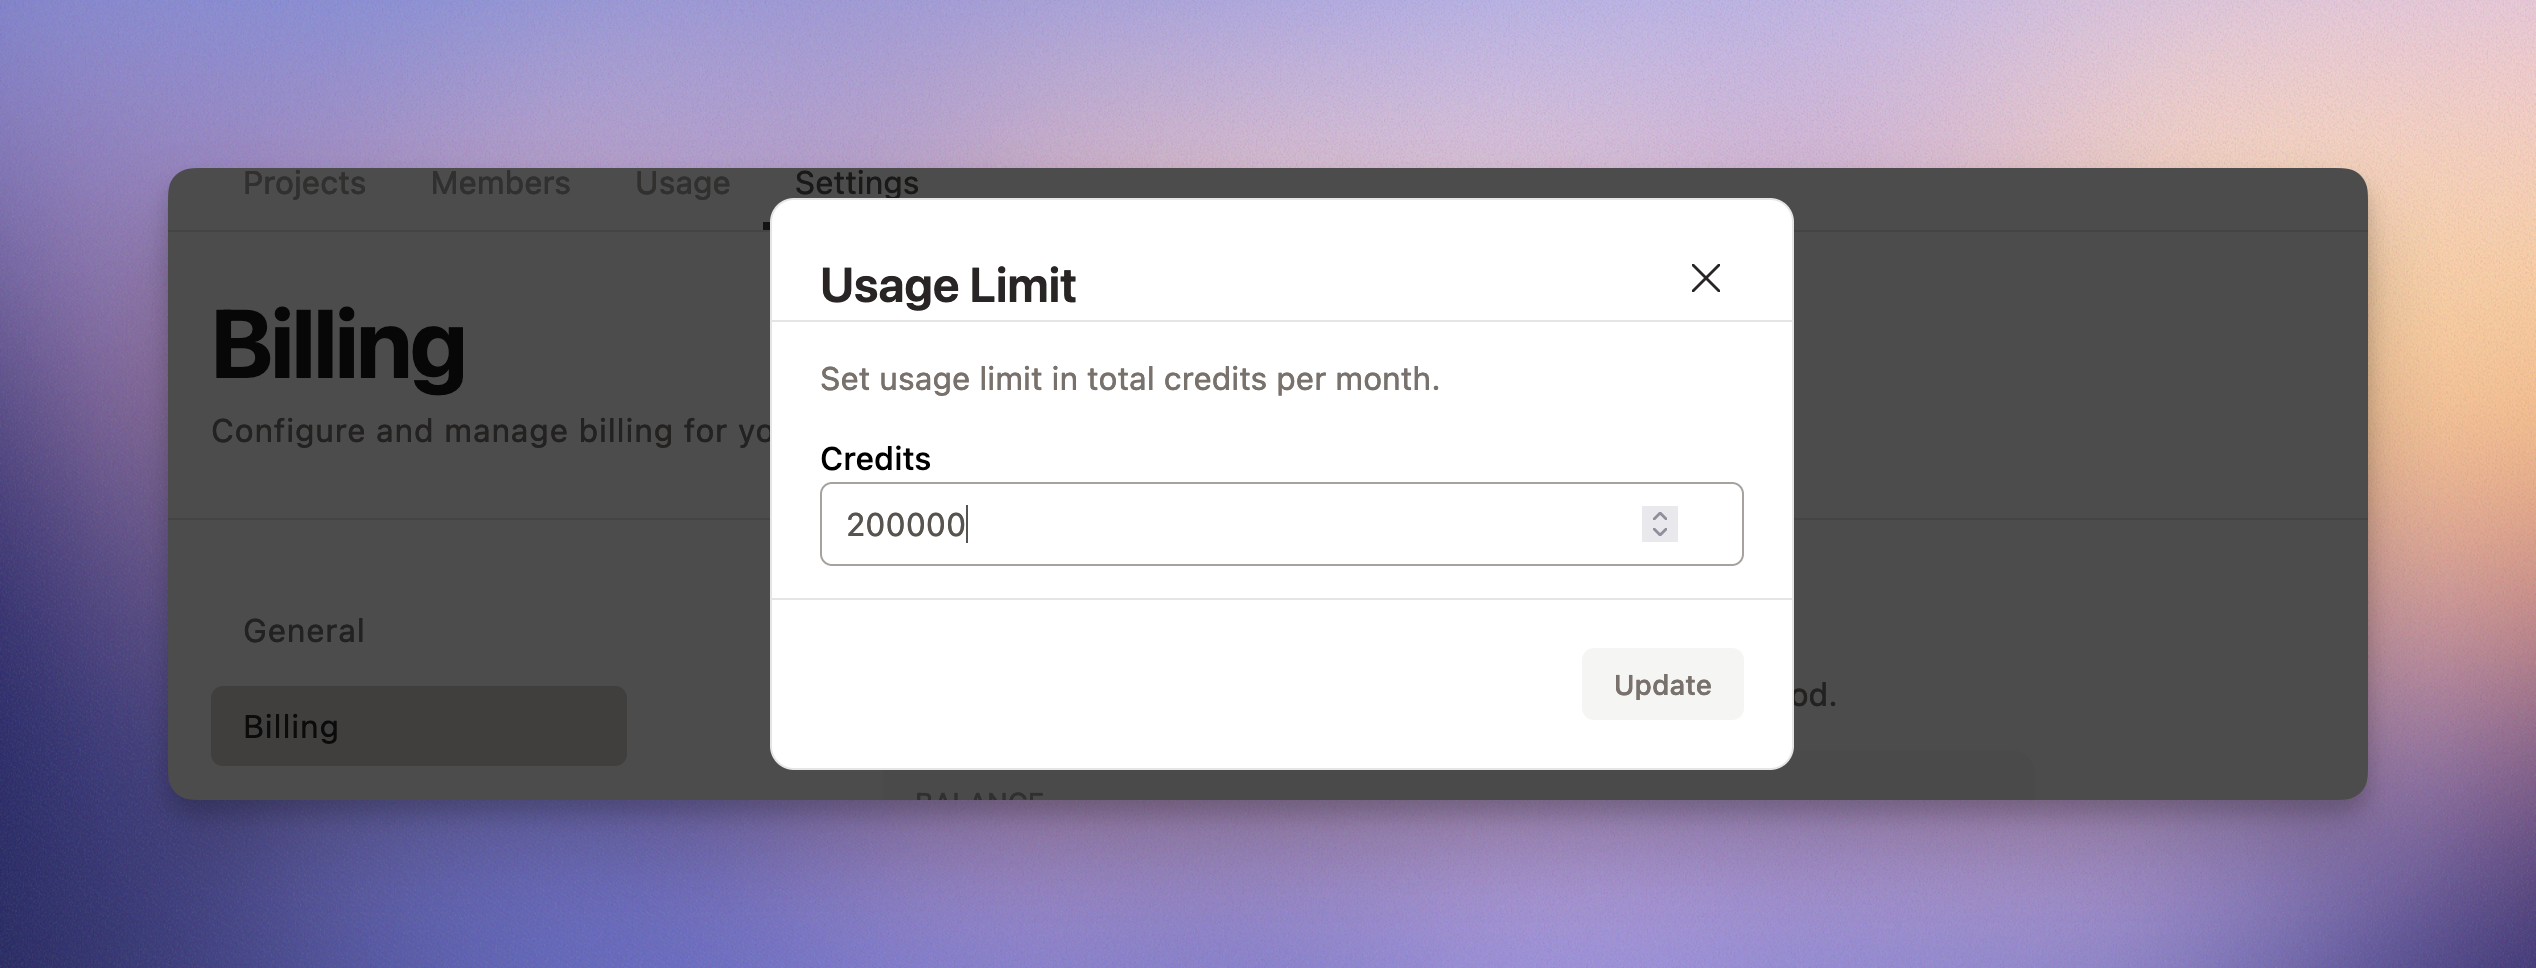 ## Managing Your Subscription
### Cancelling Your Subscription
1. Navigate to **Settings > Billing**
2. Click **Cancel Subscription**
3. Confirm cancellation
**Important**: After cancellation, your subscription remains active until the end of your current billing period. You'll continue to have access to CORE features until then.
### Accessing Stripe Customer Portal
For detailed billing information, payment history, and advanced payment management:
1. Go to **Settings > Billing**
2. Click **Manage Billing Details** or **View in Stripe**
3. You'll be redirected to the Stripe Customer Portal
In the Stripe portal, you can:
#### Update Billing Information
* **Payment Methods**: Add, remove, or set default credit/debit cards
* **Billing Address**: Update your billing address for tax and invoice purposes
* **Tax Information**: Add VAT numbers, tax IDs, and other tax-related details
* **Contact Details**: Update billing contact information and email preferences
#### Invoice History
* **Download Invoices**: Access and download all past invoices in PDF format
* **Payment History**: View detailed payment records and transaction history
* **Invoice Details**: See itemized breakdowns of charges and usage
* **Receipt Management**: Download receipts for accounting and expense reporting
#### Additional Features
* **Subscription Overview**: View current subscription status and next billing date
* **Usage Tracking**: Monitor your current billing period usage (see [Usage & Credits](/ona/billing/usage) for detailed OCU tracking)
* **Payment Notifications**: Manage email preferences for billing notifications
## Managing Your Subscription
### Cancelling Your Subscription
1. Navigate to **Settings > Billing**
2. Click **Cancel Subscription**
3. Confirm cancellation
**Important**: After cancellation, your subscription remains active until the end of your current billing period. You'll continue to have access to CORE features until then.
### Accessing Stripe Customer Portal
For detailed billing information, payment history, and advanced payment management:
1. Go to **Settings > Billing**
2. Click **Manage Billing Details** or **View in Stripe**
3. You'll be redirected to the Stripe Customer Portal
In the Stripe portal, you can:
#### Update Billing Information
* **Payment Methods**: Add, remove, or set default credit/debit cards
* **Billing Address**: Update your billing address for tax and invoice purposes
* **Tax Information**: Add VAT numbers, tax IDs, and other tax-related details
* **Contact Details**: Update billing contact information and email preferences
#### Invoice History
* **Download Invoices**: Access and download all past invoices in PDF format
* **Payment History**: View detailed payment records and transaction history
* **Invoice Details**: See itemized breakdowns of charges and usage
* **Receipt Management**: Download receipts for accounting and expense reporting
#### Additional Features
* **Subscription Overview**: View current subscription status and next billing date
* **Usage Tracking**: Monitor your current billing period usage (see [Usage & Credits](/ona/billing/usage) for detailed OCU tracking)
* **Payment Notifications**: Manage email preferences for billing notifications
 ## Troubleshooting
### Common Issues
**Card verification failed**
* Ensure your card has sufficient funds for the \$1 verification charge
* Check that your card details are entered correctly
* Contact your bank if the charge is being declined
**Subscription not upgrading**
* Verify your payment method is valid and has sufficient funds
* Clear your browser cache and try again
* Check for any browser extensions that might block payment processing
**Can't access billing settings**
* Ensure you have the correct permissions (organization admin)
* Try logging out and back in
* Contact support if the issue persists
**Payment security concerns**
* All payment processing is handled by Stripe, not Ona
* Ona never has access to your full credit card information
* Your payment data is encrypted and secured by Stripe's PCI DSS Level 1 infrastructure
* For payment-specific issues, you can also access your payment history through the Stripe Customer Portal
### Getting Help
If you encounter issues with billing, contact support through the help widget in the Ona dashboard
## Plans Overview
All plans include the ability to use Ona Cloud or bring your own cloud (Enterprise).
* The free tier is best for individuals.
* Ona is best for teams that are looking for collaboration features like shared environment configurations and shared infrastructure. It comes with a two-week free trial.
* Ona Enterprise is best for large organizations with additional compliance requirements. For a comprehensive comparison of features between our Free, Core and Enterprise tiers, visit our [pricing page](https://ona.com/pricing).
### Free Trial
You can start your two-week free trial for your organization at any time from the free tier. Once the trial expires, your organization will revert to Ona's free tier. You can request an extension in the app after your trial period.
### Enterprise Billing
Ona also offers the enterprise tier. For details, [reach out to us](https://ona.com/contact/sales).
## Next Steps
* [Usage & Credits](/ona/billing/usage) - Understand OCU consumption and optimize your usage
* [Organizations Overview](/ona/organizations/overview) - Manage team billing and settings
* [Environment Inventory](/ona/organizations/environment-inventory) - Track environment usage across your organization
# Usage & Credits
Source: https://ona.com/docs/ona/billing/usage
Understand how Ona credits work, what OCUs are, and how environment and AI usage consume credits.
# Usage & Credits
Understand how Ona credits work, what OCUs are, and how your environment and AI usage consumes credits.
## What is an OCU?
An **OCU (Ona Compute Unit)** is Ona's standard unit of measurement for resource consumption. OCUs represent the computational resources used by your environments and AI features.
Key points about OCUs:
* **Standardized measurement**: OCUs provide a consistent way to measure resource usage across different features
* **Time-based consumption**: OCUs are consumed over time while resources are active
* **Credit conversion**: Your subscription credits are converted to OCUs for actual usage tracking
* **Resource scaling**: Different environment sizes and AI operations consume OCUs at different rates
## Environment Usage
Running environments consume OCUs based on their computational requirements and duration.
### How Environment OCUs Work
**Resource-based consumption**:
* **Environment size**: Larger environments (more CPU/memory) consume more OCUs per hour
* **Active time**: OCUs are consumed only while environments are running
* **Automatic stopping**: Environments automatically stop after inactivity to conserve OCUs
**Environment lifecycle**:
1. **Starting**: OCU consumption begins when environment starts
2. **Running**: Continuous OCU consumption while active
3. **Idle timeout**: Environment stops automatically after 30 minutes of inactivity
4. **Stopped**: No OCU consumption when environment is stopped
### Environment Size and OCU Rates
Different environment classes consume OCUs at different rates:
* **Standard environments**: Base OCU consumption rate
* **Large environments**: Higher OCU consumption for increased resources
* **Custom configurations**: OCU rates vary based on CPU and memory allocation
## AI Usage
AI features in Ona also consume OCUs when you use AI-powered functionality.
### AI OCU Consumption
**AI features that consume OCUs**:
* **Code generation**: AI-powered code suggestions and completions
* **Code explanation**: AI analysis and explanation of code
* **Chat interactions**: Conversations with AI assistants
* **Code refactoring**: AI-assisted code improvements
**OCU consumption patterns**:
* **Per-request basis**: Each AI interaction consumes a specific amount of OCUs
* **Variable consumption**: Complex requests may consume more OCUs than simple ones
* **Real-time deduction**: OCUs are deducted immediately when AI features are used
### Managing AI Usage
**Optimization strategies**:
* **Selective usage**: Use AI features when most beneficial
* **Batch requests**: Combine multiple questions into single interactions when possible
* **Monitor consumption**: Track AI OCU usage through billing dashboard
## Credit to OCU Conversion
Your subscription credits are converted to OCUs for actual usage tracking. Learn more about [subscription plans and credit allocation](/ona/billing/overview#core-subscription).
### How Conversion Works
**Credit system**:
* **Monthly allocation**: [Subscription plans](/ona/billing/overview#core-subscription) include a specific number of credits
* **OCU conversion**: Credits are converted to OCUs at a fixed rate
* **Usage tracking**: OCU consumption is tracked in real-time
* **Credit depletion**: When OCUs are consumed, equivalent credits are deducted
## Optimizing OCU Usage
Maximize your credit efficiency with these optimization strategies.
### Environment Optimization
**Best practices**:
* **Delete unused environments**: Remove environments when not needed
* **Right-size environments**: Choose appropriate environment size for your tasks
### AI Usage Optimization
**Efficient AI usage**:
* **Targeted requests**: Ask specific, focused questions
* **Context awareness**: Provide relevant context to get better responses
* **Review before requesting**: Check if information is available in documentation first
* **Batch similar requests**: Combine related questions when possible
## Troubleshooting Usage Issues
Common usage-related issues and solutions.
### High OCU Consumption
**Potential causes**:
* **Long-running environments**: Environments left running unnecessarily
* **Oversized environments**: Using larger environments than needed
* **Frequent AI usage**: Heavy reliance on AI features
* **Multiple concurrent environments**: Running several environments simultaneously
**Solutions**:
* **Review active environments**: Check and stop unused environments
* **Optimize environment size**: Use smallest suitable environment configuration
* **Use environment sharing**: Share environments within teams when appropriate
### Credit Depletion
**When credits run low**:
* **Top-up credits**: [Purchase additional credits](/ona/billing/overview#credit-top-up) for immediate access
* **Upgrade subscription**: [Move to higher-tier plan](/ona/billing/overview#core-subscription) with more credits
* **Optimize usage**: Implement usage optimization strategies
## Next Steps
* [Billing Overview](/ona/billing/overview) - Manage subscriptions, payments, and credit top-ups
* [Environment Inventory](/ona/organizations/environment-inventory) - Track team environment usage
* [Organizations Overview](/ona/organizations/overview) - Manage team settings and policies
# Command deny list
Source: https://ona.com/docs/ona/command-deny-list
Control which commands Ona Agent can execute with command deny lists.
## Troubleshooting
### Common Issues
**Card verification failed**
* Ensure your card has sufficient funds for the \$1 verification charge
* Check that your card details are entered correctly
* Contact your bank if the charge is being declined
**Subscription not upgrading**
* Verify your payment method is valid and has sufficient funds
* Clear your browser cache and try again
* Check for any browser extensions that might block payment processing
**Can't access billing settings**
* Ensure you have the correct permissions (organization admin)
* Try logging out and back in
* Contact support if the issue persists
**Payment security concerns**
* All payment processing is handled by Stripe, not Ona
* Ona never has access to your full credit card information
* Your payment data is encrypted and secured by Stripe's PCI DSS Level 1 infrastructure
* For payment-specific issues, you can also access your payment history through the Stripe Customer Portal
### Getting Help
If you encounter issues with billing, contact support through the help widget in the Ona dashboard
## Plans Overview
All plans include the ability to use Ona Cloud or bring your own cloud (Enterprise).
* The free tier is best for individuals.
* Ona is best for teams that are looking for collaboration features like shared environment configurations and shared infrastructure. It comes with a two-week free trial.
* Ona Enterprise is best for large organizations with additional compliance requirements. For a comprehensive comparison of features between our Free, Core and Enterprise tiers, visit our [pricing page](https://ona.com/pricing).
### Free Trial
You can start your two-week free trial for your organization at any time from the free tier. Once the trial expires, your organization will revert to Ona's free tier. You can request an extension in the app after your trial period.
### Enterprise Billing
Ona also offers the enterprise tier. For details, [reach out to us](https://ona.com/contact/sales).
## Next Steps
* [Usage & Credits](/ona/billing/usage) - Understand OCU consumption and optimize your usage
* [Organizations Overview](/ona/organizations/overview) - Manage team billing and settings
* [Environment Inventory](/ona/organizations/environment-inventory) - Track environment usage across your organization
# Usage & Credits
Source: https://ona.com/docs/ona/billing/usage
Understand how Ona credits work, what OCUs are, and how environment and AI usage consume credits.
# Usage & Credits
Understand how Ona credits work, what OCUs are, and how your environment and AI usage consumes credits.
## What is an OCU?
An **OCU (Ona Compute Unit)** is Ona's standard unit of measurement for resource consumption. OCUs represent the computational resources used by your environments and AI features.
Key points about OCUs:
* **Standardized measurement**: OCUs provide a consistent way to measure resource usage across different features
* **Time-based consumption**: OCUs are consumed over time while resources are active
* **Credit conversion**: Your subscription credits are converted to OCUs for actual usage tracking
* **Resource scaling**: Different environment sizes and AI operations consume OCUs at different rates
## Environment Usage
Running environments consume OCUs based on their computational requirements and duration.
### How Environment OCUs Work
**Resource-based consumption**:
* **Environment size**: Larger environments (more CPU/memory) consume more OCUs per hour
* **Active time**: OCUs are consumed only while environments are running
* **Automatic stopping**: Environments automatically stop after inactivity to conserve OCUs
**Environment lifecycle**:
1. **Starting**: OCU consumption begins when environment starts
2. **Running**: Continuous OCU consumption while active
3. **Idle timeout**: Environment stops automatically after 30 minutes of inactivity
4. **Stopped**: No OCU consumption when environment is stopped
### Environment Size and OCU Rates
Different environment classes consume OCUs at different rates:
* **Standard environments**: Base OCU consumption rate
* **Large environments**: Higher OCU consumption for increased resources
* **Custom configurations**: OCU rates vary based on CPU and memory allocation
## AI Usage
AI features in Ona also consume OCUs when you use AI-powered functionality.
### AI OCU Consumption
**AI features that consume OCUs**:
* **Code generation**: AI-powered code suggestions and completions
* **Code explanation**: AI analysis and explanation of code
* **Chat interactions**: Conversations with AI assistants
* **Code refactoring**: AI-assisted code improvements
**OCU consumption patterns**:
* **Per-request basis**: Each AI interaction consumes a specific amount of OCUs
* **Variable consumption**: Complex requests may consume more OCUs than simple ones
* **Real-time deduction**: OCUs are deducted immediately when AI features are used
### Managing AI Usage
**Optimization strategies**:
* **Selective usage**: Use AI features when most beneficial
* **Batch requests**: Combine multiple questions into single interactions when possible
* **Monitor consumption**: Track AI OCU usage through billing dashboard
## Credit to OCU Conversion
Your subscription credits are converted to OCUs for actual usage tracking. Learn more about [subscription plans and credit allocation](/ona/billing/overview#core-subscription).
### How Conversion Works
**Credit system**:
* **Monthly allocation**: [Subscription plans](/ona/billing/overview#core-subscription) include a specific number of credits
* **OCU conversion**: Credits are converted to OCUs at a fixed rate
* **Usage tracking**: OCU consumption is tracked in real-time
* **Credit depletion**: When OCUs are consumed, equivalent credits are deducted
## Optimizing OCU Usage
Maximize your credit efficiency with these optimization strategies.
### Environment Optimization
**Best practices**:
* **Delete unused environments**: Remove environments when not needed
* **Right-size environments**: Choose appropriate environment size for your tasks
### AI Usage Optimization
**Efficient AI usage**:
* **Targeted requests**: Ask specific, focused questions
* **Context awareness**: Provide relevant context to get better responses
* **Review before requesting**: Check if information is available in documentation first
* **Batch similar requests**: Combine related questions when possible
## Troubleshooting Usage Issues
Common usage-related issues and solutions.
### High OCU Consumption
**Potential causes**:
* **Long-running environments**: Environments left running unnecessarily
* **Oversized environments**: Using larger environments than needed
* **Frequent AI usage**: Heavy reliance on AI features
* **Multiple concurrent environments**: Running several environments simultaneously
**Solutions**:
* **Review active environments**: Check and stop unused environments
* **Optimize environment size**: Use smallest suitable environment configuration
* **Use environment sharing**: Share environments within teams when appropriate
### Credit Depletion
**When credits run low**:
* **Top-up credits**: [Purchase additional credits](/ona/billing/overview#credit-top-up) for immediate access
* **Upgrade subscription**: [Move to higher-tier plan](/ona/billing/overview#core-subscription) with more credits
* **Optimize usage**: Implement usage optimization strategies
## Next Steps
* [Billing Overview](/ona/billing/overview) - Manage subscriptions, payments, and credit top-ups
* [Environment Inventory](/ona/organizations/environment-inventory) - Track team environment usage
* [Organizations Overview](/ona/organizations/overview) - Manage team settings and policies
# Command deny list
Source: https://ona.com/docs/ona/command-deny-list
Control which commands Ona Agent can execute with command deny lists.
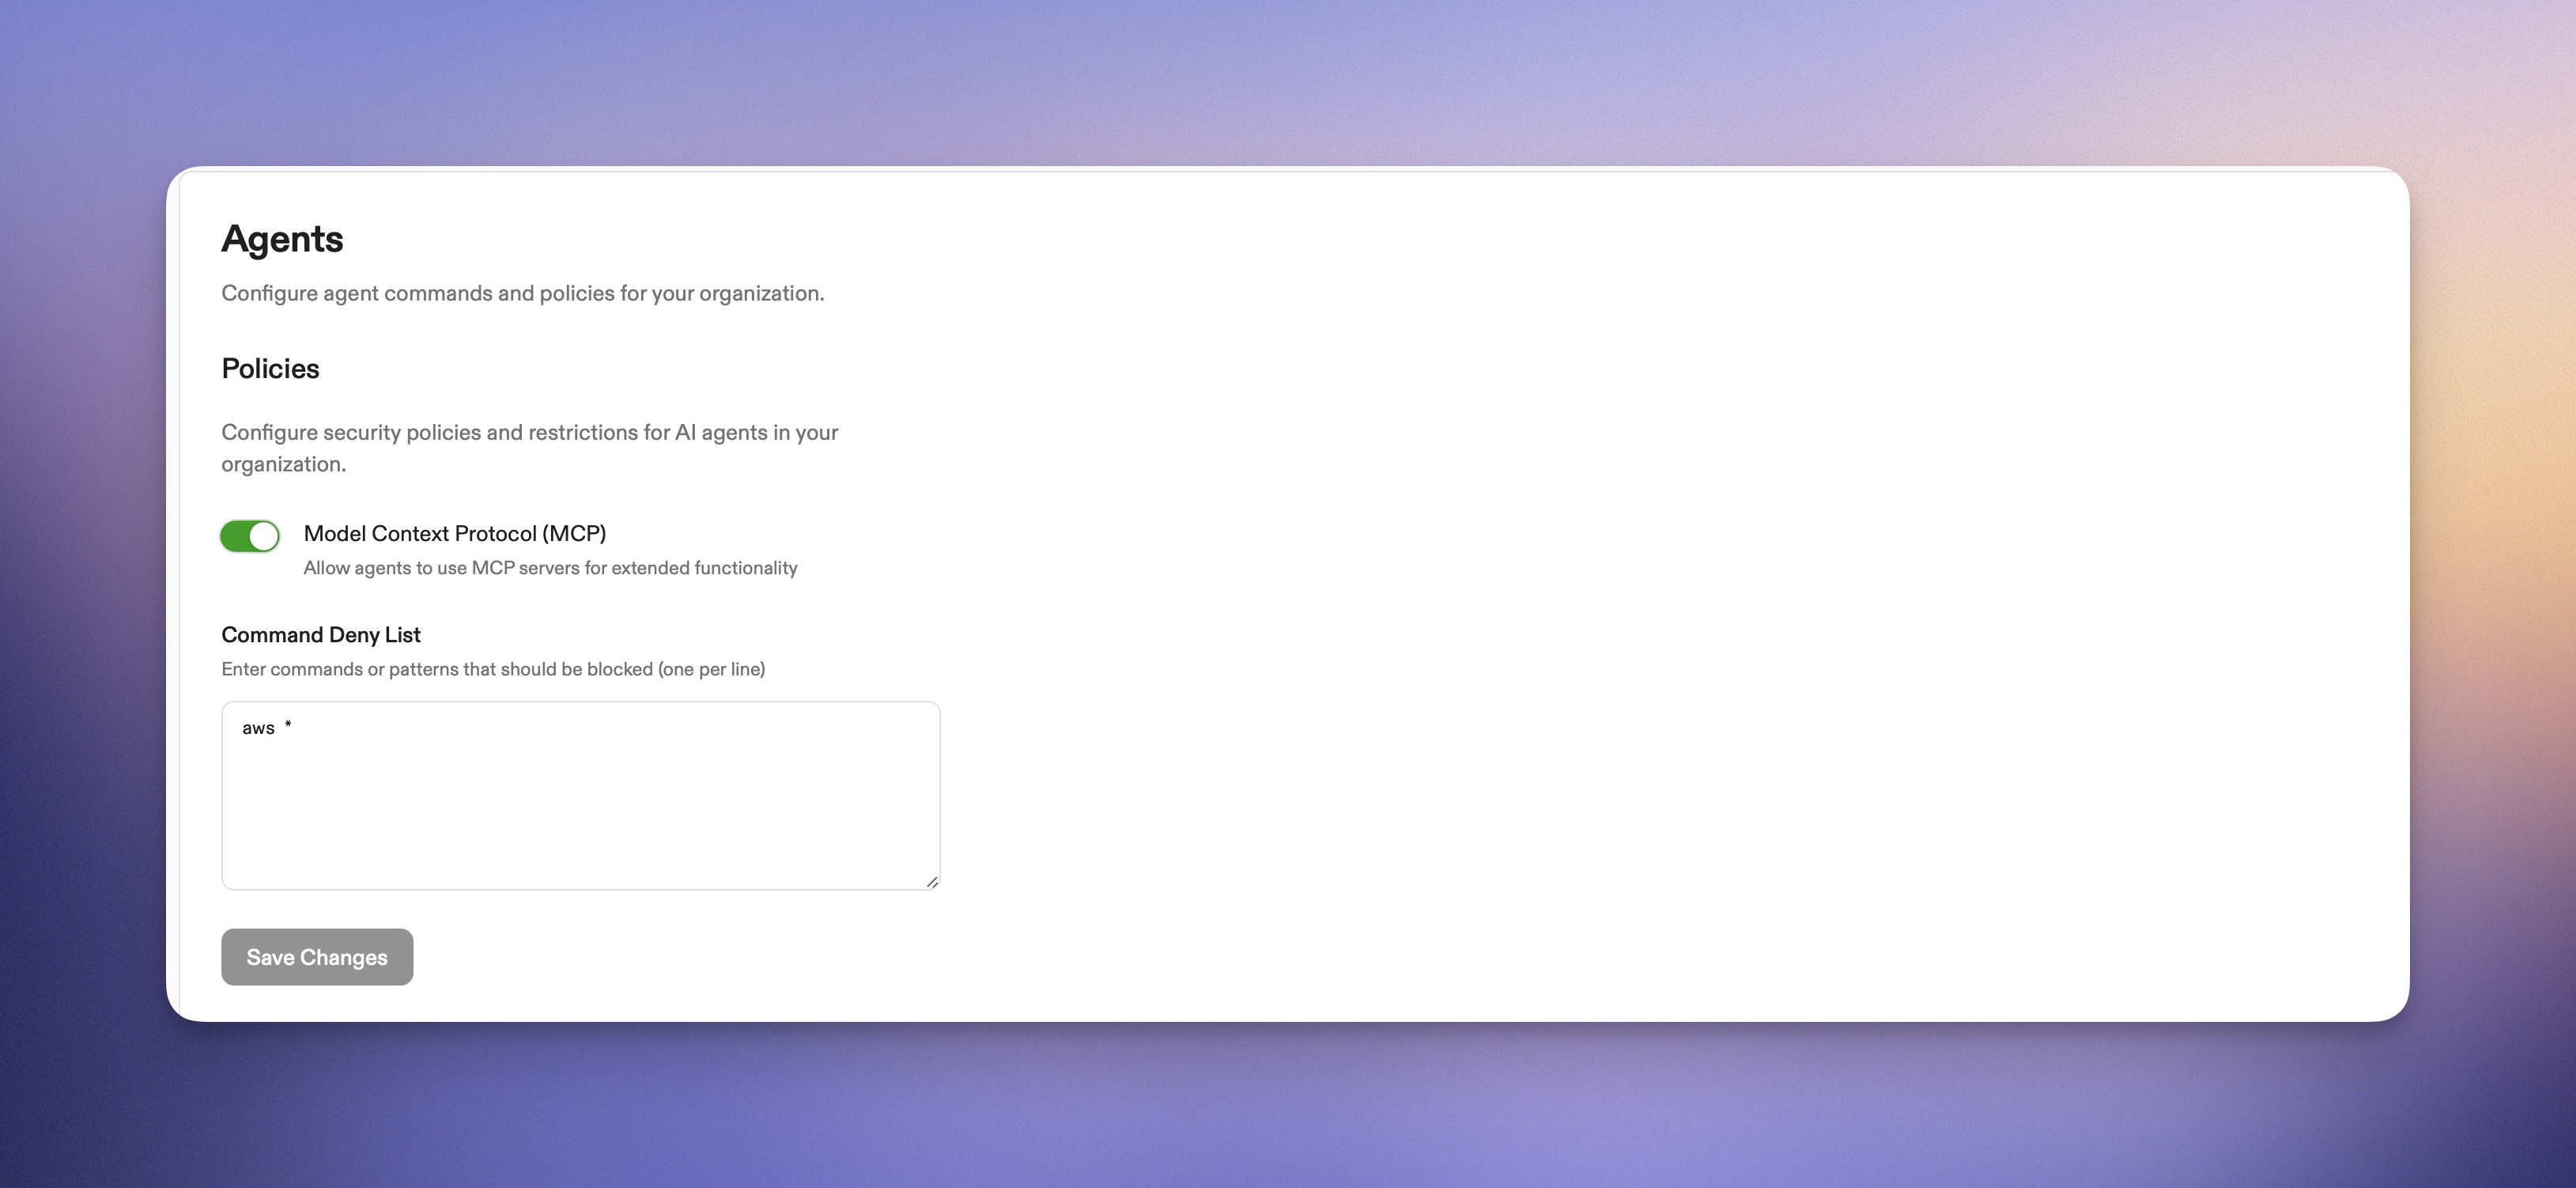 Use command deny lists to restrict which system commands Ona Agent can execute. This guide explains how to configure and test deny lists.
### Example deny list patterns
Here are common patterns you might want to include:
```
# Block package management (if needed)
apt *
yum *
dnf *
# Block commands that interact with cloud providers
aws *
gcloud *
```
## Effect on users
### When commands are blocked
Users will see clear error messages when Ona Agent attempts to execute blocked commands:
```
Error: command execution prohibited: Command 'rm -rf /' matches deny pattern 'rm *'.
Do not attempt to retry this command as it is blocked by security policy.
```
### User experience
* **No impact on manual commands**: Users can still run commands directly in their terminals
* **Ona Agent limitations**: Only Ona Agent command execution is restricted
* **Clear feedback**: Users receive informative error messages explaining why commands were blocked
* **No retry attempts**: Ona Agent is instructed not to retry blocked commands
### Pattern best practices
1. **Start with broad patterns**: Use `aws *` instead of listing every `aws` variant
2. **Test thoroughly**: Verify patterns work as expected in a test environment
3. **Document your choices**: Keep a record of why specific patterns were added
4. **Regular review**: Periodically review and update patterns based on usage
## Security considerations
### What the deny list protects against
* **Accidental destructive commands**: Prevents Ona Agent from accidentally running dangerous operations
* **Malicious prompt injection**: Blocks attempts to trick Ona Agent into running harmful commands
* **Compliance violations**: Ensures Ona Agent doesn't perform actions that violate organizational policies
* **Resource abuse**: Prevents commands that could consume excessive system resources
### What the deny list does not protect against
* **Direct user commands**: Users can still run any command directly in their terminal
* **Application-level actions**: Commands executed within applications (not system commands)
* **Slash command abuse**: Slash commands themselves cannot be blocked via deny lists
### Test your configuration
To test your deny list configuration:
1. Create a new environment
2. Ask Ona Agent to run a command that should be blocked
3. Verify the command is blocked with an appropriate error message
## Getting help
If you need assistance with command deny lists, Enterprise customers can reach out to your account representative.
# Configuring Automations
Source: https://ona.com/docs/ona/configuration/automations/basic-configuration
Explore Ona's automation features: Services and Tasks. Learn how to configure long-running services and execute specific tasks to streamline your development workflow. Understand execution options, dependencies, and best practices for efficient environment management.
# Basic configuration
When an environment is created the system loads Automations from the default file: `.ona/automations.yaml` relative to your repository root. You can change this location using [Projects](/ona/projects/overview). An `automations.yaml` consists of services and tasks defined at the root level, for example:
```yaml
services: ...
tasks: ...
```
Services and tasks are a map where the key serves as reference for the corresponding item. When looking at task dependencies their use becomes clear.
See [reference](/ona/configuration/automations/overview#reference) for a full example.
## Services in the automations.yaml
Example workflow:
```yaml
services:
database:
name: PostgreSQL
description: The backend database
triggeredBy:
- postEnvironmentStart
commands:
start: 'docker run --rm -t --name database postgres:latest'
redis:
name: Redis
description: Our message bus
triggeredBy:
- postEnvironmentStart
commands:
start: >-
docker run --rm -t --name redis -p 6379:6379
redis/redis-stack-server:latest
backend:
name: Application Backend
description: The application backend
triggeredBy:
- postEnvironmentStart
commands:
start: cd backend && go run main.go
```
## Tasks in the automations.yaml
Example workflow:
```yaml
tasks:
buildAll:
name: Build All
description: builds all code
command: go build .
runUnitTests:
name: Runs unit tests
command: go test -v ./...
validate:
name: Validate
description: Builds and tests the code
triggeredBy:
- postEnvironmentStart
dependsOn:
- buildAll
- runUnitTests
```
## Iterating on Automations
You can iterate on Automations using the [CLI](/ona/integrations/cli) which is available by default in every Ona environment. The CLI can
* reload the Automations file using:
```sh
gitpod automations update [optional-path-to-automations.yaml]
```
* start a task or service:
```sh
gitpod automations service start ...
gitpod automations task start ...
```
## Using Automations outside of an environment
The CLI commands to interact with an environment’s Automations are also available outside of an environment. The following snippet brings up an environment, adds a task, runs it, waits for the task to complete and brings the environment back down again:
```sh
# gitpod env create will set the environment context to the newly created env
gitpod env create https://github.com/some/repo
# add the task to the environment
cat <
Use command deny lists to restrict which system commands Ona Agent can execute. This guide explains how to configure and test deny lists.
### Example deny list patterns
Here are common patterns you might want to include:
```
# Block package management (if needed)
apt *
yum *
dnf *
# Block commands that interact with cloud providers
aws *
gcloud *
```
## Effect on users
### When commands are blocked
Users will see clear error messages when Ona Agent attempts to execute blocked commands:
```
Error: command execution prohibited: Command 'rm -rf /' matches deny pattern 'rm *'.
Do not attempt to retry this command as it is blocked by security policy.
```
### User experience
* **No impact on manual commands**: Users can still run commands directly in their terminals
* **Ona Agent limitations**: Only Ona Agent command execution is restricted
* **Clear feedback**: Users receive informative error messages explaining why commands were blocked
* **No retry attempts**: Ona Agent is instructed not to retry blocked commands
### Pattern best practices
1. **Start with broad patterns**: Use `aws *` instead of listing every `aws` variant
2. **Test thoroughly**: Verify patterns work as expected in a test environment
3. **Document your choices**: Keep a record of why specific patterns were added
4. **Regular review**: Periodically review and update patterns based on usage
## Security considerations
### What the deny list protects against
* **Accidental destructive commands**: Prevents Ona Agent from accidentally running dangerous operations
* **Malicious prompt injection**: Blocks attempts to trick Ona Agent into running harmful commands
* **Compliance violations**: Ensures Ona Agent doesn't perform actions that violate organizational policies
* **Resource abuse**: Prevents commands that could consume excessive system resources
### What the deny list does not protect against
* **Direct user commands**: Users can still run any command directly in their terminal
* **Application-level actions**: Commands executed within applications (not system commands)
* **Slash command abuse**: Slash commands themselves cannot be blocked via deny lists
### Test your configuration
To test your deny list configuration:
1. Create a new environment
2. Ask Ona Agent to run a command that should be blocked
3. Verify the command is blocked with an appropriate error message
## Getting help
If you need assistance with command deny lists, Enterprise customers can reach out to your account representative.
# Configuring Automations
Source: https://ona.com/docs/ona/configuration/automations/basic-configuration
Explore Ona's automation features: Services and Tasks. Learn how to configure long-running services and execute specific tasks to streamline your development workflow. Understand execution options, dependencies, and best practices for efficient environment management.
# Basic configuration
When an environment is created the system loads Automations from the default file: `.ona/automations.yaml` relative to your repository root. You can change this location using [Projects](/ona/projects/overview). An `automations.yaml` consists of services and tasks defined at the root level, for example:
```yaml
services: ...
tasks: ...
```
Services and tasks are a map where the key serves as reference for the corresponding item. When looking at task dependencies their use becomes clear.
See [reference](/ona/configuration/automations/overview#reference) for a full example.
## Services in the automations.yaml
Example workflow:
```yaml
services:
database:
name: PostgreSQL
description: The backend database
triggeredBy:
- postEnvironmentStart
commands:
start: 'docker run --rm -t --name database postgres:latest'
redis:
name: Redis
description: Our message bus
triggeredBy:
- postEnvironmentStart
commands:
start: >-
docker run --rm -t --name redis -p 6379:6379
redis/redis-stack-server:latest
backend:
name: Application Backend
description: The application backend
triggeredBy:
- postEnvironmentStart
commands:
start: cd backend && go run main.go
```
## Tasks in the automations.yaml
Example workflow:
```yaml
tasks:
buildAll:
name: Build All
description: builds all code
command: go build .
runUnitTests:
name: Runs unit tests
command: go test -v ./...
validate:
name: Validate
description: Builds and tests the code
triggeredBy:
- postEnvironmentStart
dependsOn:
- buildAll
- runUnitTests
```
## Iterating on Automations
You can iterate on Automations using the [CLI](/ona/integrations/cli) which is available by default in every Ona environment. The CLI can
* reload the Automations file using:
```sh
gitpod automations update [optional-path-to-automations.yaml]
```
* start a task or service:
```sh
gitpod automations service start ...
gitpod automations task start ...
```
## Using Automations outside of an environment
The CLI commands to interact with an environment’s Automations are also available outside of an environment. The following snippet brings up an environment, adds a task, runs it, waits for the task to complete and brings the environment back down again:
```sh
# gitpod env create will set the environment context to the newly created env
gitpod env create https://github.com/some/repo
# add the task to the environment
cat <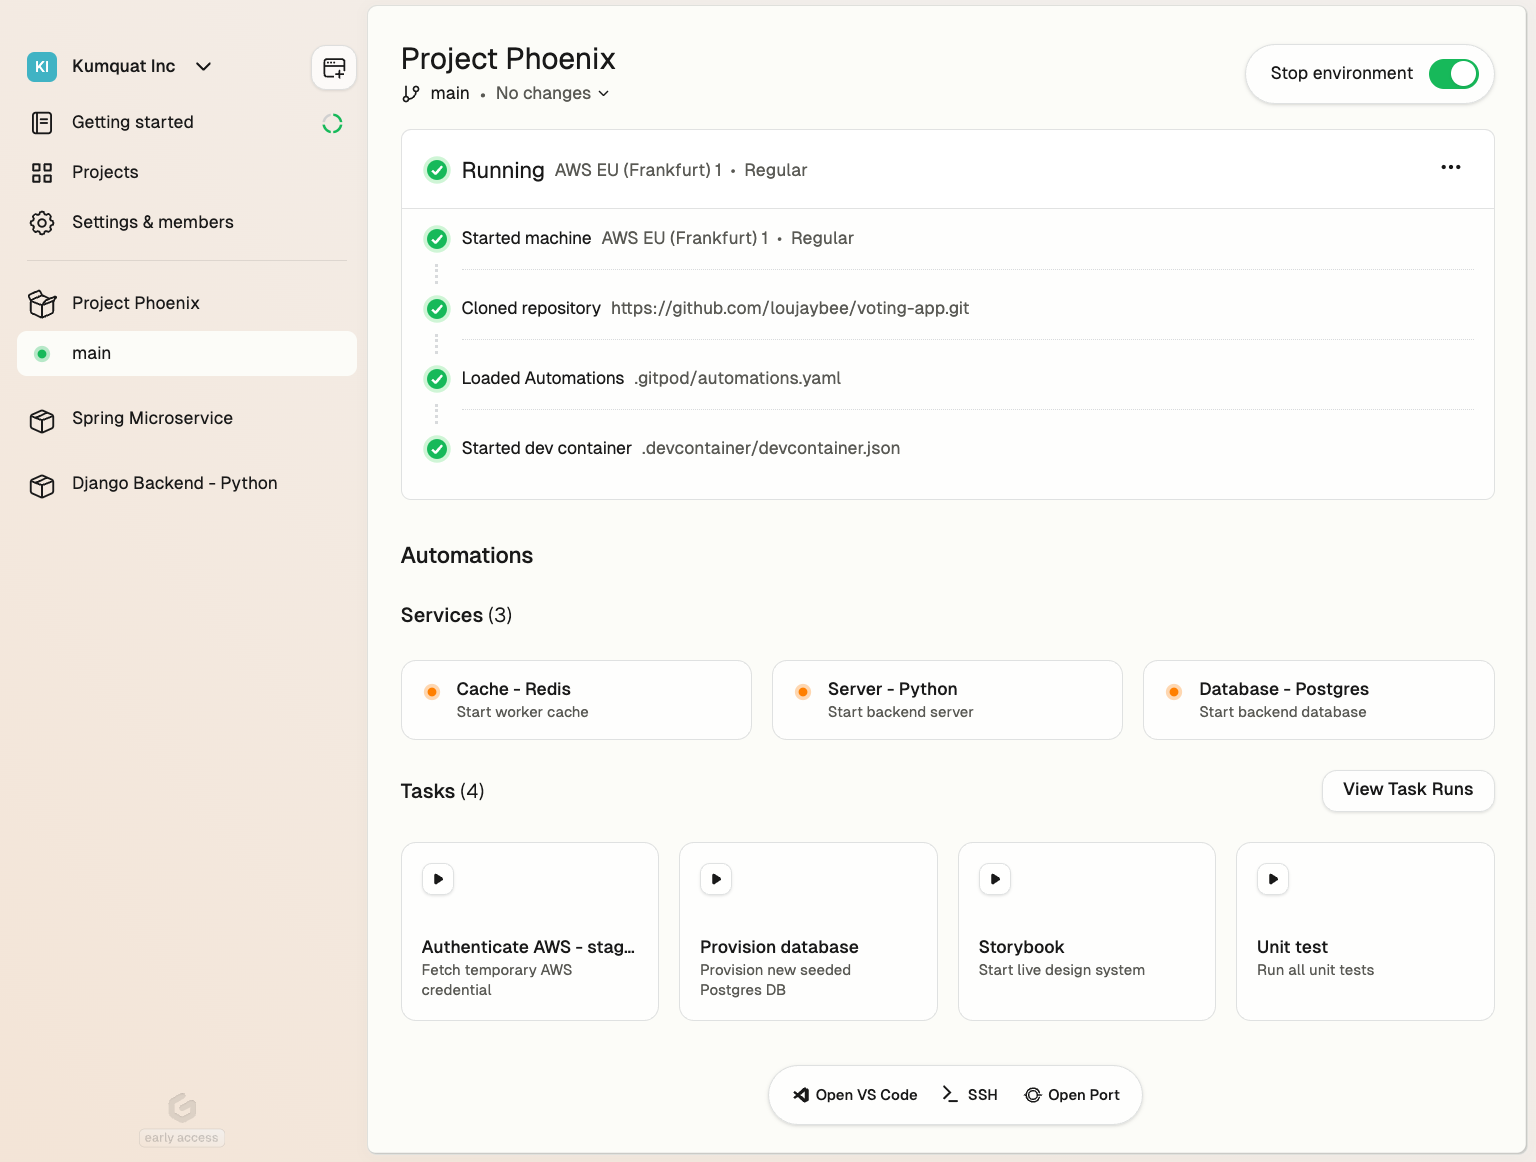 Using Automations you can automate:
* **Setup** - Seed a database, provision infra or authenticate with a cloud account
* **Operations** - Turn your runbooks into one-click self-service actions
* **Editor interfaces** - Start up a server such as Jupyter notebook
* **Enforce policies** - Run security or scanning tools
* **AI workflows** - Configure AI agents or code assistants
See [examples](/ona/configuration/automations/examples) for more.
Automations are defined in configuration YAML files that can live alongside your source code, in another repo, or any location accessible from the development environment.
* [Automations](#automations)
* [The two modes of Automations](#the-two-modes-of-automations)
* [Services](#services)
* [Service Configuration](#service-configuration)
* [Tasks](#tasks)
* [Triggers](#triggers)
* [Available Triggers](#available-triggers)
* [Runners vs. Ona Desktop behaviors](#runners-vs-ona-desktop-behaviors)
* [Dependencies](#dependencies)
* [Best Practices for Using Triggers](#best-practices-for-using-triggers)
* [Reference](#reference)
## The two modes of Automations
Ona supports two primary types of Automations:
1. **[services](#services)** - for long-running processes like starting a server
2. **[tasks](#tasks)** - for performing one-off actions like executing unit tests
```yaml
services:
database:
name: PostgreSQL
commands:
start: docker run postgres
tasks:
run-unit-tests:
name: Runs unit tests
command: go test -v ./...
```
**Caption:** A minimal automation definition.
## Services
Services are **designed for long-running processes**. These are typically components that need to be continuously available throughout your development session.
Common examples include:
* Databases like PostgreSQL
* Caching systems such as Redis
* Your project's backend and frontend servers.
The key characteristic of a service is its persistent nature – it's not expected to terminate on its own but to remain active and ready for interaction as long as your development environment is running.
See [reference](#reference) for a full example.
### Service Configuration
Configuring a service involves defining up to three key commands:
* `start` (required) - The service itself. The process is expected to continue running until stopped. If this command fails (i.e. exits with a non-zero exit code), the service is considered failed.
* `ready` (optional) - Acts as a health check, determining when the service is fully operational and available for use. Ona executes this command periodically (once per second) until it exits with a status code of 0, indicating the service is ready. If you don't specify a `ready` command, Ona assumes the service is immediately available after the `start` command completes.
* `stop` (optional) - Defines a graceful shutdown procedure for your service. If omitted, Ona will send a `SIGTERM` signal to terminate the service when needed.
## Tasks
In contrast to services, **tasks are individual commands designed to perform specific, often one-off actions within your environment**.
Common examples include:
* Compiling code
* Executing test suites
* Populating a database with test data
* Authenticating with cloud services
* Resetting your local environment to a known state.
Tasks are typically short-lived, executing a defined set of operations and then terminating once complete. Tasks consist of a single command to be executed, however their power lies in their ability to be chained and dependent on other components of your environment.
Tasks will exit immediately if a command exits with a non-zero status code, and the task will be marked as failed. This behavior allows for proper error handling in automation pipelines and dependency chains. For example, if a task depends on another task that fails (exits with non-zero status), the dependent task will not be executed.
See [reference](#reference) for a full example.
### Stop a Task
A started task can be stopped prematurely, which will send a `SIGTERM` signal to the task's command (or any chained commands). Once the command has exited, the task will be marked as stopped.
If the command does not exit within 10 seconds, it will be forcefully terminated and the task run will be marked as failed.
## Triggers
Triggers are **the events that initiate the execution of Automations in your Ona environment**. This section covers the available triggers and explains their behavior.
### Available Triggers
Ona supports three main types of triggers for Automations:
* The `postEnvironmentStart` trigger activates every time the environment is started. This includes both the initial start of the environment and any subsequent restarts. It's particularly useful for operations that need to be performed consistently on every environment start, regardless of the underlying container state. For example, you might use this trigger to set up environment variables or check for updates to critical tools.
* The `postDevcontainerStart` trigger, on the other hand, is activated every time the devcontainer is started. This occurs during the first start of the environment and any subsequent devcontainer restarts, such as after a rebuild. This trigger is ideal for setup tasks that are specific to the devcontainer configuration, like initializing databases or compiling project-specific dependencies.
* The `manual` trigger provides a unique affordance in the user interface, allowing developers to start an action on demand. This trigger is particularly valuable for curating a set of actions that developers frequently perform. By using manual triggers, you can shape and refine the experience others will have in your Ona environment. For instance, you might create manual triggers for running tests, generating documentation, or deploying to a staging environment. This approach not only streamlines common tasks but also helps standardize processes across your team.
See [reference](#reference) for a full example.
### Runners vs. Ona Desktop behaviors
It's important to note that the behavior of these triggers can vary depending on the Ona runner being used. The AWS runner typically uses a suspend/resume model for environment management. When an environment is restarted on EC2, it usually resumes from a suspended state. In this scenario, `postDevcontainerStart` is not called on restart, but `postEnvironmentStart` is still triggered.
Ona Desktop takes a different approach. Instead of using suspend/resume, it reboots the entire environment on restart. This causes both `postDevcontainerStart` and `postEnvironmentStart` to run on every environment restart.
This intentional difference in behavior is designed to help recreate state that might be lost due to the lifecycle of individual elements in different environments. For AWS runners, the suspended state preserves most of the environment, so fewer reinitializations are needed. For Ona Desktop, the full reboot ensures a clean state each time, which may require more extensive reinitialization.
### Dependencies
Tasks can specify dependencies, allowing you to create sophisticated automation workflows. A task can depend on other tasks, ensuring that these dependencies are executed beforehand. This feature is particularly useful for setting up complex environments where certain operations must occur in a specific order.
It's important to note that task dependencies are re-evaluated and re-executed each time the main task runs. This ensures that your environment is always in the expected state before a task begins, even if it's run multiple times during a development session.
Each task execution is treated as an isolated event. This means that if you modify a task's definition while it's running, those changes won't affect the current execution. This isolation ensures consistency and predictability in your automation workflows.
### Best Practices for Using Triggers
When working with triggers, it's advisable to use `postEnvironmentStart` for tasks that should run on every start, regardless of the runner or whether it's a fresh start or a resume.
Use `postDevcontainerStart` for tasks specifically related to devcontainer setup or for operations that need to run after a full environment reboot. This could involve compiling dependencies or initializing databases.
The `manual` trigger is best used for discretionary tasks that developers might need to perform multiple times during a session, or for complex operations that don't need to run automatically. By thoughtfully implementing manual triggers, you can significantly improve the usability of your Ona environment for all team members.
## Reference
Automations are defined as YAML, in a [file](/ona/configuration/automations/basic-configuration) or [directly uploaded to the system](/ona/configuration/automations/generating-automations).
```yaml
# defines automation services (optional)
services:
# serviceReference is an identifier for the service within the environment.
# It is used when referencing the service, e.g. from the CLI.
# It needs to only contain alphanumeric characters, underscores, and hyphens, and must be between 1 and 128 characters long.
serviceReference:
# Name is a required, human readable string.
name: Human readable name
description: Optional description providing more detail
# triggeredBy lists all trigger that start the service. If none are provided the service isn't started automatically.
# See below for a complete list of trigger.
triggeredBy:
- ...
commands:
# start is a mandatory command constitutes the service itself and is expected to continue running until stopped.
# If this command fails (i.e. exits with a non-zero exit code), the service is considered failed.
start: your-service-command
# ready acts as a readiness check, determining when the service is fully operational and available for use.
# Ona executes this command periodically (once per second) until it exits with a status code of 0, indicating the service is ready. # If you don't specify a ready command, Ona assumes the service is immediately available after the start command completes.
ready: your-service-command --is-running
# This optional command allows you to define a graceful shutdown procedure for your service.
# If omitted, Ona will send a SIGTERM signal to terminate the service when needed.
stop: killall your-service-command
# defines automation tasks (optional)
tasks:
taskReference:
# Name is a required, human readable string.
name: Human readable name
description: Optional description providing more detail
# triggeredBy lists all trigger that start the service. If none are provided the service isn't started automatically.
# See below for a complete list of trigger.
triggeredBy:
# postEnvironmentStart activates every time the environment is started, e.g. on first start
- postEnvironmentStart
# postDevcontainerStart activates every time the devcontainer is started, e.g. on first start or devcontainer rebuild
- postDevcontainerStart
# manual trigger provides a unique affordance in the user interface, allowing developers to start an action on demand.
- manual
# dependsOn expresses a dependency on another task which ensures that this other task runs before this one.
dependsOn:
- someOtherTask
# command is the actual task command that gets executed. Ona will run this as a shell script, i.e. multiline input is possible
command: |
echo We are in the workspace directory: $PWD
echo Let's go
```
# Getting started
Source: https://ona.com/docs/ona/configuration/devcontainer/getting-started
Explore Dev Container features in Ona environments. Learn about benefits, how to create a devcontainer.json, and how Ona uses Dev Containers.
Using Automations you can automate:
* **Setup** - Seed a database, provision infra or authenticate with a cloud account
* **Operations** - Turn your runbooks into one-click self-service actions
* **Editor interfaces** - Start up a server such as Jupyter notebook
* **Enforce policies** - Run security or scanning tools
* **AI workflows** - Configure AI agents or code assistants
See [examples](/ona/configuration/automations/examples) for more.
Automations are defined in configuration YAML files that can live alongside your source code, in another repo, or any location accessible from the development environment.
* [Automations](#automations)
* [The two modes of Automations](#the-two-modes-of-automations)
* [Services](#services)
* [Service Configuration](#service-configuration)
* [Tasks](#tasks)
* [Triggers](#triggers)
* [Available Triggers](#available-triggers)
* [Runners vs. Ona Desktop behaviors](#runners-vs-ona-desktop-behaviors)
* [Dependencies](#dependencies)
* [Best Practices for Using Triggers](#best-practices-for-using-triggers)
* [Reference](#reference)
## The two modes of Automations
Ona supports two primary types of Automations:
1. **[services](#services)** - for long-running processes like starting a server
2. **[tasks](#tasks)** - for performing one-off actions like executing unit tests
```yaml
services:
database:
name: PostgreSQL
commands:
start: docker run postgres
tasks:
run-unit-tests:
name: Runs unit tests
command: go test -v ./...
```
**Caption:** A minimal automation definition.
## Services
Services are **designed for long-running processes**. These are typically components that need to be continuously available throughout your development session.
Common examples include:
* Databases like PostgreSQL
* Caching systems such as Redis
* Your project's backend and frontend servers.
The key characteristic of a service is its persistent nature – it's not expected to terminate on its own but to remain active and ready for interaction as long as your development environment is running.
See [reference](#reference) for a full example.
### Service Configuration
Configuring a service involves defining up to three key commands:
* `start` (required) - The service itself. The process is expected to continue running until stopped. If this command fails (i.e. exits with a non-zero exit code), the service is considered failed.
* `ready` (optional) - Acts as a health check, determining when the service is fully operational and available for use. Ona executes this command periodically (once per second) until it exits with a status code of 0, indicating the service is ready. If you don't specify a `ready` command, Ona assumes the service is immediately available after the `start` command completes.
* `stop` (optional) - Defines a graceful shutdown procedure for your service. If omitted, Ona will send a `SIGTERM` signal to terminate the service when needed.
## Tasks
In contrast to services, **tasks are individual commands designed to perform specific, often one-off actions within your environment**.
Common examples include:
* Compiling code
* Executing test suites
* Populating a database with test data
* Authenticating with cloud services
* Resetting your local environment to a known state.
Tasks are typically short-lived, executing a defined set of operations and then terminating once complete. Tasks consist of a single command to be executed, however their power lies in their ability to be chained and dependent on other components of your environment.
Tasks will exit immediately if a command exits with a non-zero status code, and the task will be marked as failed. This behavior allows for proper error handling in automation pipelines and dependency chains. For example, if a task depends on another task that fails (exits with non-zero status), the dependent task will not be executed.
See [reference](#reference) for a full example.
### Stop a Task
A started task can be stopped prematurely, which will send a `SIGTERM` signal to the task's command (or any chained commands). Once the command has exited, the task will be marked as stopped.
If the command does not exit within 10 seconds, it will be forcefully terminated and the task run will be marked as failed.
## Triggers
Triggers are **the events that initiate the execution of Automations in your Ona environment**. This section covers the available triggers and explains their behavior.
### Available Triggers
Ona supports three main types of triggers for Automations:
* The `postEnvironmentStart` trigger activates every time the environment is started. This includes both the initial start of the environment and any subsequent restarts. It's particularly useful for operations that need to be performed consistently on every environment start, regardless of the underlying container state. For example, you might use this trigger to set up environment variables or check for updates to critical tools.
* The `postDevcontainerStart` trigger, on the other hand, is activated every time the devcontainer is started. This occurs during the first start of the environment and any subsequent devcontainer restarts, such as after a rebuild. This trigger is ideal for setup tasks that are specific to the devcontainer configuration, like initializing databases or compiling project-specific dependencies.
* The `manual` trigger provides a unique affordance in the user interface, allowing developers to start an action on demand. This trigger is particularly valuable for curating a set of actions that developers frequently perform. By using manual triggers, you can shape and refine the experience others will have in your Ona environment. For instance, you might create manual triggers for running tests, generating documentation, or deploying to a staging environment. This approach not only streamlines common tasks but also helps standardize processes across your team.
See [reference](#reference) for a full example.
### Runners vs. Ona Desktop behaviors
It's important to note that the behavior of these triggers can vary depending on the Ona runner being used. The AWS runner typically uses a suspend/resume model for environment management. When an environment is restarted on EC2, it usually resumes from a suspended state. In this scenario, `postDevcontainerStart` is not called on restart, but `postEnvironmentStart` is still triggered.
Ona Desktop takes a different approach. Instead of using suspend/resume, it reboots the entire environment on restart. This causes both `postDevcontainerStart` and `postEnvironmentStart` to run on every environment restart.
This intentional difference in behavior is designed to help recreate state that might be lost due to the lifecycle of individual elements in different environments. For AWS runners, the suspended state preserves most of the environment, so fewer reinitializations are needed. For Ona Desktop, the full reboot ensures a clean state each time, which may require more extensive reinitialization.
### Dependencies
Tasks can specify dependencies, allowing you to create sophisticated automation workflows. A task can depend on other tasks, ensuring that these dependencies are executed beforehand. This feature is particularly useful for setting up complex environments where certain operations must occur in a specific order.
It's important to note that task dependencies are re-evaluated and re-executed each time the main task runs. This ensures that your environment is always in the expected state before a task begins, even if it's run multiple times during a development session.
Each task execution is treated as an isolated event. This means that if you modify a task's definition while it's running, those changes won't affect the current execution. This isolation ensures consistency and predictability in your automation workflows.
### Best Practices for Using Triggers
When working with triggers, it's advisable to use `postEnvironmentStart` for tasks that should run on every start, regardless of the runner or whether it's a fresh start or a resume.
Use `postDevcontainerStart` for tasks specifically related to devcontainer setup or for operations that need to run after a full environment reboot. This could involve compiling dependencies or initializing databases.
The `manual` trigger is best used for discretionary tasks that developers might need to perform multiple times during a session, or for complex operations that don't need to run automatically. By thoughtfully implementing manual triggers, you can significantly improve the usability of your Ona environment for all team members.
## Reference
Automations are defined as YAML, in a [file](/ona/configuration/automations/basic-configuration) or [directly uploaded to the system](/ona/configuration/automations/generating-automations).
```yaml
# defines automation services (optional)
services:
# serviceReference is an identifier for the service within the environment.
# It is used when referencing the service, e.g. from the CLI.
# It needs to only contain alphanumeric characters, underscores, and hyphens, and must be between 1 and 128 characters long.
serviceReference:
# Name is a required, human readable string.
name: Human readable name
description: Optional description providing more detail
# triggeredBy lists all trigger that start the service. If none are provided the service isn't started automatically.
# See below for a complete list of trigger.
triggeredBy:
- ...
commands:
# start is a mandatory command constitutes the service itself and is expected to continue running until stopped.
# If this command fails (i.e. exits with a non-zero exit code), the service is considered failed.
start: your-service-command
# ready acts as a readiness check, determining when the service is fully operational and available for use.
# Ona executes this command periodically (once per second) until it exits with a status code of 0, indicating the service is ready. # If you don't specify a ready command, Ona assumes the service is immediately available after the start command completes.
ready: your-service-command --is-running
# This optional command allows you to define a graceful shutdown procedure for your service.
# If omitted, Ona will send a SIGTERM signal to terminate the service when needed.
stop: killall your-service-command
# defines automation tasks (optional)
tasks:
taskReference:
# Name is a required, human readable string.
name: Human readable name
description: Optional description providing more detail
# triggeredBy lists all trigger that start the service. If none are provided the service isn't started automatically.
# See below for a complete list of trigger.
triggeredBy:
# postEnvironmentStart activates every time the environment is started, e.g. on first start
- postEnvironmentStart
# postDevcontainerStart activates every time the devcontainer is started, e.g. on first start or devcontainer rebuild
- postDevcontainerStart
# manual trigger provides a unique affordance in the user interface, allowing developers to start an action on demand.
- manual
# dependsOn expresses a dependency on another task which ensures that this other task runs before this one.
dependsOn:
- someOtherTask
# command is the actual task command that gets executed. Ona will run this as a shell script, i.e. multiline input is possible
command: |
echo We are in the workspace directory: $PWD
echo Let's go
```
# Getting started
Source: https://ona.com/docs/ona/configuration/devcontainer/getting-started
Explore Dev Container features in Ona environments. Learn about benefits, how to create a devcontainer.json, and how Ona uses Dev Containers.
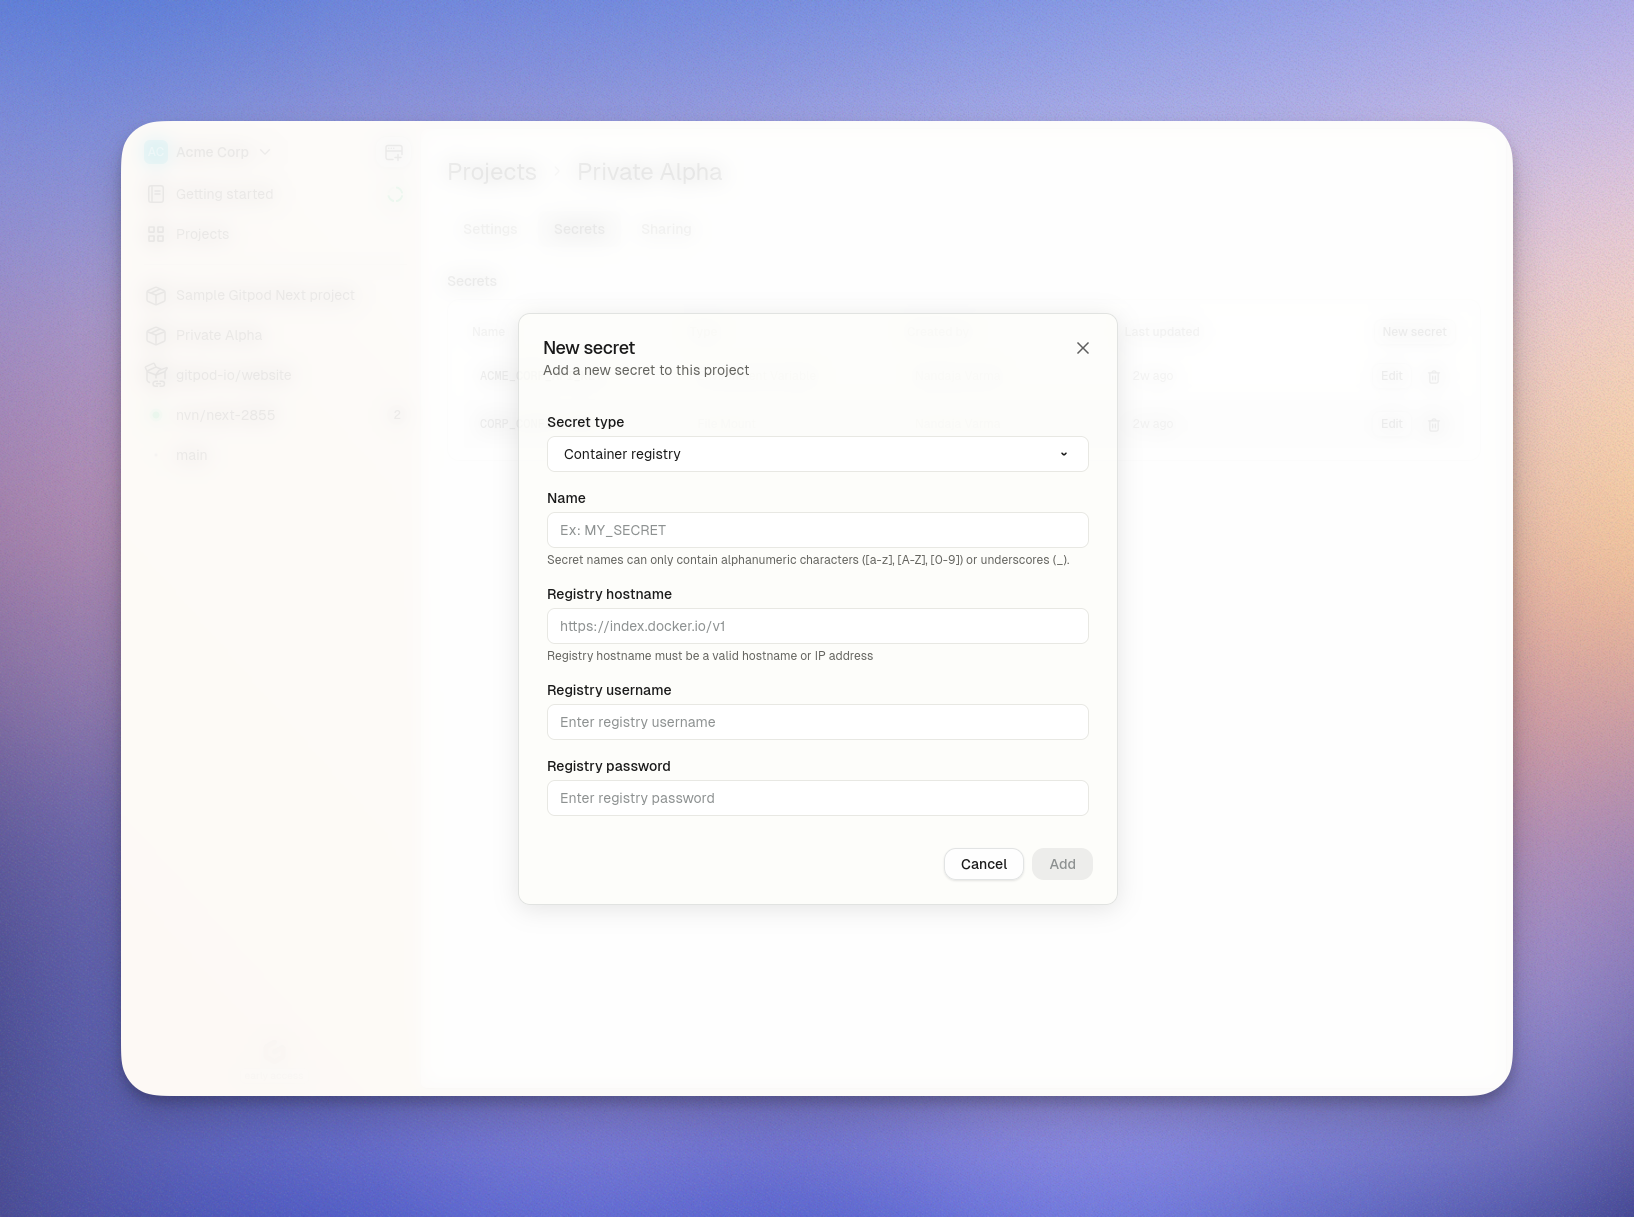 #### Common Registry Hostnames
* Docker Hub: `https://index.docker.io/v1/` (note the https\:// prefix)
* GitHub Container Registry: `ghcr.io`
* GitLab Container Registry: `registry.gitlab.com`
* Azure Container Registry: `[registry-name].azurecr.io`
* Google Container Registry: `gcr.io`
* AWS ECR: \[account-id].dkr.ecr.\[region].amazonaws.com (with runner-native support on EC2 runners)
## Using AWS ECR with IAM authentication
Ona now supports AWS ECR registries with IAM based authentication when using AWS EC2 runners. This means you can access private ECR repositories without manually managing credentials.
### Prerequisites
* You must be using AWS EC2 runners for your Ona environments
* Your ECR registry and EC2 runners must be in the same AWS account or have appropriate cross-account access configured
### Setting up ECR Registry Access
* Navigate to Project > Secrets > New Secret in your Ona dashboard
* Select Container Registry Basic Auth from the type dropdown
* For the Registry hostname, enter your ECR registry hostname in the format: \[account-id].dkr.ecr.\[region].amazonaws.com
* When you enter an ECR registry hostname, the username and password fields will automatically be filled with runner-native to indicate that native runner authentication will be used
* Click Add
#### Common Registry Hostnames
* Docker Hub: `https://index.docker.io/v1/` (note the https\:// prefix)
* GitHub Container Registry: `ghcr.io`
* GitLab Container Registry: `registry.gitlab.com`
* Azure Container Registry: `[registry-name].azurecr.io`
* Google Container Registry: `gcr.io`
* AWS ECR: \[account-id].dkr.ecr.\[region].amazonaws.com (with runner-native support on EC2 runners)
## Using AWS ECR with IAM authentication
Ona now supports AWS ECR registries with IAM based authentication when using AWS EC2 runners. This means you can access private ECR repositories without manually managing credentials.
### Prerequisites
* You must be using AWS EC2 runners for your Ona environments
* Your ECR registry and EC2 runners must be in the same AWS account or have appropriate cross-account access configured
### Setting up ECR Registry Access
* Navigate to Project > Secrets > New Secret in your Ona dashboard
* Select Container Registry Basic Auth from the type dropdown
* For the Registry hostname, enter your ECR registry hostname in the format: \[account-id].dkr.ecr.\[region].amazonaws.com
* When you enter an ECR registry hostname, the username and password fields will automatically be filled with runner-native to indicate that native runner authentication will be used
* Click Add
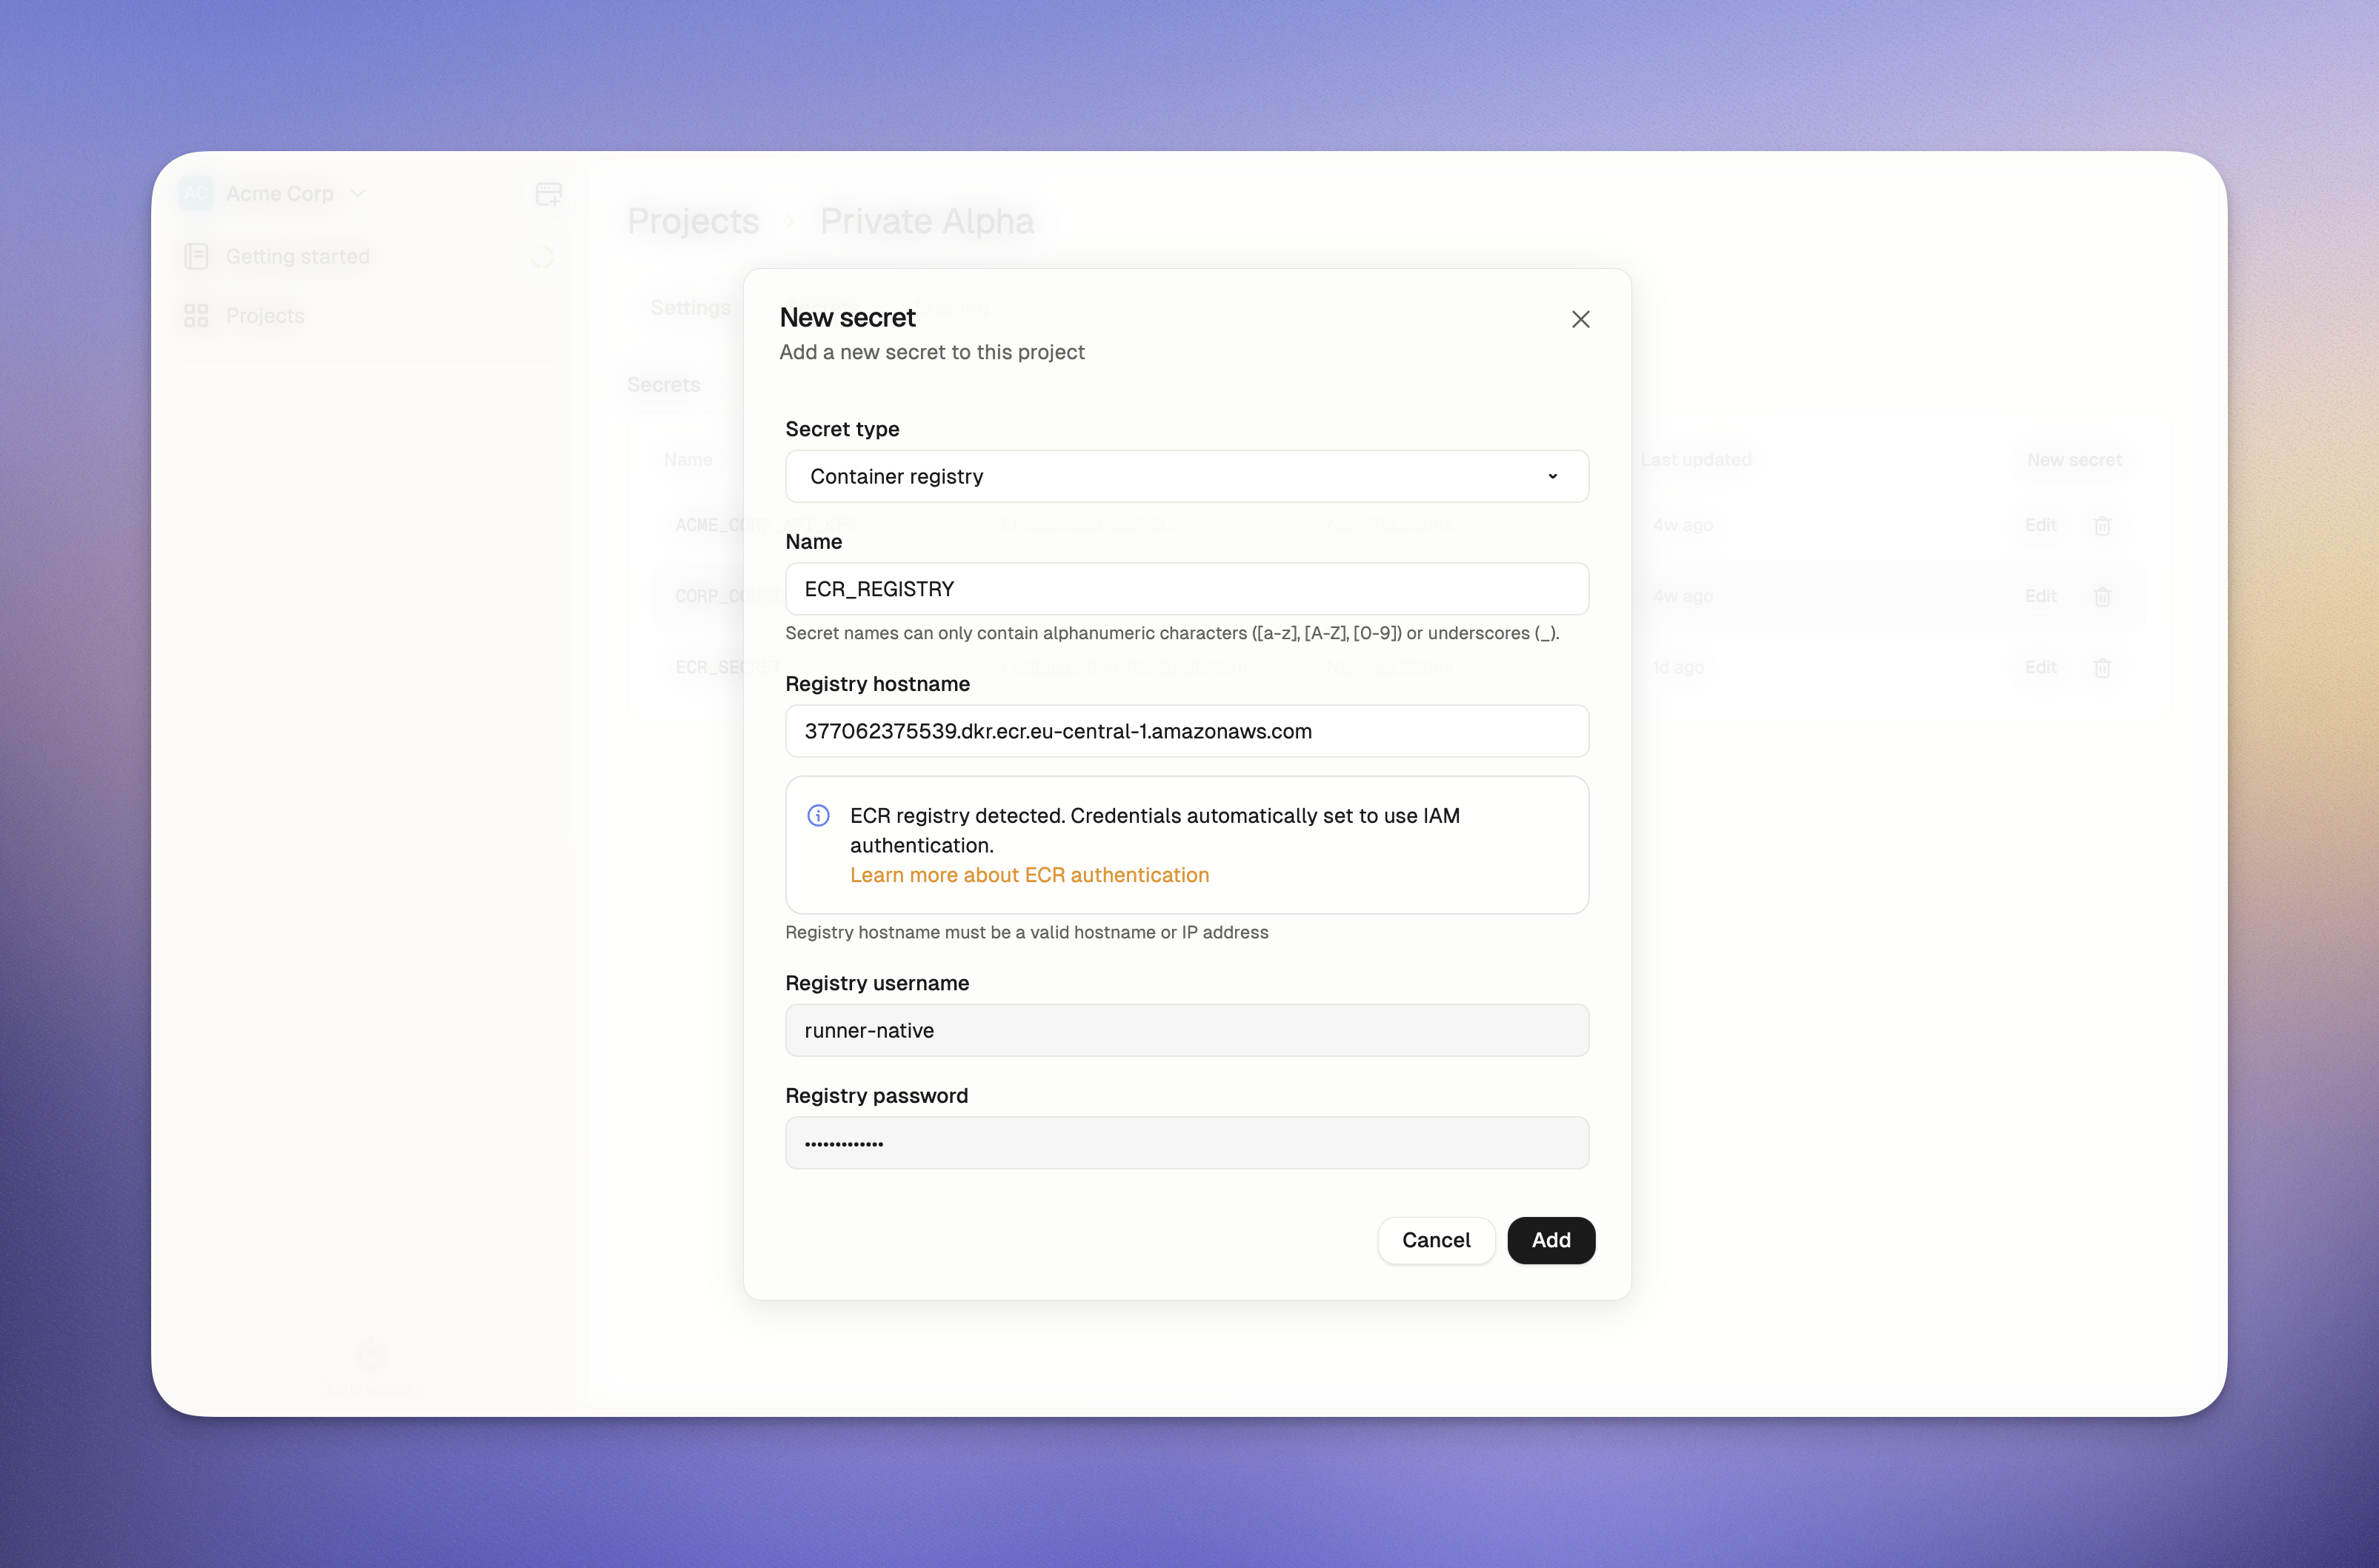 ### Configuring IAM Permissions
To enable your EC2 runners to access your ECR repositories, you need to configure the appropriate IAM permissions:
* Locate your runner environment's IAM role from your CloudFormation stack outputs
* Attach appropriate ECR permissions to this role to allow it to pull images from your ECR repositories
* Update the repository policy of your ECR repository to allow access from the runner's IAM role
* Ensure the IAM role's permission boundaries (if configured) include the required ECR permissions
Here's an example policy you can attach to your runner's IAM role:
```
{
"Version": "2012-10-17",
"Statement": [
{
"Effect": "Allow",
"Action": [
"ecr:GetAuthorizationToken"
],
"Resource": "*"
},
{
"Effect": "Allow",
"Action": [
"ecr:GetDownloadUrlForLayer",
"ecr:BatchGetImage",
"ecr:BatchCheckLayerAvailability"
],
"Resource": "arn:aws:ecr:[region]:[account-id]:repository/[repository-name]"
}
]
}
```
You'll also need to update the repository policy of your ECR repository to allow the runner's IAM role to access it. Here's an example ECR repository policy:
```
{
"Version": "2012-10-17",
"Statement": [
{
"Sid": "AllowOnaRunnerPull",
"Effect": "Allow",
"Principal": {
"AWS": "arn:aws:iam::[account-id]:role/[runner-role-name]"
},
"Action": [
"ecr:BatchGetImage",
"ecr:GetDownloadUrlForLayer",
"ecr:BatchCheckLayerAvailability"
]
}
]
}
```
### Limitations
* ECR runner-native registry support is only available for AWS EC2 runners
* Your EC2 runners and ECR registry must have properly configured IAM permissions
* Existing environments must be recreated to apply changes to ECR permissions
## Accessing Container Registry Secrets
Once created, container registry secrets serve two purposes:
1. They authenticate with private registries to pull images for your Dev Container during environment creation.
2. If your Dev Container image includes the `docker` CLI, Ona automatically runs `docker login` inside your environment to enable continued access to the registry.
### Configuring IAM Permissions
To enable your EC2 runners to access your ECR repositories, you need to configure the appropriate IAM permissions:
* Locate your runner environment's IAM role from your CloudFormation stack outputs
* Attach appropriate ECR permissions to this role to allow it to pull images from your ECR repositories
* Update the repository policy of your ECR repository to allow access from the runner's IAM role
* Ensure the IAM role's permission boundaries (if configured) include the required ECR permissions
Here's an example policy you can attach to your runner's IAM role:
```
{
"Version": "2012-10-17",
"Statement": [
{
"Effect": "Allow",
"Action": [
"ecr:GetAuthorizationToken"
],
"Resource": "*"
},
{
"Effect": "Allow",
"Action": [
"ecr:GetDownloadUrlForLayer",
"ecr:BatchGetImage",
"ecr:BatchCheckLayerAvailability"
],
"Resource": "arn:aws:ecr:[region]:[account-id]:repository/[repository-name]"
}
]
}
```
You'll also need to update the repository policy of your ECR repository to allow the runner's IAM role to access it. Here's an example ECR repository policy:
```
{
"Version": "2012-10-17",
"Statement": [
{
"Sid": "AllowOnaRunnerPull",
"Effect": "Allow",
"Principal": {
"AWS": "arn:aws:iam::[account-id]:role/[runner-role-name]"
},
"Action": [
"ecr:BatchGetImage",
"ecr:GetDownloadUrlForLayer",
"ecr:BatchCheckLayerAvailability"
]
}
]
}
```
### Limitations
* ECR runner-native registry support is only available for AWS EC2 runners
* Your EC2 runners and ECR registry must have properly configured IAM permissions
* Existing environments must be recreated to apply changes to ECR permissions
## Accessing Container Registry Secrets
Once created, container registry secrets serve two purposes:
1. They authenticate with private registries to pull images for your Dev Container during environment creation.
2. If your Dev Container image includes the `docker` CLI, Ona automatically runs `docker login` inside your environment to enable continued access to the registry.
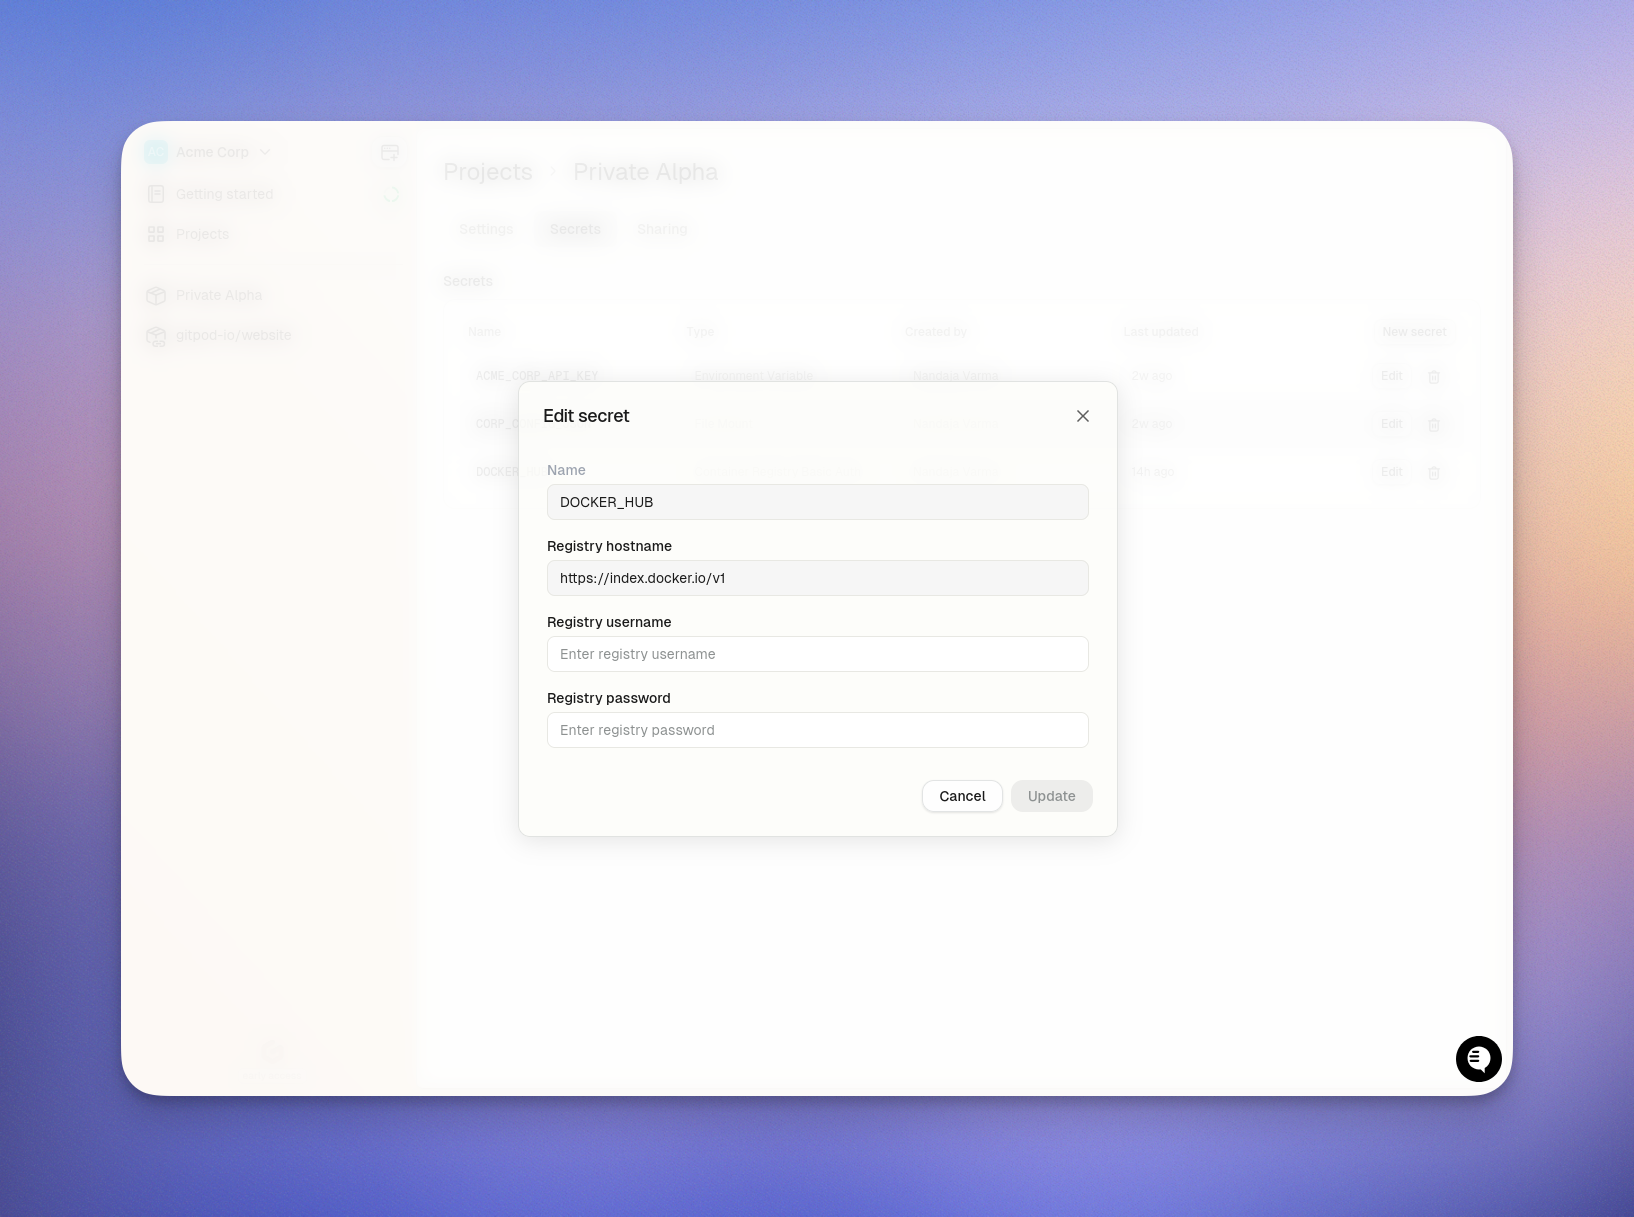 When you update a Container Registry Secret:
* **New environments** will use the updated credentials
* **Existing running environments** will continue to use the old credentials until they are restarted
* **Registry hostname** cannot be modified after creation
* To apply updates to running environments, you must restart them
## Deleting a Container Registry Secret
To delete a Container Registry Secret:
1. Navigate to secret management in your Ona dashboard
* **Project > Secrets** for Project secrets
* **Settings > Secrets** for User secrets
2. Find your Container Registry Secret and click the `Delete` button
3. Confirm the deletion
After deletion:
* New environments launched from the project will no longer have access to the secret
* Existing environments that already have the secret will retain it until those environments themselves are deleted
* This may cause image pull failures if your environment depends on images from that registry
**Note:** When a project is deleted, all its secrets are automatically deleted as well.
# Environment Variables
Source: https://ona.com/docs/ona/configuration/secrets/environment-variables
Environment variables allow you to store and manage configuration settings that your application needs at runtime. These variables are accessible to your application's processes as standard environment variables, enabling you to:
* Configure your application for different environments (development, staging, production)
* Store configuration settings separate from your code
* Manage API keys and other configuration values
Environment Variable secrets you create in the Ona dashboard become accessible as system environment variables in your environment. The name you provide for the secret becomes the environment variable name.
## When to use Environment Variables
**Security Consideration**: For sensitive data (passwords, API tokens, private keys), we strongly recommend using [**files**](/ona/configuration/secrets/files) instead of environment variables.
### Comparison: Files vs Environment Variables
| Files | Environment Variables |
| ----------------------------------------------- | ------------------------------------------ |
| Support complex structures (JSON, certificates) | Limited to simple string values |
| Not visible in process listings | Visible via `ps auxe` commands |
| Not included in crash reports or logs | Often dumped in logs and error reports |
| Explicitly used by processes | Automatically inherited by child processes |
Use environment variables for non-sensitive configuration like feature flags, API endpoints, or application modes.
## Creating an Environment Variable Secret
To create an Environment Variable Secret:
1. Navigate to secret management in your Ona dashboard
* **Project > Secrets > New Secret** for Project secrets
* **Settings > Secrets > New Secret** for User secrets
2. Select **Environment Variable** from the type dropdown
3. Configure the following fields:
* **Type of secret**: "Environment Variable" (cannot be changed after creation)
* **Name**: A unique identifier (3-127 characters, only alphanumeric characters, underscores, and hyphens)
* **Value**: The value to be stored (maximum size: 4KB)
When you update a Container Registry Secret:
* **New environments** will use the updated credentials
* **Existing running environments** will continue to use the old credentials until they are restarted
* **Registry hostname** cannot be modified after creation
* To apply updates to running environments, you must restart them
## Deleting a Container Registry Secret
To delete a Container Registry Secret:
1. Navigate to secret management in your Ona dashboard
* **Project > Secrets** for Project secrets
* **Settings > Secrets** for User secrets
2. Find your Container Registry Secret and click the `Delete` button
3. Confirm the deletion
After deletion:
* New environments launched from the project will no longer have access to the secret
* Existing environments that already have the secret will retain it until those environments themselves are deleted
* This may cause image pull failures if your environment depends on images from that registry
**Note:** When a project is deleted, all its secrets are automatically deleted as well.
# Environment Variables
Source: https://ona.com/docs/ona/configuration/secrets/environment-variables
Environment variables allow you to store and manage configuration settings that your application needs at runtime. These variables are accessible to your application's processes as standard environment variables, enabling you to:
* Configure your application for different environments (development, staging, production)
* Store configuration settings separate from your code
* Manage API keys and other configuration values
Environment Variable secrets you create in the Ona dashboard become accessible as system environment variables in your environment. The name you provide for the secret becomes the environment variable name.
## When to use Environment Variables
**Security Consideration**: For sensitive data (passwords, API tokens, private keys), we strongly recommend using [**files**](/ona/configuration/secrets/files) instead of environment variables.
### Comparison: Files vs Environment Variables
| Files | Environment Variables |
| ----------------------------------------------- | ------------------------------------------ |
| Support complex structures (JSON, certificates) | Limited to simple string values |
| Not visible in process listings | Visible via `ps auxe` commands |
| Not included in crash reports or logs | Often dumped in logs and error reports |
| Explicitly used by processes | Automatically inherited by child processes |
Use environment variables for non-sensitive configuration like feature flags, API endpoints, or application modes.
## Creating an Environment Variable Secret
To create an Environment Variable Secret:
1. Navigate to secret management in your Ona dashboard
* **Project > Secrets > New Secret** for Project secrets
* **Settings > Secrets > New Secret** for User secrets
2. Select **Environment Variable** from the type dropdown
3. Configure the following fields:
* **Type of secret**: "Environment Variable" (cannot be changed after creation)
* **Name**: A unique identifier (3-127 characters, only alphanumeric characters, underscores, and hyphens)
* **Value**: The value to be stored (maximum size: 4KB)
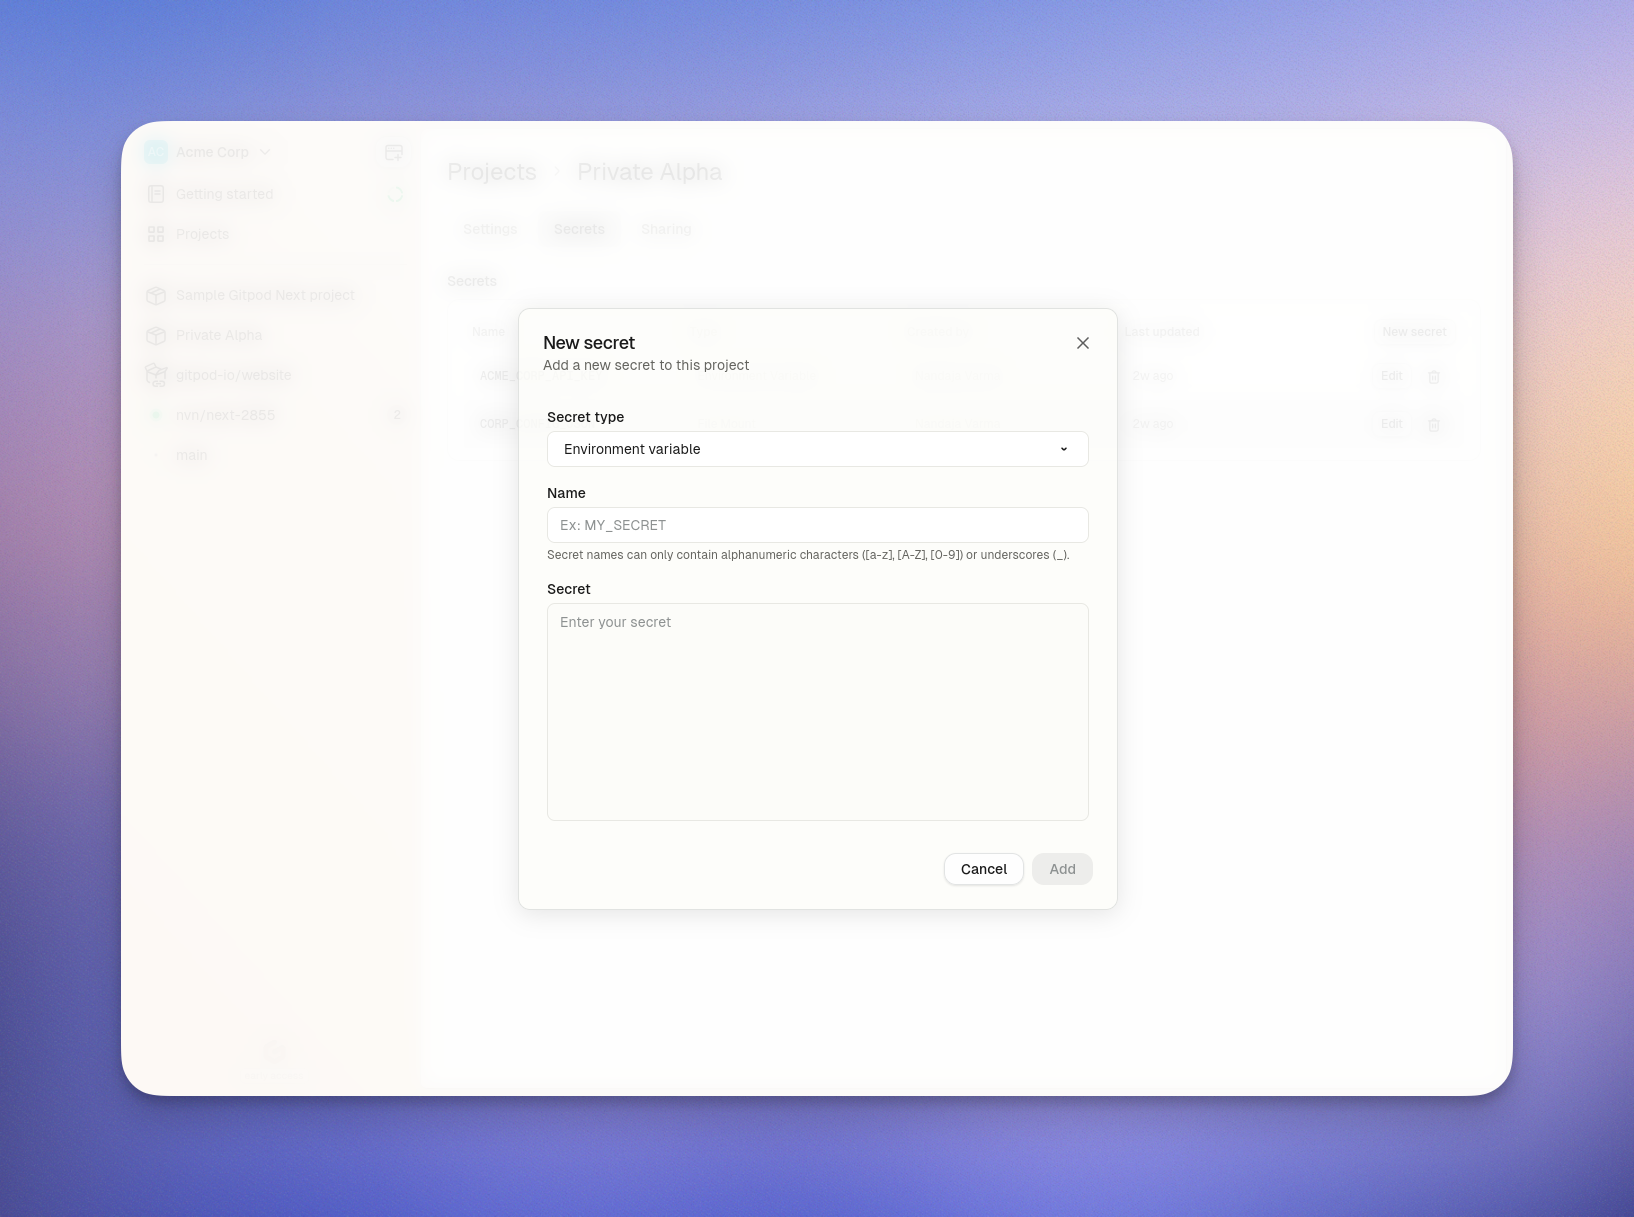 ## Accessing Environment Variables
Once created, environment variables are automatically available in your Ona environment as system environment variables by the name you provided. No special code is required to access them.
## Updating an Environment Variable Secret
You can update the value of an environment variable at any time:
1. Navigate to secret management in your Ona dashboard
* **Project > Secrets** for Project secrets
* **Settings > Secrets** for User secrets
2. Click the `Edit` button
3. Update the value
4. Click `Save`
## Accessing Environment Variables
Once created, environment variables are automatically available in your Ona environment as system environment variables by the name you provided. No special code is required to access them.
## Updating an Environment Variable Secret
You can update the value of an environment variable at any time:
1. Navigate to secret management in your Ona dashboard
* **Project > Secrets** for Project secrets
* **Settings > Secrets** for User secrets
2. Click the `Edit` button
3. Update the value
4. Click `Save`
 When you update a secret value:
* **New environments** will receive the updated value
* **Existing running environments** will continue to use the old value until they are restarted
* To apply updates to running environments, you must restart them
## Deleting an Environment Variable Secret
To delete an environment variable:
1. Navigate to secret management in your Ona dashboard
* **Project > Secrets** for Project secrets
* **Settings > Secrets** for User secrets
2. Click the `Delete` button
3. Confirm the deletion
After deletion:
* New environments launched from the project will no longer have access to the secret
* Existing environments that already have the secret will retain it until those environments themselves are deleted
**Note:** When a project is deleted, all its secrets are automatically deleted as well.
# Files
Source: https://ona.com/docs/ona/configuration/secrets/files
File secrets mount sensitive data as actual files in your Ona environment at a specified location. These files are automatically created when your environment starts, allowing your applications to read them like any other file on the filesystem.
## When to use File Secrets
File secrets are the recommended choice for:
* **Complex data structures** - JSON configurations, certificates, or other multi-line content
* **Sensitive credentials** - API keys, authentication tokens, and passwords
* **Binary data** - Certificates, keystore files, or other non-text content
* **Configuration that applications expect in file format** - Many applications look for specific configuration files
## Creating a File Secret
To create a File Secret:
1. Navigate to secret management in your Ona dashboard
* **Project > Secrets > New Secret** for Project secrets
* **Settings > Secrets > New Secret** for User secrets
2. Select **File** from the type dropdown
3. Configure the following fields:
* **Type of secret**: "File" (cannot be changed after creation)
* **Name**: A unique identifier (3-127 characters, only alphanumeric characters, underscores, and hyphens)
* **Value**: The content to be stored in the file (maximum size: 4KB)
* **Mount Path**: The filepath where the secret will be mounted in your environment (cannot be changed after creation)
When you update a secret value:
* **New environments** will receive the updated value
* **Existing running environments** will continue to use the old value until they are restarted
* To apply updates to running environments, you must restart them
## Deleting an Environment Variable Secret
To delete an environment variable:
1. Navigate to secret management in your Ona dashboard
* **Project > Secrets** for Project secrets
* **Settings > Secrets** for User secrets
2. Click the `Delete` button
3. Confirm the deletion
After deletion:
* New environments launched from the project will no longer have access to the secret
* Existing environments that already have the secret will retain it until those environments themselves are deleted
**Note:** When a project is deleted, all its secrets are automatically deleted as well.
# Files
Source: https://ona.com/docs/ona/configuration/secrets/files
File secrets mount sensitive data as actual files in your Ona environment at a specified location. These files are automatically created when your environment starts, allowing your applications to read them like any other file on the filesystem.
## When to use File Secrets
File secrets are the recommended choice for:
* **Complex data structures** - JSON configurations, certificates, or other multi-line content
* **Sensitive credentials** - API keys, authentication tokens, and passwords
* **Binary data** - Certificates, keystore files, or other non-text content
* **Configuration that applications expect in file format** - Many applications look for specific configuration files
## Creating a File Secret
To create a File Secret:
1. Navigate to secret management in your Ona dashboard
* **Project > Secrets > New Secret** for Project secrets
* **Settings > Secrets > New Secret** for User secrets
2. Select **File** from the type dropdown
3. Configure the following fields:
* **Type of secret**: "File" (cannot be changed after creation)
* **Name**: A unique identifier (3-127 characters, only alphanumeric characters, underscores, and hyphens)
* **Value**: The content to be stored in the file (maximum size: 4KB)
* **Mount Path**: The filepath where the secret will be mounted in your environment (cannot be changed after creation)
 ## Accessing File Secrets
Once created, the file secret is automatically mounted at the specified path in your Ona environment. Your application can read it like any other file on the filesystem. No special code is required to access the file beyond normal file system operations.
## Updating a File Secret
You can update the content of a file secret at any time, although the mount path cannot be changed once the secret is created.
1. Navigate to the **Project > Secrets** page in your Ona dashboard
2. Click the `Edit` button
3. Update the value
4. Click `Save`
## Accessing File Secrets
Once created, the file secret is automatically mounted at the specified path in your Ona environment. Your application can read it like any other file on the filesystem. No special code is required to access the file beyond normal file system operations.
## Updating a File Secret
You can update the content of a file secret at any time, although the mount path cannot be changed once the secret is created.
1. Navigate to the **Project > Secrets** page in your Ona dashboard
2. Click the `Edit` button
3. Update the value
4. Click `Save`
 When you update a secret value:
* **New environments** will receive the updated file content
* **Existing running environments** will continue to use the old file content until they are restarted
* To apply updates to running environments, you must restart them
* The mount path cannot be changed after creation
## Deleting a File Secret
To delete a file secret:
1. Navigate to the **Project > Secrets** page in your Ona dashboard
2. Click the `Delete` button
3. Confirm the deletion
After deletion:
* New environments launched from the project will no longer have access to the secret
* Existing environments that already have the secret will retain it until those environments themselves are deleted
**Note:** When a project is deleted, all its secrets are automatically deleted as well.
# Overview
Source: https://ona.com/docs/ona/configuration/secrets/overview
Learn how to configure secrets in Ona
Secrets allow you to securely store and inject sensitive data into your environments. These include API keys, access tokens, credentials, and certificates that your applications need but shouldn't be exposed in your source code.
Secrets are configured at three levels: organization, project, or user. They are automatically made available to any environment launched from that project. This ensures consistent and secure access to sensitive data across your development workflow.
## Secret Precedence
When secrets with the same name exist at different levels, they follow a strict precedence order:
1. **User Secrets** - Highest precedence
2. **Project Secrets** - Middle precedence
3. **Organization Secrets** - Lowest precedence
This means:
* User secrets override both project and organization secrets with the same name and mount
* Project secrets override organization secrets with the same name
* Organization secrets have the lowest priority
Learn more about managing [organization secrets](/ona/organizations/organization-secrets), [project secrets](/ona/projects/project-secrets), or [user secrets](/ona/configuration/secrets/user-secrets).
## Encryption of Secrets
All secrets you create are protected with industry-standard encryption. Secrets can only be retrieved by environments created from your projects (for Project secrets) or your user (for User secrets).
We use `AES256-GCM` to encrypt all secrets at rest in the database, with an additional layer of protection through AWS RDS encryption. This dual-layer approach ensures your sensitive data remains secure both at the application level and infrastructure level. In transit, all secrets are encrypted using TLS.
**Ona employees do not have access to the encryption keys and cannot decrypt your secrets.**
## Types of Secrets
Ona supports multiple types of secrets to accommodate different needs:
* [Files](/ona/configuration/secrets/files): Securely store and inject entire files into your environment
* [Environment Variables](/ona/configuration/secrets/environment-variables): Key-value pairs injected into your environment's process space
* [Container Registry Secrets](/ona/configuration/secrets/container-registry-secret): Authentication credentials for private container registries
Each type of secret serves a specific purpose in your development workflow. Click the links above to learn more about how to use each type effectively.
# User Secrets
Source: https://ona.com/docs/ona/configuration/secrets/user-secrets
Learn how to configure user secrets in your Ona Project
User secrets are a type of secret that are specific to a user. They are used to store sensitive data that is specific to a user, such as API keys, access tokens, and credentials which are shared across all projects and environments of a user.
**User secrets have the highest precedence** in the secrets hierarchy. This means they will override any project or organization secrets with the same name, allowing you to customize your environment without affecting other team members.
To manage your user secrets, navigate to the **Settings > My account > Secrets** page in your Ona dashboard.
When you update a secret value:
* **New environments** will receive the updated file content
* **Existing running environments** will continue to use the old file content until they are restarted
* To apply updates to running environments, you must restart them
* The mount path cannot be changed after creation
## Deleting a File Secret
To delete a file secret:
1. Navigate to the **Project > Secrets** page in your Ona dashboard
2. Click the `Delete` button
3. Confirm the deletion
After deletion:
* New environments launched from the project will no longer have access to the secret
* Existing environments that already have the secret will retain it until those environments themselves are deleted
**Note:** When a project is deleted, all its secrets are automatically deleted as well.
# Overview
Source: https://ona.com/docs/ona/configuration/secrets/overview
Learn how to configure secrets in Ona
Secrets allow you to securely store and inject sensitive data into your environments. These include API keys, access tokens, credentials, and certificates that your applications need but shouldn't be exposed in your source code.
Secrets are configured at three levels: organization, project, or user. They are automatically made available to any environment launched from that project. This ensures consistent and secure access to sensitive data across your development workflow.
## Secret Precedence
When secrets with the same name exist at different levels, they follow a strict precedence order:
1. **User Secrets** - Highest precedence
2. **Project Secrets** - Middle precedence
3. **Organization Secrets** - Lowest precedence
This means:
* User secrets override both project and organization secrets with the same name and mount
* Project secrets override organization secrets with the same name
* Organization secrets have the lowest priority
Learn more about managing [organization secrets](/ona/organizations/organization-secrets), [project secrets](/ona/projects/project-secrets), or [user secrets](/ona/configuration/secrets/user-secrets).
## Encryption of Secrets
All secrets you create are protected with industry-standard encryption. Secrets can only be retrieved by environments created from your projects (for Project secrets) or your user (for User secrets).
We use `AES256-GCM` to encrypt all secrets at rest in the database, with an additional layer of protection through AWS RDS encryption. This dual-layer approach ensures your sensitive data remains secure both at the application level and infrastructure level. In transit, all secrets are encrypted using TLS.
**Ona employees do not have access to the encryption keys and cannot decrypt your secrets.**
## Types of Secrets
Ona supports multiple types of secrets to accommodate different needs:
* [Files](/ona/configuration/secrets/files): Securely store and inject entire files into your environment
* [Environment Variables](/ona/configuration/secrets/environment-variables): Key-value pairs injected into your environment's process space
* [Container Registry Secrets](/ona/configuration/secrets/container-registry-secret): Authentication credentials for private container registries
Each type of secret serves a specific purpose in your development workflow. Click the links above to learn more about how to use each type effectively.
# User Secrets
Source: https://ona.com/docs/ona/configuration/secrets/user-secrets
Learn how to configure user secrets in your Ona Project
User secrets are a type of secret that are specific to a user. They are used to store sensitive data that is specific to a user, such as API keys, access tokens, and credentials which are shared across all projects and environments of a user.
**User secrets have the highest precedence** in the secrets hierarchy. This means they will override any project or organization secrets with the same name, allowing you to customize your environment without affecting other team members.
To manage your user secrets, navigate to the **Settings > My account > Secrets** page in your Ona dashboard.
 ## Secret Types
User secrets support the following types:
* [Environment Variables](/ona/configuration/secrets/environment-variables)
* [Files](/ona/configuration/secrets/files)
* [Container Registry Secrets](/ona/configuration/secrets/container-registry-secret)
## Creating a User Secret
To create a user secret, navigate to the **Settings > My account > Secrets** page in your Ona dashboard and click the **New Secret** button.
## Updating a User Secret
To update a user secret, navigate to the **Settings > My account > Secrets** page in your Ona dashboard and click the **Edit** button.
## Deleting a User Secret
To delete a user secret, navigate to the **Settings > My account > Secrets** page in your Ona dashboard and click the **Delete** button.
# Cursor
Source: https://ona.com/docs/ona/editors/cursor
[Cursor](https://www.cursor.com/) uses the same extension as VS Code. Most of [VS Code documentation](/ona/editors/vscode) is applicable to Cursor. When reaching out to support, please specify that you are using Cursor as your editor.
## Opening an Environment
You can select Cursor from the editor selector dropdown by clicking on the dropdown arrow next to the editor button on the action bar.
## Secret Types
User secrets support the following types:
* [Environment Variables](/ona/configuration/secrets/environment-variables)
* [Files](/ona/configuration/secrets/files)
* [Container Registry Secrets](/ona/configuration/secrets/container-registry-secret)
## Creating a User Secret
To create a user secret, navigate to the **Settings > My account > Secrets** page in your Ona dashboard and click the **New Secret** button.
## Updating a User Secret
To update a user secret, navigate to the **Settings > My account > Secrets** page in your Ona dashboard and click the **Edit** button.
## Deleting a User Secret
To delete a user secret, navigate to the **Settings > My account > Secrets** page in your Ona dashboard and click the **Delete** button.
# Cursor
Source: https://ona.com/docs/ona/editors/cursor
[Cursor](https://www.cursor.com/) uses the same extension as VS Code. Most of [VS Code documentation](/ona/editors/vscode) is applicable to Cursor. When reaching out to support, please specify that you are using Cursor as your editor.
## Opening an Environment
You can select Cursor from the editor selector dropdown by clicking on the dropdown arrow next to the editor button on the action bar.
 # JetBrains
Source: https://ona.com/docs/ona/editors/jetbrains
Integrate JetBrains IDEs with Ona
Ona seamlessly integrates with JetBrains IDEs including IntelliJ IDEA Ultimate, GoLand, PhpStorm, PyCharm, RubyMine, WebStorm, Rider, CLion, and RustRover.
This guide will walk you through the setup process and provide tips for managing your development environments.
# JetBrains
Source: https://ona.com/docs/ona/editors/jetbrains
Integrate JetBrains IDEs with Ona
Ona seamlessly integrates with JetBrains IDEs including IntelliJ IDEA Ultimate, GoLand, PhpStorm, PyCharm, RubyMine, WebStorm, Rider, CLion, and RustRover.
This guide will walk you through the setup process and provide tips for managing your development environments.
 ## Prerequisites
Before starting, ensure that you have:
1. [JetBrains Toolbox](https://www.jetbrains.com/toolbox-app/) installed on your system
> **Tip**: Keep JetBrains Toolbox for the best experience.
## Opening an Environment
1. Start an environment in Ona
2. Select your preferred JetBrains IDE (e.g., "Open IntelliJ IDEA Ultimate") from the action bar
## Prerequisites
Before starting, ensure that you have:
1. [JetBrains Toolbox](https://www.jetbrains.com/toolbox-app/) installed on your system
> **Tip**: Keep JetBrains Toolbox for the best experience.
## Opening an Environment
1. Start an environment in Ona
2. Select your preferred JetBrains IDE (e.g., "Open IntelliJ IDEA Ultimate") from the action bar
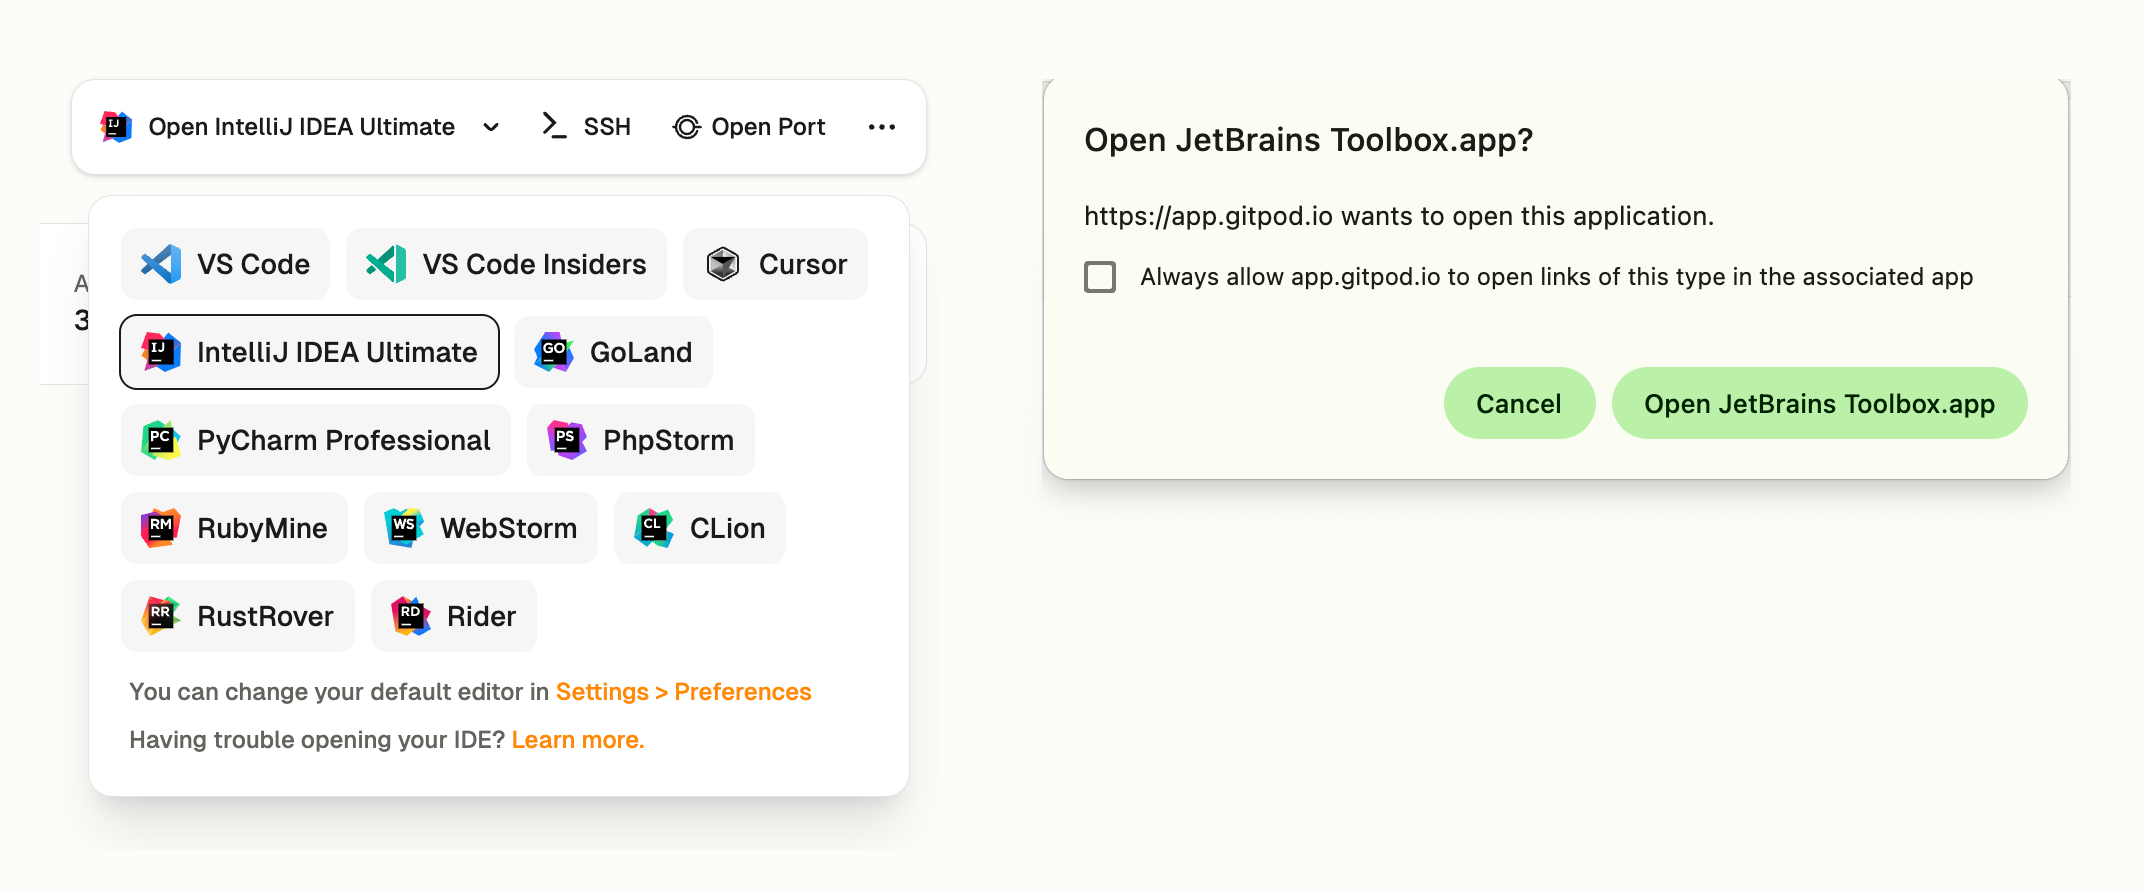 ### First-time Setup
On your first environment open, the setup process will:
1. Launch JetBrains Toolbox
2. Install the Ona plugin when prompted
### First-time Setup
On your first environment open, the setup process will:
1. Launch JetBrains Toolbox
2. Install the Ona plugin when prompted
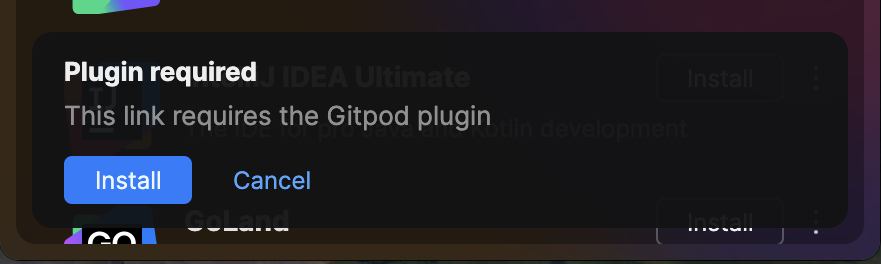 3. Request authentication with your Ona account
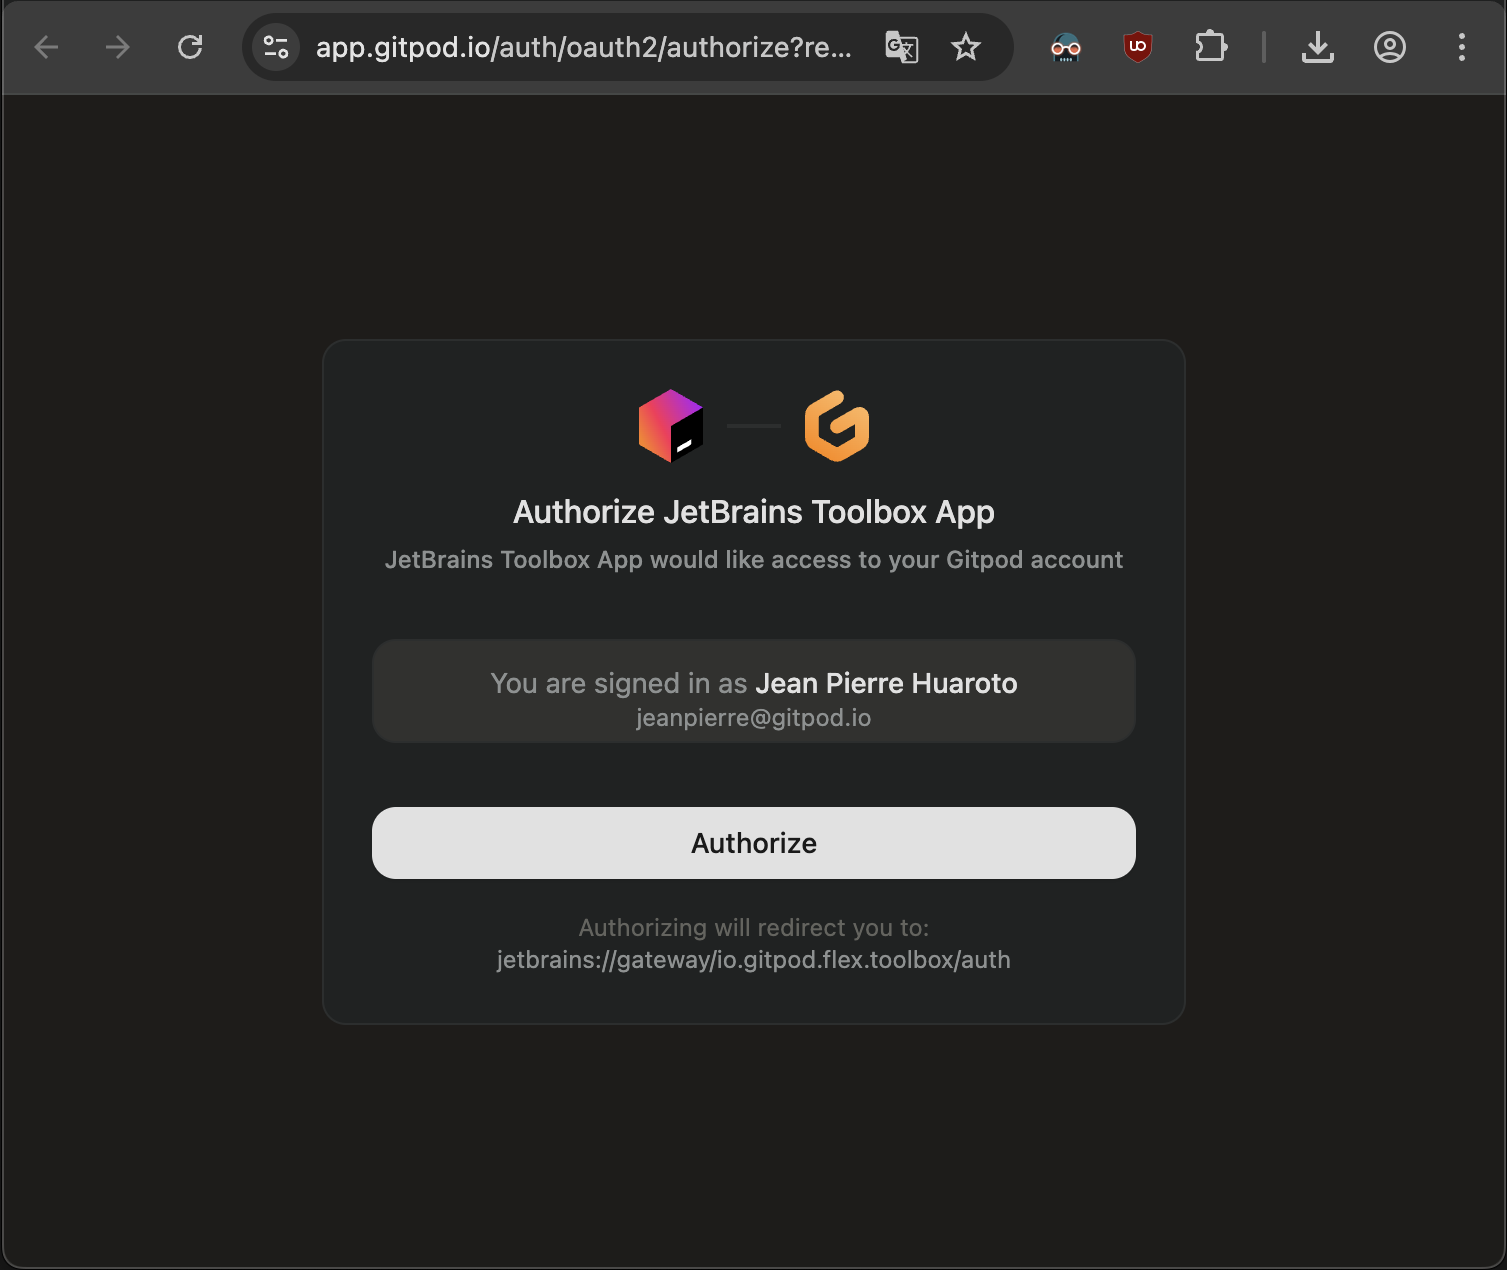 ### Connection Process
After authentication, Toolbox will:
1. Download and provision the IDE backend
### Connection Process
After authentication, Toolbox will:
1. Download and provision the IDE backend
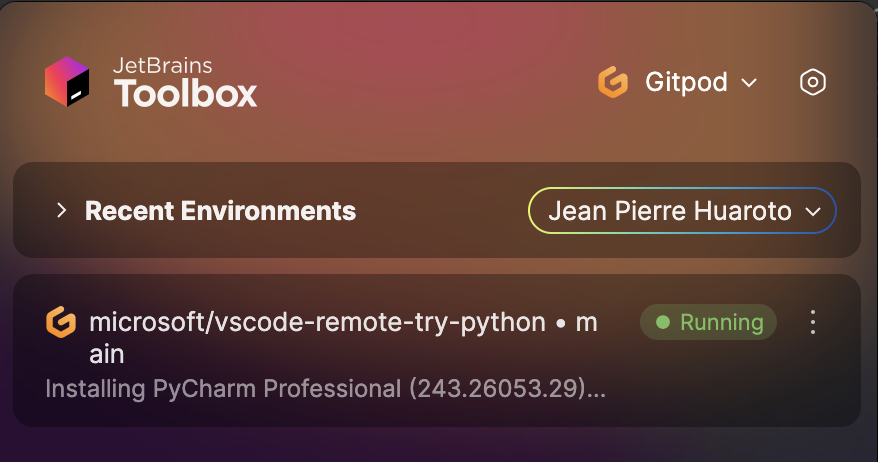 2. Start your local IDE client
 3. Connect to your environment automatically
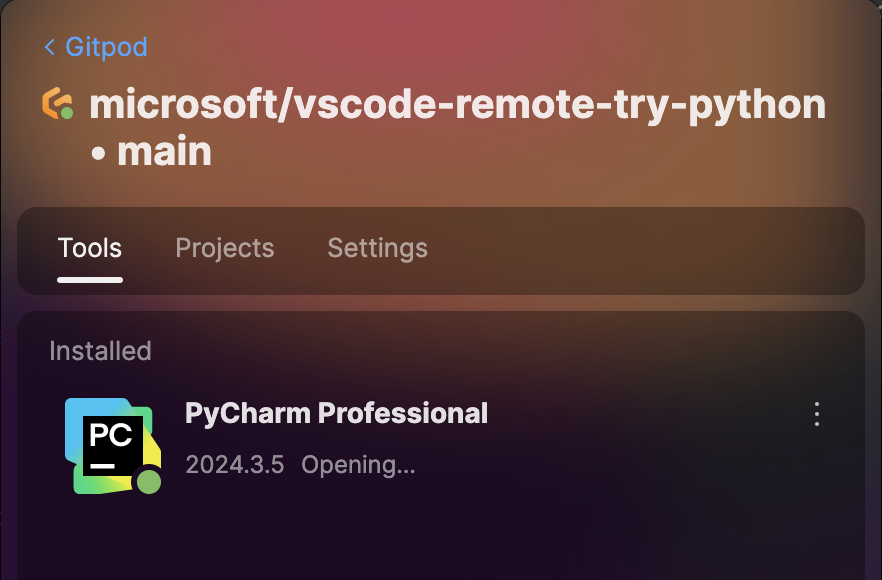 ## Plugin Customization
You can customize JetBrains IDE plugins using your `devcontainer.json` configuration. This allows you to pre-install plugins for your team and ensure consistent development environments.
### Basic Plugin Configuration
Add plugins to your `devcontainer.json` by adding the Plugin ID list to the `customizations.jetbrains.plugins` property:
```json
{
"customizations": {
"jetbrains": {
"plugins": [
"org.intellij.plugins.hcl",
"com.intellij.kubernetes"
]
}
}
}
```
### Finding Plugin IDs
To find the correct plugin ID:
1. Visit the [JetBrains Marketplace](https://plugins.jetbrains.com/)
2. Search for your desired plugin
3. Copy the plugin ID from **Additional Information** at the bottom of the plugin details page
## Plugin Customization
You can customize JetBrains IDE plugins using your `devcontainer.json` configuration. This allows you to pre-install plugins for your team and ensure consistent development environments.
### Basic Plugin Configuration
Add plugins to your `devcontainer.json` by adding the Plugin ID list to the `customizations.jetbrains.plugins` property:
```json
{
"customizations": {
"jetbrains": {
"plugins": [
"org.intellij.plugins.hcl",
"com.intellij.kubernetes"
]
}
}
}
```
### Finding Plugin IDs
To find the correct plugin ID:
1. Visit the [JetBrains Marketplace](https://plugins.jetbrains.com/)
2. Search for your desired plugin
3. Copy the plugin ID from **Additional Information** at the bottom of the plugin details page
 ## Limitations
* The version of JetBrains IDEs cannot be changed.
* JetBrains IDE settings cannot be customized.
## Managing Authentication
To change your Ona account or sign out from JetBrains Toolbox:
1. Open JetBrains Toolbox
2. Go to Settings → Providers → Ona
3. Click "Sign Out"
4. Click "Sign In" to authenticate with a different account
## Limitations
* The version of JetBrains IDEs cannot be changed.
* JetBrains IDE settings cannot be customized.
## Managing Authentication
To change your Ona account or sign out from JetBrains Toolbox:
1. Open JetBrains Toolbox
2. Go to Settings → Providers → Ona
3. Click "Sign Out"
4. Click "Sign In" to authenticate with a different account
 ## Managing Environments
Toolbox list shows only recent environments you've previously opened. Open new environments from Ona directly.
## Managing Environments
Toolbox list shows only recent environments you've previously opened. Open new environments from Ona directly.
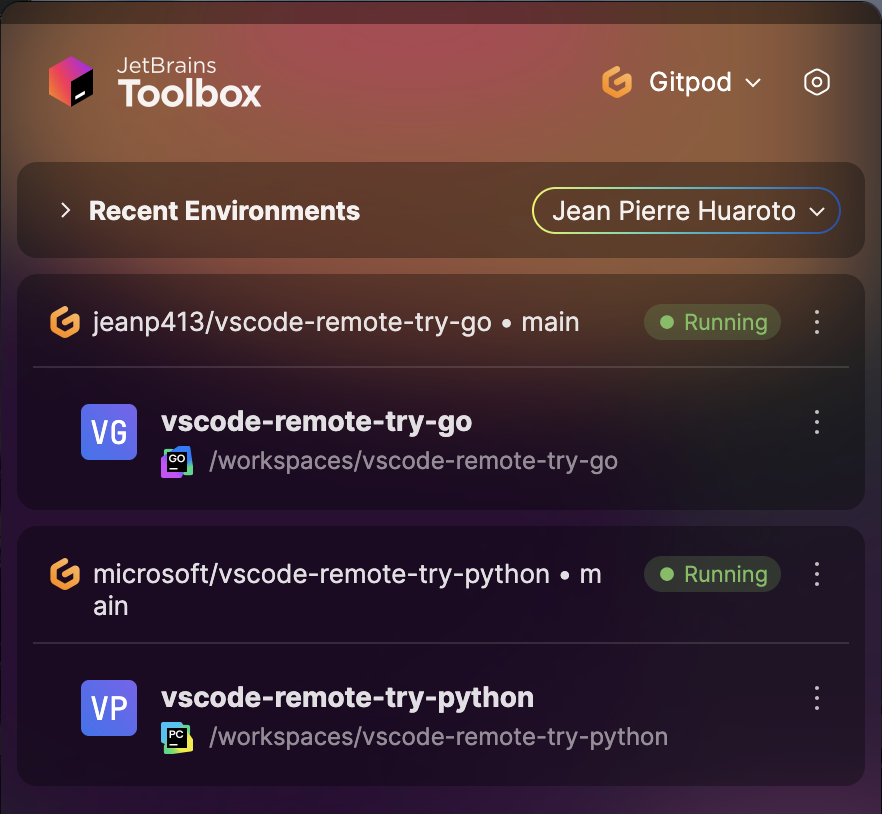 ## Rebuilding Dev Containers
When rebuilding a devcontainer:
1. Close your current IDE window
2. Wait for rebuild to complete
3. Return to Ona
4. Select the IDE in the action bar to reconnect
## Troubleshooting
### Connection Issues
If your IDE doesn't connect:
1. Verify JetBrains Toolbox is running
2. Ensure your environment is running in Ona
3. Try closing the IDE and reopening from Ona
### Collecting Toolbox Logs
For persistent issues:
1. Open JetBrains Toolbox
2. Navigate to Settings → About
3. Click "Show log files"
4. Locate `toolbox.log`
5. Send to [support@ona.com](mailto:support@ona.com)
## Rebuilding Dev Containers
When rebuilding a devcontainer:
1. Close your current IDE window
2. Wait for rebuild to complete
3. Return to Ona
4. Select the IDE in the action bar to reconnect
## Troubleshooting
### Connection Issues
If your IDE doesn't connect:
1. Verify JetBrains Toolbox is running
2. Ensure your environment is running in Ona
3. Try closing the IDE and reopening from Ona
### Collecting Toolbox Logs
For persistent issues:
1. Open JetBrains Toolbox
2. Navigate to Settings → About
3. Click "Show log files"
4. Locate `toolbox.log`
5. Send to [support@ona.com](mailto:support@ona.com)

 ## Prerequisites
Before starting, ensure that you have the following:
1. [VS Code](https://code.visualstudio.com/download) installed.
2. The [Ona](https://marketplace.visualstudio.com/items?itemName=gitpod.gitpod-flex) extension for VS Code installed and enabled.
3. The [Remote - SSH](https://marketplace.visualstudio.com/items?itemName=ms-vscode-remote.remote-ssh) extension installed and enabled in VS Code.
> **Tip**: Keep your VS Code and extensions updated for the best experience.
## Opening an Environment
### VS Code
1. Start an environment in Ona
2. Open in **VS Code**
* While the environment is starting, you can click the **Open in VS Code** button on the action bar. This button is available at any stage—even when the environment is not fully running yet.
## Prerequisites
Before starting, ensure that you have the following:
1. [VS Code](https://code.visualstudio.com/download) installed.
2. The [Ona](https://marketplace.visualstudio.com/items?itemName=gitpod.gitpod-flex) extension for VS Code installed and enabled.
3. The [Remote - SSH](https://marketplace.visualstudio.com/items?itemName=ms-vscode-remote.remote-ssh) extension installed and enabled in VS Code.
> **Tip**: Keep your VS Code and extensions updated for the best experience.
## Opening an Environment
### VS Code
1. Start an environment in Ona
2. Open in **VS Code**
* While the environment is starting, you can click the **Open in VS Code** button on the action bar. This button is available at any stage—even when the environment is not fully running yet.
 * Alternatively, use the **VS Code** icon from the sidebar to launch the environment.
 3. VS Code should open or you should see a dialog asking you to open. See **Prerequisites** if you cannot open VS Code.
 ### VS Code Insiders
You can select **VS Code Insiders** from the editor selector dropdown by clicking on the dropdown arrow next to the editor button on the action bar.
### VS Code Insiders
You can select **VS Code Insiders** from the editor selector dropdown by clicking on the dropdown arrow next to the editor button on the action bar.
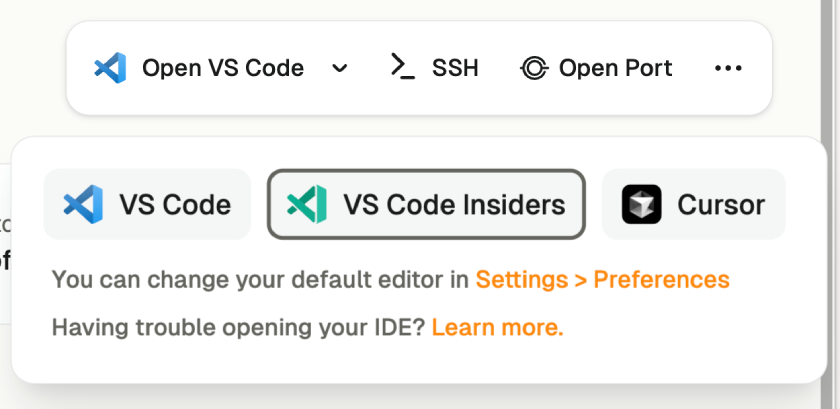 ## Install and Sign In
#### 1. Install the Ona Extension
After opening, VS Code will prompt you to install the **Ona** extension if it's not already installed.
* Click **Allow** when prompted.
## Install and Sign In
#### 1. Install the Ona Extension
After opening, VS Code will prompt you to install the **Ona** extension if it's not already installed.
* Click **Allow** when prompted.
 > **Note**: The extension will make changes to your local SSH configuration to enable a smooth experience. This allows for seamless connectivity between VS Code and your environments.
#### 2. Install Remote Development Extensions
The integration requires both the **Remote - SSH** extension to function. If this is not already installed, VS Code will notify you to add it.
* Click **Install** to add this dependency.
> **Note**: The extension will make changes to your local SSH configuration to enable a smooth experience. This allows for seamless connectivity between VS Code and your environments.
#### 2. Install Remote Development Extensions
The integration requires both the **Remote - SSH** extension to function. If this is not already installed, VS Code will notify you to add it.
* Click **Install** to add this dependency.
 #### 3. Authenticate with Ona
VS Code will then ask you to authenticate with your Ona account:
1. Click **Open** when prompted to navigate to the Ona authentication page.
#### 3. Authenticate with Ona
VS Code will then ask you to authenticate with your Ona account:
1. Click **Open** when prompted to navigate to the Ona authentication page.
 2. Follow the authentication process to complete the sign-in.
 3. After signing in, you will be redirected back to VS Code and the page can be closed.
> **Note**: If you encounter any issues during the sign-in process, it may be helpful to sign out and try again.
## Workspace Trust
When connecting to a new environment, VS Code may prompt you to trust the workspace. This is a standard security measure for potentially untrusted code. For more information, refer to the [VS Code documentation](https://code.visualstudio.com/editor/workspace-trust).
Ona environments always run in isolated VMs, ensuring that code doesn't access secrets outside the environment. The environment remains secure regardless of how you access it. If you're familiar with the repository, you can safely click **Trust Folder & Continue**.
3. After signing in, you will be redirected back to VS Code and the page can be closed.
> **Note**: If you encounter any issues during the sign-in process, it may be helpful to sign out and try again.
## Workspace Trust
When connecting to a new environment, VS Code may prompt you to trust the workspace. This is a standard security measure for potentially untrusted code. For more information, refer to the [VS Code documentation](https://code.visualstudio.com/editor/workspace-trust).
Ona environments always run in isolated VMs, ensuring that code doesn't access secrets outside the environment. The environment remains secure regardless of how you access it. If you're familiar with the repository, you can safely click **Trust Folder & Continue**.
 ## Managing Your Environment
Once connected, you can manage your environment directly from VS Code:
### Viewing Environment Details
* Check the status, active branch, and logs using the **Environment Details** panel.
* If you closed the panel, re-open it using the `Ona: Show Environment Details` command from the Command Palette.
## Managing Your Environment
Once connected, you can manage your environment directly from VS Code:
### Viewing Environment Details
* Check the status, active branch, and logs using the **Environment Details** panel.
* If you closed the panel, re-open it using the `Ona: Show Environment Details` command from the Command Palette.
 > **Note**: Clicking on **details** while opening the environment will also open the **Environment Details** panel.
 ### Accessing Commands
* Open the Command Palette (`Cmd+Shift+P` or `Ctrl+Shift+P`) and type `Ona` to view commands such as:
### Accessing Commands
* Open the Command Palette (`Cmd+Shift+P` or `Ctrl+Shift+P`) and type `Ona` to view commands such as:
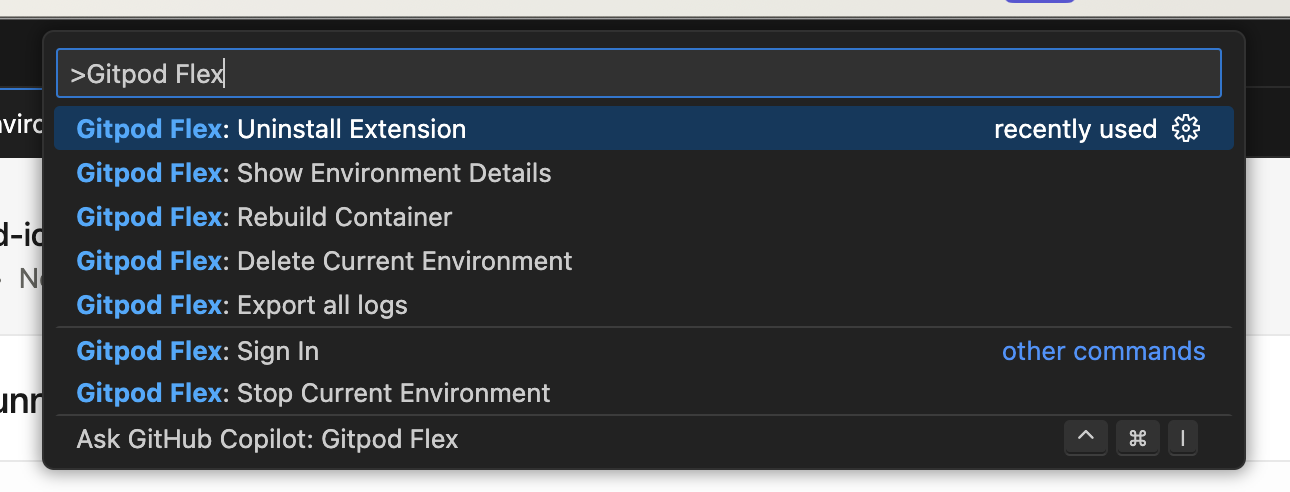 * Clicking on the **remote indicator** in the bottom-left corner of the remote window also shows a quick menu of Ona commands.
 ### Rebuild
Rebuilding is necessary to apply changes made to `.devcontainer.json`, `Dockerfile`, or `docker-compose.yml` files to the container. This process ensures that your development environment reflects the latest configuration updates.
To rebuild the container, you have two options:
1. **Command Palette**: Use `Ona: Rebuild Container`
2. **Rebuild Prompt**: VS Code detects changes and prompts
### Rebuild
Rebuilding is necessary to apply changes made to `.devcontainer.json`, `Dockerfile`, or `docker-compose.yml` files to the container. This process ensures that your development environment reflects the latest configuration updates.
To rebuild the container, you have two options:
1. **Command Palette**: Use `Ona: Rebuild Container`
2. **Rebuild Prompt**: VS Code detects changes and prompts
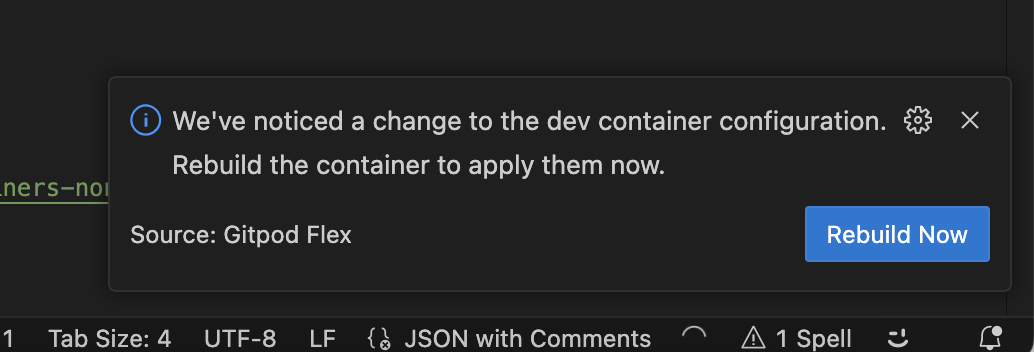 While the container is rebuilding, you will be disconnected and automatically reconnected when it's finished. You can inspect the details view to learn about the progress and inspect logs.
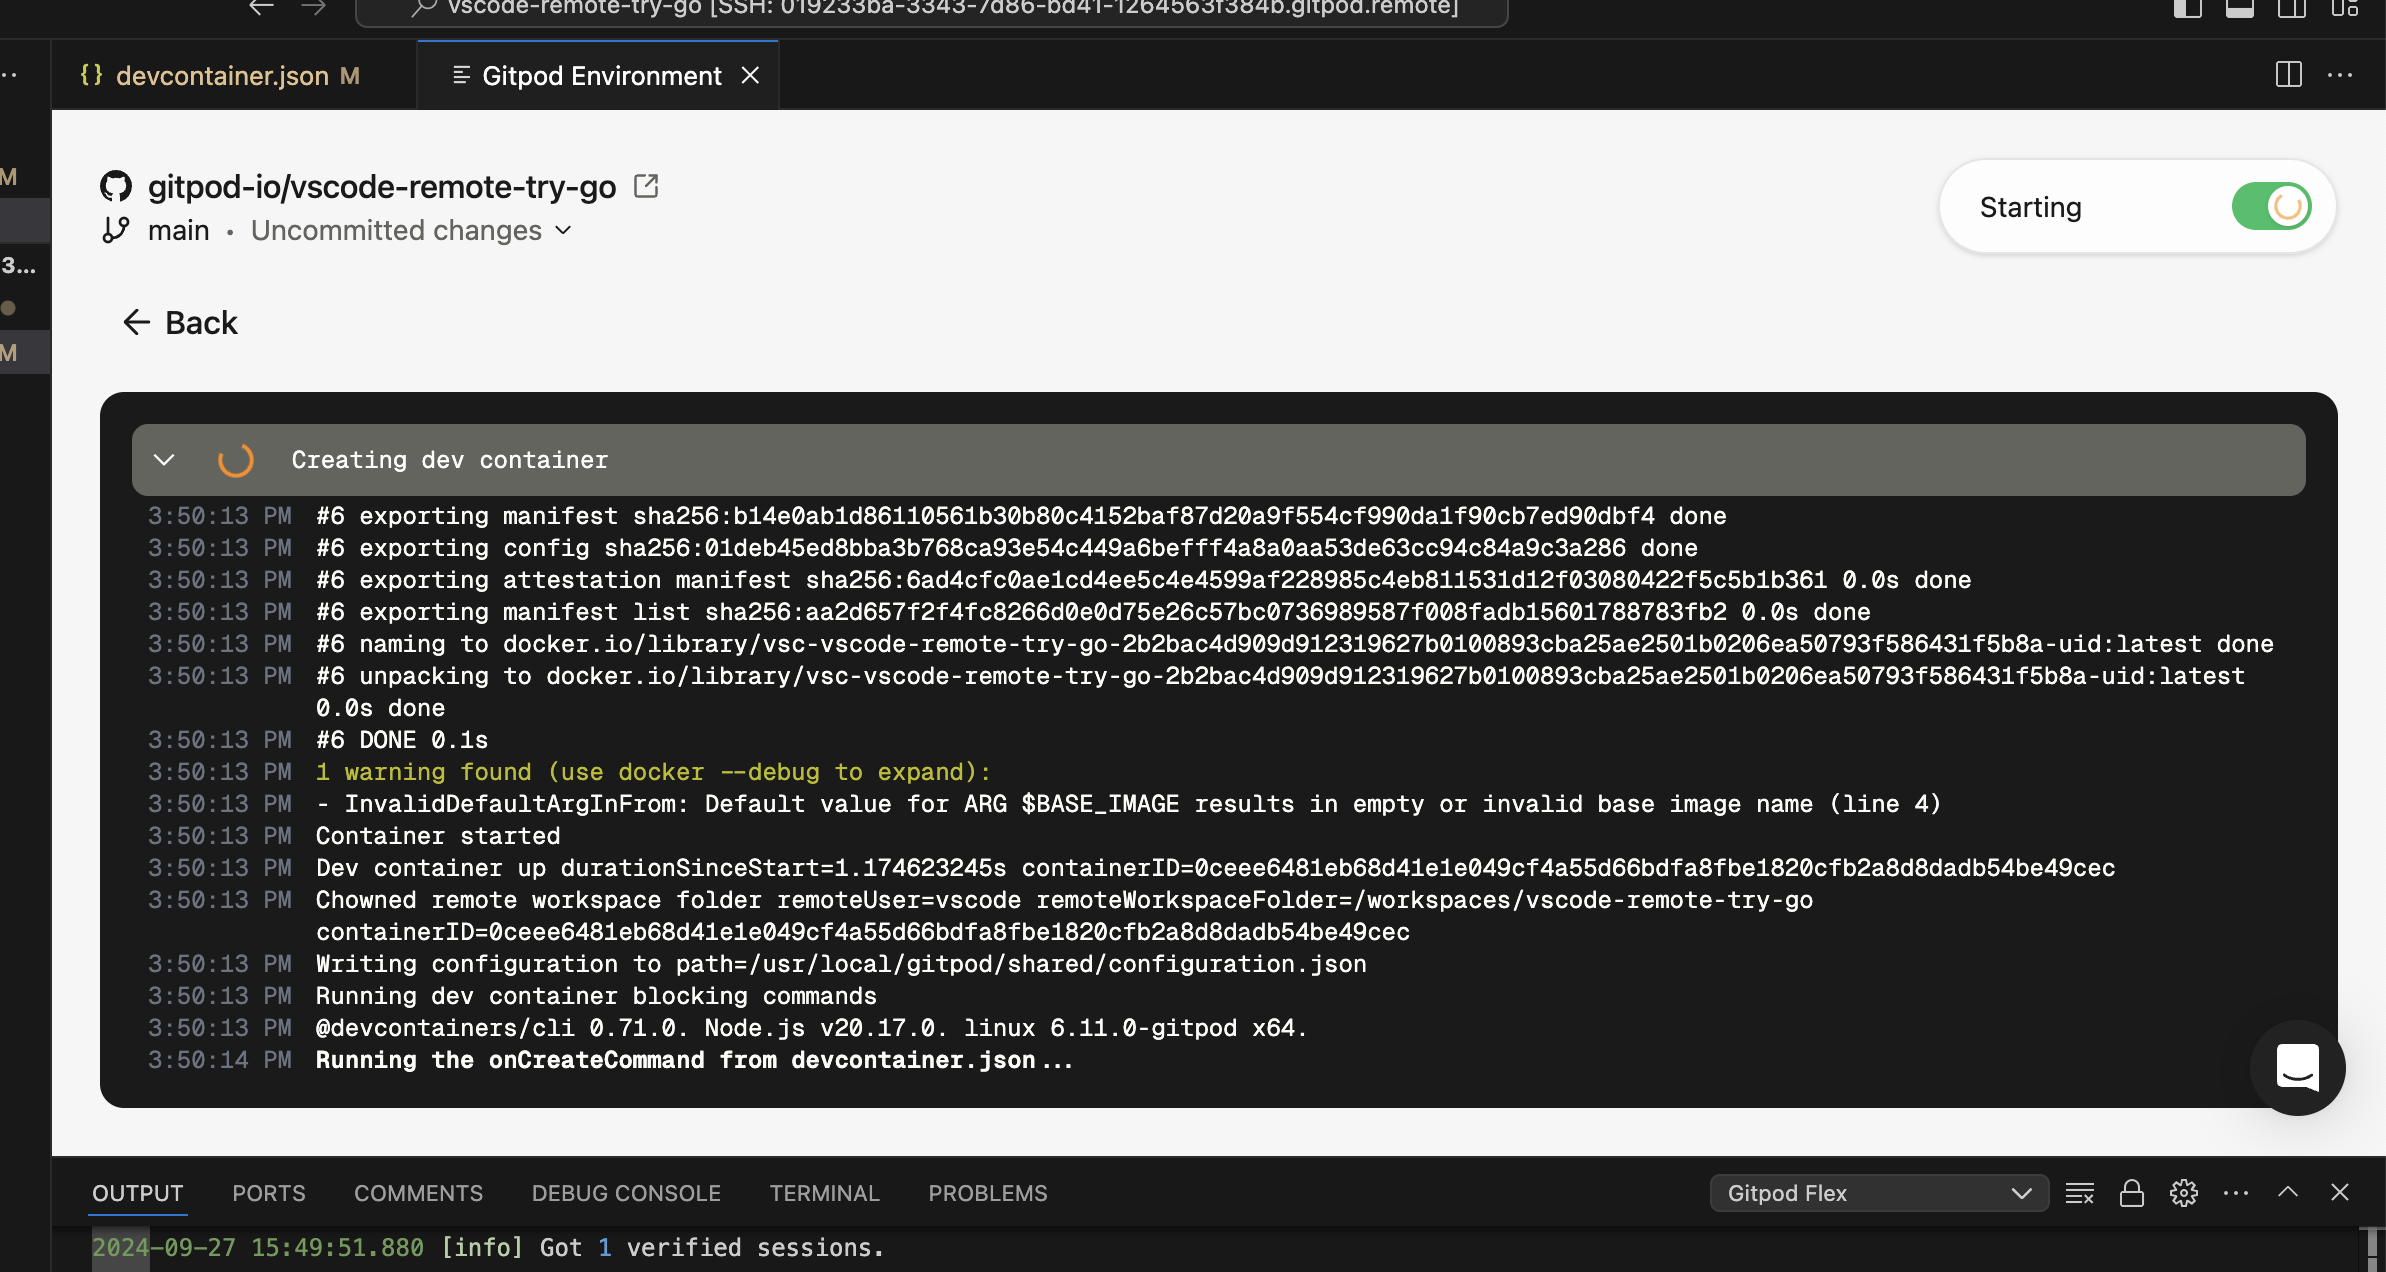 ## Troubleshooting
### Limitations
Currently there are a couple limitations related to the devcontainer specification:
* Port forwarding does not work for hosts other than `localhost`. For instance, forwarding ports from other services specified in a docker-compose.yml .
* ✅ Workaround: Use `network_mode: host` in your docker-compose.yml for the services you want to port forward.
* `remoteEnv` environment variables values are not applied unless the devcontainer is rebuilt.
### Build Issues
If the initial build or a rebuild fails, you will enter recovery mode.
When a build failure occurs:
1. A modal will appear notifying you of the failure.
## Troubleshooting
### Limitations
Currently there are a couple limitations related to the devcontainer specification:
* Port forwarding does not work for hosts other than `localhost`. For instance, forwarding ports from other services specified in a docker-compose.yml .
* ✅ Workaround: Use `network_mode: host` in your docker-compose.yml for the services you want to port forward.
* `remoteEnv` environment variables values are not applied unless the devcontainer is rebuilt.
### Build Issues
If the initial build or a rebuild fails, you will enter recovery mode.
When a build failure occurs:
1. A modal will appear notifying you of the failure.
 2. Pay close attention to the error messages in the details view.
 3. Inspect the logs as necessary to understand the root cause of the failure.
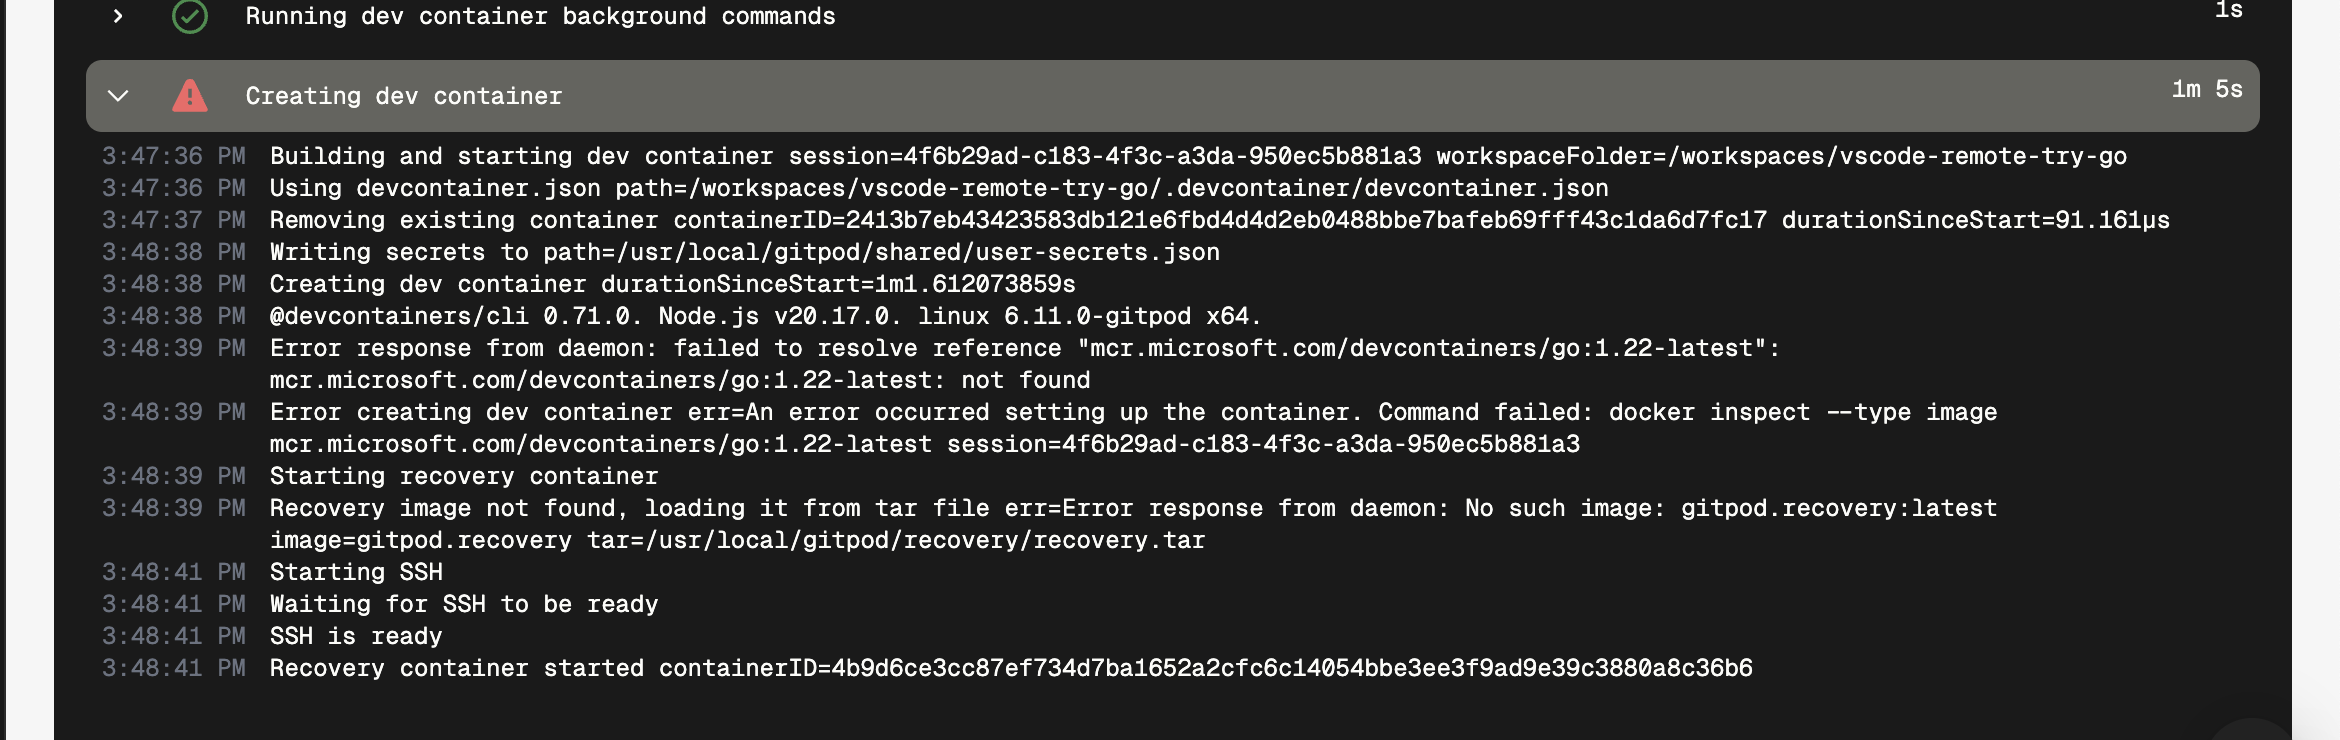 4. Make the required changes to the `.devcontainer.json` file to address the issue.
5. Trigger a rebuild using the `Ona: Rebuild Container` command.
> **Important**: The recovery mode is not stable for development. Always aim to fix the configuration and successfully rebuild the container.
### Authentication Issues
If you're experiencing authentication issues or need to switch accounts:
1. Use the `Ona: Sign Out` command to sign out.
2. Confirm the sign-out when prompted.
3. You can then sign in again with the same or a different account.
### Connection Issues After Dev Container Rebuild
If you are unable to reliably connect to an environment after rebuilding a Dev Container in macOS:
1. Allow VS Code's "Code Helper.app" program in your local machine's firewall.
2. After updating firewall settings, restart VS Code, rebuild the Dev Container, and it should reconnect successfully.
### General Issues
If you encounter unexpected problems:
1. Check the `Ona` output view for any useful information.
2. Check your network settings, sometimes the VPN or firewall settings can interfere with the connection.
3. When sharing reports with us:
* Use `Developer: Set Log Level...` command to Trace, it would give us more insights. Remember to set it back to Info afterwards.
* In your VS Code settings, set `remote.SSH.logLevel` to `trace`.
* Use the `Ona: Export all logs` command from the problematic window. This will contain all relevant logs.
> **Note**: Be cautious when sharing logs on the internet, as they may contain sensitive information.
## Uninstalling
When uninstalling the Ona extension, simply removing the extension from VS Code is not sufficient for a complete uninstall. Using the `Uninstall Extension` command ensures that all associated configurations, including SSH settings, are properly cleaned up.
1. Use the `Ona: Uninstall Extension` command to initiate the uninstallation process.
2. Follow the prompts to complete the uninstallation process.
If you've already uninstalled the extension without using the command, you can install it again and then use the uninstall command.
# VS Code Browser
Source: https://ona.com/docs/ona/editors/vscode-browser
You can connect to your environments using VS Code in the browser, providing a zero-install, “ready to code” experience.
This guide will walk you through the setup process and provide tips for managing and troubleshooting within VS Code Browser.
4. Make the required changes to the `.devcontainer.json` file to address the issue.
5. Trigger a rebuild using the `Ona: Rebuild Container` command.
> **Important**: The recovery mode is not stable for development. Always aim to fix the configuration and successfully rebuild the container.
### Authentication Issues
If you're experiencing authentication issues or need to switch accounts:
1. Use the `Ona: Sign Out` command to sign out.
2. Confirm the sign-out when prompted.
3. You can then sign in again with the same or a different account.
### Connection Issues After Dev Container Rebuild
If you are unable to reliably connect to an environment after rebuilding a Dev Container in macOS:
1. Allow VS Code's "Code Helper.app" program in your local machine's firewall.
2. After updating firewall settings, restart VS Code, rebuild the Dev Container, and it should reconnect successfully.
### General Issues
If you encounter unexpected problems:
1. Check the `Ona` output view for any useful information.
2. Check your network settings, sometimes the VPN or firewall settings can interfere with the connection.
3. When sharing reports with us:
* Use `Developer: Set Log Level...` command to Trace, it would give us more insights. Remember to set it back to Info afterwards.
* In your VS Code settings, set `remote.SSH.logLevel` to `trace`.
* Use the `Ona: Export all logs` command from the problematic window. This will contain all relevant logs.
> **Note**: Be cautious when sharing logs on the internet, as they may contain sensitive information.
## Uninstalling
When uninstalling the Ona extension, simply removing the extension from VS Code is not sufficient for a complete uninstall. Using the `Uninstall Extension` command ensures that all associated configurations, including SSH settings, are properly cleaned up.
1. Use the `Ona: Uninstall Extension` command to initiate the uninstallation process.
2. Follow the prompts to complete the uninstallation process.
If you've already uninstalled the extension without using the command, you can install it again and then use the uninstall command.
# VS Code Browser
Source: https://ona.com/docs/ona/editors/vscode-browser
You can connect to your environments using VS Code in the browser, providing a zero-install, “ready to code” experience.
This guide will walk you through the setup process and provide tips for managing and troubleshooting within VS Code Browser.
 ## Opening an Environment
1. Start an environment in Ona
2. Open in **VS Code Browser**
* While the environment is starting, you can click the **Open in VS Code Browser** button on the action bar, which is possible even when the environment is not fully running yet. VS Code Browser should open in a new tab.
## Opening an Environment
1. Start an environment in Ona
2. Open in **VS Code Browser**
* While the environment is starting, you can click the **Open in VS Code Browser** button on the action bar, which is possible even when the environment is not fully running yet. VS Code Browser should open in a new tab.
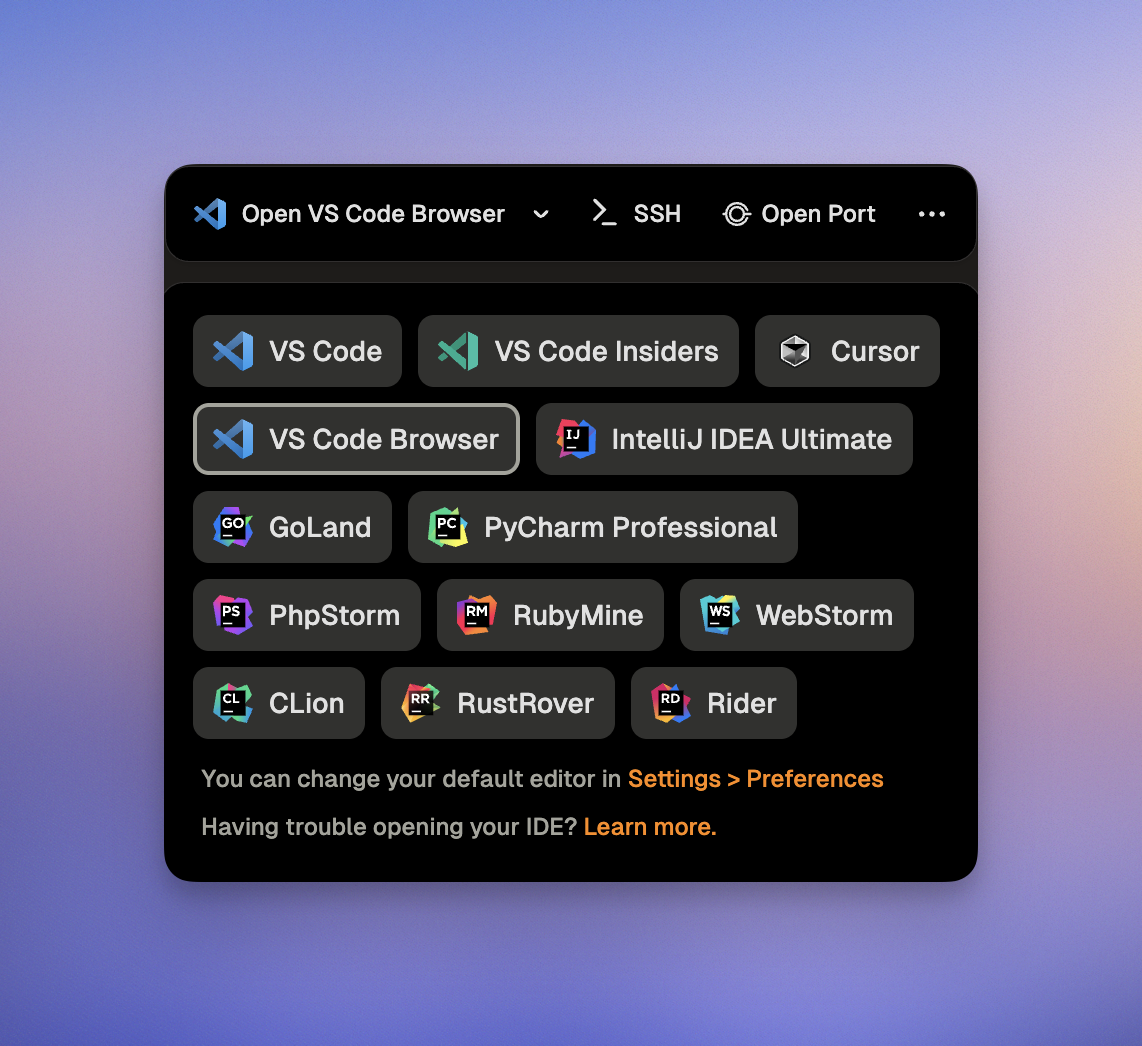 3. VS Code Browser will then ask you to authenticate with your Ona account:
1. Click **Allow** when prompted to sign in to navigate to the Ona authentication page.
3. VS Code Browser will then ask you to authenticate with your Ona account:
1. Click **Allow** when prompted to sign in to navigate to the Ona authentication page.
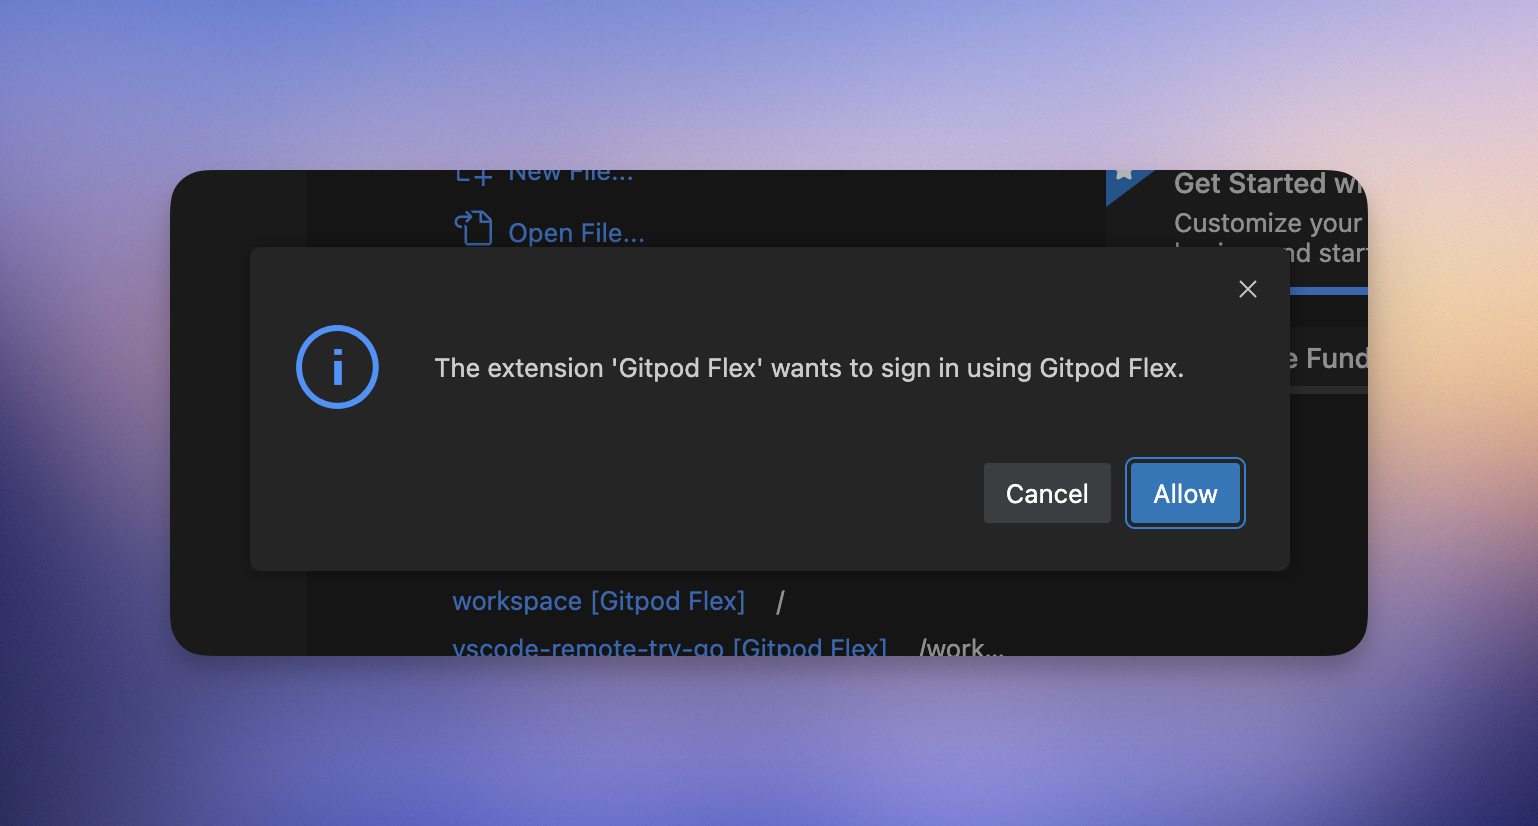 2. Follow the authentication process to complete the sign-in.
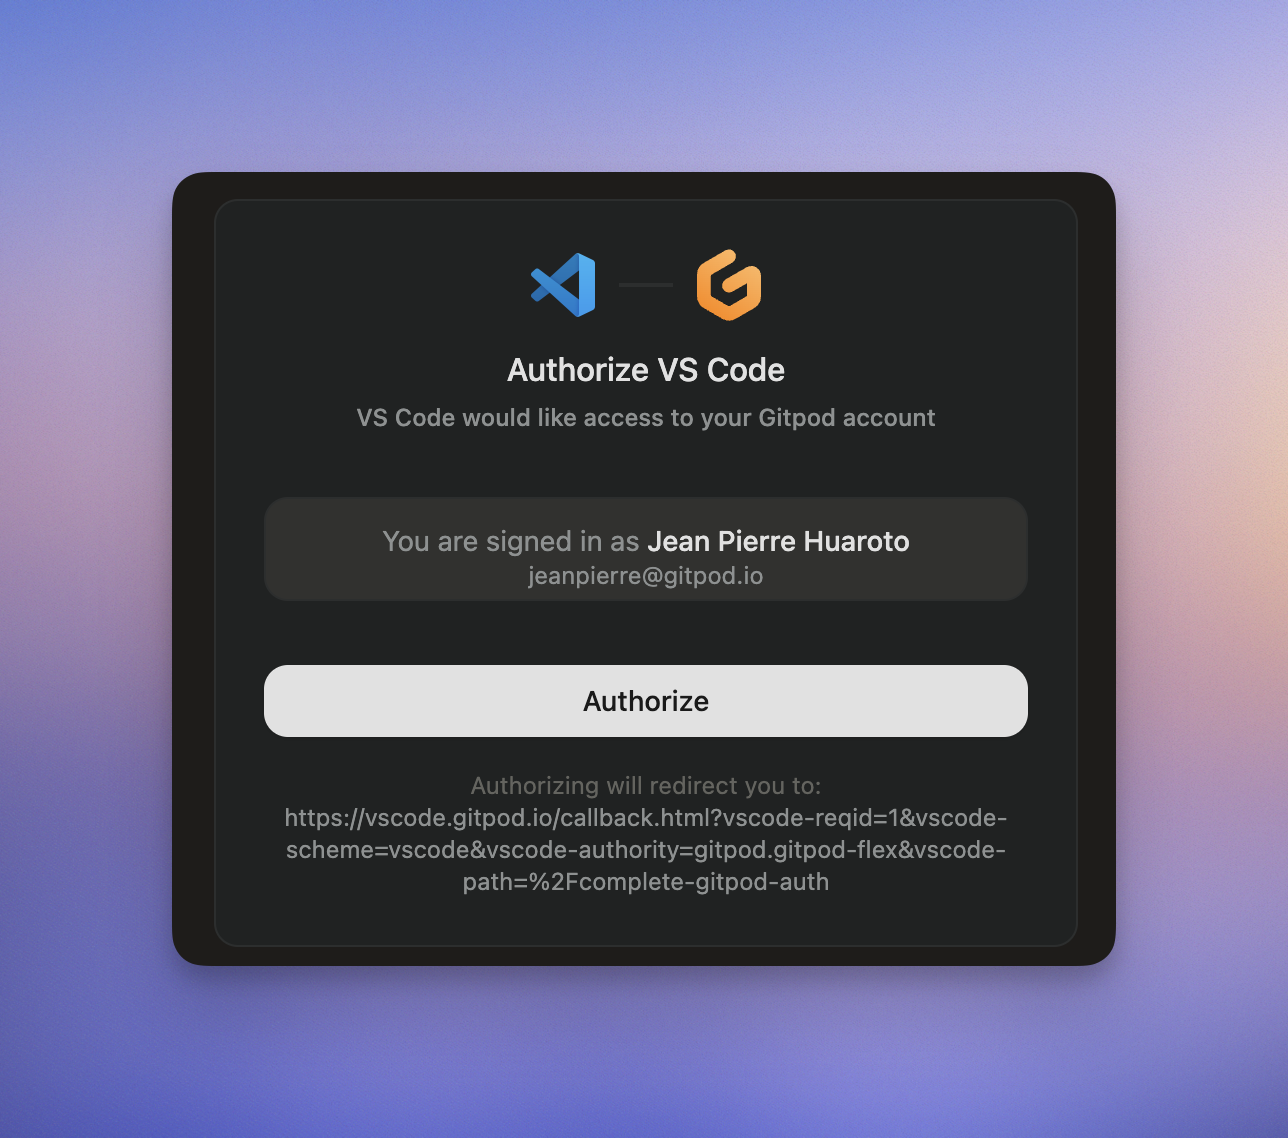 3. After signing in, you will be redirected back to VS Code and the page can be closed.
> **Note**: If you encounter any issues during the sign-in process, it may be helpful to sign out and try again.
## Managing Your Environment
Once connected, you can manage your environment directly from VS Code in the Browser:
### Viewing Environment Details
* Check the status, active branch, and logs using the **Environment Details** panel.
* If you closed the panel, re-open it using the `Ona: Show Environment Details` command from the Command Palette.
3. After signing in, you will be redirected back to VS Code and the page can be closed.
> **Note**: If you encounter any issues during the sign-in process, it may be helpful to sign out and try again.
## Managing Your Environment
Once connected, you can manage your environment directly from VS Code in the Browser:
### Viewing Environment Details
* Check the status, active branch, and logs using the **Environment Details** panel.
* If you closed the panel, re-open it using the `Ona: Show Environment Details` command from the Command Palette.
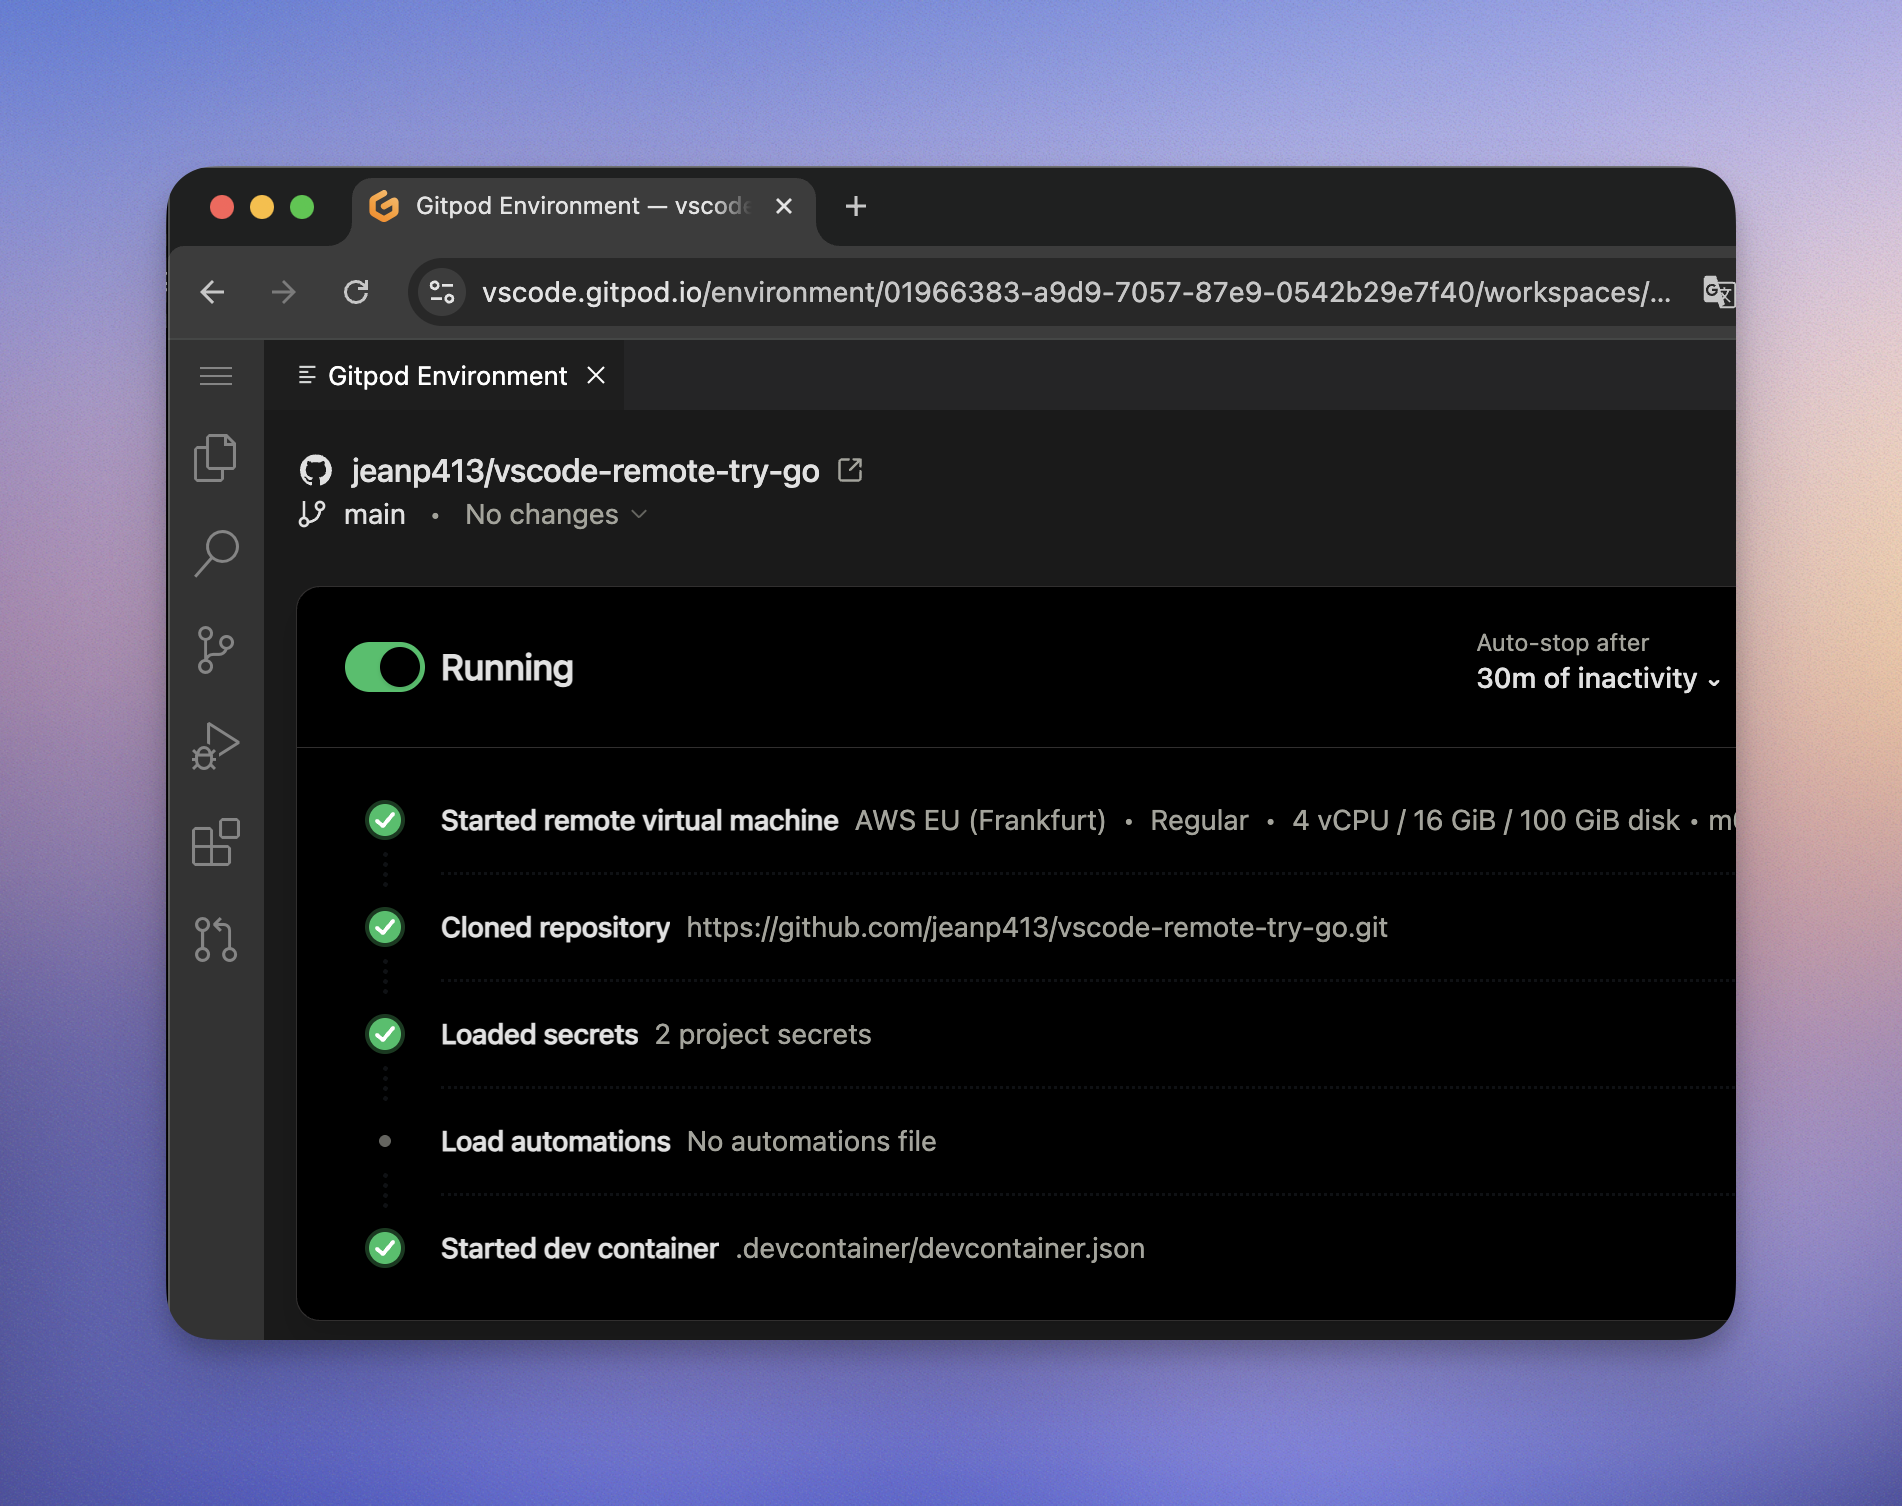 ### Accessing Commands
* Open the Command Palette (`Cmd+Shift+P` or `Ctrl+Shift+P`) and type `Ona` to view commands such as:
### Accessing Commands
* Open the Command Palette (`Cmd+Shift+P` or `Ctrl+Shift+P`) and type `Ona` to view commands such as:
 * Clicking on the **remote indicator** in the bottom-left corner of the window also shows a quick menu of Ona commands.
 ### Rebuild
Rebuilding is necessary to apply changes made to `.devcontainer.json`, `Dockerfile`, or `docker-compose.yml` files to the container. This process ensures that your development environment reflects the latest configuration updates.
To rebuild the container, you have two options:
1. **Command Palette**: Use `Ona: Rebuild Container`
2. **Rebuild Prompt**: VS Code detects changes and prompts
While the container is rebuilding, you will be disconnected and automatically reconnected when it's finished. You can inspect the details view to learn about the progress and inspect logs.
### Settings Sync
Enable Settings Sync to sync all your extensions and other preferences from VS Code Desktop in VS Code Browser, read more about over at the [offical Settings Sync documentation](https://code.visualstudio.com/docs/configure/settings-sync#_turning-on-settings-sync).
## Troubleshooting
### Limitations
The following limitations are present in addition to the [limitations listed for VS Code Desktop](/ona/editors/vscode#limitations):
* For environments using a Docker Compose configuration, it's required to set `network_mode: "host"` on the main service in your Docker Compose file for VS Code Browser to successfully connect to the environment.
* VS Code Browser is not supported for local environments created using Gitpod Desktop.
### Authentication Issues
If you're experiencing authentication issues or need to switch accounts:
1. Use the `Ona: Sign Out` command to sign out.
2. Confirm the sign-out when prompted.
3. You can then sign in again with the same or a different account.
### General Issues
If you encounter unexpected problems:
1. Check the `Ona` output view for any useful information.
2. When sharing reports with us:
* Use `Developer: Set Log Level...` command to Trace, it would give us more insights. Remember to set it back to Info afterwards.
* Use the `Gitpod: Export all logs` command from the problematic window. This will contain all relevant logs.
> **Note**: Be cautious when sharing logs on the internet, as they may contain sensitive information.
# Windsurf
Source: https://ona.com/docs/ona/editors/windsurf
[Windsurf](https://windsurf.com/) uses the same extension as VS Code. Most of [VS Code documentation](/ona/editors/vscode) is applicable to Windsurf. When reaching out to support, please specify that you are using Windsurf as your editor.
## Opening an Environment
You can select Windsurf from the editor selector dropdown by clicking on the dropdown arrow next to the editor button on the action bar.
### Rebuild
Rebuilding is necessary to apply changes made to `.devcontainer.json`, `Dockerfile`, or `docker-compose.yml` files to the container. This process ensures that your development environment reflects the latest configuration updates.
To rebuild the container, you have two options:
1. **Command Palette**: Use `Ona: Rebuild Container`
2. **Rebuild Prompt**: VS Code detects changes and prompts
While the container is rebuilding, you will be disconnected and automatically reconnected when it's finished. You can inspect the details view to learn about the progress and inspect logs.
### Settings Sync
Enable Settings Sync to sync all your extensions and other preferences from VS Code Desktop in VS Code Browser, read more about over at the [offical Settings Sync documentation](https://code.visualstudio.com/docs/configure/settings-sync#_turning-on-settings-sync).
## Troubleshooting
### Limitations
The following limitations are present in addition to the [limitations listed for VS Code Desktop](/ona/editors/vscode#limitations):
* For environments using a Docker Compose configuration, it's required to set `network_mode: "host"` on the main service in your Docker Compose file for VS Code Browser to successfully connect to the environment.
* VS Code Browser is not supported for local environments created using Gitpod Desktop.
### Authentication Issues
If you're experiencing authentication issues or need to switch accounts:
1. Use the `Ona: Sign Out` command to sign out.
2. Confirm the sign-out when prompted.
3. You can then sign in again with the same or a different account.
### General Issues
If you encounter unexpected problems:
1. Check the `Ona` output view for any useful information.
2. When sharing reports with us:
* Use `Developer: Set Log Level...` command to Trace, it would give us more insights. Remember to set it back to Info afterwards.
* Use the `Gitpod: Export all logs` command from the problematic window. This will contain all relevant logs.
> **Note**: Be cautious when sharing logs on the internet, as they may contain sensitive information.
# Windsurf
Source: https://ona.com/docs/ona/editors/windsurf
[Windsurf](https://windsurf.com/) uses the same extension as VS Code. Most of [VS Code documentation](/ona/editors/vscode) is applicable to Windsurf. When reaching out to support, please specify that you are using Windsurf as your editor.
## Opening an Environment
You can select Windsurf from the editor selector dropdown by clicking on the dropdown arrow next to the editor button on the action bar.
 # Zed
Source: https://ona.com/docs/ona/editors/zed
## Connecting an environment to Zed
Ona works with any remote and SSH compatible editor, including [Zed](https://zed.dev/download).
### Step 1 - Install the CLI and setup your SSH configuration
The easiest way to setup SSH configuration is by installing the [Ona CLI](/ona/integrations/cli).
Once installed, run `gitpod env ssh-config` to update your **local** SSH configuration.
To validate ensure the directory `~/.ssh/gitpod` is created on your local machine.
### Step 2 - Find the host for your environment
You can find the host name on your started environment details page.
The host format is: `
# Zed
Source: https://ona.com/docs/ona/editors/zed
## Connecting an environment to Zed
Ona works with any remote and SSH compatible editor, including [Zed](https://zed.dev/download).
### Step 1 - Install the CLI and setup your SSH configuration
The easiest way to setup SSH configuration is by installing the [Ona CLI](/ona/integrations/cli).
Once installed, run `gitpod env ssh-config` to update your **local** SSH configuration.
To validate ensure the directory `~/.ssh/gitpod` is created on your local machine.
### Step 2 - Find the host for your environment
You can find the host name on your started environment details page.
The host format is: `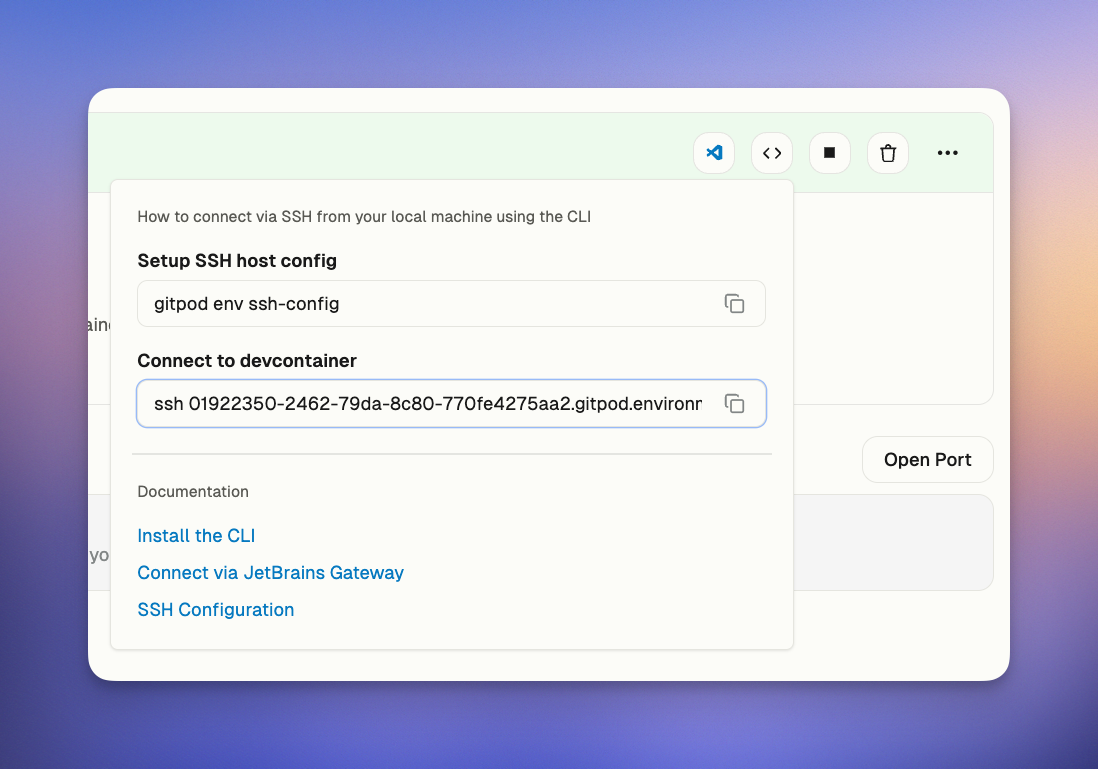 > **Note:** You do not need the `ssh` command when connecting to JetBrains.
### Step 3 - Connect with your environment
In Zed open the remote projects dialogue with `cmd-shift-p remote`. - Add a connection. - Insert the SSH host from above.
> **Note:** You do not need the `ssh` command when connecting to JetBrains.
### Step 3 - Connect with your environment
In Zed open the remote projects dialogue with `cmd-shift-p remote`. - Add a connection. - Insert the SSH host from above.
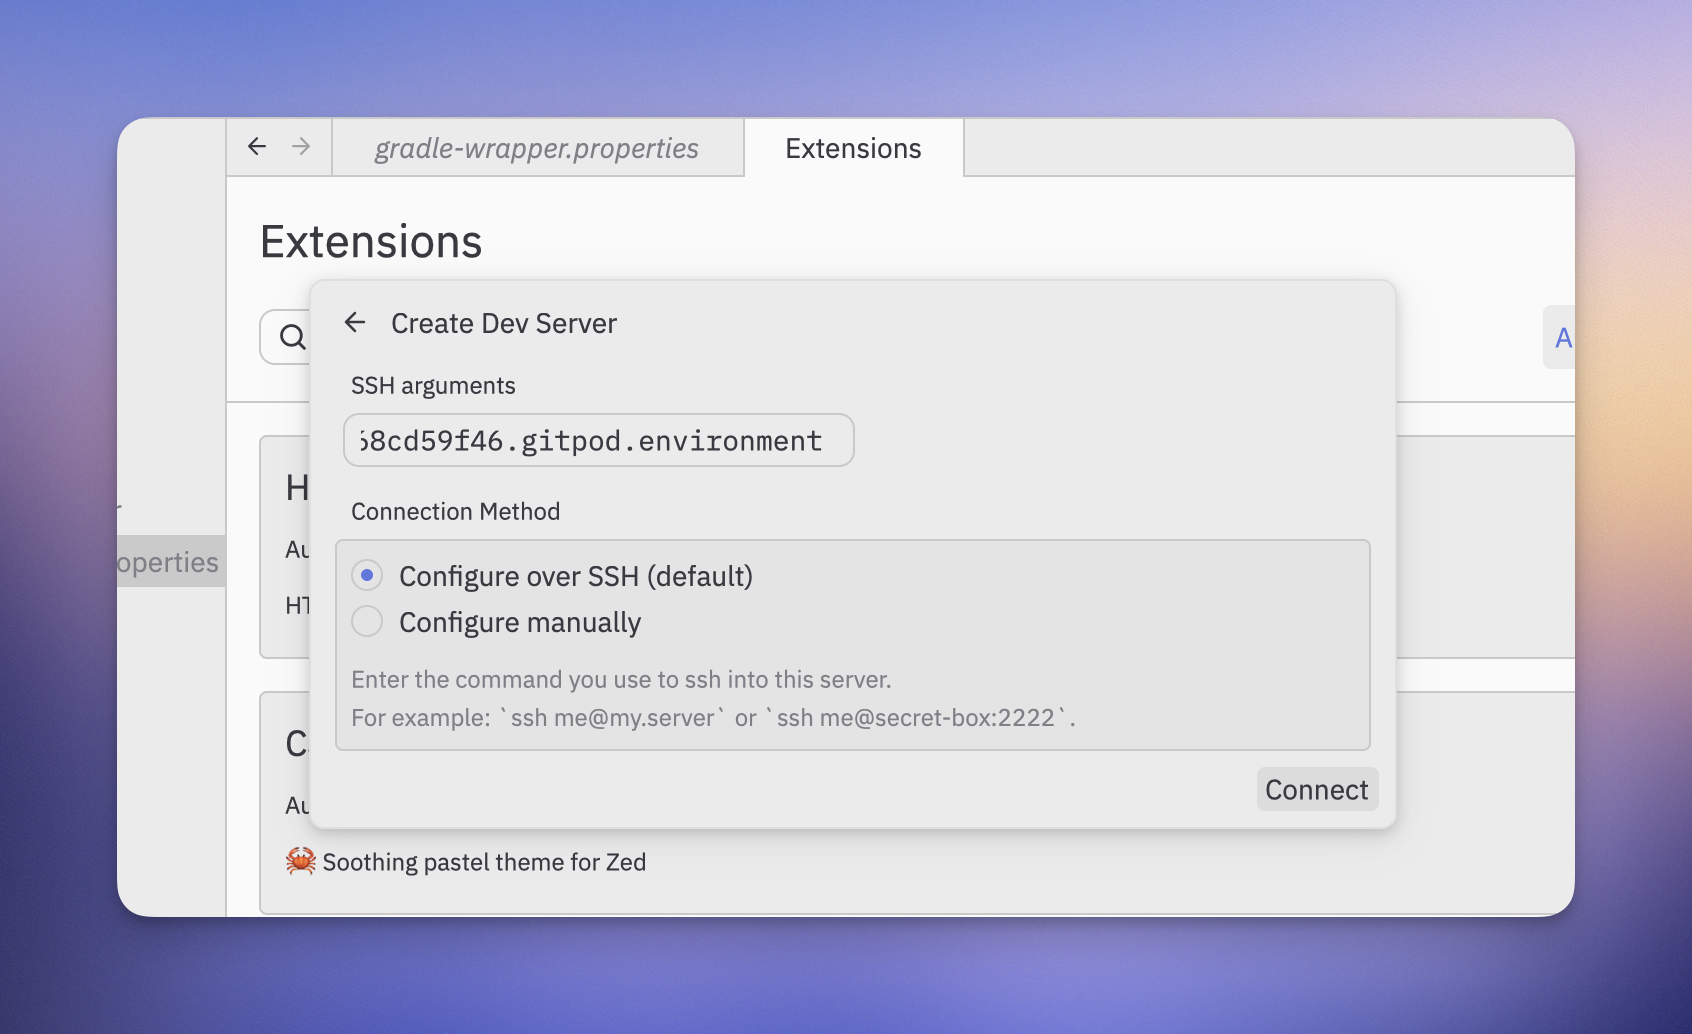 See [zed documentation](https://zed.dev/remote-development) for more.
***
title: 'Zed'
description: ''
---------------
Coming soon.
# Archive & Auto-delete
Source: https://ona.com/docs/ona/environments/archive-auto-delete
Automatically manage inactive environments to optimize storage costs
Archive & Auto-delete automatically manages inactive environments through a two-stage lifecycle: archival after 7 days of inactivity, then auto-deletion based on configurable policies.
## How it works
1. **Automatic archiving**: After 7 days of inactivity (fixed)
2. **Configurable auto-deletion**: After 1, 2, or 4 weeks, or never
### Environment lifecycle
```mermaid
graph LR
A[Active] -->|7 days inactive| B[Archived]
B -->|After 1w, 2w, or 4w| C[Auto-deleted]
B -->|Unarchive| A
B -->|Delete| D[Deleted]
```
## Automatic archiving
Environments are archived when stopped for 7 consecutive days (fixed period).
Archived environments:
* Move to a separate archive view
* Can be unarchived or deleted
## Accessing archived environments
See [zed documentation](https://zed.dev/remote-development) for more.
***
title: 'Zed'
description: ''
---------------
Coming soon.
# Archive & Auto-delete
Source: https://ona.com/docs/ona/environments/archive-auto-delete
Automatically manage inactive environments to optimize storage costs
Archive & Auto-delete automatically manages inactive environments through a two-stage lifecycle: archival after 7 days of inactivity, then auto-deletion based on configurable policies.
## How it works
1. **Automatic archiving**: After 7 days of inactivity (fixed)
2. **Configurable auto-deletion**: After 1, 2, or 4 weeks, or never
### Environment lifecycle
```mermaid
graph LR
A[Active] -->|7 days inactive| B[Archived]
B -->|After 1w, 2w, or 4w| C[Auto-deleted]
B -->|Unarchive| A
B -->|Delete| D[Deleted]
```
## Automatic archiving
Environments are archived when stopped for 7 consecutive days (fixed period).
Archived environments:
* Move to a separate archive view
* Can be unarchived or deleted
## Accessing archived environments
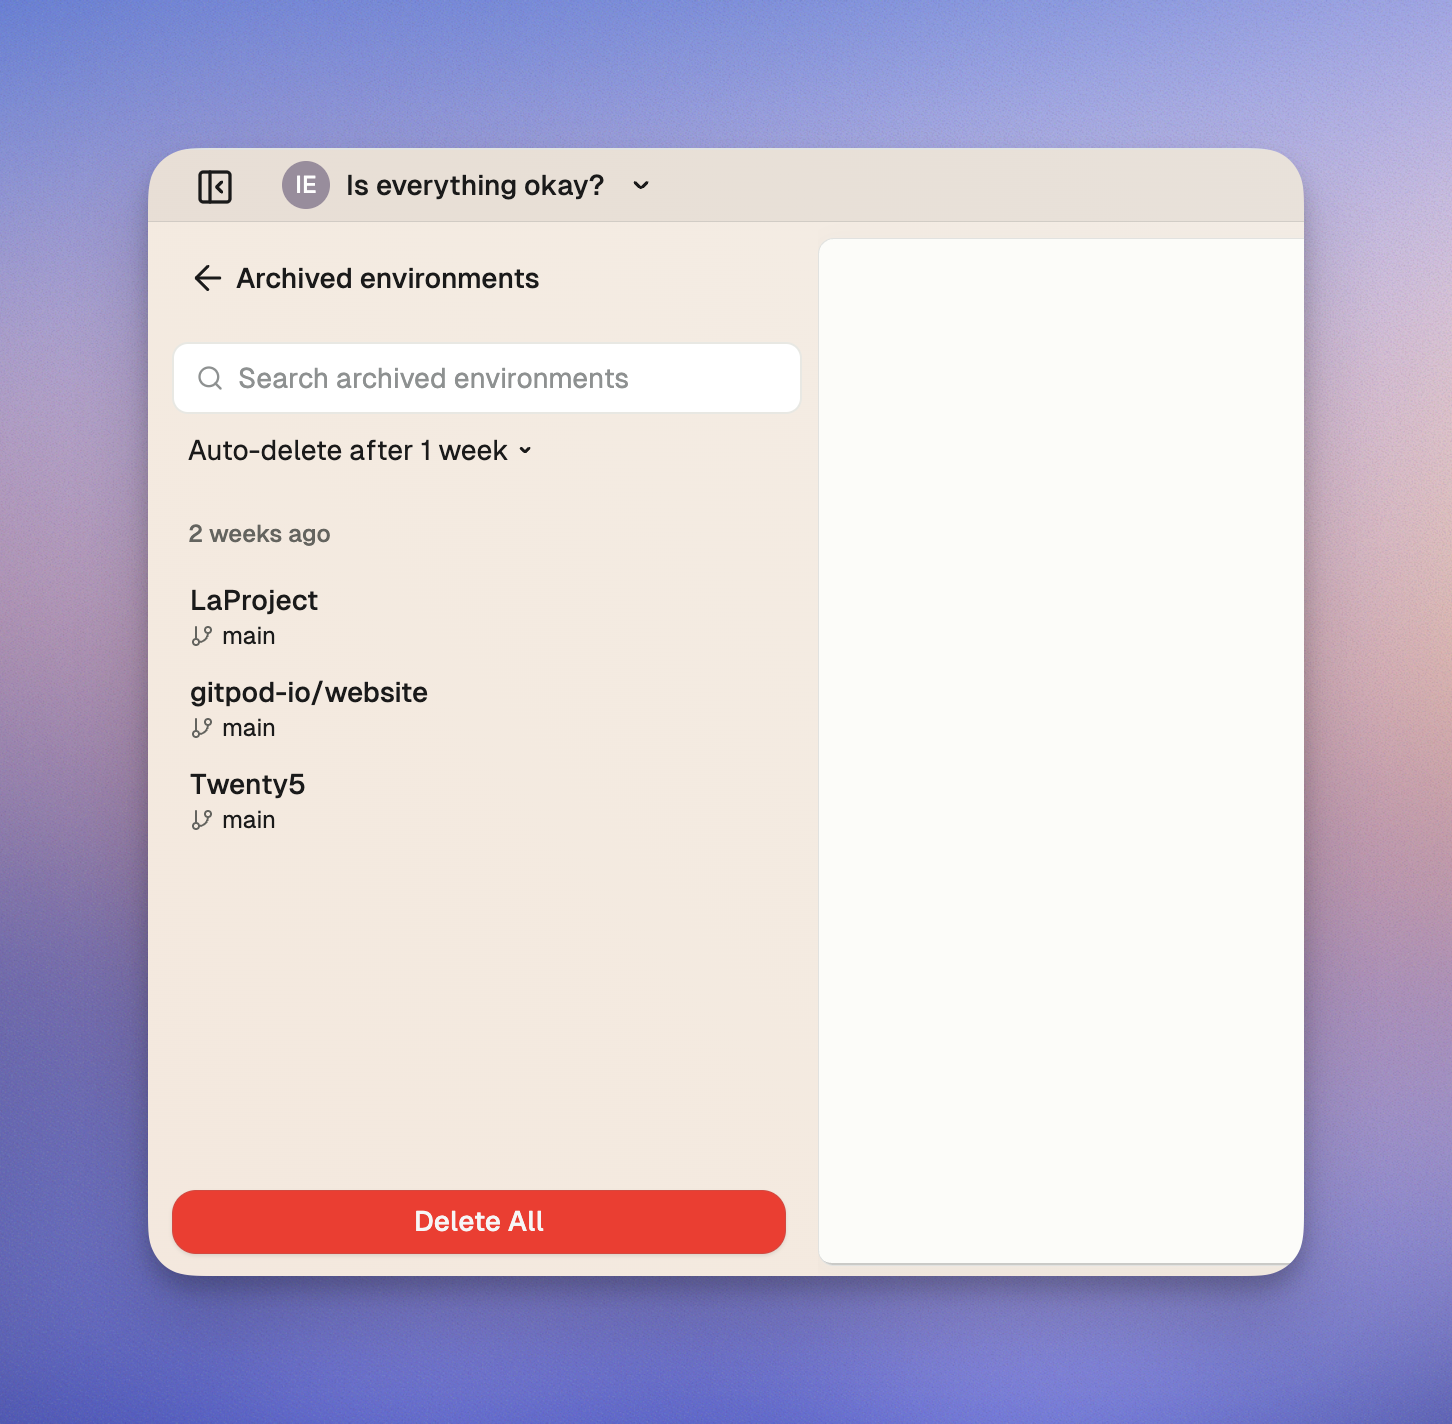 *The Archive view shows all archived environments*
## Managing archived environments
### Archive view organization
Environments are grouped by when they were archived:
* **1 week ago**
* **2 weeks ago**
* **1+ month ago**
### Available actions
*The Archive view shows all archived environments*
## Managing archived environments
### Archive view organization
Environments are grouped by when they were archived:
* **1 week ago**
* **2 weeks ago**
* **1+ month ago**
### Available actions
 *Hover over an archived environment to see available actions*
#### Unarchive an environment
Hover over the environment and click the restore button to unarchive. The environment returns to your main list immediately.
#### Delete an environment
Hover over the environment and click the delete button to delete. Confirm in the dialog.
> Warning: Deleting an environment permanently removes all content, including code, configurations, and data. This action cannot be undone.
#### Delete all archived environments
*Hover over an archived environment to see available actions*
#### Unarchive an environment
Hover over the environment and click the restore button to unarchive. The environment returns to your main list immediately.
#### Delete an environment
Hover over the environment and click the delete button to delete. Confirm in the dialog.
> Warning: Deleting an environment permanently removes all content, including code, configurations, and data. This action cannot be undone.
#### Delete all archived environments
 *The Delete All button appears at the bottom of the archive view*
Click the **Delete All** button at the bottom and confirm to delete all archived environments.
## Auto-delete configuration
### Setting your preference
*The Delete All button appears at the bottom of the archive view*
Click the **Delete All** button at the bottom and confirm to delete all archived environments.
## Auto-delete configuration
### Setting your preference
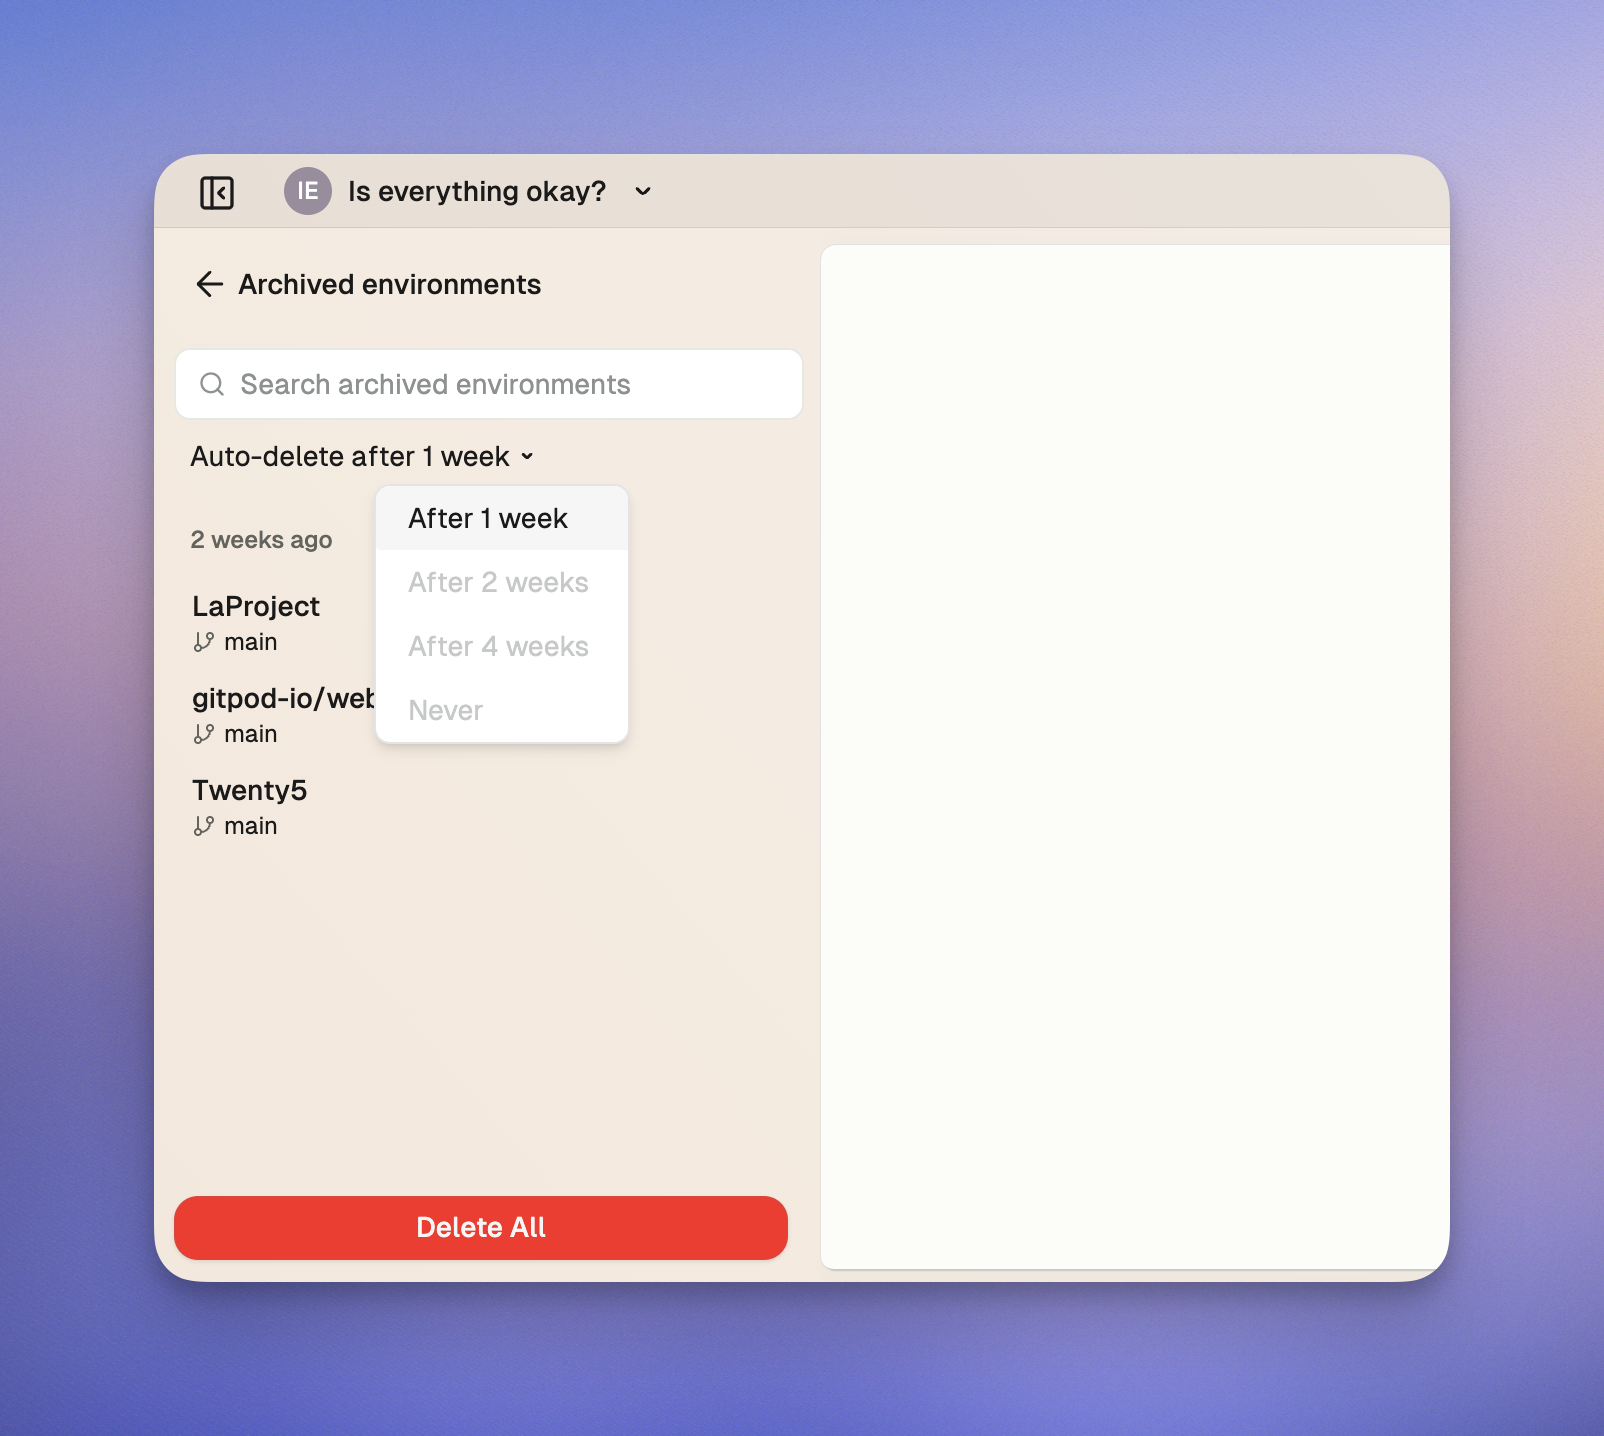 *Configure your auto-delete preference using the dropdown in the archive view*
Select your auto-delete preference from the dropdown:
* **After 1 week**: 14 days total from last use
* **After 2 weeks**: 21 days total from last use
* **After 4 weeks**: 35 days total from last use
* **Never**
### Organization policies
Organization policies override user preferences when more restrictive. Disabled options in the dropdown indicate policy restrictions.
## Best practices
* **Before archiving**: Commit and push important work
* **Team coordination**: Align deletion timelines with your workflow needs
## Frequently asked questions
**When are environments archived?**
After 7 days of inactivity (fixed period).
**Can I recover deleted environments?**
No, deletion is permanent. Only archived environments can be recovered.
**Why are some auto-delete options disabled?**
Your organization policy may enforce maximum retention periods.
**Do running environments get archived?**
No, only stopped environments are archived.
## Troubleshooting
**Can't change auto-delete preference**: Check for organization policy restrictions.
# Getting started
Source: https://ona.com/docs/ona/getting-started
Start building with Ona - mission control for software projects and engineering agents.
*Configure your auto-delete preference using the dropdown in the archive view*
Select your auto-delete preference from the dropdown:
* **After 1 week**: 14 days total from last use
* **After 2 weeks**: 21 days total from last use
* **After 4 weeks**: 35 days total from last use
* **Never**
### Organization policies
Organization policies override user preferences when more restrictive. Disabled options in the dropdown indicate policy restrictions.
## Best practices
* **Before archiving**: Commit and push important work
* **Team coordination**: Align deletion timelines with your workflow needs
## Frequently asked questions
**When are environments archived?**
After 7 days of inactivity (fixed period).
**Can I recover deleted environments?**
No, deletion is permanent. Only archived environments can be recovered.
**Why are some auto-delete options disabled?**
Your organization policy may enforce maximum retention periods.
**Do running environments get archived?**
No, only stopped environments are archived.
## Troubleshooting
**Can't change auto-delete preference**: Check for organization policy restrictions.
# Getting started
Source: https://ona.com/docs/ona/getting-started
Start building with Ona - mission control for software projects and engineering agents.
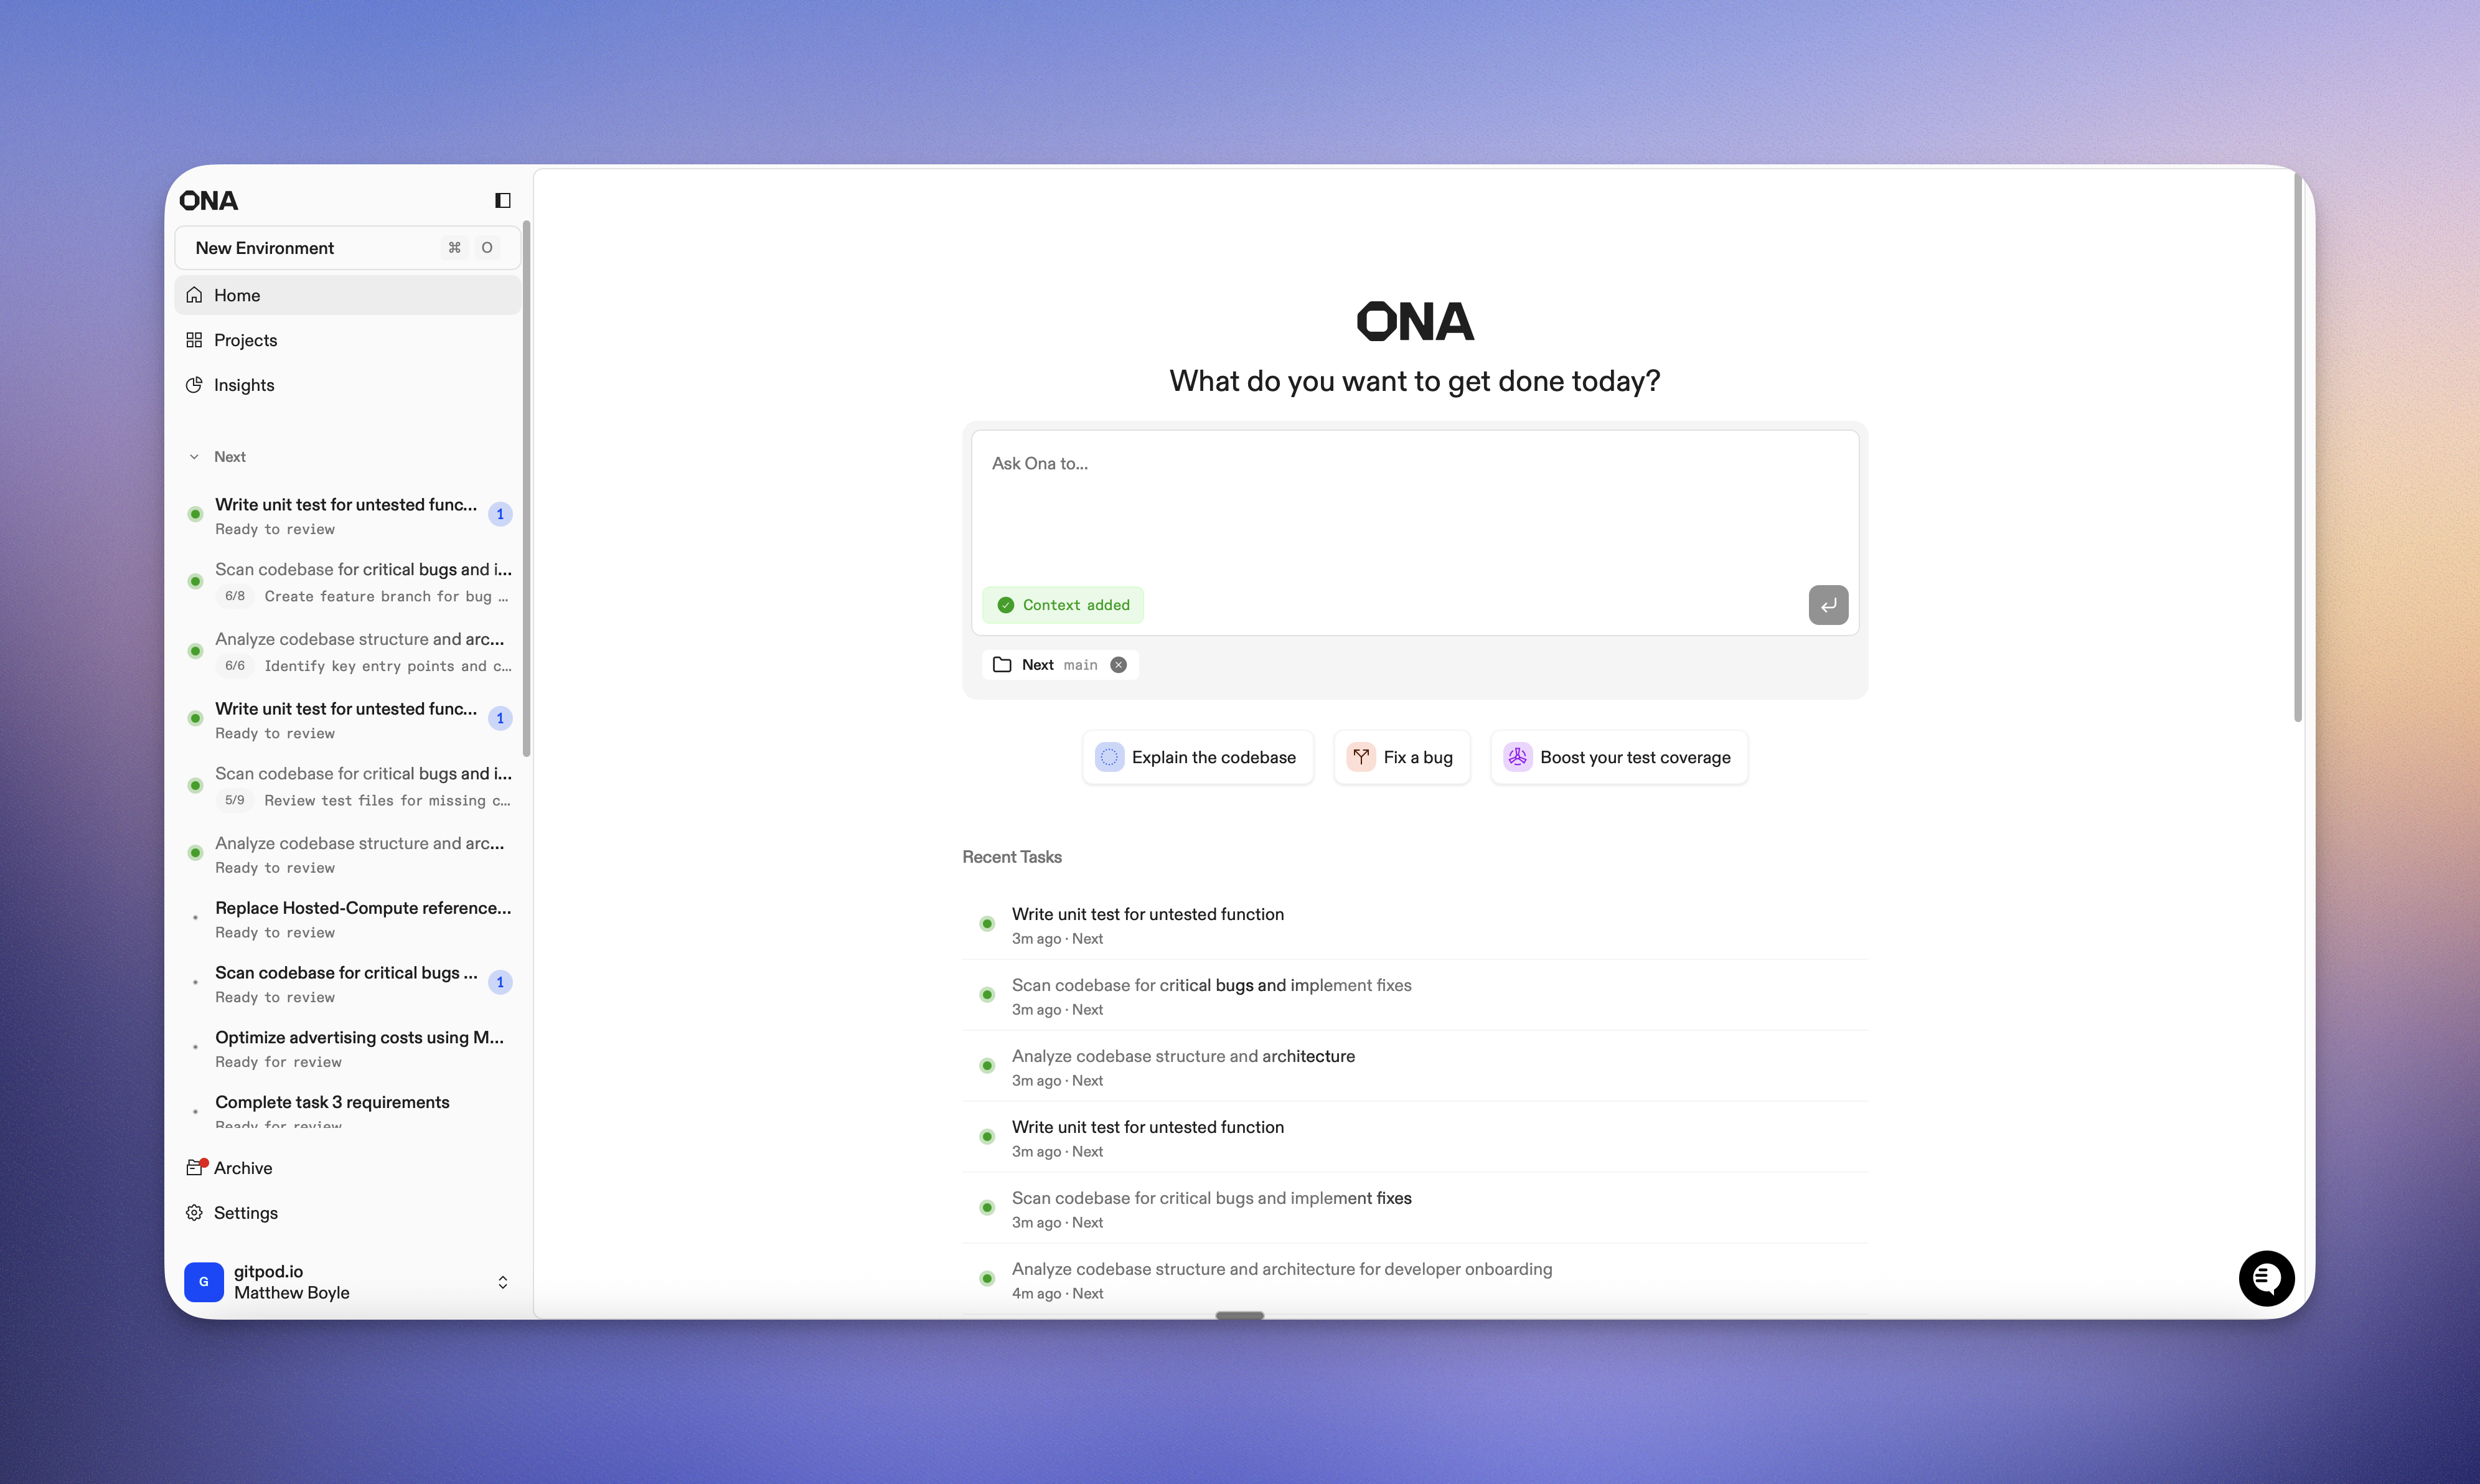 # Welcome to Ona
Your mission control for software projects and software engineering agents. Keep momentum on any device with sandboxed development environments in [our cloud](/ona/runners/ona-cloud) or [your VPC](/ona/runners/aws/enterprise-runner/overview).
Ona is a software development platform built on three building blocks:
* **Ona Environments**: secure, ephemeral, pre‑configured development environments.
* **Ona Agents**: professional software engineering agents that execute tasks in parallel or autonomously with full environment context.
* **Ona Guardrails**: security, compliance, and governance to deploy at scale inside your VPC.
## Modes of development
* **Craft Mode**: code directly in your IDE; Ona provisions standardized, policy‑compliant environments.
* **Autonomous Mode**: delegate long‑running work (migrations, refactors, tests) to agents running in isolated environments.
## Quick start
**1) Set up environments and runners**
* Choose where to run: [Ona Cloud](/ona/runners/ona-cloud) or [your AWS account](/ona/runners/aws/enterprise-runner/overview)
* Configure [Dev Containers](/ona/configuration/devcontainer/getting-started) and [Automations](/ona/configuration/automations/overview)
**2) Bring your AI provider (Enterprise only)**
* Bring your existing AI relationships - run inference in your own VPC.
* Providers: [Anthropic](/ona/agents/llm-providers/anthropic), [Google Vertex](/ona/agents/llm-providers/google-vertex), [AWS Bedrock](/ona/agents/llm-providers/bedrock), [Portkey](/ona/agents/llm-providers/portkey)
**3) Enable Ona Agents**
* Learn capabilities and best practices: [Ona Agent](/ona/agents)
* Add team conventions with [AGENTS.md](/ona/agents-md)
* Create [Slash commands](/ona/slash-commands) and use [Bash commands](/ona/bash-commands)
**4) Use guardrails**
* Enforce policies and governance: [Guardrails](/ona/guardrails)
* Audit changes: [Audit logs](/ona/audit-logs/overview)
* Control agent execution: [Command deny list](/ona/command-deny-list)
* Enterprise identity: [SSO overview](/ona/sso/overview), [OIDC](/ona/configuration/oidc)
## Next steps
* [Configure Environments](/ona/configuration/overview): Dev Containers, secrets, automations, and multi‑repo setups
* [Ona Agents](/ona/agents): Build faster with professional engineering agents
* [Setup Guardrails](/ona/guardrails): Policies, auditability, SSO, and execution controls
* [Our Cloud or yours?](/ona/runners/aws/enterprise-runner/overview): Choose Ona Cloud or deploy in your VPC
# Overview
Source: https://ona.com/docs/ona/guardrails/overview
Overview of Guardrails: policies, identity, and auditability
Ona Guardrails provide policies, identity integration, and auditability so teams can use agents and standardized environments safely at scale.
## What you can do
* Enforce organization‑wide policies for environments and agents
* Require SSO, configure session controls, and centralize identity
* Block risky operations with a command deny list
* Replace long‑lived secrets with OIDC for cloud/provider access
* Audit user and agent activity with logs
## Components
* Policies: Standardize environments and agent behavior across projects
* Identity & SSO: Central authentication and access management
* OIDC: Short‑lived, claim‑based access to cloud resources
* Audit logs: Track actions for compliance and incident response
* Command deny list: Prevent disallowed commands from executing
## Before you start
* Ensure you are an organization admin
* Choose an identity provider and decide SSO posture
* Connect runners to your organization
* Decide initial policy defaults and rollout scope (project vs organization)
Next steps:
* [Configure organization policies](/ona/organizations/policies)
* [Review audit logs](/ona/audit-logs/overview)
* [Enable SSO](/ona/sso/overview)
* [Set up OIDC](/ona/configuration/oidc)
* [Define a command deny list](/ona/command-deny-list)
# Amazon Web Services (AWS)
Source: https://ona.com/docs/ona/integrations/aws
Ona is a flexible tool that works with many cloud providers, including AWS. This guide describes how to integrate Ona and AWS using OpenID Connect (OIDC).
## OIDC Integration with AWS
Ona can connect environments to AWS using Ona support for [OpenID Connect](/ona/configuration/oidc), which allows environments to retrieve AWS access credentials without using static credentials or environment variables.
In this authentication flow, an IAM role is created in an external AWS account, accessible through the `gitpod` command in Ona. The generated JWT token includes claims about the environment and its owner, and is exchanged with AWS for an STS token. That STS token is associated with an IAM role and inherits any access granted to that role. Access control configuration is the responsibility of the AWS account owner/administrator.
### Step 1: Create an "AWS Identity Provider" resource
To connect Ona to AWS, you need to create an "IAM identity provider" to establish a trust relationship between your AWS account and Ona. Ona supports OpenID Connect (OIDC), so follow [AWS's guide here](https://docs.aws.amazon.com/IAM/latest/UserGuide/id_roles_providers_create_oidc.html) to create an OIDC identity provider.
* Configure the URL of the identity provider to: `https://app.gitpod.io`
* The client ID / Audience should be set to: `sts.amazonaws.com`
> Note: Add `/.well-known/openid-configuration` to the end of the identity provider's URL to see the provider's publicly available configuration document and metadata: `https://app.gitpod.io/.well-known/openid-configuration`
**Read more:**
* [\[AWS docs\] Identity providers and federation](https://docs.aws.amazon.com/IAM/latest/UserGuide/id_roles_providers.html)
* [\[AWS docs\] Creating OpenID Connect (OIDC) identity providers](https://docs.aws.amazon.com/IAM/latest/UserGuide/id_roles_providers_create_oidc.html)
### Step 2: Create an AWS role with a trust policy
Now that your AWS account is set up to trust Ona, you need to [create an AWS IAM role](https://docs.aws.amazon.com/IAM/latest/UserGuide/id_roles_create_for-idp.html) that can be assumed by the Ona environment user. You can restrict who has access to the assumed role based on claims in your Ona environment JWT token.
> Info: We strongly recommend you adhere to the principle of least privilege, and ensure that only relevant environments and users can assume your AWS role.
```json
{
"Claims": {
"aud": "sts.amazonaws.com",
"exp": 1740517845,
"iat": 1740514245,
"iss": "https://app.gitpod.io",
"org": "0191e223-1c3c-7607-badf-303c98b52d2f",
"sub": "org:0191e223-1c3c-7607-badf-303c98b52d2f/prj:019527e4-75d5-704d-a5a4-a2b52cf56198/env:019527e4-75d5-704d-a5a4-a2b52cf56196"
},
"Header": [
{
"KeyID": "k0",
"JSONWebKey": null,
"Algorithm": "RS256",
"Nonce": "",
"ExtraHeaders": null
}
]
}
```
> Note: You can inspect the claims that will be sent to AWS by running `gitpod idp token --decode --audience sts.amazonaws.com` inside an Ona environment. Pay attention to the `sub` claim containing the organization, project, and environment information.
To adjust the IAM role trust policy to restrict which environments can assume the role, you can define condition keys using the name of the OIDC provider (created in step 1, e.g. `app.gitpod.io`) followed by the claim (`:aud`, `:sub`, etc.). The examples below show how this works. Read more about these OIDC condition keys [here](https://docs.aws.amazon.com/IAM/latest/UserGuide/reference_policies_iam-condition-keys.html#condition-keys-wif).
Here are some examples restricting who can assume the role depending on the `sub` key contents:
This example shows that only environments created within a specific organization can assume this role:
```json
{
"Version": "2012-10-17",
"Statement": [
{
"Effect": "Allow",
"Principal": {
"Federated": "arn:aws:iam::981341800645:oidc-provider/app.gitpod.io"
},
"Action": "sts:AssumeRoleWithWebIdentity",
"Condition": {
"StringEquals": {
"app.gitpod.io:aud": "sts.amazonaws.com"
},
"StringLike": {
"app.gitpod.io:sub": "org:0191e223-1c3c-7607-badf-303c98b52d2f/*"
}
}
}
]
}
```
This example shows how to grant access only to environments created from a specific project:
```json
{
"Version": "2012-10-17",
"Statement": [
{
"Effect": "Allow",
"Principal": {
"Federated": "arn:aws:iam::981241700645:oidc-provider/app.gitpod.io"
},
"Action": "sts:AssumeRoleWithWebIdentity",
"Condition": {
"StringEquals": {
"app.gitpod.io:aud": "sts.amazonaws.com"
},
"StringLike": {
"app.gitpod.io:sub": "org:0191e223-1c3c-7607-badf-303c98b52d2f/prj:019527e4-75d5-704d-a5a4-a2b52cf56198/*"
}
}
}
]
}
```
**Read more:**
* [\[AWS docs\] IAM and AWS STS condition context keys](https://docs.aws.amazon.com/IAM/latest/UserGuide/reference_policies_iam-condition-keys.html)
* [\[AWS docs\] IAM String condition operators](https://docs.aws.amazon.com/IAM/latest/UserGuide/reference_policies_elements_condition_operators.html#Conditions_String)
### Step 3: Assume the AWS role to retrieve the AWS credentials
> Note: The following assumes that your environment has the AWS CLI installed so that it can call `aws sts assume-role-with-web-identity`.
You can either call the AWS CLI `assume-role` command manually, or use the helper command within the `gitpod` CLI, `gitpod idp login aws` which will automatically update your AWS CLI credentials file.
The token expiry can be customized using `--duration-seconds=
# Welcome to Ona
Your mission control for software projects and software engineering agents. Keep momentum on any device with sandboxed development environments in [our cloud](/ona/runners/ona-cloud) or [your VPC](/ona/runners/aws/enterprise-runner/overview).
Ona is a software development platform built on three building blocks:
* **Ona Environments**: secure, ephemeral, pre‑configured development environments.
* **Ona Agents**: professional software engineering agents that execute tasks in parallel or autonomously with full environment context.
* **Ona Guardrails**: security, compliance, and governance to deploy at scale inside your VPC.
## Modes of development
* **Craft Mode**: code directly in your IDE; Ona provisions standardized, policy‑compliant environments.
* **Autonomous Mode**: delegate long‑running work (migrations, refactors, tests) to agents running in isolated environments.
## Quick start
**1) Set up environments and runners**
* Choose where to run: [Ona Cloud](/ona/runners/ona-cloud) or [your AWS account](/ona/runners/aws/enterprise-runner/overview)
* Configure [Dev Containers](/ona/configuration/devcontainer/getting-started) and [Automations](/ona/configuration/automations/overview)
**2) Bring your AI provider (Enterprise only)**
* Bring your existing AI relationships - run inference in your own VPC.
* Providers: [Anthropic](/ona/agents/llm-providers/anthropic), [Google Vertex](/ona/agents/llm-providers/google-vertex), [AWS Bedrock](/ona/agents/llm-providers/bedrock), [Portkey](/ona/agents/llm-providers/portkey)
**3) Enable Ona Agents**
* Learn capabilities and best practices: [Ona Agent](/ona/agents)
* Add team conventions with [AGENTS.md](/ona/agents-md)
* Create [Slash commands](/ona/slash-commands) and use [Bash commands](/ona/bash-commands)
**4) Use guardrails**
* Enforce policies and governance: [Guardrails](/ona/guardrails)
* Audit changes: [Audit logs](/ona/audit-logs/overview)
* Control agent execution: [Command deny list](/ona/command-deny-list)
* Enterprise identity: [SSO overview](/ona/sso/overview), [OIDC](/ona/configuration/oidc)
## Next steps
* [Configure Environments](/ona/configuration/overview): Dev Containers, secrets, automations, and multi‑repo setups
* [Ona Agents](/ona/agents): Build faster with professional engineering agents
* [Setup Guardrails](/ona/guardrails): Policies, auditability, SSO, and execution controls
* [Our Cloud or yours?](/ona/runners/aws/enterprise-runner/overview): Choose Ona Cloud or deploy in your VPC
# Overview
Source: https://ona.com/docs/ona/guardrails/overview
Overview of Guardrails: policies, identity, and auditability
Ona Guardrails provide policies, identity integration, and auditability so teams can use agents and standardized environments safely at scale.
## What you can do
* Enforce organization‑wide policies for environments and agents
* Require SSO, configure session controls, and centralize identity
* Block risky operations with a command deny list
* Replace long‑lived secrets with OIDC for cloud/provider access
* Audit user and agent activity with logs
## Components
* Policies: Standardize environments and agent behavior across projects
* Identity & SSO: Central authentication and access management
* OIDC: Short‑lived, claim‑based access to cloud resources
* Audit logs: Track actions for compliance and incident response
* Command deny list: Prevent disallowed commands from executing
## Before you start
* Ensure you are an organization admin
* Choose an identity provider and decide SSO posture
* Connect runners to your organization
* Decide initial policy defaults and rollout scope (project vs organization)
Next steps:
* [Configure organization policies](/ona/organizations/policies)
* [Review audit logs](/ona/audit-logs/overview)
* [Enable SSO](/ona/sso/overview)
* [Set up OIDC](/ona/configuration/oidc)
* [Define a command deny list](/ona/command-deny-list)
# Amazon Web Services (AWS)
Source: https://ona.com/docs/ona/integrations/aws
Ona is a flexible tool that works with many cloud providers, including AWS. This guide describes how to integrate Ona and AWS using OpenID Connect (OIDC).
## OIDC Integration with AWS
Ona can connect environments to AWS using Ona support for [OpenID Connect](/ona/configuration/oidc), which allows environments to retrieve AWS access credentials without using static credentials or environment variables.
In this authentication flow, an IAM role is created in an external AWS account, accessible through the `gitpod` command in Ona. The generated JWT token includes claims about the environment and its owner, and is exchanged with AWS for an STS token. That STS token is associated with an IAM role and inherits any access granted to that role. Access control configuration is the responsibility of the AWS account owner/administrator.
### Step 1: Create an "AWS Identity Provider" resource
To connect Ona to AWS, you need to create an "IAM identity provider" to establish a trust relationship between your AWS account and Ona. Ona supports OpenID Connect (OIDC), so follow [AWS's guide here](https://docs.aws.amazon.com/IAM/latest/UserGuide/id_roles_providers_create_oidc.html) to create an OIDC identity provider.
* Configure the URL of the identity provider to: `https://app.gitpod.io`
* The client ID / Audience should be set to: `sts.amazonaws.com`
> Note: Add `/.well-known/openid-configuration` to the end of the identity provider's URL to see the provider's publicly available configuration document and metadata: `https://app.gitpod.io/.well-known/openid-configuration`
**Read more:**
* [\[AWS docs\] Identity providers and federation](https://docs.aws.amazon.com/IAM/latest/UserGuide/id_roles_providers.html)
* [\[AWS docs\] Creating OpenID Connect (OIDC) identity providers](https://docs.aws.amazon.com/IAM/latest/UserGuide/id_roles_providers_create_oidc.html)
### Step 2: Create an AWS role with a trust policy
Now that your AWS account is set up to trust Ona, you need to [create an AWS IAM role](https://docs.aws.amazon.com/IAM/latest/UserGuide/id_roles_create_for-idp.html) that can be assumed by the Ona environment user. You can restrict who has access to the assumed role based on claims in your Ona environment JWT token.
> Info: We strongly recommend you adhere to the principle of least privilege, and ensure that only relevant environments and users can assume your AWS role.
```json
{
"Claims": {
"aud": "sts.amazonaws.com",
"exp": 1740517845,
"iat": 1740514245,
"iss": "https://app.gitpod.io",
"org": "0191e223-1c3c-7607-badf-303c98b52d2f",
"sub": "org:0191e223-1c3c-7607-badf-303c98b52d2f/prj:019527e4-75d5-704d-a5a4-a2b52cf56198/env:019527e4-75d5-704d-a5a4-a2b52cf56196"
},
"Header": [
{
"KeyID": "k0",
"JSONWebKey": null,
"Algorithm": "RS256",
"Nonce": "",
"ExtraHeaders": null
}
]
}
```
> Note: You can inspect the claims that will be sent to AWS by running `gitpod idp token --decode --audience sts.amazonaws.com` inside an Ona environment. Pay attention to the `sub` claim containing the organization, project, and environment information.
To adjust the IAM role trust policy to restrict which environments can assume the role, you can define condition keys using the name of the OIDC provider (created in step 1, e.g. `app.gitpod.io`) followed by the claim (`:aud`, `:sub`, etc.). The examples below show how this works. Read more about these OIDC condition keys [here](https://docs.aws.amazon.com/IAM/latest/UserGuide/reference_policies_iam-condition-keys.html#condition-keys-wif).
Here are some examples restricting who can assume the role depending on the `sub` key contents:
This example shows that only environments created within a specific organization can assume this role:
```json
{
"Version": "2012-10-17",
"Statement": [
{
"Effect": "Allow",
"Principal": {
"Federated": "arn:aws:iam::981341800645:oidc-provider/app.gitpod.io"
},
"Action": "sts:AssumeRoleWithWebIdentity",
"Condition": {
"StringEquals": {
"app.gitpod.io:aud": "sts.amazonaws.com"
},
"StringLike": {
"app.gitpod.io:sub": "org:0191e223-1c3c-7607-badf-303c98b52d2f/*"
}
}
}
]
}
```
This example shows how to grant access only to environments created from a specific project:
```json
{
"Version": "2012-10-17",
"Statement": [
{
"Effect": "Allow",
"Principal": {
"Federated": "arn:aws:iam::981241700645:oidc-provider/app.gitpod.io"
},
"Action": "sts:AssumeRoleWithWebIdentity",
"Condition": {
"StringEquals": {
"app.gitpod.io:aud": "sts.amazonaws.com"
},
"StringLike": {
"app.gitpod.io:sub": "org:0191e223-1c3c-7607-badf-303c98b52d2f/prj:019527e4-75d5-704d-a5a4-a2b52cf56198/*"
}
}
}
]
}
```
**Read more:**
* [\[AWS docs\] IAM and AWS STS condition context keys](https://docs.aws.amazon.com/IAM/latest/UserGuide/reference_policies_iam-condition-keys.html)
* [\[AWS docs\] IAM String condition operators](https://docs.aws.amazon.com/IAM/latest/UserGuide/reference_policies_elements_condition_operators.html#Conditions_String)
### Step 3: Assume the AWS role to retrieve the AWS credentials
> Note: The following assumes that your environment has the AWS CLI installed so that it can call `aws sts assume-role-with-web-identity`.
You can either call the AWS CLI `assume-role` command manually, or use the helper command within the `gitpod` CLI, `gitpod idp login aws` which will automatically update your AWS CLI credentials file.
The token expiry can be customized using `--duration-seconds= **Caption:** The button shown on a GitHub repository, created by the browser extension
The extension is available for the following browsers: 1. [Chrome](https://chromewebstore.google.com/detail/gitpod/dodmmooeoklaejobgleioelladacbeki) (including Edge, Brave and other Chromium-based browsers) 2. [Firefox](https://addons.mozilla.org/firefox/addon/gitpod/) ## Access the extension settings You can access the extension settings by clicking on the extension icon in the browser toolbar. In the resulting popup you can find a comprehensive view of all possible customization.
 ## Enabling the browser extension on self-hosted SCM providers (e.g. GitLab CE/EE and Bitbucket Datacenter)
By default, the browser extension is automatically enabled for the domains of GitHub (`github.com`), GitLab (`gitlab.com`), Bitbucket (`bitbucket.org`) and Azure DevOps (`dev.azure.com`). If the `run on all sites` option is disabled, all other domains must be configured manually.
To add a custom SCM domain, open the extension's context menu. Opening the context menu can be achieved by either right clicking the extension icon in the browser toolbar or revealing it by clicking on a kebab menu \[Chrome] / cog wheel \[Firefox] in the extensions dropdown.
| Chrome | Firefox |
| -------------------------------------------------------------------------------------------------------------------------------------------------------------------------------------------------------------------------------------------------------------------------------------------------------------------------------------------------------------------------------------------------------------------------------------------------------------------------------------------------------------------------------------------------------------------------------------------------------------------------------------------------------------------------------------------------------------------------------------------------------------------------------------------------------------------------------------------------------------------------------------------------------------------------------------------------------------------------------------------------------------------------------------------------------------------------------------------------------------------------------------------------------------------------------------------------------------------------------------------------------------------------------------------------------------------------------------------------------------------------------------------------------------------------------------------------------------------------------------------------------------------------------------------------------------------------------------------------------------------------------------- | ------------------------------------------------------------------------------------------------------------------------------------------------------------------------------------------------------------------------------------------------------------------------------------------------------------------------------------------------------------------------------------------------------------------------------------------------------------------------------------------------------------------------------------------------------------------------------------------------------------------------------------------------------------------------------------------------------------------------------------------------------------------------------------------------------------------------------------------------------------------------------------------------------------------------------------------------------------------------------------------------------------------------------------------------------------------------------------------------------------------------------------------------------------------------------------------------------------------------------------------------------------------------------------------------------------------------------------------------------------------------------------------------------------------------------------------------------------------------------------------------------------------------------------------------------------------------------------------------------------------------------------------------- |
|
## Enabling the browser extension on self-hosted SCM providers (e.g. GitLab CE/EE and Bitbucket Datacenter)
By default, the browser extension is automatically enabled for the domains of GitHub (`github.com`), GitLab (`gitlab.com`), Bitbucket (`bitbucket.org`) and Azure DevOps (`dev.azure.com`). If the `run on all sites` option is disabled, all other domains must be configured manually.
To add a custom SCM domain, open the extension's context menu. Opening the context menu can be achieved by either right clicking the extension icon in the browser toolbar or revealing it by clicking on a kebab menu \[Chrome] / cog wheel \[Firefox] in the extensions dropdown.
| Chrome | Firefox |
| -------------------------------------------------------------------------------------------------------------------------------------------------------------------------------------------------------------------------------------------------------------------------------------------------------------------------------------------------------------------------------------------------------------------------------------------------------------------------------------------------------------------------------------------------------------------------------------------------------------------------------------------------------------------------------------------------------------------------------------------------------------------------------------------------------------------------------------------------------------------------------------------------------------------------------------------------------------------------------------------------------------------------------------------------------------------------------------------------------------------------------------------------------------------------------------------------------------------------------------------------------------------------------------------------------------------------------------------------------------------------------------------------------------------------------------------------------------------------------------------------------------------------------------------------------------------------------------------------------------------------------------- | ------------------------------------------------------------------------------------------------------------------------------------------------------------------------------------------------------------------------------------------------------------------------------------------------------------------------------------------------------------------------------------------------------------------------------------------------------------------------------------------------------------------------------------------------------------------------------------------------------------------------------------------------------------------------------------------------------------------------------------------------------------------------------------------------------------------------------------------------------------------------------------------------------------------------------------------------------------------------------------------------------------------------------------------------------------------------------------------------------------------------------------------------------------------------------------------------------------------------------------------------------------------------------------------------------------------------------------------------------------------------------------------------------------------------------------------------------------------------------------------------------------------------------------------------------------------------------------------------------------------------------------------------- |
|  |
|  |
## Use a custom instance URL
If you are using a custom Ona instance you can still use the browser extension by configuring it with your instance URL.
After you've installed the extension, open its options (see chapter [Access the extension settings](#access-the-extension-settings)) and enter your custom instance URL. Then, simply click "Save" and approve the browser's request for new permissions.
## Source Code
The browser extension is open source, meaning that you can check out its [source code](https://github.com/gitpod-io/browser-extension).
# Gitpod CLI
Source: https://ona.com/docs/ona/integrations/cli
The Gitpod CLI is a powerful tool that allows you to interact with your Ona environments and manage your development workflow directly from the terminal. Whether you're starting new environments, managing existing ones, or configuring your workspace, the CLI provides a streamlined interface for all your operations.
## Installation
Getting started with the Gitpod CLI is straightforward. You have two options:
### Option 1: Quick Install (UNIX Systems - macOS, Linux)
This one-line installation method works for macOS and Linux systems:
```bash
curl -o gitpod -fsSL "https://releases.gitpod.io/cli/stable/gitpod-$(uname -s | tr '[:upper:]' '[:lower:]')-$(uname -m | sed 's/x86_64/amd64/;s/\(arm64\|aarch64\)/arm64/')" && \
chmod +x gitpod && \
sudo mv gitpod /usr/local/bin
```
### Option 2: Direct Download
Choose the appropriate version for your system:
* macOS: [x86\_64](https://releases.gitpod.io/cli/stable/gitpod-darwin-amd64) | [arm64](https://releases.gitpod.io/cli/stable/gitpod-darwin-arm64)
* Linux: [x86\_64](https://releases.gitpod.io/cli/stable/gitpod-linux-amd64) | [arm64](https://releases.gitpod.io/cli/stable/gitpod-linux-arm64)
* Windows: [x86\_64](https://releases.gitpod.io/cli/stable/gitpod-windows-amd64.exe) | [arm64](https://releases.gitpod.io/cli/stable/gitpod-windows-arm64.exe)
After downloading, you'll need to:
1. Make the binary executable:
```bash
chmod +x gitpod
```
Move it to your PATH:
```bash
sudo mv gitpod /usr/local/bin
```
|
## Use a custom instance URL
If you are using a custom Ona instance you can still use the browser extension by configuring it with your instance URL.
After you've installed the extension, open its options (see chapter [Access the extension settings](#access-the-extension-settings)) and enter your custom instance URL. Then, simply click "Save" and approve the browser's request for new permissions.
## Source Code
The browser extension is open source, meaning that you can check out its [source code](https://github.com/gitpod-io/browser-extension).
# Gitpod CLI
Source: https://ona.com/docs/ona/integrations/cli
The Gitpod CLI is a powerful tool that allows you to interact with your Ona environments and manage your development workflow directly from the terminal. Whether you're starting new environments, managing existing ones, or configuring your workspace, the CLI provides a streamlined interface for all your operations.
## Installation
Getting started with the Gitpod CLI is straightforward. You have two options:
### Option 1: Quick Install (UNIX Systems - macOS, Linux)
This one-line installation method works for macOS and Linux systems:
```bash
curl -o gitpod -fsSL "https://releases.gitpod.io/cli/stable/gitpod-$(uname -s | tr '[:upper:]' '[:lower:]')-$(uname -m | sed 's/x86_64/amd64/;s/\(arm64\|aarch64\)/arm64/')" && \
chmod +x gitpod && \
sudo mv gitpod /usr/local/bin
```
### Option 2: Direct Download
Choose the appropriate version for your system:
* macOS: [x86\_64](https://releases.gitpod.io/cli/stable/gitpod-darwin-amd64) | [arm64](https://releases.gitpod.io/cli/stable/gitpod-darwin-arm64)
* Linux: [x86\_64](https://releases.gitpod.io/cli/stable/gitpod-linux-amd64) | [arm64](https://releases.gitpod.io/cli/stable/gitpod-linux-arm64)
* Windows: [x86\_64](https://releases.gitpod.io/cli/stable/gitpod-windows-amd64.exe) | [arm64](https://releases.gitpod.io/cli/stable/gitpod-windows-arm64.exe)
After downloading, you'll need to:
1. Make the binary executable:
```bash
chmod +x gitpod
```
Move it to your PATH:
```bash
sudo mv gitpod /usr/local/bin
```
### 1. **Sign Up** * Go to [app.gitpod.io](https://app.gitpod.io) and sign up. * Once logged in, generate a **Personal Access Token** for SDK authentication under your account settings at [Personal Access Tokens](https://app.gitpod.io/settings/personal-access-tokens). ### 2. **Install the SDK** Install for your preferred language: * **Python SDK**: ```bash pip install gitpod-sdk ``` * **Node/Typescript SDK**: ```bash npm install @gitpod/sdk ``` * **Go SDK**: ```bash go get github.com/gitpod-io/gitpod-sdk-go ``` ### 3. **Authenticate** Authenticate using your personal access token. Set via environment variable or pass in code. * **Option 1**: Set the environment variable `GITPOD_API_KEY`: ```bash export GITPOD_API_KEY="your_token_here" ``` * **Option 2**: Authenticate directly in your code: * **For Python SDK**: ```python from gitpod_sdk import Gitpod gitpod = Gitpod(bearer_token="your_token_here") ``` * **For Go SDK**: ```go package main import ( "github.com/gitpod-io/gitpod-sdk-go" ) func main() { gitpod := gitpod.NewGitpod("your_token_here") } ``` * **For Node/Typescript SDK**: ```typescript import { Gitpod } from '@gitpod/sdk'; const gitpod = new Gitpod({ bearerToken: 'your_token_here' }); ``` ### 4. **Run an Example** Create an environment and run a command using the Python SDK: ```python import asyncio from gitpod import AsyncGitpod import gitpod.lib as util repo_url = "https://github.com/containerd/containerd" command_to_execute = "go test -v -short ./..." async def execute_command_in_environment(): client = AsyncGitpod() machine_class_id = (await util.find_most_used_environment_class(client)).id create_params = { "machine": {"class": machine_class_id}, "content": {"initializer": {"specs": [{"context_url": {"url": repo_url}}]}} } environment = (await client.environments.create(spec=create_params)).environment await util.wait_for_environment_running(client, environment.id) async for line in await util.run_command(client, environment.id, command_to_execute): print(line) await client.environments.delete(environment_id=environment.id) if __name__ == "__main__": asyncio.run(execute_command_in_environment()) ``` ## Available Examples Examples in the SDK repositories: ### 1. **Run a Command in an Environment** * **Description**: Initialize an environment from a Git repository and run a command inside it. * **Location**: [Python SDK Example - Run Command](https://github.com/gitpod-io/gitpod-sdk-python/tree/main/examples/run_command.py) ### 2. **Run a Service in an Environment** * **Description**: Run a long-lived service (such as a database or message queue) inside an environment. * **Location**: [Python SDK Example - Run Service](https://github.com/gitpod-io/gitpod-sdk-python/tree/main/examples/run_service.py) ### 3. **Access the File System in an Environment** * **Description**: Access and interact with the file system programmatically. * **Location**: [Python SDK Example - File System Access](https://github.com/gitpod-io/gitpod-sdk-python/tree/main/examples/fs_access.py) ### 4. **Use the Anthropic Tool in an Environment** * **Description**: Use the Anthropic tool within an environment and interact with **Model Context Protocol (MCP)**. * **Location**: [Python SDK Example - Anthropic Tool Use](https://github.com/gitpod-io/gitpod-sdk-python/tree/main/examples/anthropic_tool_use.py) ### 5. **MCP Server Example** * **Description**: Demonstrate MCP integration. * **Location**: [Go SDK Example - MCP Server](https://github.com/gitpod-io/gitpod-sdk-go/tree/main/examples/mcp-server) # Model Context Protocol (MCP) Source: https://ona.com/docs/ona/mcp Enable and configure external tools and services for Ona Agent using the Model Context Protocol (MCP). Ona Agent supports the Model Context Protocol (MCP) to access external tools and resources through MCP servers. Use MCP to extend Ona Agent beyond built-in capabilities with integrations such as GitHub, Linear, or browser automation. ## What is MCP? [Model Context Protocol (MCP)](https://modelcontextprotocol.io/docs/guide/) is a standardized protocol that enables AI agents to communicate with external services via client/server architecture: 1. MCP servers provide tools and resources (for example, [GitHub MCP server](https://docs.github.com/en/copilot/how-tos/provide-context/use-mcp/use-the-github-mcp-server), [Linear (MCP directory)](https://modelcontextprotocol.io/examples), [Playwright MCP server](https://www.npmjs.com/package/@executeautomation/playwright-mcp-server)) 2. Ona Agent acts as the MCP client and manages connections 3. The AI accesses tools via MCP using JSON-RPC 2.0 over stdio or HTTP ``` Ona Agent → MCP Client → External MCP Server → External Service ``` ## Prerequisites None! MCP is available out of the box on all tiers. ## Configure MCP for a project Create a `.ona/mcp-config.json` file in your repository to configure MCP servers. ### Minimal example ```json { "mcpServers": { "github": { "name": "github", "command": "docker", "args": ["run", "--rm", "-i", "ghcr.io/github/github-mcp-server"], "disabled": false, "timeout": 30 } } } ``` ### Advanced configuration ```json { "mcpServers": { "github": { "name": "github", "command": "docker", "args": [ "run", "-i", "--rm", "-e", "GITHUB_PERSONAL_ACCESS_TOKEN", "ghcr.io/github/github-mcp-server" ], "disabled": false, "timeout": 30, "env": { "GITHUB_PERSONAL_ACCESS_TOKEN": "${exec:printf 'protocol=https\nhost=github.com\n' | git credential fill 2>/dev/null | awk -F= '/password/ {print $2}' 2>/dev/null}" }, "toolDenyList": ["search_code"], "workingDir": "/workspace" }, "linear": { "name": "linear", "command": "/usr/local/bin/linear-mcp-go", "args": ["serve", "--write-access=false"], "disabled": false, "env": { "LINEAR_API_KEY": "${exec:printenv LINEAR_API_KEY}" } } }, "globalTimeout": 30, "logLevel": "info" } ``` ## Common server configurations ### GitHub Server link: [GitHub MCP server (GitHub Docs)](https://docs.github.com/en/copilot/how-tos/provide-context/use-mcp/use-the-github-mcp-server) Tip: Ensure a Git credential helper is configured so `git credential fill` returns a Personal Access Token (for example, run `gh auth login`). ```json { "mcpServers": { "github": { "name": "github", "command": "docker", "args": [ "run", "-i", "--rm", "-e", "GITHUB_PERSONAL_ACCESS_TOKEN", "ghcr.io/github/github-mcp-server" ], "disabled": false, "env": { "GITHUB_PERSONAL_ACCESS_TOKEN": "${exec:printf 'protocol=https\nhost=github.com\n' | git credential fill 2>/dev/null | awk -F= '/password/ {print $2}' 2>/dev/null}" }, "toolDenyList": ["search_code"] } } } ``` ### Linear Server link: [Search for Linear MCP servers](https://modelcontextprotocol.io/examples) ```json { "mcpServers": { "linear": { "name": "linear", "command": "/usr/local/bin/linear-mcp-go", "args": ["serve", "--write-access=false"], "disabled": false, "env": { "LINEAR_API_KEY": "${exec:printenv LINEAR_API_KEY}" } } } } ``` ### Playwright (browser automation) Server link: [@executeautomation/playwright-mcp-server (npm)](https://www.npmjs.com/package/@executeautomation/playwright-mcp-server) ```json { "mcpServers": { "playwright": { "name": "playwright", "command": "npx", "args": ["-y", "@executeautomation/playwright-mcp-server"], "disabled": false, "timeout": 60 } } } ``` ## Security and controls ### Process isolation * Each MCP server runs as a separate process within your environment. You set per-server environment variables in the MCP config (`env`), and if you run the server via Docker you can additionally leverage container isolation * Timeouts can be set per server (`timeout`) and globally (`globalTimeout`) in your MCP config * Defaults: If not set, per-server `timeout` defaults to 30s and initial connection timeout defaults to 60s * Gitpod environments run in isolated virtual machines for strong workload isolation. See [runners overview](/ona/runners/overview) Timeouts example: ```json { "globalTimeout": 45, "mcpServers": { "github": { "timeout": 30, "name": "github", "command": "docker", "args": ["run", "-i", "--rm", "ghcr.io/github/github-mcp-server"] } } } ``` ### Credential management
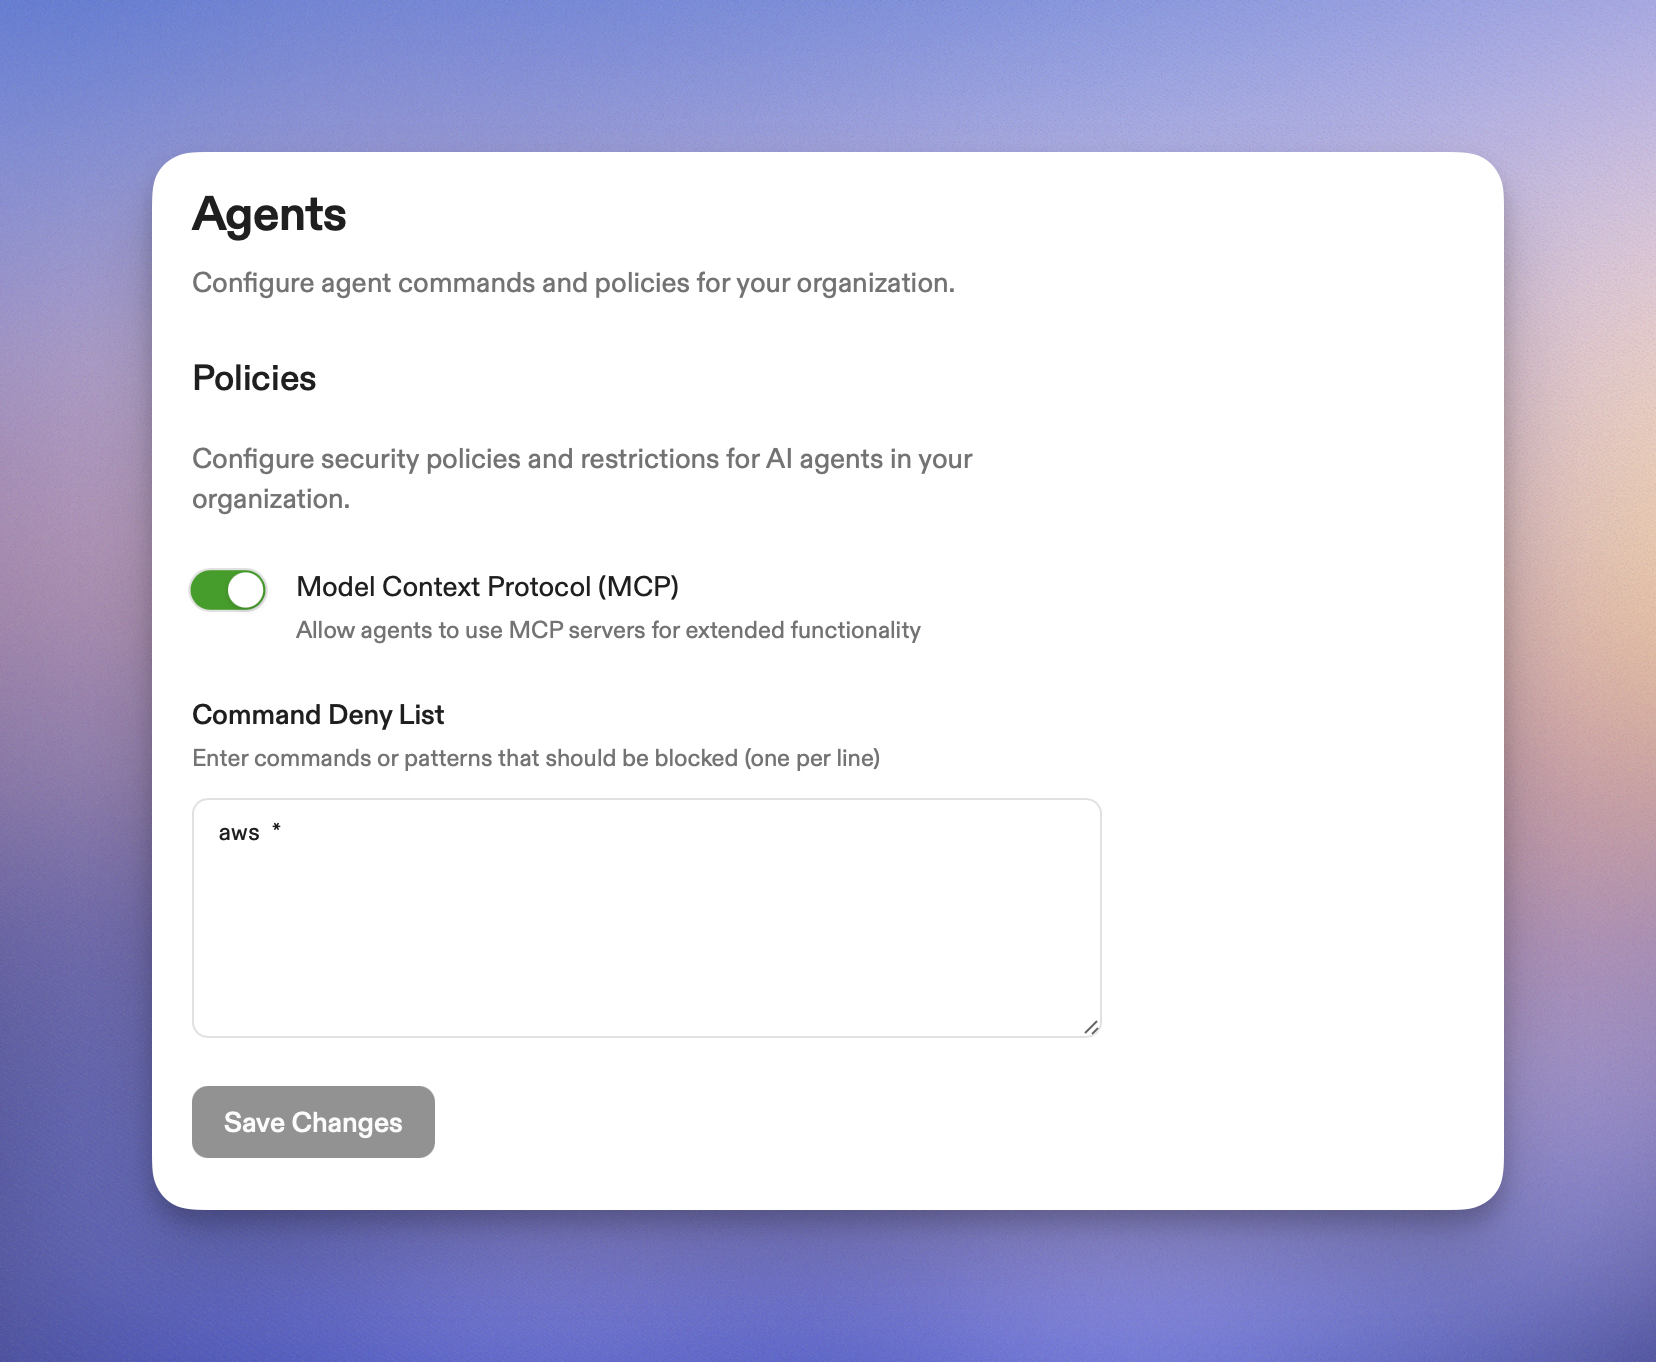 Organization owners can control MCP usage across their organization in settings.
To disable MCP:
1. Navigate to [Settings > Agents](https://app.gitpod.io/settings/agents)
2. Locate the MCP controls
3. Toggle MCP off to disable Model Context Protocol across all environments in your organization
When MCP is disabled at the organization level:
* `.ona/mcp-config.json` files in projects are ignored
* Ona Agent operates with built-in tools only
* External MCP server connections are blocked
* Changes apply to new Ona Agent sessions; existing sessions should be restarted to apply the policy
This enterprise control helps compliance teams enforce security policies while developers can still keep MCP configurations in code for future use. See [Audit logs](/ona/audit-logs/overview) to review organization-level changes.
# Create or join an organization
Source: https://ona.com/docs/ona/organizations/create-organization
If you're signing in for the first time, Ona will prompt you to create a new organization, where you'll automatically be the *admin*.
## Create a new organization
When creating a new organization, you need to specify its name. You can change the name later in the Settings.
Select the option 'Anyone with a “*yourdomain.org*” domain can join' to allow users with the same email domain to join when they sign up.
Organization owners can control MCP usage across their organization in settings.
To disable MCP:
1. Navigate to [Settings > Agents](https://app.gitpod.io/settings/agents)
2. Locate the MCP controls
3. Toggle MCP off to disable Model Context Protocol across all environments in your organization
When MCP is disabled at the organization level:
* `.ona/mcp-config.json` files in projects are ignored
* Ona Agent operates with built-in tools only
* External MCP server connections are blocked
* Changes apply to new Ona Agent sessions; existing sessions should be restarted to apply the policy
This enterprise control helps compliance teams enforce security policies while developers can still keep MCP configurations in code for future use. See [Audit logs](/ona/audit-logs/overview) to review organization-level changes.
# Create or join an organization
Source: https://ona.com/docs/ona/organizations/create-organization
If you're signing in for the first time, Ona will prompt you to create a new organization, where you'll automatically be the *admin*.
## Create a new organization
When creating a new organization, you need to specify its name. You can change the name later in the Settings.
Select the option 'Anyone with a “*yourdomain.org*” domain can join' to allow users with the same email domain to join when they sign up.
 ## Join an organization
If other users have already created organizations that allow you to join, you'll see a list of them. You can select 'Join' to become a *member* of one of those organizations.
## Join an organization
If other users have already created organizations that allow you to join, you'll see a list of them. You can select 'Join' to become a *member* of one of those organizations.
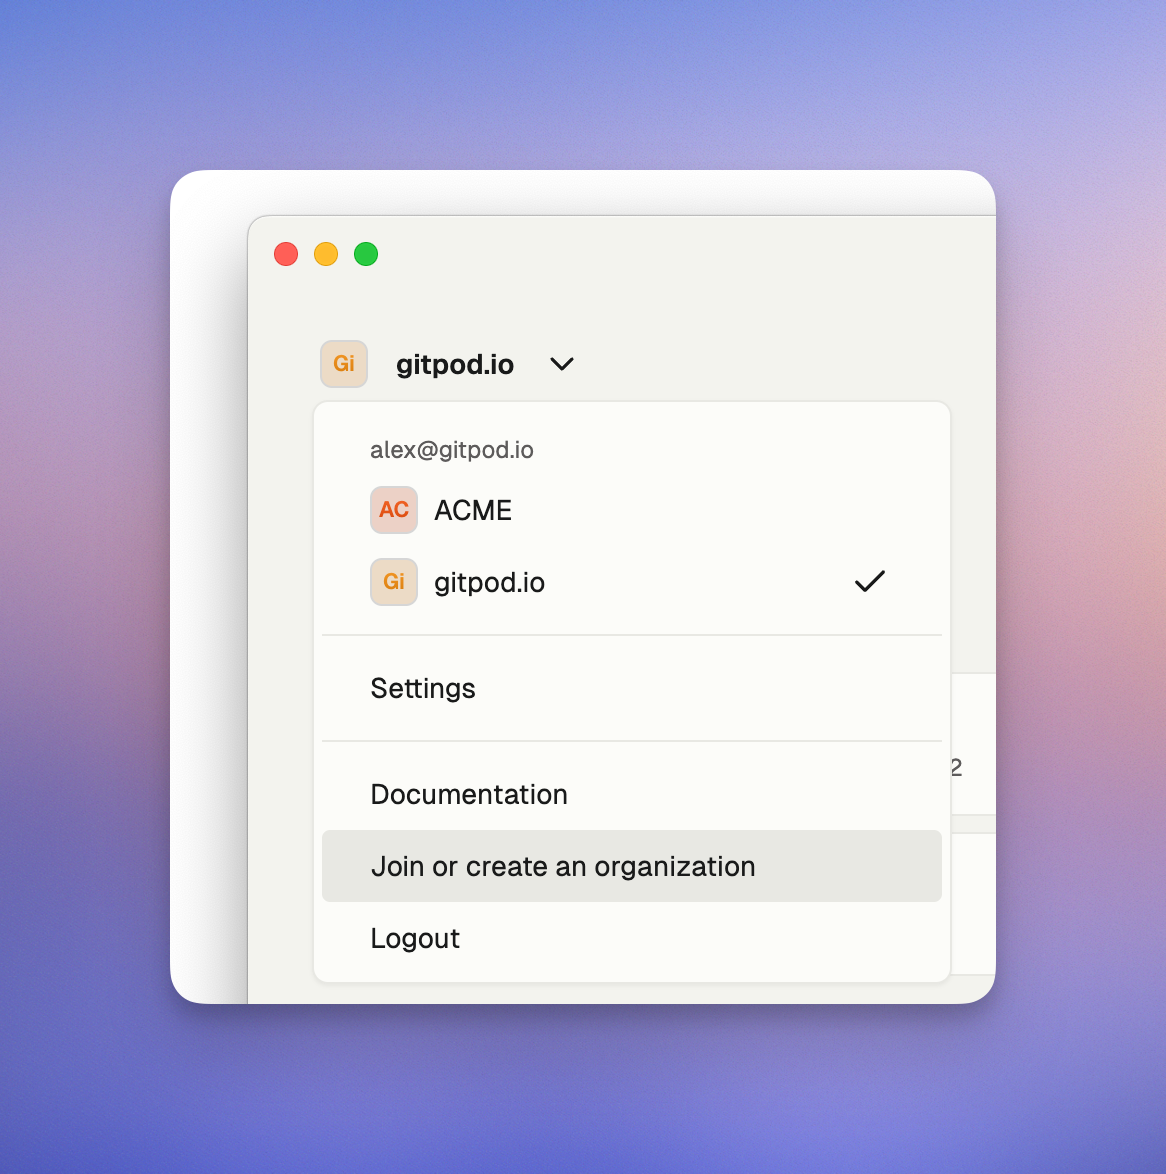 You can access the `Join or create an organization` dialog from the account drop-down menu at any time.
# Environment inventory
Source: https://ona.com/docs/ona/organizations/environment-inventory
This settings page allows you, as the admin of the current organization, to view all environments within the organization. You can see details such as the owner, project, runner, and status of each environment. Use the filters at the top of the page to find the specific data you're looking for.
You can access the `Join or create an organization` dialog from the account drop-down menu at any time.
# Environment inventory
Source: https://ona.com/docs/ona/organizations/environment-inventory
This settings page allows you, as the admin of the current organization, to view all environments within the organization. You can see details such as the owner, project, runner, and status of each environment. Use the filters at the top of the page to find the specific data you're looking for.
 In the Danger Zone, you'll find options to stop or delete any environment in your organization. Select the appropriate option from the drop-down menu.
 # Insights
Source: https://ona.com/docs/ona/organizations/insights
## Overview
Insights provide organization administrators with powerful analytics to track environment usage across their organization. This feature helps identify usage patterns, optimize cloud infrastructure costs, and monitor adoption across teams.
# Insights
Source: https://ona.com/docs/ona/organizations/insights
## Overview
Insights provide organization administrators with powerful analytics to track environment usage across their organization. This feature helps identify usage patterns, optimize cloud infrastructure costs, and monitor adoption across teams.
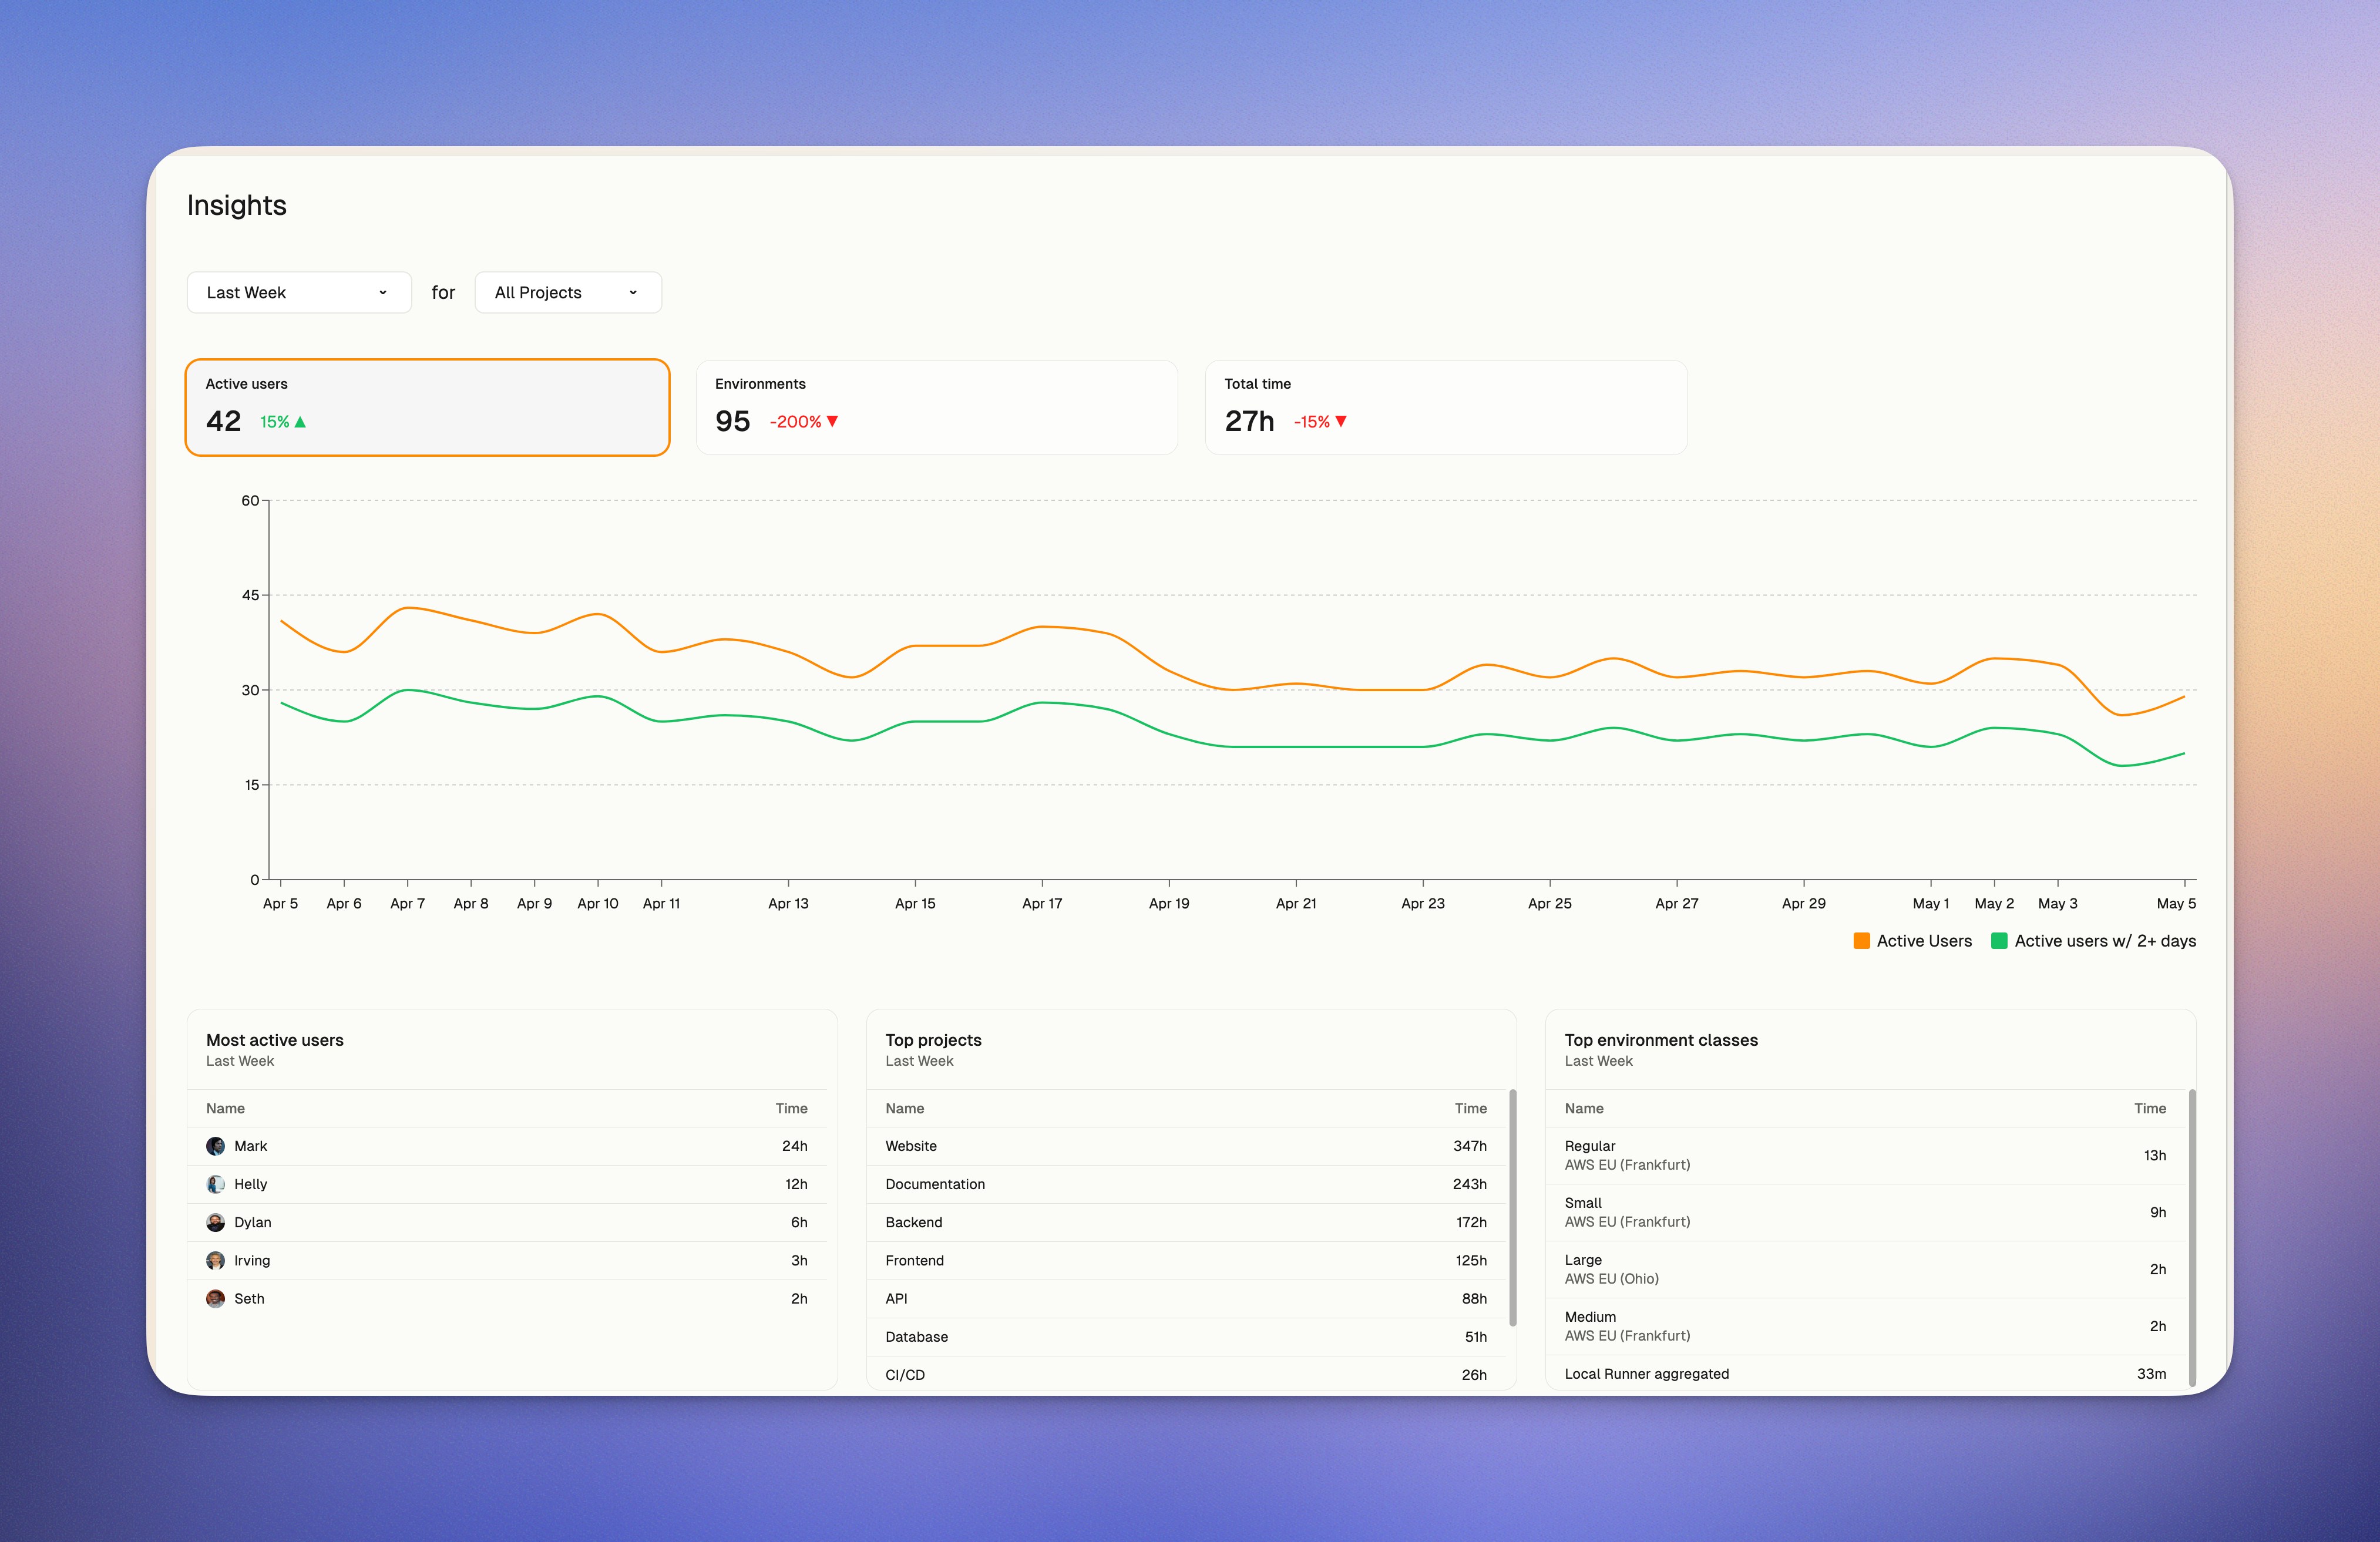 Available exclusively for organizations on the **Enterprise** billing tier, Insights offers detailed metrics on environment usage, active users, and resource consumption.
## Key Benefits
* **Usage Analysis**: Track environment runtime hours across projects and users
* **Cost Optimization**: Identify opportunities to reduce cloud infrastructure expenses
* **Adoption Monitoring**: Measure user engagement and feature adoption
## Accessing Insights
Insights are available to all administrator users of organizations on the Enterprise billing tier.
1. Navigate to [https://app.ona.com](https://app.ona.com)
2. Select **Insights** from the left navigation menu
## Using the Insights Dashboard
### Time Range Selection
The Insights dashboard allows you to select different time ranges to analyze your data:
* Last Day
* Last Week
* Last 14 Days
* Last Month
* Last 6 Months
* Last Year
### Available Metrics
The Insights dashboard provides several key metrics:
#### Active Users
Shows the number of unique users who started at least one environment during the selected time period. Includes:
* Weekly active users: Users with at least one started environment in the previous 7 days
* Weekly active users w/2+ days: Users with environments started on two or more different days in the past 7 days
Available exclusively for organizations on the **Enterprise** billing tier, Insights offers detailed metrics on environment usage, active users, and resource consumption.
## Key Benefits
* **Usage Analysis**: Track environment runtime hours across projects and users
* **Cost Optimization**: Identify opportunities to reduce cloud infrastructure expenses
* **Adoption Monitoring**: Measure user engagement and feature adoption
## Accessing Insights
Insights are available to all administrator users of organizations on the Enterprise billing tier.
1. Navigate to [https://app.ona.com](https://app.ona.com)
2. Select **Insights** from the left navigation menu
## Using the Insights Dashboard
### Time Range Selection
The Insights dashboard allows you to select different time ranges to analyze your data:
* Last Day
* Last Week
* Last 14 Days
* Last Month
* Last 6 Months
* Last Year
### Available Metrics
The Insights dashboard provides several key metrics:
#### Active Users
Shows the number of unique users who started at least one environment during the selected time period. Includes:
* Weekly active users: Users with at least one started environment in the previous 7 days
* Weekly active users w/2+ days: Users with environments started on two or more different days in the past 7 days
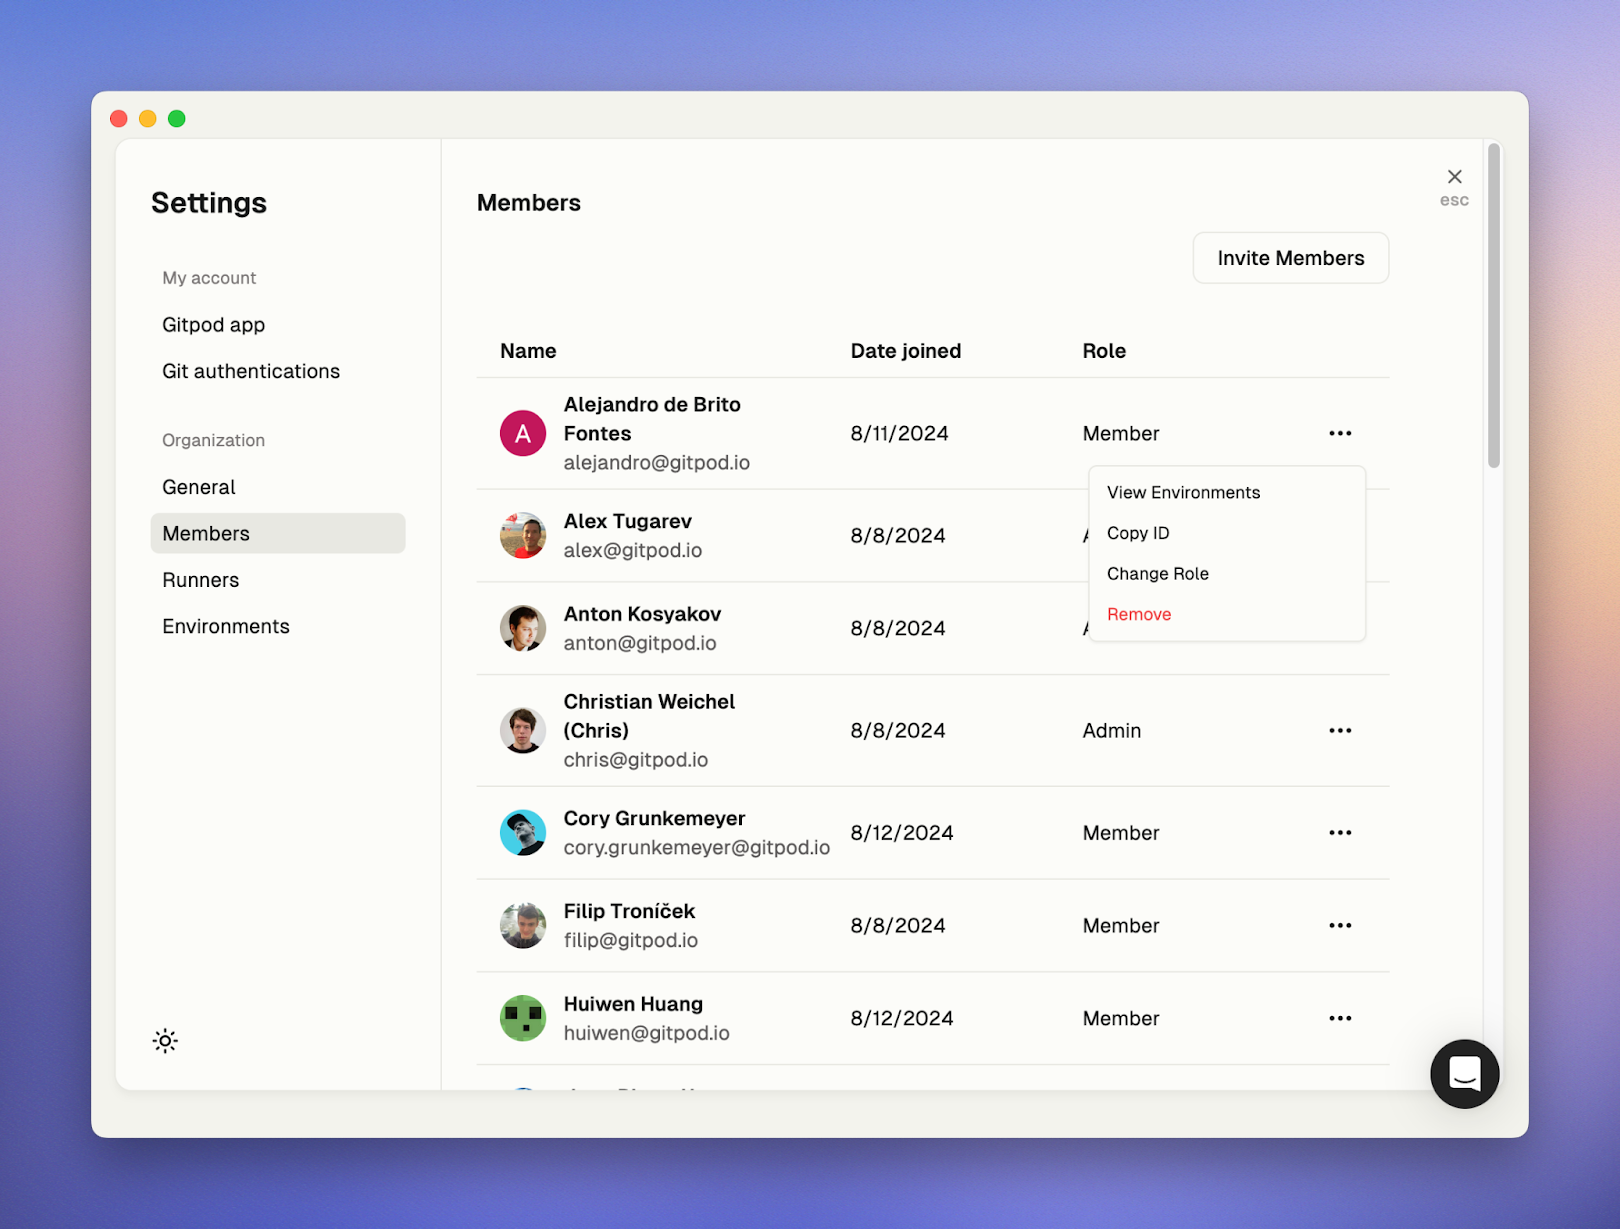 ## User roles
Members of an organization can have of the following roles:
* Admin - an admin is a privilidged member who can manage other members, create remote Runners, view all resources and administer the organization.
* Member - a regular user who can only a use a Local Runner, or a Runner that's been shared with them by an Admin.
## Permissions table
The following table outlines the specific permissions for each role in Ona:
| Permission | Admin | Member |
| --------------------------------------- | ----- | -------------------- |
| **Organization Management** | | |
| Create and manage organization | ✅ | ❌ |
| Invite members | ✅ | ❌ |
| Manage member roles | ✅ | ❌ |
| View all organization members | ✅ | ✅ |
| Configure organization policies | ✅ | ❌ |
| View organization audit logs | ✅ | ❌ |
| Configure SSO | ✅ | ❌ |
| **User** | | |
| Create Personal Access Token | ✅ | ✅ |
| **Projects** | | |
| Create projects | ✅ | Depends on policy |
| Share projects within organization | ✅ | ❌ |
| View and use existing projects | ✅ | ✅ |
| **Runners** | | |
| Create remote runners | ✅ | ❌ |
| Use remote runners | ✅ | When shared by admin |
| Use Gitpod Desktop (if enabled) | ✅ | ✅ |
| **Environments** | | |
| Create environments from any repository | ✅ | Depends on policy |
| View all organization environments | ✅ | ❌ |
| **Secrets** | | |
| Manage project secrets | ✅ | ❌ |
| Manage personal secrets | ✅ | ✅ |
To change a user's role, select 'Change Role' from the drop-down menu. This will open a modal where you can update their role.
## User roles
Members of an organization can have of the following roles:
* Admin - an admin is a privilidged member who can manage other members, create remote Runners, view all resources and administer the organization.
* Member - a regular user who can only a use a Local Runner, or a Runner that's been shared with them by an Admin.
## Permissions table
The following table outlines the specific permissions for each role in Ona:
| Permission | Admin | Member |
| --------------------------------------- | ----- | -------------------- |
| **Organization Management** | | |
| Create and manage organization | ✅ | ❌ |
| Invite members | ✅ | ❌ |
| Manage member roles | ✅ | ❌ |
| View all organization members | ✅ | ✅ |
| Configure organization policies | ✅ | ❌ |
| View organization audit logs | ✅ | ❌ |
| Configure SSO | ✅ | ❌ |
| **User** | | |
| Create Personal Access Token | ✅ | ✅ |
| **Projects** | | |
| Create projects | ✅ | Depends on policy |
| Share projects within organization | ✅ | ❌ |
| View and use existing projects | ✅ | ✅ |
| **Runners** | | |
| Create remote runners | ✅ | ❌ |
| Use remote runners | ✅ | When shared by admin |
| Use Gitpod Desktop (if enabled) | ✅ | ✅ |
| **Environments** | | |
| Create environments from any repository | ✅ | Depends on policy |
| View all organization environments | ✅ | ❌ |
| **Secrets** | | |
| Manage project secrets | ✅ | ❌ |
| Manage personal secrets | ✅ | ✅ |
To change a user's role, select 'Change Role' from the drop-down menu. This will open a modal where you can update their role.
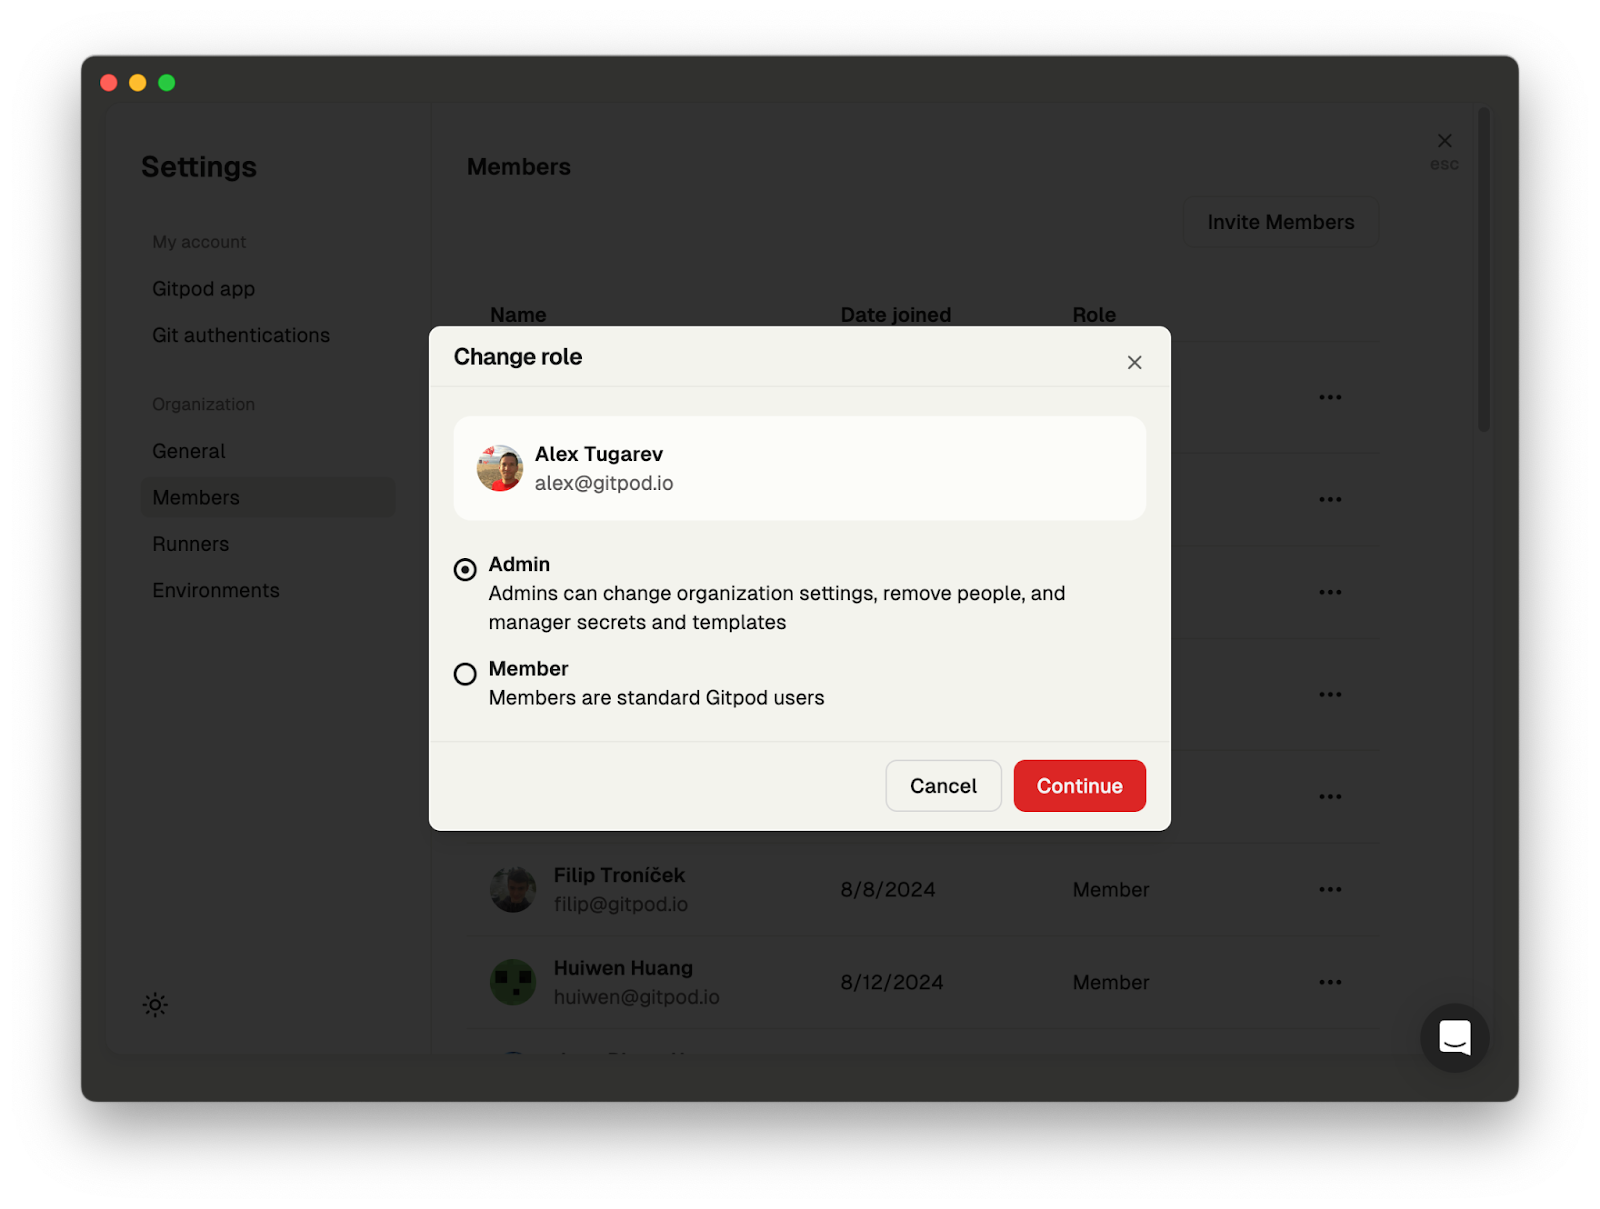 ## Create an invite link
Select the 'Invite Members' button at the top of the list to open the 'Invite Members' page, where you can copy the invite link to share with your team. If you need to deactivate a link, click 'Reset Invite Link' to invalidate any previously created links.
## Create an invite link
Select the 'Invite Members' button at the top of the list to open the 'Invite Members' page, where you can copy the invite link to share with your team. If you need to deactivate a link, click 'Reset Invite Link' to invalidate any previously created links.
 # Manage organization
Source: https://ona.com/docs/ona/organizations/manage-organization
If you are an admin of the current organization, you can modify the general settings. This includes:
* Changing the display name of your organization.
* Adjusting the email domains of users who can discover and join your organization.
In the Danger Zone, you have the option to delete the organization.
# Manage organization
Source: https://ona.com/docs/ona/organizations/manage-organization
If you are an admin of the current organization, you can modify the general settings. This includes:
* Changing the display name of your organization.
* Adjusting the email domains of users who can discover and join your organization.
In the Danger Zone, you have the option to delete the organization.
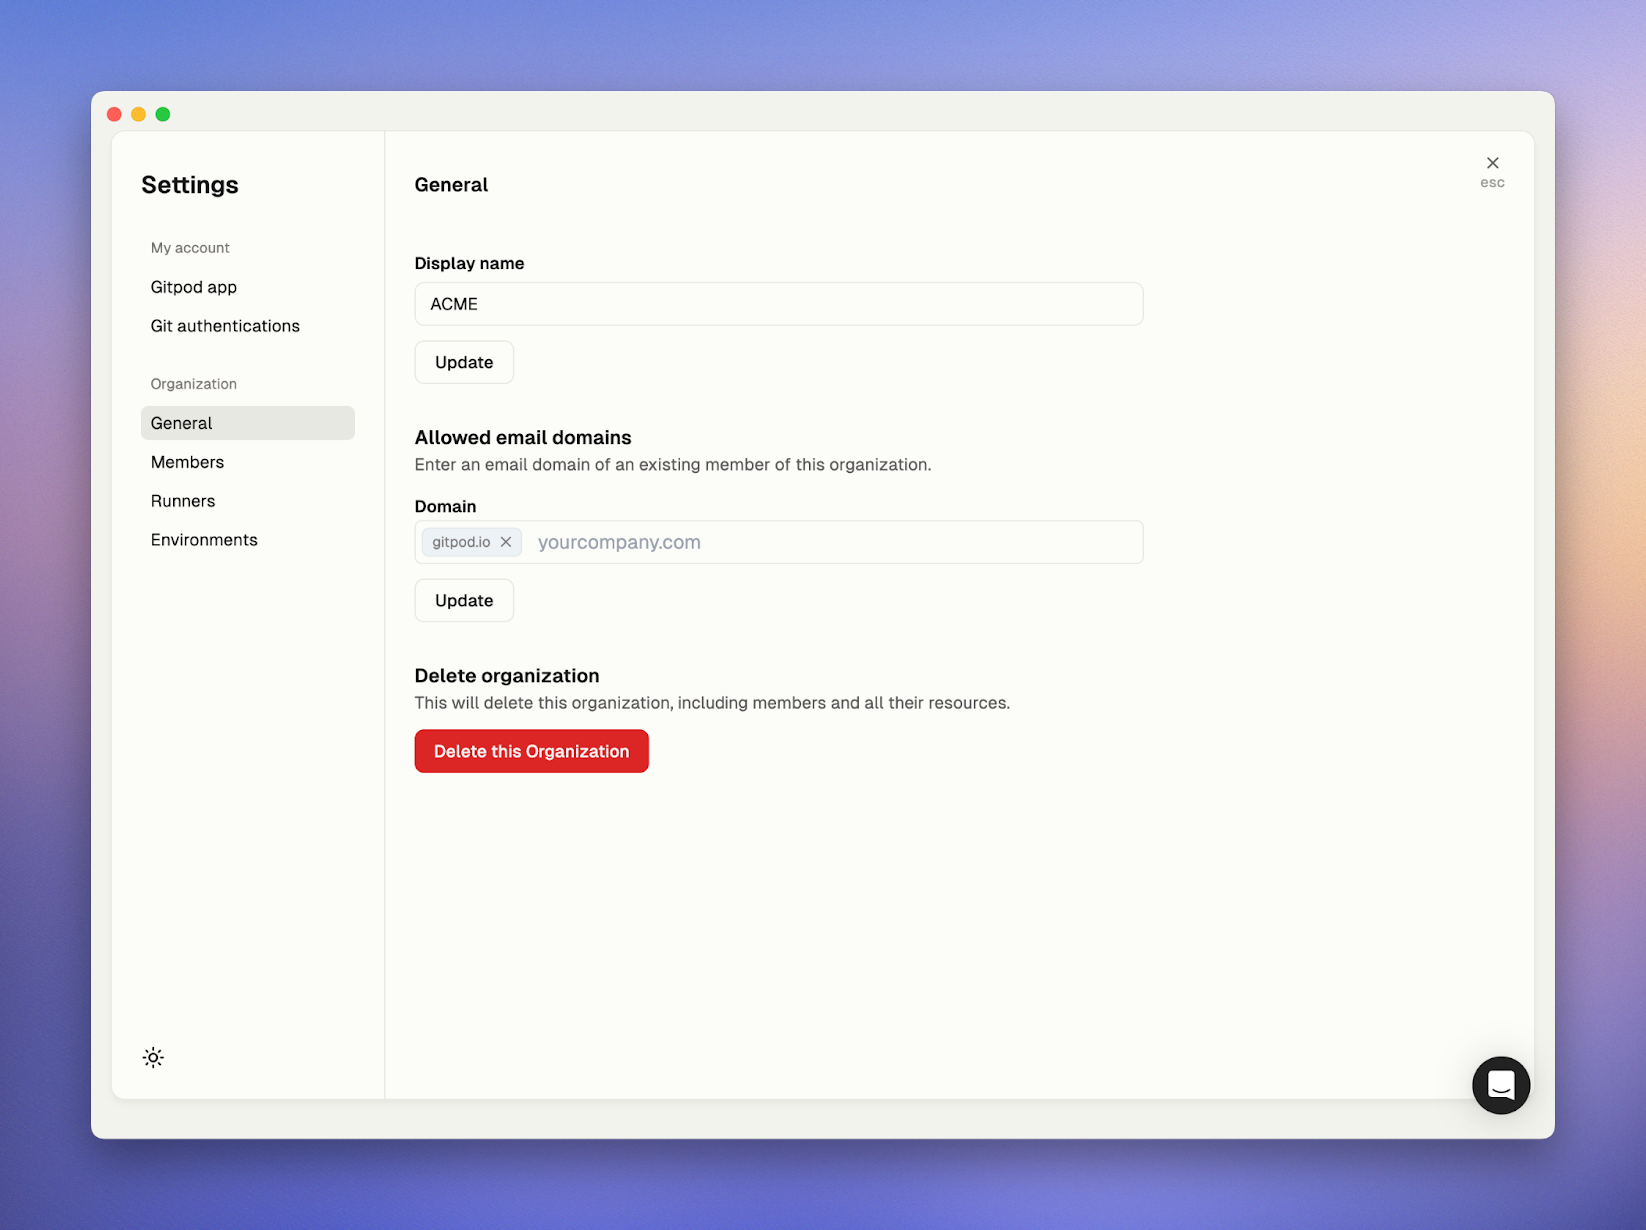 ## Allowed email domains
You can allow others to join your organization if their email address matches one of the allowed email domains in organization settings. Ona enforces a validation rule that only permits email domains provided by the identity provider (IdP) during sign-in. This means you can't add domains to the list unless they are used by members of your organization.
## Allowed email domains
You can allow others to join your organization if their email address matches one of the allowed email domains in organization settings. Ona enforces a validation rule that only permits email domains provided by the identity provider (IdP) during sign-in. This means you can't add domains to the list unless they are used by members of your organization.
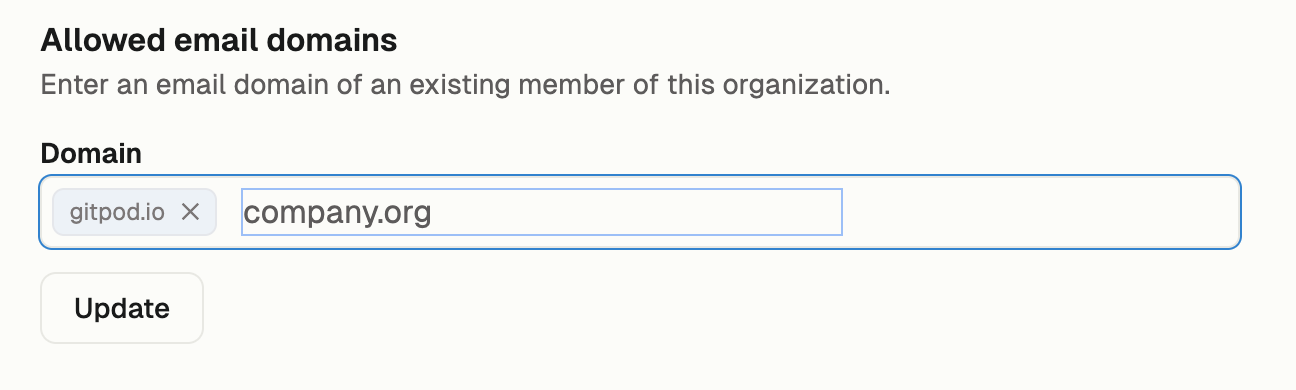
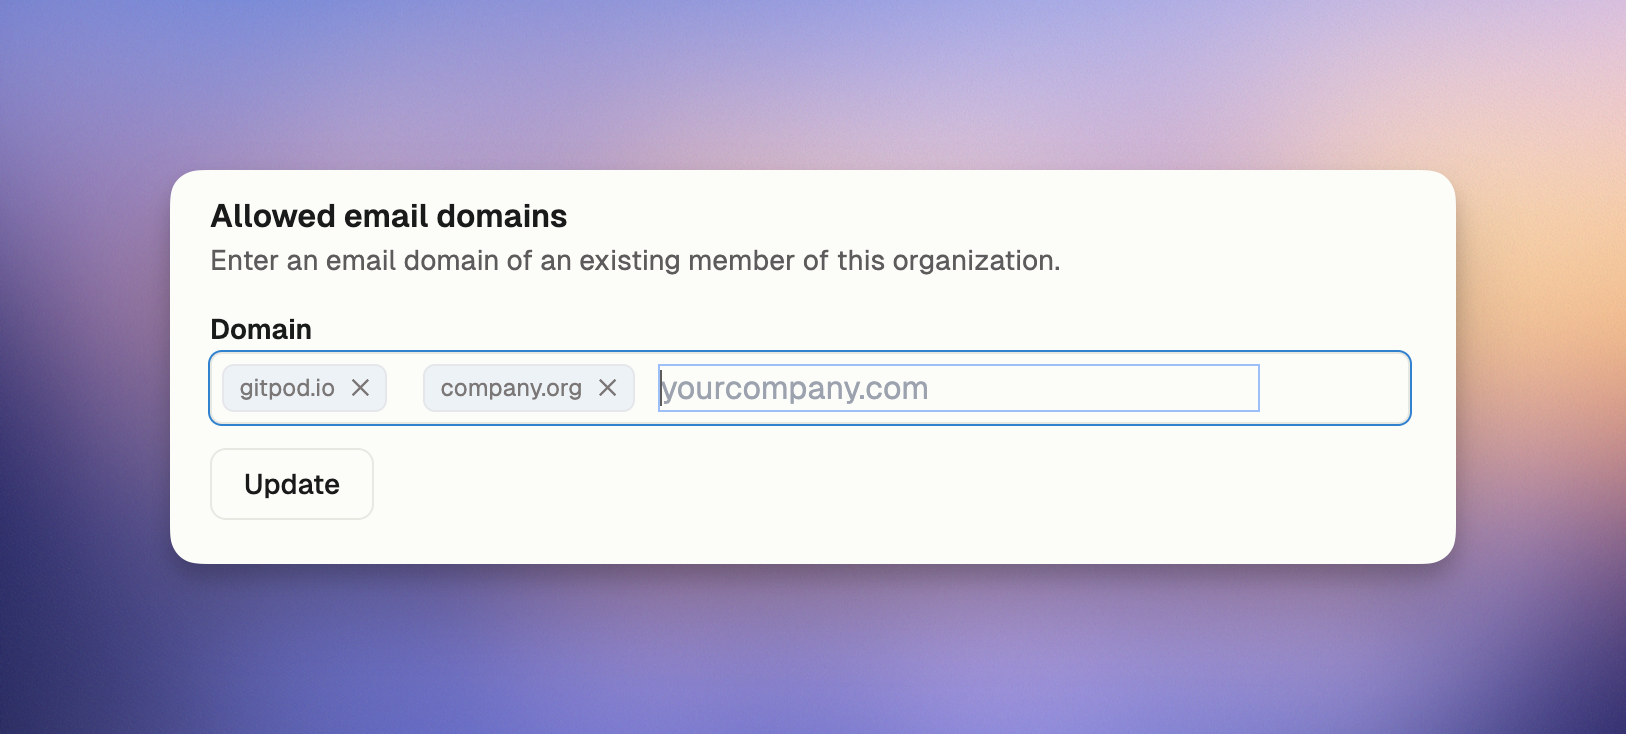
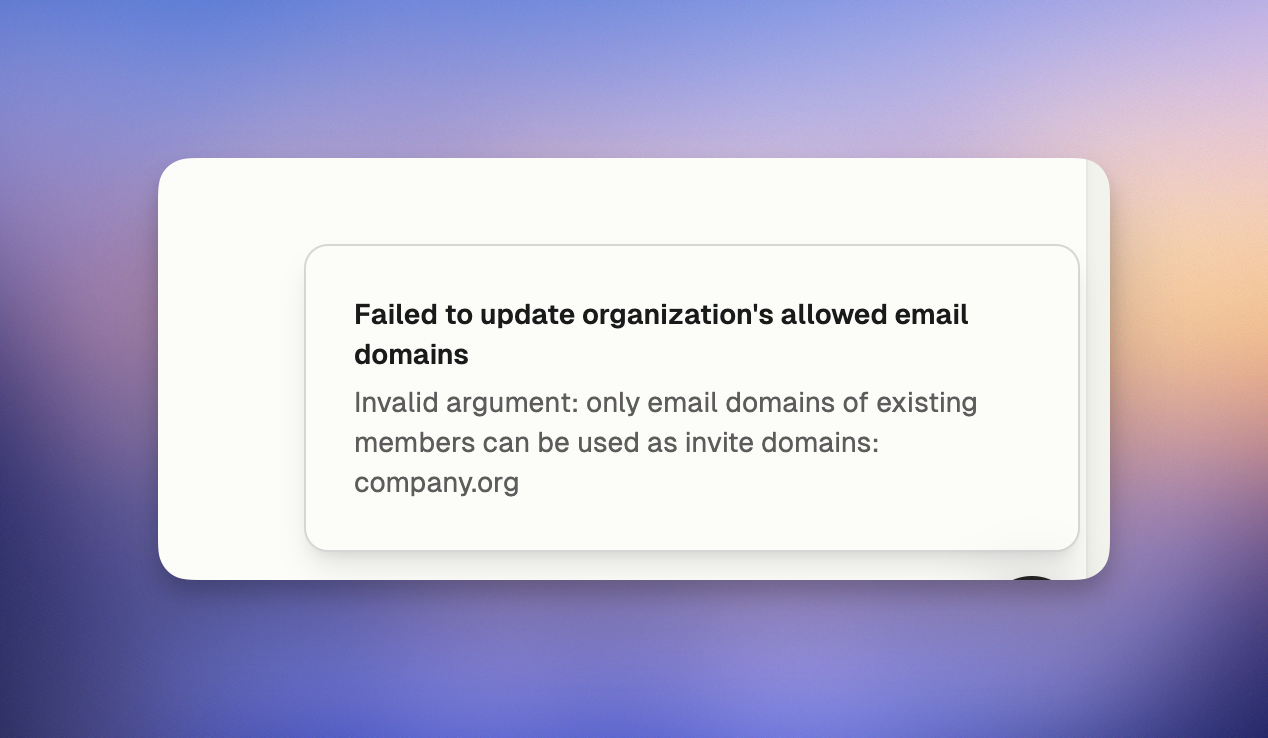 # Organization Secrets
Source: https://ona.com/docs/ona/organizations/organization-secrets
Learn how to configure Organization-wide secrets in your Organization
Organization secrets are a type of secret scoped to the organization level. They are used to store sensitive data such as API keys, access tokens, and credentials which are shared across all environments in the organization.
**Organization secrets have the lowest precedence** in the secrets hierarchy. They can be overridden by both project secrets and user secrets with the same name. This makes them ideal for setting organization-wide defaults while still allowing projects and individual users to customize as needed.
To manage your organization secrets, navigate to the **Settings > Organization > Secrets** page in your Ona dashboard.
# Organization Secrets
Source: https://ona.com/docs/ona/organizations/organization-secrets
Learn how to configure Organization-wide secrets in your Organization
Organization secrets are a type of secret scoped to the organization level. They are used to store sensitive data such as API keys, access tokens, and credentials which are shared across all environments in the organization.
**Organization secrets have the lowest precedence** in the secrets hierarchy. They can be overridden by both project secrets and user secrets with the same name. This makes them ideal for setting organization-wide defaults while still allowing projects and individual users to customize as needed.
To manage your organization secrets, navigate to the **Settings > Organization > Secrets** page in your Ona dashboard.
 ## Secret Types
Organization secrets support the following types:
* [Environment Variables](/ona/configuration/secrets/environment-variables)
* [Files](/ona/configuration/secrets/files)
* [Container Registry Secrets](/ona/configuration/secrets/container-registry-secret)
## Creating an Organization Secret
To create an organization secret, navigate to the **Settings > Organization > Secrets** page in your Ona dashboard and click the **New Secret** button.
## Updating an Organization Secret
To update an organization secret, navigate to the **Settings > Organization > Secrets** page in your Ona dashboard and click the **Edit** button.
## Deleting an Organization Secret
To delete an organization secret, navigate to the **Settings > Organization > Secrets** page in your Ona dashboard and click the **Delete** button next to the corresponding secret.
# Overview
Source: https://ona.com/docs/ona/organizations/overview
Organizations represent groups you can join within an account. They let users share resources like remote runners and projects to collaborate easily.
Organizations give administrators control and insight into resources. Administrators can manage shared projects and environments, as well as create shared runners to be used by all members.
Organizations help teams collaborate effectively by providing a shared space for development resources and controls. They represent distinct groups within your account, each with their own isolated set of resources and permissions.
For personal use, you can create an Organization for yourself.
## Key Benefits
* Resource Sharing: Share runners, projects and secrets across your team
* Access Control: Manage who can access what through role-based permissions
* Standardization: Create organization-wide projects
* Cost Management: Track and control of resource usage in your Organization
## Organization Resources
Organizations act as containers for:
* Projects: Standardized development environment configurations
* Runners: Self-hosted infrastructure for running environments
* Members: Users with varying levels of access and permissions
* Settings: Organization-wide configurations and policies
## Isolation
Organizations represent hard boundaries - resources cannot be shared or transferred between organizations. Organizations are isolated from each other through strong access controls.
Each organizational resource belongs to exactly one organization - runners, projects and environments. Users can be members of multiple organizations but must switch between them explicitly
## Getting Started
* [How to create an organization](/ona/organizations/create-organization)
# Organization Policies
Source: https://ona.com/docs/ona/organizations/policies
Control how Ona is used in your organization with powerful policy settings that help manage resources, control costs, and ensure consistency.
## Secret Types
Organization secrets support the following types:
* [Environment Variables](/ona/configuration/secrets/environment-variables)
* [Files](/ona/configuration/secrets/files)
* [Container Registry Secrets](/ona/configuration/secrets/container-registry-secret)
## Creating an Organization Secret
To create an organization secret, navigate to the **Settings > Organization > Secrets** page in your Ona dashboard and click the **New Secret** button.
## Updating an Organization Secret
To update an organization secret, navigate to the **Settings > Organization > Secrets** page in your Ona dashboard and click the **Edit** button.
## Deleting an Organization Secret
To delete an organization secret, navigate to the **Settings > Organization > Secrets** page in your Ona dashboard and click the **Delete** button next to the corresponding secret.
# Overview
Source: https://ona.com/docs/ona/organizations/overview
Organizations represent groups you can join within an account. They let users share resources like remote runners and projects to collaborate easily.
Organizations give administrators control and insight into resources. Administrators can manage shared projects and environments, as well as create shared runners to be used by all members.
Organizations help teams collaborate effectively by providing a shared space for development resources and controls. They represent distinct groups within your account, each with their own isolated set of resources and permissions.
For personal use, you can create an Organization for yourself.
## Key Benefits
* Resource Sharing: Share runners, projects and secrets across your team
* Access Control: Manage who can access what through role-based permissions
* Standardization: Create organization-wide projects
* Cost Management: Track and control of resource usage in your Organization
## Organization Resources
Organizations act as containers for:
* Projects: Standardized development environment configurations
* Runners: Self-hosted infrastructure for running environments
* Members: Users with varying levels of access and permissions
* Settings: Organization-wide configurations and policies
## Isolation
Organizations represent hard boundaries - resources cannot be shared or transferred between organizations. Organizations are isolated from each other through strong access controls.
Each organizational resource belongs to exactly one organization - runners, projects and environments. Users can be members of multiple organizations but must switch between them explicitly
## Getting Started
* [How to create an organization](/ona/organizations/create-organization)
# Organization Policies
Source: https://ona.com/docs/ona/organizations/policies
Control how Ona is used in your organization with powerful policy settings that help manage resources, control costs, and ensure consistency.
 *Organization Policies*
### Who Can Access Policies?
Only organization **administrators** can view and modify policies. Regular **members** do not have access to organization policies.
### How Policies Work
* Most policies apply to all organization members
* Changes take effect immediately for new actions
* Existing environments are not affected by policy changes
* Administrators can override certain policies (like environment creation restrictions)
## Available Policies
### Editor Restrictions
This policy lets you standardize which code editors your team can use, creating consistency across development environments, enforcing company standards, and simplifying onboarding with standardized tools. You can also set a default editor that will be pre-selected for all users.
**Configuration**
1. In your [Organization Policies](https://app.ona.com/settings/policies) page, click on `Manage Editors` button
2. Select the editors you want to allow from the list
3. Choose a default editor that will be pre-selected for users
4. Save your changes
> **Remember:** You must keep at least one editor selected.
*Organization Policies*
### Who Can Access Policies?
Only organization **administrators** can view and modify policies. Regular **members** do not have access to organization policies.
### How Policies Work
* Most policies apply to all organization members
* Changes take effect immediately for new actions
* Existing environments are not affected by policy changes
* Administrators can override certain policies (like environment creation restrictions)
## Available Policies
### Editor Restrictions
This policy lets you standardize which code editors your team can use, creating consistency across development environments, enforcing company standards, and simplifying onboarding with standardized tools. You can also set a default editor that will be pre-selected for all users.
**Configuration**
1. In your [Organization Policies](https://app.ona.com/settings/policies) page, click on `Manage Editors` button
2. Select the editors you want to allow from the list
3. Choose a default editor that will be pre-selected for users
4. Save your changes
> **Remember:** You must keep at least one editor selected.
 *You can toggle the editors you want to limit your organization from using and choose an org default*
**Effect on users**
* Users will only see the allowed editors in the editor selection dropdown
* The default editor you selected will be pre-selected automatically
* Attempts to use a non-allowed editor (for example: via CLI) will be met with an error indicating the reason
### Maximum Environment Timeout
Limit the auto-stop timeout options that users can select for their environments to prevent unnecessary resource usage and control computing costs.
**Configuration**
1. In your [Organization Policies](https://app.ona.com/settings/policies) page, click on dropdown under `Maximum timeout duration` option
2. Choose from the following available maximum values:
* 30 minutes
* 1 hour
* 3 hours
* 8 hours
* No Max Timeout (all options available, including `Never` Timeout)
*You can toggle the editors you want to limit your organization from using and choose an org default*
**Effect on users**
* Users will only see the allowed editors in the editor selection dropdown
* The default editor you selected will be pre-selected automatically
* Attempts to use a non-allowed editor (for example: via CLI) will be met with an error indicating the reason
### Maximum Environment Timeout
Limit the auto-stop timeout options that users can select for their environments to prevent unnecessary resource usage and control computing costs.
**Configuration**
1. In your [Organization Policies](https://app.ona.com/settings/policies) page, click on dropdown under `Maximum timeout duration` option
2. Choose from the following available maximum values:
* 30 minutes
* 1 hour
* 3 hours
* 8 hours
* No Max Timeout (all options available, including `Never` Timeout)
 *You can choose what is the maximum timeout that is available to the users*
**Effect on users**
* Users will only see timeout options up to the maximum allowed by your policy in the dropdown menu
For example, if you select "3 hours" as the maximum timeout, users will only see these options when starting an environment:
* 30 minutes
* 1 hour
* 3 hours
* If you select "No maximum," users will see all timeout options including "Never."
*You can choose what is the maximum timeout that is available to the users*
**Effect on users**
* Users will only see timeout options up to the maximum allowed by your policy in the dropdown menu
For example, if you select "3 hours" as the maximum timeout, users will only see these options when starting an environment:
* 30 minutes
* 1 hour
* 3 hours
* If you select "No maximum," users will see all timeout options including "Never."
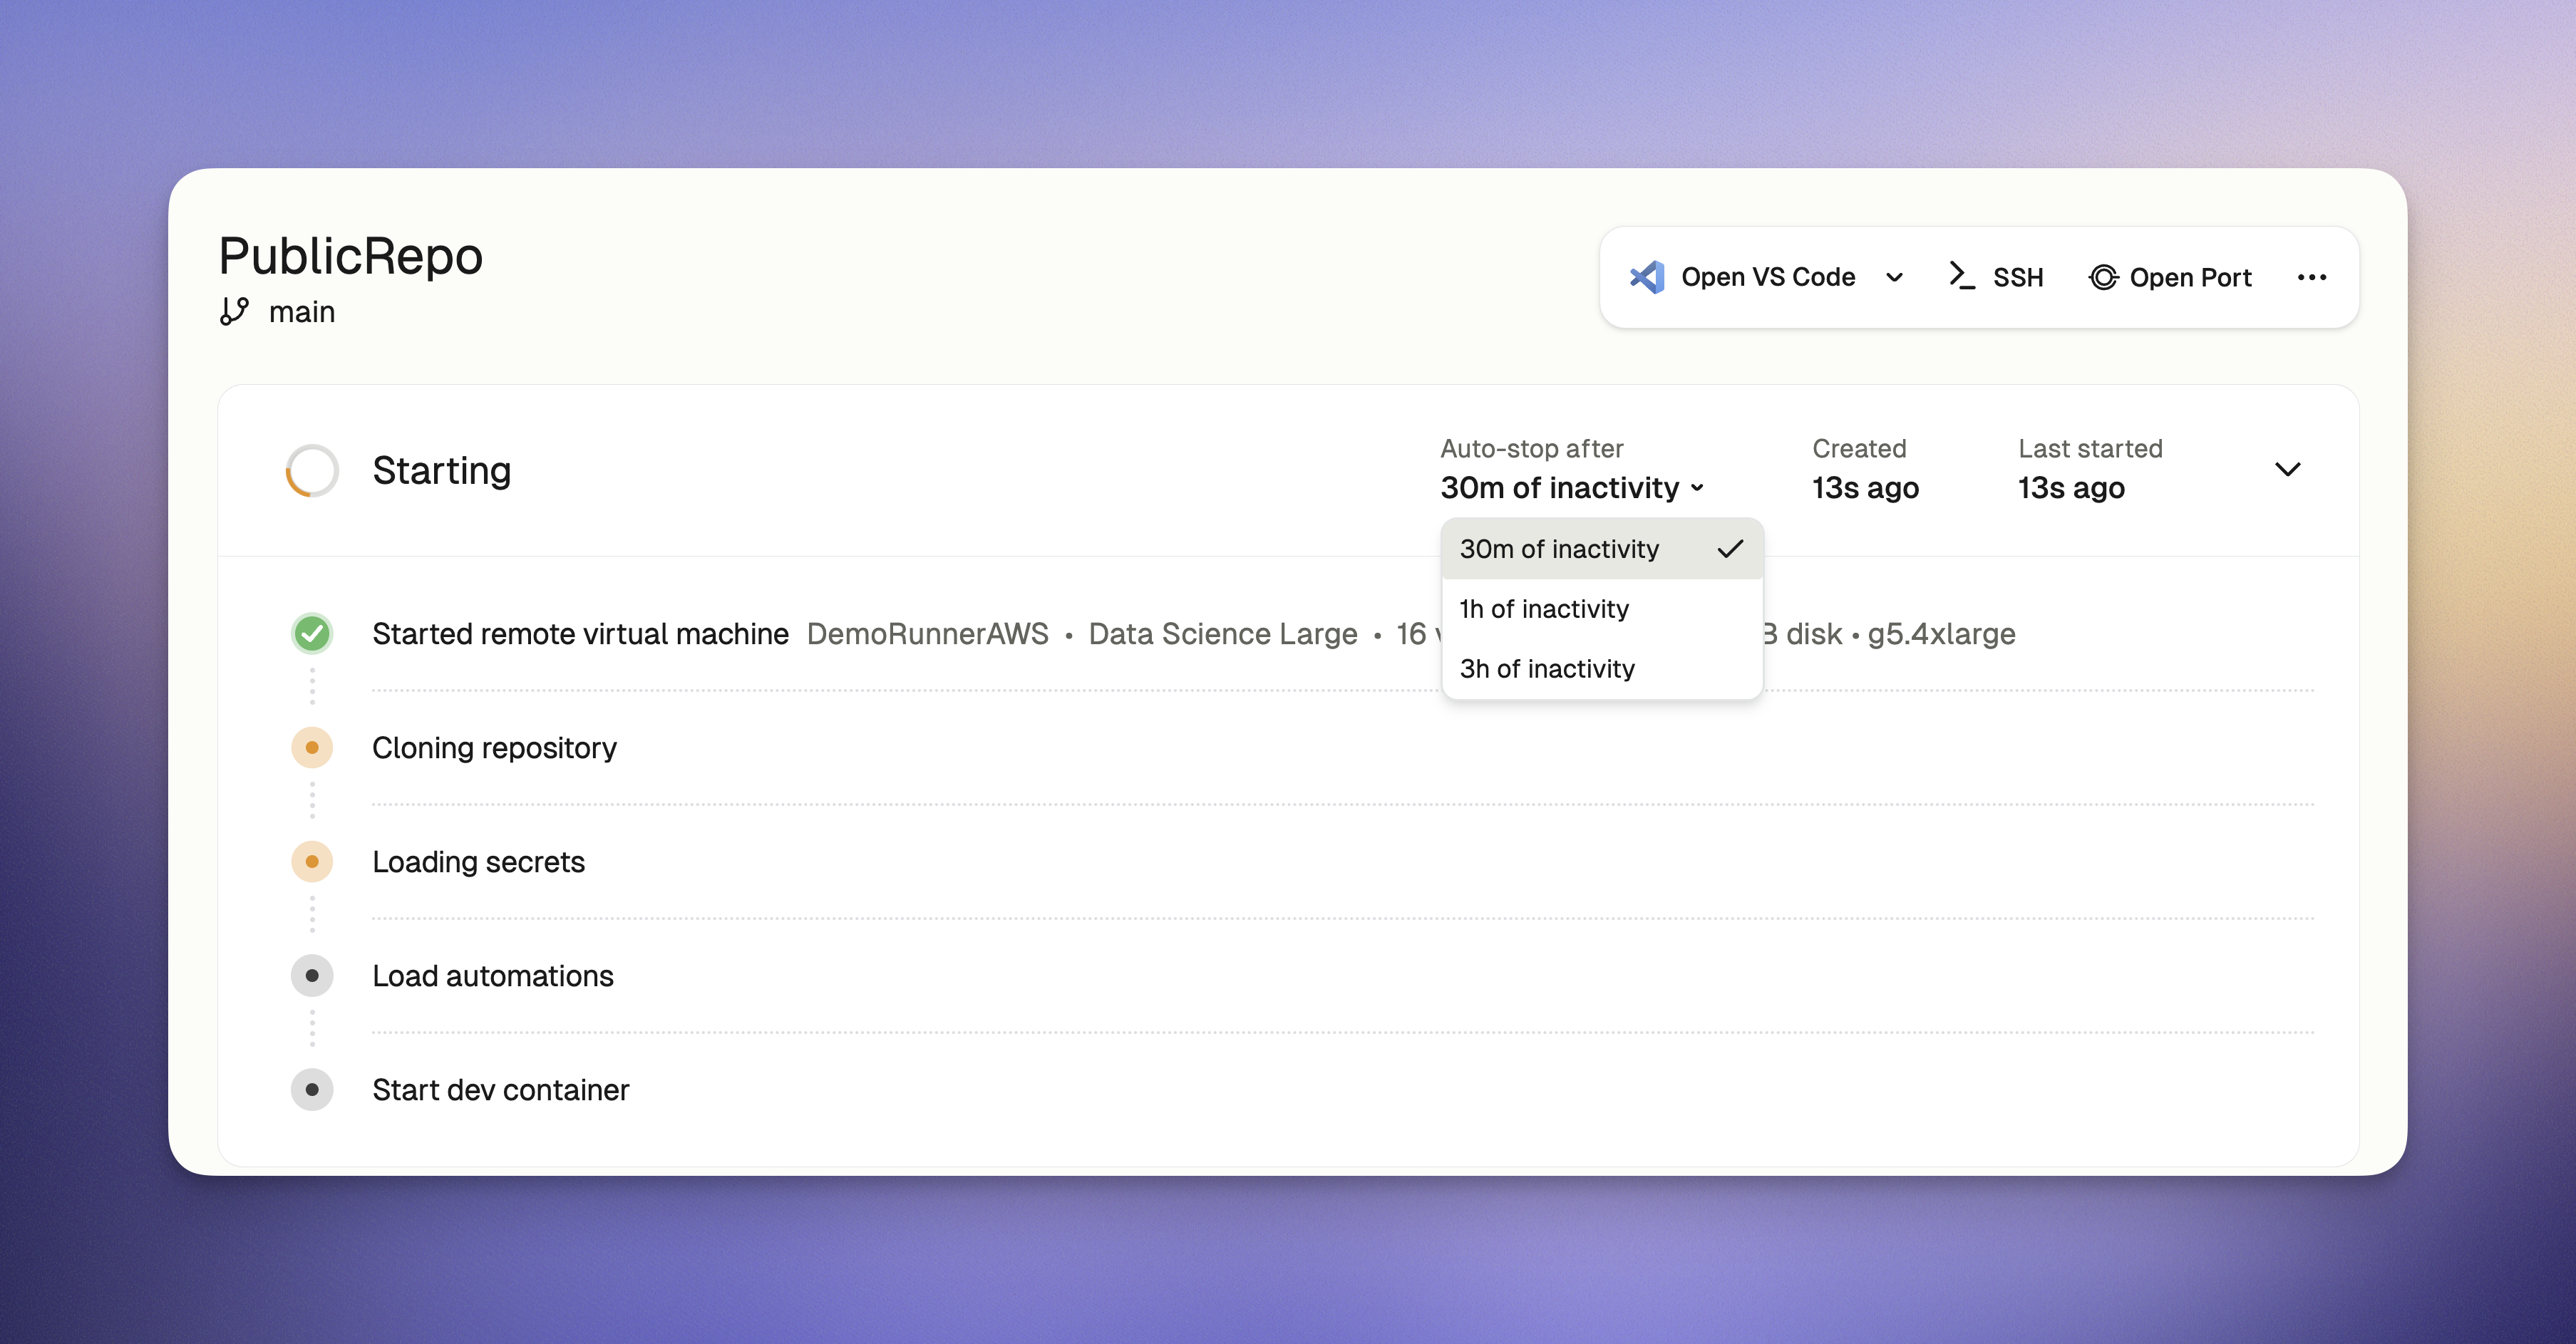 *The policy will limit what users see as available timeout options*
### Environment Creation Restrictions
> Note: This policy only affects organization members and not organization admins.
This policy controls whether regular organization members can create environments directly from repository URLs or if they are restricted to only creating environments from pre-defined projects.
This policy ensures that regular members work only within approved projects that administrators have set up, maintaining organizational control over which repositories are used for development.
**Configuration**
1. Go to your [Organization Policies](https://app.ona.com/settings/policies) page
2. Check "Environments can only be created from projects" option under `Environment creation restrictions` to enable this restriction
*The policy will limit what users see as available timeout options*
### Environment Creation Restrictions
> Note: This policy only affects organization members and not organization admins.
This policy controls whether regular organization members can create environments directly from repository URLs or if they are restricted to only creating environments from pre-defined projects.
This policy ensures that regular members work only within approved projects that administrators have set up, maintaining organizational control over which repositories are used for development.
**Configuration**
1. Go to your [Organization Policies](https://app.ona.com/settings/policies) page
2. Check "Environments can only be created from projects" option under `Environment creation restrictions` to enable this restriction
 *Environment creation restrictions*
**Effect on users**
* Organization Members:
* Can only create environments within existing projects
* Will see "Create Environment" button restricted to existing projects only
* Cannot create new projects
* Will receive a policy notification when attempting to use repository URLs directly
* Organization Administrators:
* Can create environments from any source, including direct repository URLs
* Have exclusive permission to create new projects
* Retain full access to all environment creation features
### Port Sharing Restrictions
This policy controls whether organization members can share ports from their environments to make services publicly accessible on the internet. If enforced, this restriction prevents users from exposing any ports from their Ona environments.
This policy helps you:
* Maintain security by preventing unauthorized exposure of development services
* Ensure compliance with organizational security policies
* Prevent accidental exposure of sensitive applications or data
* Control network access patterns within your organization
**Configuration**
1. Go to your [Organization Policies](https://app.ona.com/settings/policies) page
2. Check "Disable port sharing" option under `Port sharing restrictions` to prevent users from sharing ports
*Environment creation restrictions*
**Effect on users**
* Organization Members:
* Can only create environments within existing projects
* Will see "Create Environment" button restricted to existing projects only
* Cannot create new projects
* Will receive a policy notification when attempting to use repository URLs directly
* Organization Administrators:
* Can create environments from any source, including direct repository URLs
* Have exclusive permission to create new projects
* Retain full access to all environment creation features
### Port Sharing Restrictions
This policy controls whether organization members can share ports from their environments to make services publicly accessible on the internet. If enforced, this restriction prevents users from exposing any ports from their Ona environments.
This policy helps you:
* Maintain security by preventing unauthorized exposure of development services
* Ensure compliance with organizational security policies
* Prevent accidental exposure of sensitive applications or data
* Control network access patterns within your organization
**Configuration**
1. Go to your [Organization Policies](https://app.ona.com/settings/policies) page
2. Check "Disable port sharing" option under `Port sharing restrictions` to prevent users from sharing ports
 *Port sharing restrictions*
**Effect on users**
* Users will not be able to share ports using either the UI or CLI methods
* Attempts to use `gitpod environment port open` CLI commands will be blocked with a policy restriction message
* Users will not be able to use VS Code Browser
* Users will see a notification explaining that port sharing is disabled by organization policy
### Maximum Concurrent and total environments a user can have
This policy helps administrators manage resource usage and control costs by setting two important limits:
* **Maximum total environments per user**: Limits how many total environments (running or stopped) each user can have
* **Maximum running environments per user**: Limits how many environments each user can have running simultaneously
By setting reasonable limits, you can:
* Prevent resource overuse that might impact your organization's infrastructure
* Control cloud computing costs, especially with AWS EC2 runners
* Encourage users to clean up environments they're no longer using
* Ensure resources are distributed fairly across your team
**Configuration**
1. Go to your [Organization Policies](https://app.ona.co/settings/policies) page
2. Set appropriate values for both `Maximum concurrent environments` and `Maximum total environments`
* Both values must be between 1 and 100
3. These are set to 10 and 50 respectively by default
*Port sharing restrictions*
**Effect on users**
* Users will not be able to share ports using either the UI or CLI methods
* Attempts to use `gitpod environment port open` CLI commands will be blocked with a policy restriction message
* Users will not be able to use VS Code Browser
* Users will see a notification explaining that port sharing is disabled by organization policy
### Maximum Concurrent and total environments a user can have
This policy helps administrators manage resource usage and control costs by setting two important limits:
* **Maximum total environments per user**: Limits how many total environments (running or stopped) each user can have
* **Maximum running environments per user**: Limits how many environments each user can have running simultaneously
By setting reasonable limits, you can:
* Prevent resource overuse that might impact your organization's infrastructure
* Control cloud computing costs, especially with AWS EC2 runners
* Encourage users to clean up environments they're no longer using
* Ensure resources are distributed fairly across your team
**Configuration**
1. Go to your [Organization Policies](https://app.ona.co/settings/policies) page
2. Set appropriate values for both `Maximum concurrent environments` and `Maximum total environments`
* Both values must be between 1 and 100
3. These are set to 10 and 50 respectively by default
 *Restrict maximum environments a user can have running or in total*
**Effect on users**
* A notification will appear when they attempt to create a new remote environment beyond the limit
* The notification will explain the policy limit and suggest stopping unused environments
> Warning: If you are using EC2 runners, note that undeleted environments (running or stopped) will incur usage costs as per AWS pricing.
*Restrict maximum environments a user can have running or in total*
**Effect on users**
* A notification will appear when they attempt to create a new remote environment beyond the limit
* The notification will explain the policy limit and suggest stopping unused environments
> Warning: If you are using EC2 runners, note that undeleted environments (running or stopped) will incur usage costs as per AWS pricing.
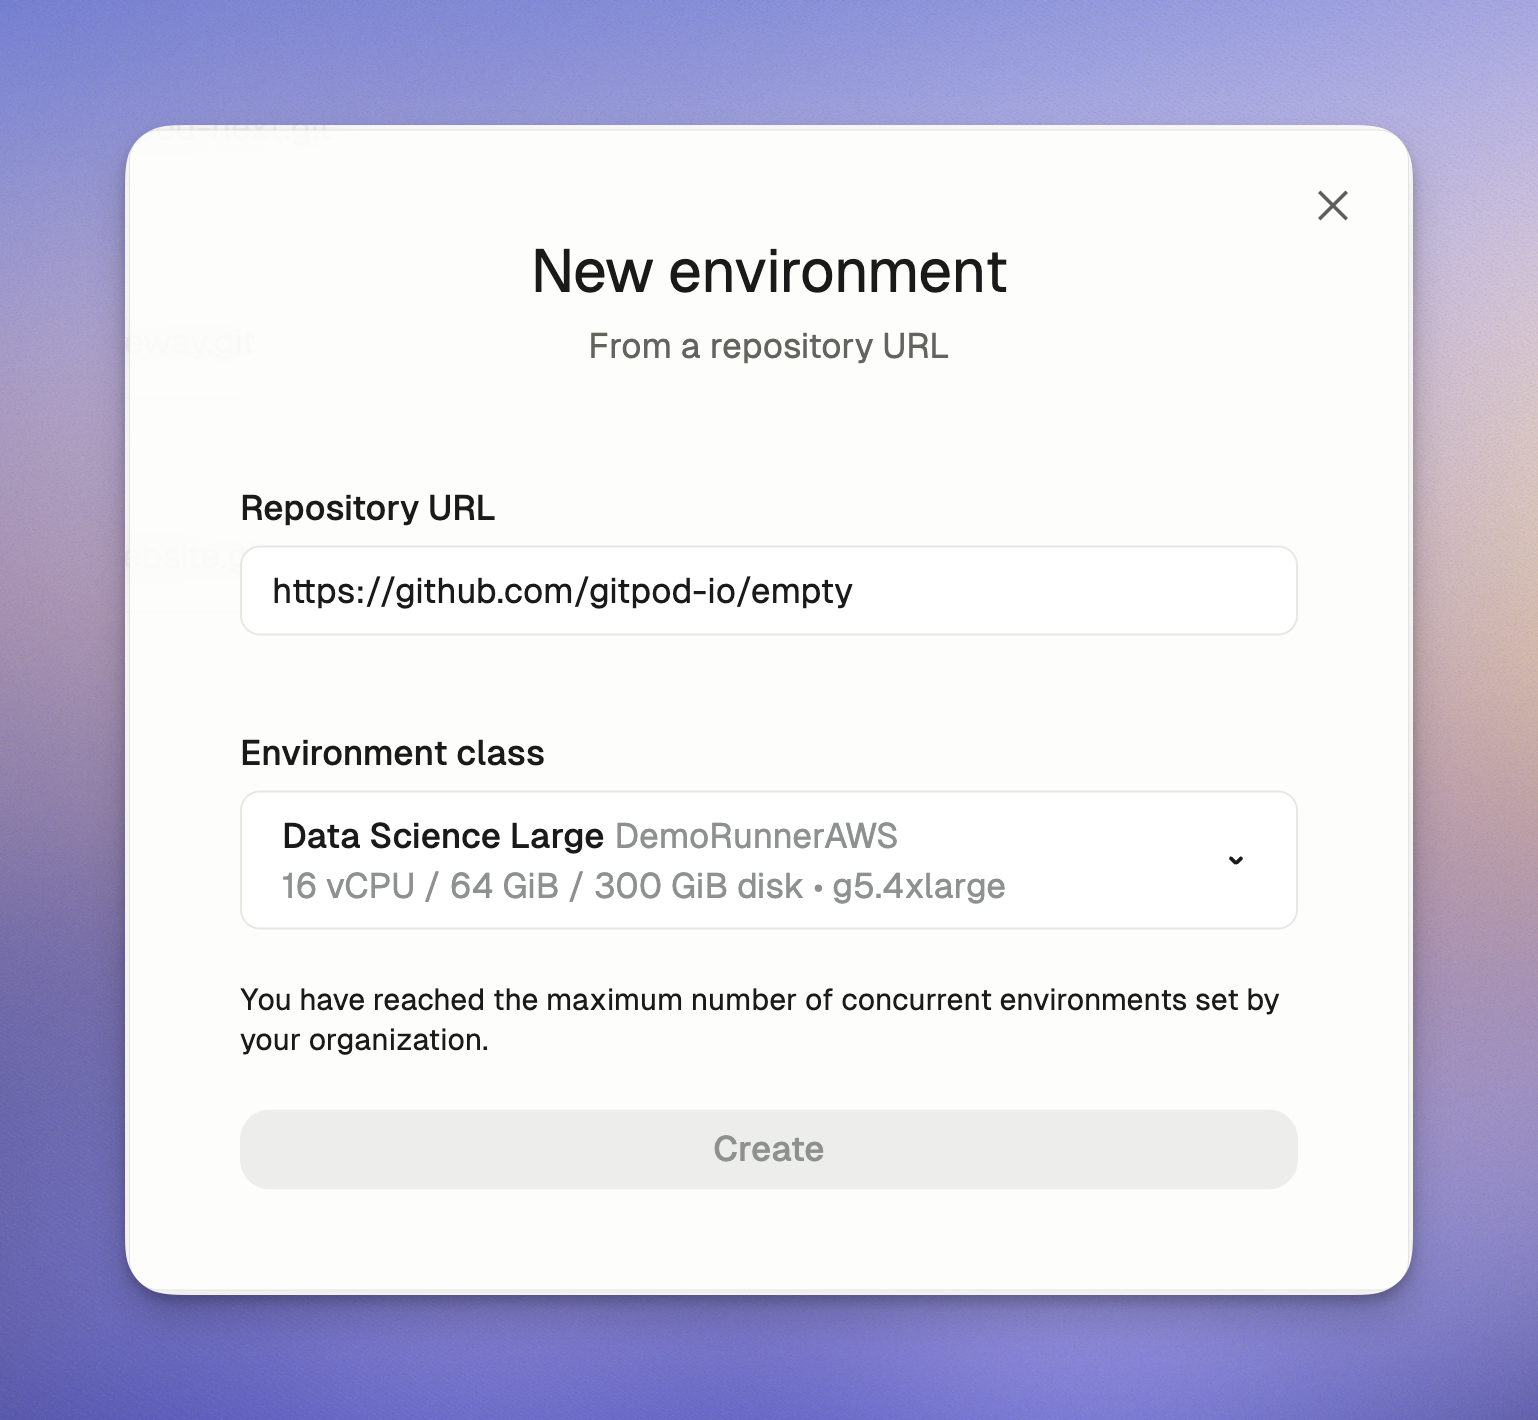 *A warning received due to the policy enforcement*
### Default Environment Image
This setting controls the default devcontainer configuration that Ona automatically generates when users open repositories without existing devcontainer configurations, or when starting blank environments. Administrators can customize this organization-wide template to:
* Provide a standard starting point for new environments
* Replace Ona's system defaults with organization-specific standards
* Ensure consistency across your organization
* If your runner network limits public Internet access, you will be able to start configuring devcontainer with images available in your network
**Configuration:**
1. Go to your [Organization Policies](https://app.ona.com/settings/policies) page
2. Enter a valid container image reference under `Default environment image` option (for example: `mcr.microsoft.com/devcontainers/base:ubuntu-24.04`)
If no value is provided, the system default (`mcr.microsoft.com/devcontainers/base:ubuntu-24.04`) will be used.
> **Using private images?** Make sure to [set up proper access](/ona/configuration/devcontainer/getting-started#using-private-container-images) for your container registry.
*A warning received due to the policy enforcement*
### Default Environment Image
This setting controls the default devcontainer configuration that Ona automatically generates when users open repositories without existing devcontainer configurations, or when starting blank environments. Administrators can customize this organization-wide template to:
* Provide a standard starting point for new environments
* Replace Ona's system defaults with organization-specific standards
* Ensure consistency across your organization
* If your runner network limits public Internet access, you will be able to start configuring devcontainer with images available in your network
**Configuration:**
1. Go to your [Organization Policies](https://app.ona.com/settings/policies) page
2. Enter a valid container image reference under `Default environment image` option (for example: `mcr.microsoft.com/devcontainers/base:ubuntu-24.04`)
If no value is provided, the system default (`mcr.microsoft.com/devcontainers/base:ubuntu-24.04`) will be used.
> **Using private images?** Make sure to [set up proper access](/ona/configuration/devcontainer/getting-started#using-private-container-images) for your container registry.
 *Set default devcontainer image*
**Effect on users**
* The configured image will be used automatically when repositories don't specify an image
* Users won't need to take any additional action
### Auto-delete Archived Environments
Set the maximum retention period for archived environments across your organization.
* Environments archive after 7 days inactive (fixed)
* This policy sets when they're auto-deleted
* Overrides user preferences when more restrictive
**Configuration:**
*Set default devcontainer image*
**Effect on users**
* The configured image will be used automatically when repositories don't specify an image
* Users won't need to take any additional action
### Auto-delete Archived Environments
Set the maximum retention period for archived environments across your organization.
* Environments archive after 7 days inactive (fixed)
* This policy sets when they're auto-deleted
* Overrides user preferences when more restrictive
**Configuration:**
 *Set organization-wide auto-delete policy for archived environments*
1. Go to your [Organization Policies](https://app.ona.com/settings/policies) page
2. Under "Auto-delete rules", select the maximum retention period from the dropdown:
* **1 week**: Delete 7 days after archiving
* **2 weeks**: Delete 14 days after archiving
* **4 weeks**: Delete 28 days after archiving
* **Never**: Keep archived environments indefinitely
Users can select equal or shorter retention periods than the organization policy. Options exceeding the policy appear disabled in the dropdown.
**Example:** If organization policy is "2 weeks", users can select "1 week" or "2 weeks" but not "4 weeks" or "Never".
For more information about the Archive & Auto-delete feature, see the [complete documentation](/ona/configuration/archive-auto-delete).
## Tracking Policy Changes
All policy changes are automatically recorded in your organization's audit logs. This gives you:
* A complete history of who changed which policies and when
* Records of any policy violation attempts
* Visibility into how policies are being enforced
To review policy-related activities, check your [organization's audit logs](/ona/audit-logs/overview).
## Best Practices for Managing Policies
### Start Gradually
* Begin with moderate limits and adjust based on actual usage
* Inform your team before implementing new restrictions
* Use [audit logs](/ona/audit-logs/overview) to see how policies affect workflow
### Optimize Resource Management
* Set limits appropriate for your team size and available resources
* Regularly review usage patterns and adjust as needed
* Consider creating a policy review schedule (quarterly or after significant team changes)
### Balance Security and Productivity
* Choose editor restrictions that align with security requirements without hampering productivity
* Use project-based environment creation to maintain organization without excessive restrictions
## Common Questions
### What happens to existing environments when I change a policy?
Existing environments aren't affected by policy changes. The new rules only apply to new environments or actions.
### Will users lose work when hitting a policy limit?
No. When users reach a policy limit (like maximum concurrent environments), they'll see a message explaining the limit and suggesting actions they can take, such as stopping unused environments.
### Can I set different policies for different teams?
Currently, policies apply to the entire organization. Team-specific policies aren't available yet.
### Do administrators have to follow these policies too?
Some policies, like environment creation restrictions, don't apply to administrators. Others, like resource limits, apply to everyone.
### How can I make a temporary exception to a policy?
The policy system doesn't include built-in exceptions. To make a temporary exception, adjust the policy temporarily and then change it back when no longer needed.
### What happens if I downgrade from Pro/Enterprise to Free tier?
If you downgrade to the Free tier, your policy settings will be preserved but will become inactive and non-editable until you upgrade again.
### Can policies be enforced retroactively?
Most policies only affect new actions or environments. Existing environments will continue to operate under the settings they were created with.
## Getting Help
If you have questions about organization policies:
* Contact us using the chat widget in the app (CORE tier and above.)
* Enterprise customers: Reach out to your account representative
# View members
Source: https://ona.com/docs/ona/organizations/view-members
As a regular member of an organization, you can view other members in the Settings. However, you cannot change anyone's membership. You do have the option to leave the organization via the drop-down menu.
*Set organization-wide auto-delete policy for archived environments*
1. Go to your [Organization Policies](https://app.ona.com/settings/policies) page
2. Under "Auto-delete rules", select the maximum retention period from the dropdown:
* **1 week**: Delete 7 days after archiving
* **2 weeks**: Delete 14 days after archiving
* **4 weeks**: Delete 28 days after archiving
* **Never**: Keep archived environments indefinitely
Users can select equal or shorter retention periods than the organization policy. Options exceeding the policy appear disabled in the dropdown.
**Example:** If organization policy is "2 weeks", users can select "1 week" or "2 weeks" but not "4 weeks" or "Never".
For more information about the Archive & Auto-delete feature, see the [complete documentation](/ona/configuration/archive-auto-delete).
## Tracking Policy Changes
All policy changes are automatically recorded in your organization's audit logs. This gives you:
* A complete history of who changed which policies and when
* Records of any policy violation attempts
* Visibility into how policies are being enforced
To review policy-related activities, check your [organization's audit logs](/ona/audit-logs/overview).
## Best Practices for Managing Policies
### Start Gradually
* Begin with moderate limits and adjust based on actual usage
* Inform your team before implementing new restrictions
* Use [audit logs](/ona/audit-logs/overview) to see how policies affect workflow
### Optimize Resource Management
* Set limits appropriate for your team size and available resources
* Regularly review usage patterns and adjust as needed
* Consider creating a policy review schedule (quarterly or after significant team changes)
### Balance Security and Productivity
* Choose editor restrictions that align with security requirements without hampering productivity
* Use project-based environment creation to maintain organization without excessive restrictions
## Common Questions
### What happens to existing environments when I change a policy?
Existing environments aren't affected by policy changes. The new rules only apply to new environments or actions.
### Will users lose work when hitting a policy limit?
No. When users reach a policy limit (like maximum concurrent environments), they'll see a message explaining the limit and suggesting actions they can take, such as stopping unused environments.
### Can I set different policies for different teams?
Currently, policies apply to the entire organization. Team-specific policies aren't available yet.
### Do administrators have to follow these policies too?
Some policies, like environment creation restrictions, don't apply to administrators. Others, like resource limits, apply to everyone.
### How can I make a temporary exception to a policy?
The policy system doesn't include built-in exceptions. To make a temporary exception, adjust the policy temporarily and then change it back when no longer needed.
### What happens if I downgrade from Pro/Enterprise to Free tier?
If you downgrade to the Free tier, your policy settings will be preserved but will become inactive and non-editable until you upgrade again.
### Can policies be enforced retroactively?
Most policies only affect new actions or environments. Existing environments will continue to operate under the settings they were created with.
## Getting Help
If you have questions about organization policies:
* Contact us using the chat widget in the app (CORE tier and above.)
* Enterprise customers: Reach out to your account representative
# View members
Source: https://ona.com/docs/ona/organizations/view-members
As a regular member of an organization, you can view other members in the Settings. However, you cannot change anyone's membership. You do have the option to leave the organization via the drop-down menu.
 If you choose to leave the organization, another one of your organizations will be selected automatically, or you’ll be prompted to create a new one.
 # Overview
Source: https://ona.com/docs/ona/projects/overview
Projects in Ona allow you to create standardized development environments across your organization. By defining consistent settings for repositories, runners, and environments, projects enable team members to create fully configured environments with just one click.
## What are Projects?
A project in Ona serves as a blueprint for development environments, connecting a specific repository with predefined configurations. This ensures all team members work with the same standardized setup, eliminating "works on my machine" problems.
Projects provide several key benefits:
* **One-click environment creation** with consistent configuration
* **Standardization** of development environments across your organization
* **Automatic secret and environment variable management**
* **Time savings** by eliminating manual environment setup
* **Team collaboration** through shared project configurations
## Prerequisites
Before creating a project, ensure you have:
* Organization administrator permissions
* At least one runner set up in your organization
## Creating a Project
To create a new project:
1. Navigate to your organization dashboard at [https://app.gitpod.io](https://app.gitpod.io)
2. If you have no existing projects, you'll see the "No projects" screen
3. Click **Create project**
# Overview
Source: https://ona.com/docs/ona/projects/overview
Projects in Ona allow you to create standardized development environments across your organization. By defining consistent settings for repositories, runners, and environments, projects enable team members to create fully configured environments with just one click.
## What are Projects?
A project in Ona serves as a blueprint for development environments, connecting a specific repository with predefined configurations. This ensures all team members work with the same standardized setup, eliminating "works on my machine" problems.
Projects provide several key benefits:
* **One-click environment creation** with consistent configuration
* **Standardization** of development environments across your organization
* **Automatic secret and environment variable management**
* **Time savings** by eliminating manual environment setup
* **Team collaboration** through shared project configurations
## Prerequisites
Before creating a project, ensure you have:
* Organization administrator permissions
* At least one runner set up in your organization
## Creating a Project
To create a new project:
1. Navigate to your organization dashboard at [https://app.gitpod.io](https://app.gitpod.io)
2. If you have no existing projects, you'll see the "No projects" screen
3. Click **Create project**
 4. Enter the repository URL for your project
5. Provide a descriptive project name
6. Select at least one **Environment Class** (determines the compute resources)
4. Enter the repository URL for your project
5. Provide a descriptive project name
6. Select at least one **Environment Class** (determines the compute resources)
 ## Project Configuration Options
### Repository URL
The Git repository that will be cloned when an environment is created from this project.
### Repository Branch
The Git repository branch that will be checked out by default when the environment is created. This is typically a branch like main, develop, or a feature branch, and it determines the initial state of the codebase in the environment.
### Environment Classes
Defines the compute resources (CPU, memory, storage) allocated to environments. Each runner can have multiple environment classes configured, a project must have at least 1 and a maximun of 30 environment classes.
### Dev Container Configuration
Specifies how the development container should be configured, including:
* Base image
* Extensions
* Environment variables
* Port forwarding rules
### Automations
Powerful tools that go beyond Dev Container configuration to define, automate, and share common workflows:
* Run services (long-running processes) and tasks (one-off actions)
* Automate database provisioning, test runs, or cloud authentication
* Define complex workflows in YAML configuration files
* Update via the Ona CLI
## Managing Existing Projects
After creating a project, you can modify its configuration at any time:
1. Navigate to your organization's projects list
2. Select the project you want to modify
3. Use the settings panel to update configuration options including:
* Dev Container configuration
* Automations
* Secrets and environment variables
You can also activate projects (to share with your organization) or deactivate them when they're no longer relevant.
## Project Configuration Options
### Repository URL
The Git repository that will be cloned when an environment is created from this project.
### Repository Branch
The Git repository branch that will be checked out by default when the environment is created. This is typically a branch like main, develop, or a feature branch, and it determines the initial state of the codebase in the environment.
### Environment Classes
Defines the compute resources (CPU, memory, storage) allocated to environments. Each runner can have multiple environment classes configured, a project must have at least 1 and a maximun of 30 environment classes.
### Dev Container Configuration
Specifies how the development container should be configured, including:
* Base image
* Extensions
* Environment variables
* Port forwarding rules
### Automations
Powerful tools that go beyond Dev Container configuration to define, automate, and share common workflows:
* Run services (long-running processes) and tasks (one-off actions)
* Automate database provisioning, test runs, or cloud authentication
* Define complex workflows in YAML configuration files
* Update via the Ona CLI
## Managing Existing Projects
After creating a project, you can modify its configuration at any time:
1. Navigate to your organization's projects list
2. Select the project you want to modify
3. Use the settings panel to update configuration options including:
* Dev Container configuration
* Automations
* Secrets and environment variables
You can also activate projects (to share with your organization) or deactivate them when they're no longer relevant.
 ## Limitations and Troubleshooting
* Projects currently support only one environment class. If you need a project to run in different regions (on different runners), you must set up multiple projects
* Projects don't yet have built-in support for multi-repo configurations, though they are supported through custom configurations
## Next Steps
After creating a project, you can:
* Create an environment from your project
* Share the project with your team
* Configure additional automations
* Add project-specific secrets
For more detailed information on specific project features, refer to the [Dev Container Configuration](/ona/configuration/devcontainer/overview) and [Automations](/ona/configuration/automations/overview) documentation.
# Project Secrets
Source: https://ona.com/docs/ona/projects/project-secrets
Project secrets are a type of secret that are specific to a project. They are used to store sensitive data that is specific to a project, such as API keys, access tokens, and credentials which are shared across all environments and users of a project.
**Project secrets have middle precedence** in the secrets hierarchy. They override organization secrets with the same name but can be overridden by user secrets. This allows teams to set project-specific values while still giving individual users the flexibility to customize their own environments.
To manage your project secrets, navigate to the **Project > Secrets** page in your Ona dashboard.
## Limitations and Troubleshooting
* Projects currently support only one environment class. If you need a project to run in different regions (on different runners), you must set up multiple projects
* Projects don't yet have built-in support for multi-repo configurations, though they are supported through custom configurations
## Next Steps
After creating a project, you can:
* Create an environment from your project
* Share the project with your team
* Configure additional automations
* Add project-specific secrets
For more detailed information on specific project features, refer to the [Dev Container Configuration](/ona/configuration/devcontainer/overview) and [Automations](/ona/configuration/automations/overview) documentation.
# Project Secrets
Source: https://ona.com/docs/ona/projects/project-secrets
Project secrets are a type of secret that are specific to a project. They are used to store sensitive data that is specific to a project, such as API keys, access tokens, and credentials which are shared across all environments and users of a project.
**Project secrets have middle precedence** in the secrets hierarchy. They override organization secrets with the same name but can be overridden by user secrets. This allows teams to set project-specific values while still giving individual users the flexibility to customize their own environments.
To manage your project secrets, navigate to the **Project > Secrets** page in your Ona dashboard.
 ## Secret Types
Project secrets support the following types:
* [Environment Variables](/ona/configuration/secrets/environment-variables)
* [Files](/ona/configuration/secrets/files)
* [Container Registry Secrets](/ona/configuration/secrets/container-registry-secret)
## Creating a Project Secret
To create a project secret, navigate to the **Project > Secrets** page in your Ona dashboard and click the **New Secret** button.
## Updating a Project Secret
To update a project secret, navigate to the **Project > Secrets** page in your Ona dashboard and click the **Edit** button.
## Deleting a Project Secret
To delete a project secret, navigate to the **Project > Secrets** page in your Ona dashboard and click the **Delete** button.
# Project Visibility
Source: https://ona.com/docs/ona/projects/project-sharing
When you create a Project, it is shared with your organization by default. Other members of your organization will see your Project and be able to launch environments.
You can change the visibility of your Project in the Project settings.
## Changing the visibility of your Project
The Project visibility can be changed in the Sharing tab within the project settings. Visibility can be toggled between all users within the organization or admins only. Projects can not be hidden from admins.
## Secret Types
Project secrets support the following types:
* [Environment Variables](/ona/configuration/secrets/environment-variables)
* [Files](/ona/configuration/secrets/files)
* [Container Registry Secrets](/ona/configuration/secrets/container-registry-secret)
## Creating a Project Secret
To create a project secret, navigate to the **Project > Secrets** page in your Ona dashboard and click the **New Secret** button.
## Updating a Project Secret
To update a project secret, navigate to the **Project > Secrets** page in your Ona dashboard and click the **Edit** button.
## Deleting a Project Secret
To delete a project secret, navigate to the **Project > Secrets** page in your Ona dashboard and click the **Delete** button.
# Project Visibility
Source: https://ona.com/docs/ona/projects/project-sharing
When you create a Project, it is shared with your organization by default. Other members of your organization will see your Project and be able to launch environments.
You can change the visibility of your Project in the Project settings.
## Changing the visibility of your Project
The Project visibility can be changed in the Sharing tab within the project settings. Visibility can be toggled between all users within the organization or admins only. Projects can not be hidden from admins.
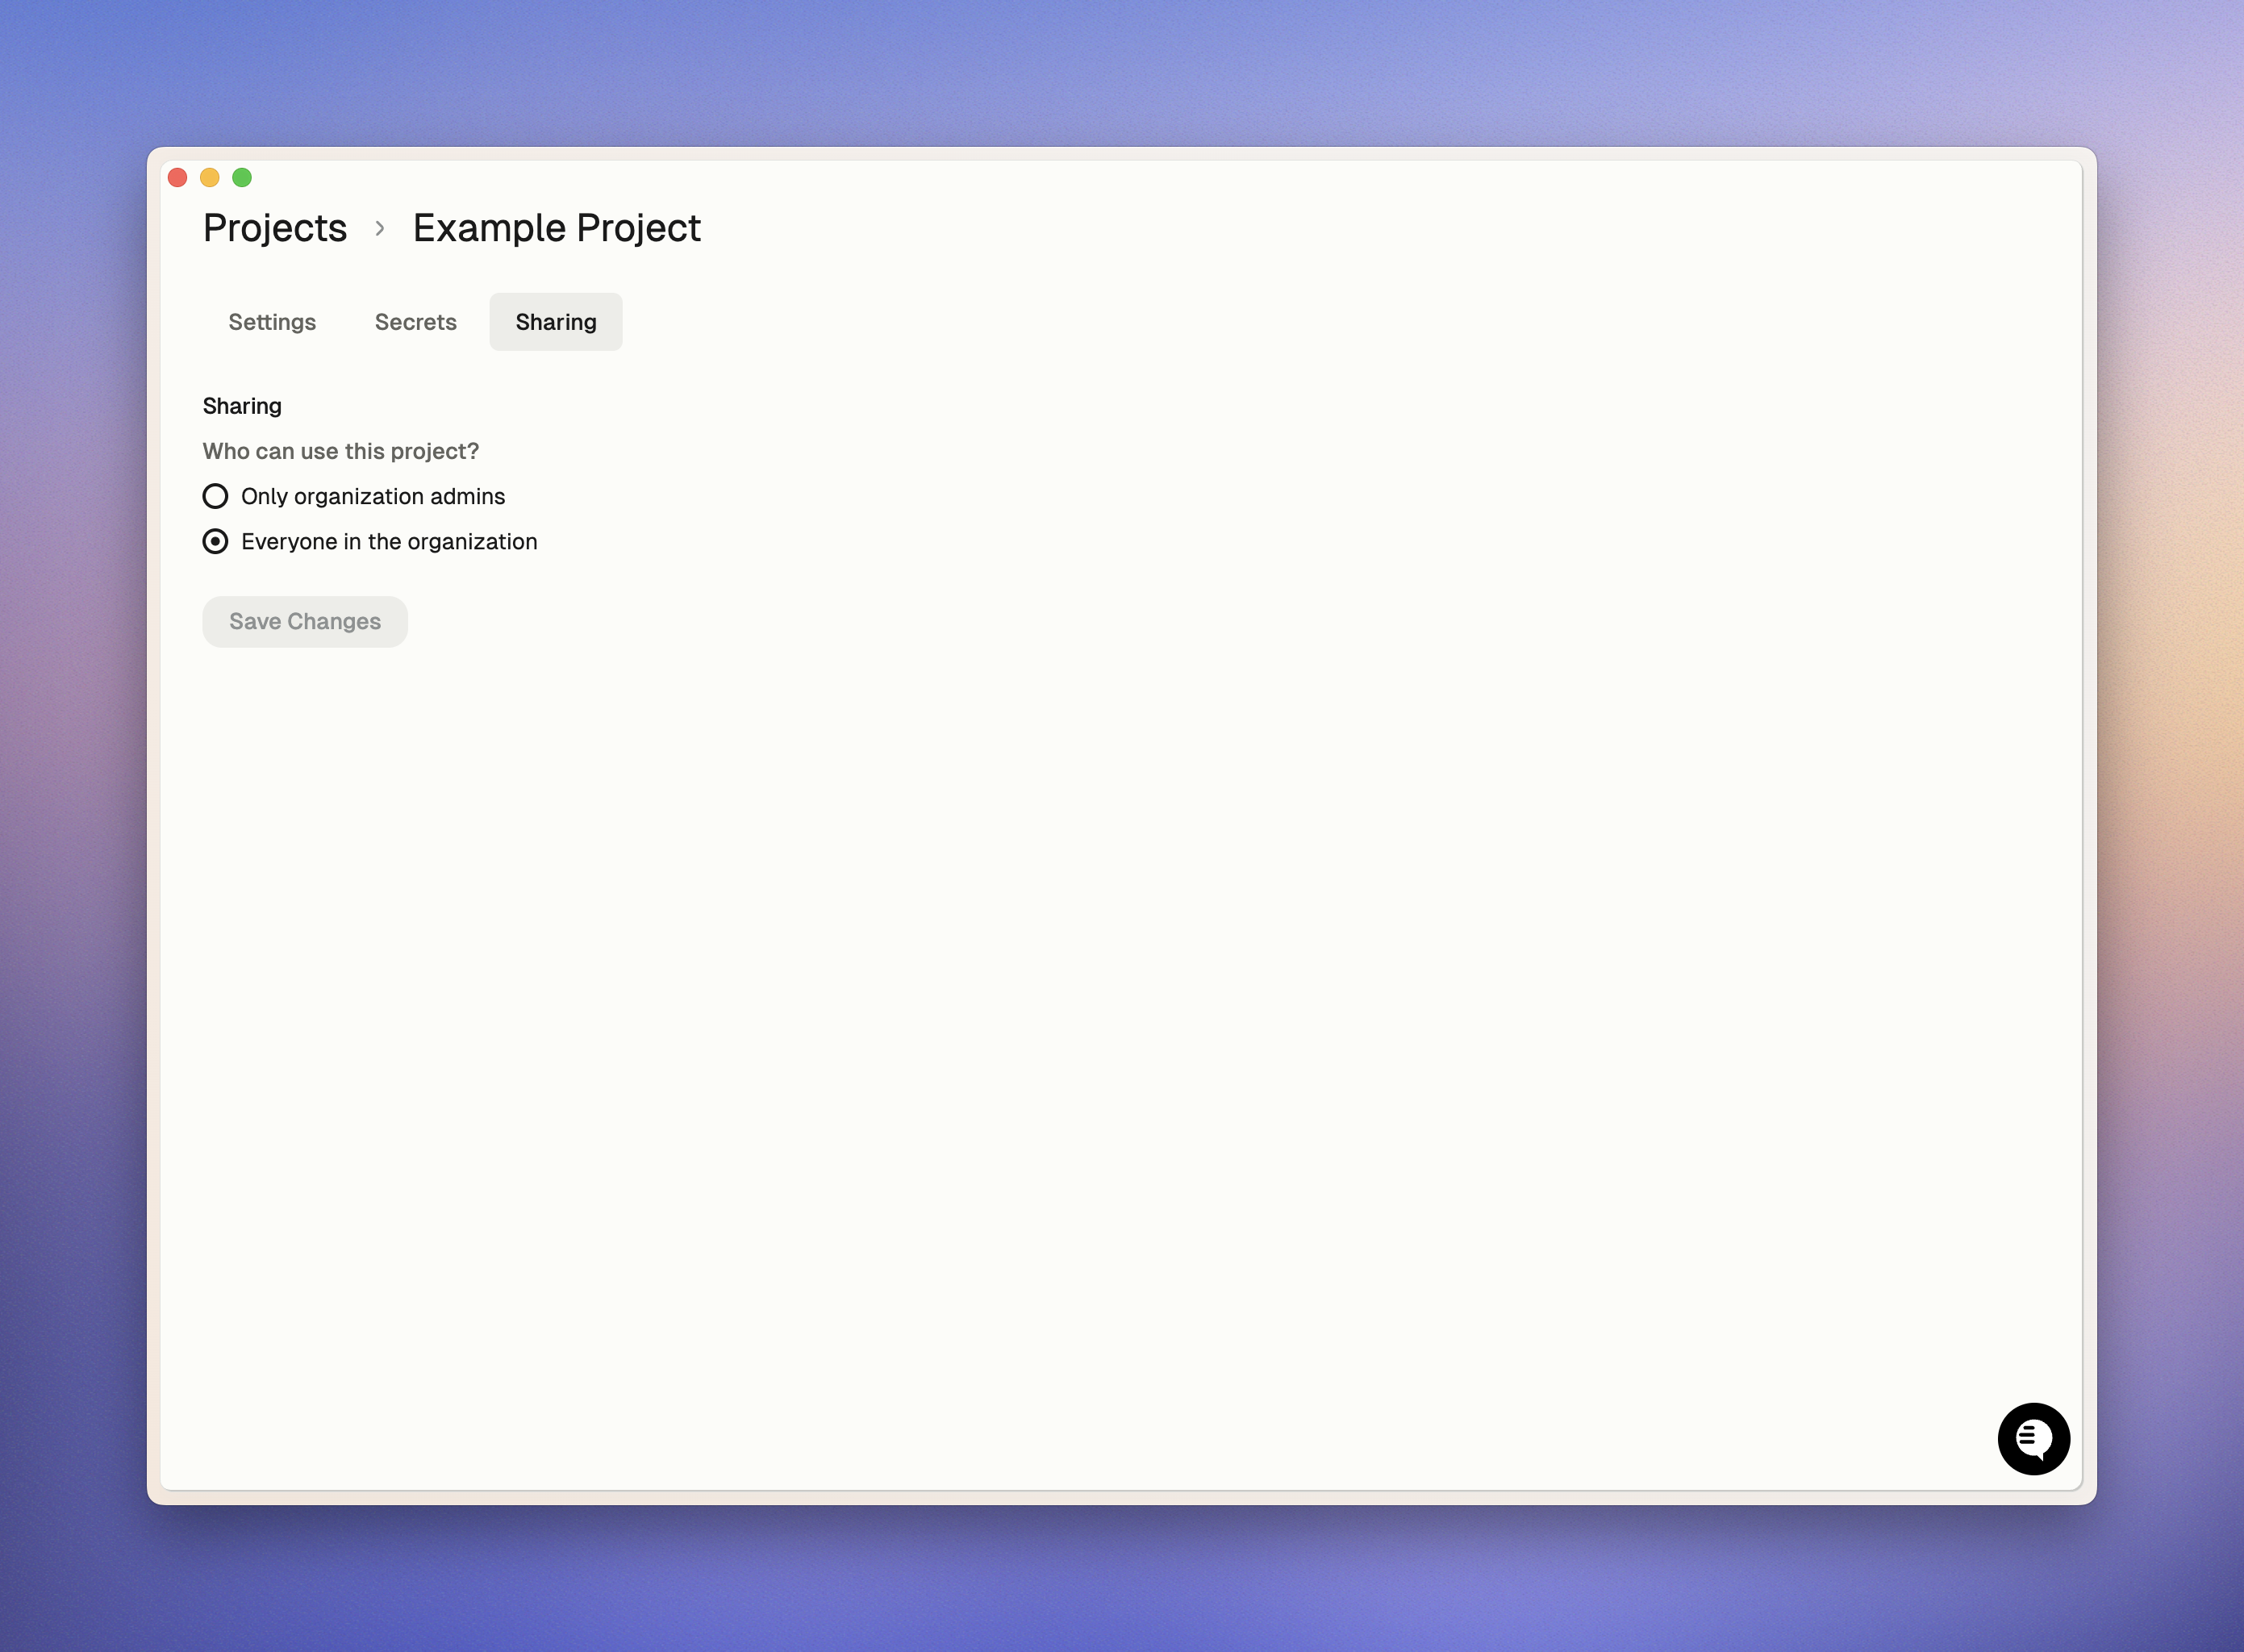 ## Launching an environment from a Project
The environment can be launched directly from the Project list view.
## Launching an environment from a Project
The environment can be launched directly from the Project list view.
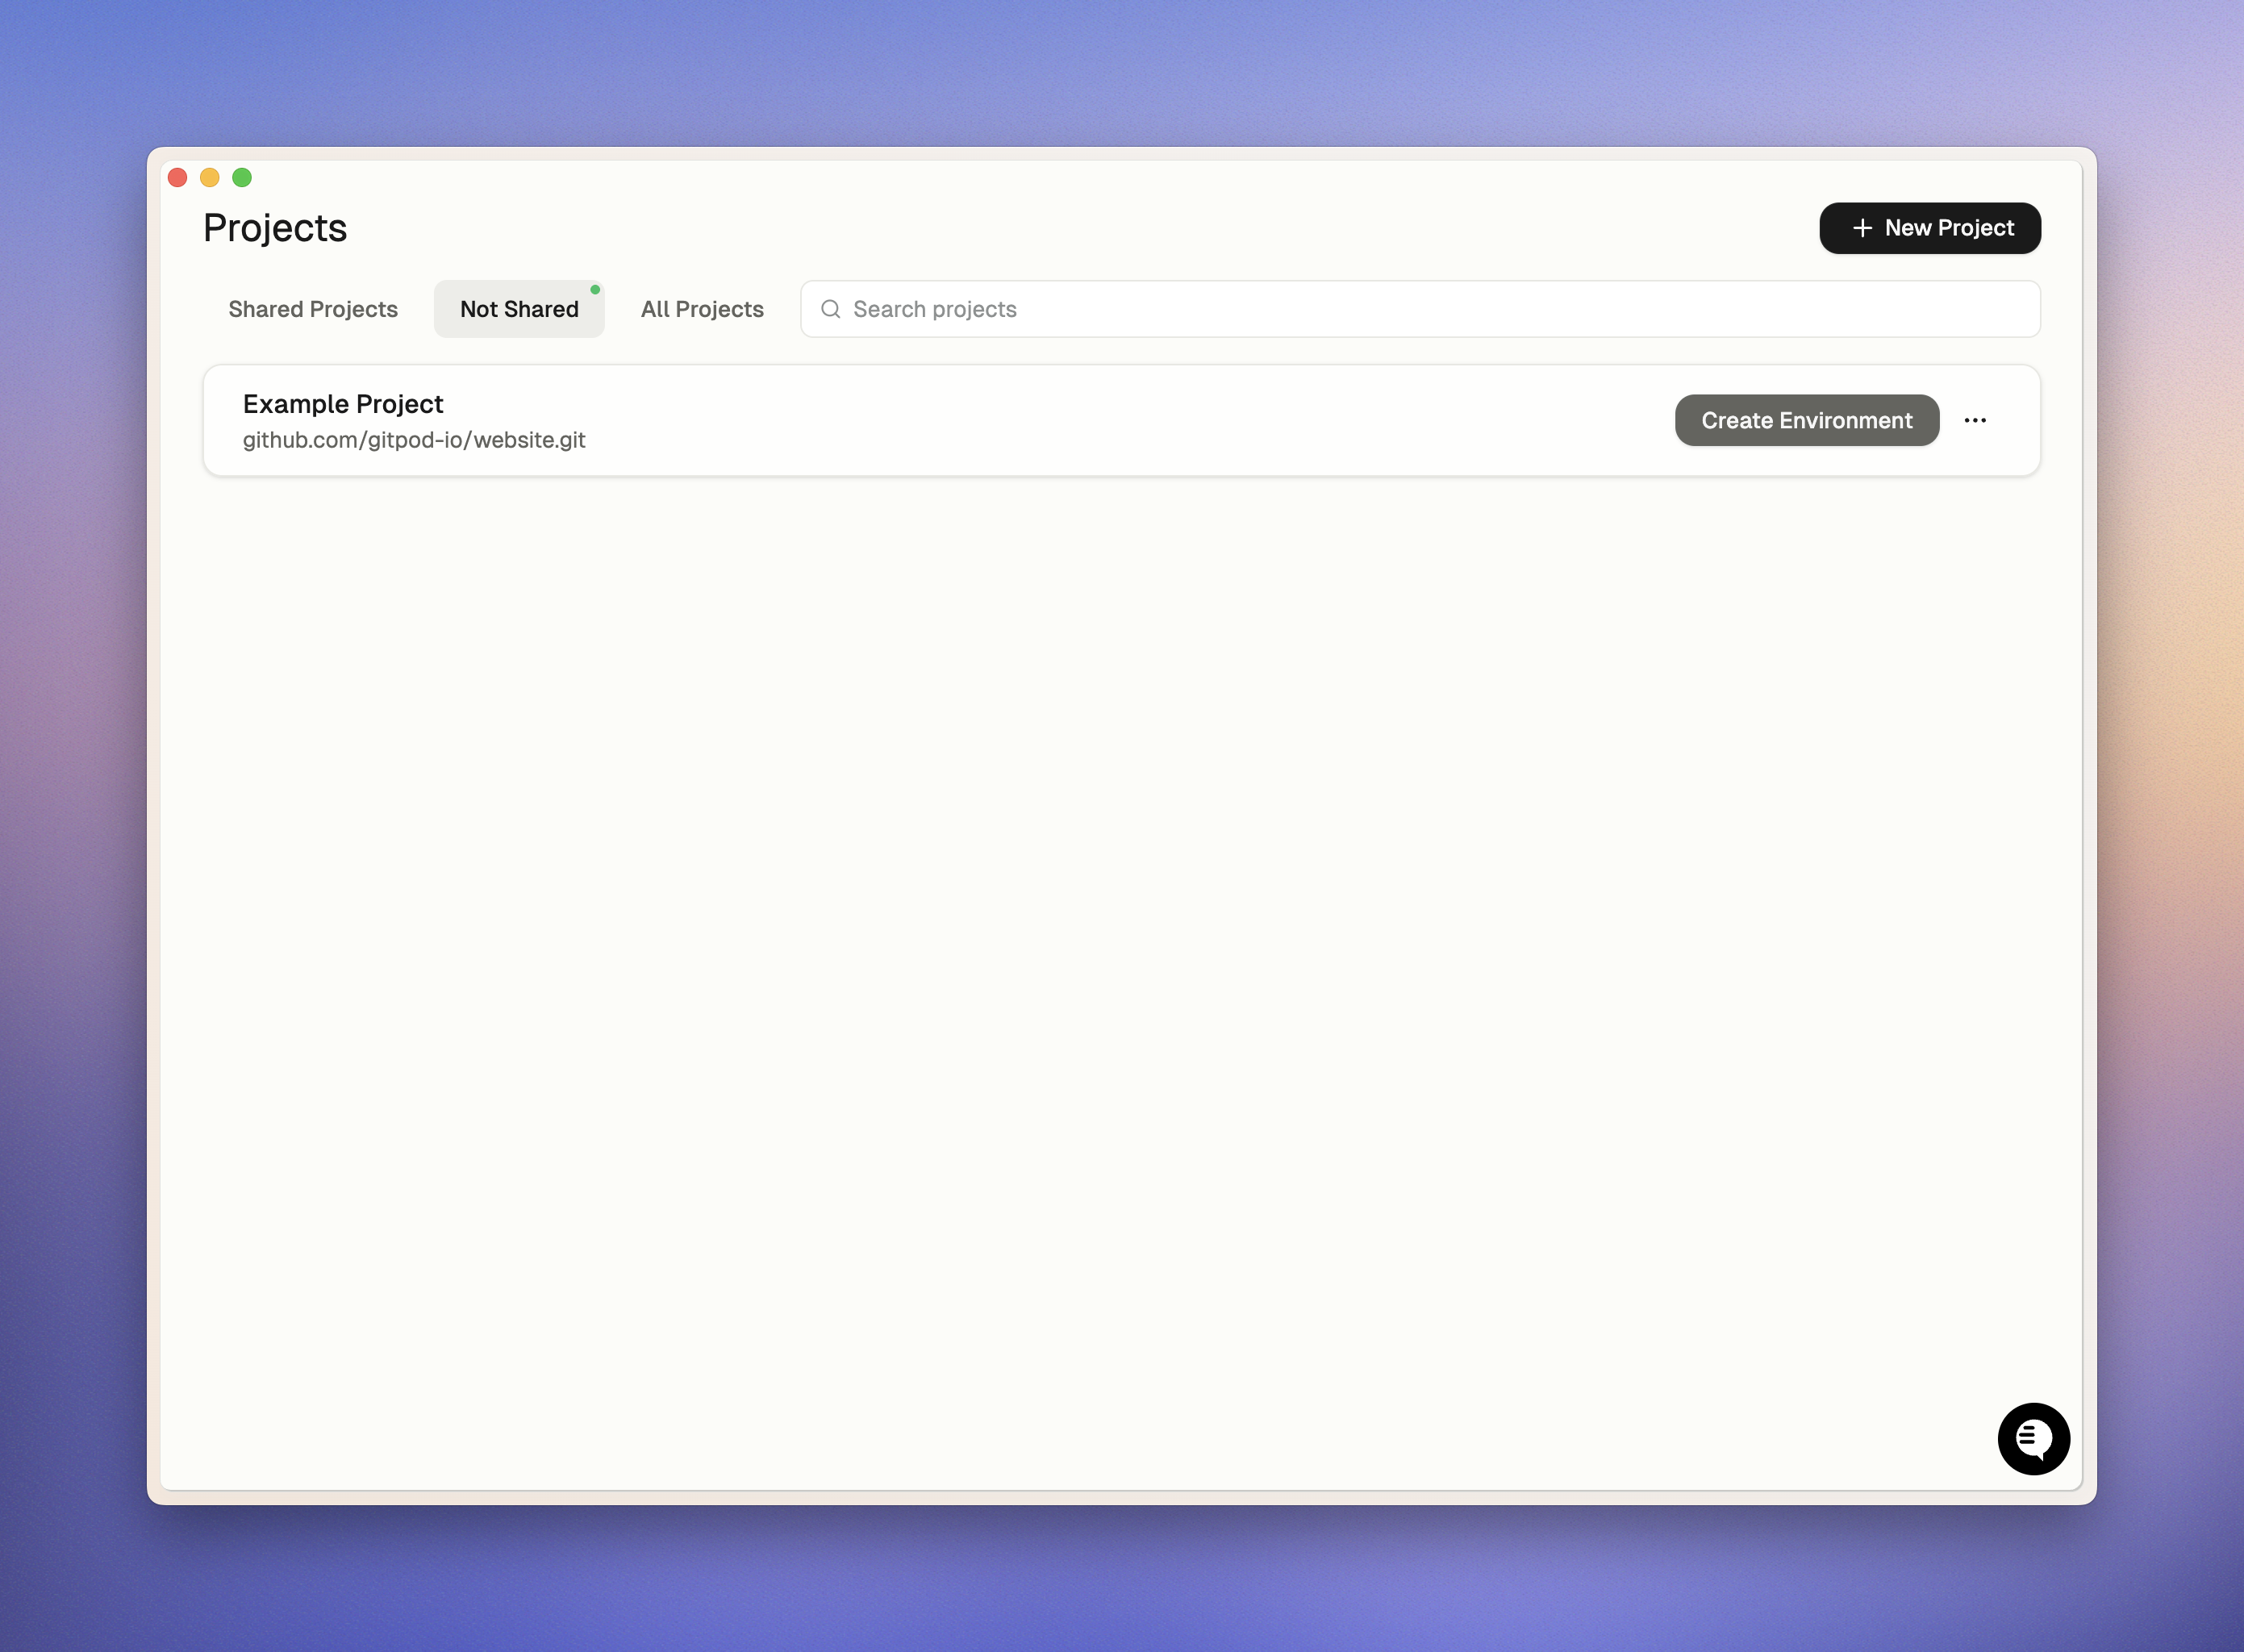 # Regions and Latency
Source: https://ona.com/docs/ona/runners/aws/aws-regions
For the best user experience, users need low network latency between their dev environment and their local machine.
Many operations in the IDE or terminal require network packets to be sent between the local machine and dev environment.
High network latency can make the IDE and terminal feel sluggish.
Follow these steps to optimize your setup:
1. Identify regions offering the best latency for your users
2. Verify these regions are among the supported regions
3. Contact Ona support if you need support for additional regions
# Predicting Network Latency
Before deploying Ona Runners, you can measure network latency using these tools:
## Latency Testing Tools
* Third-party websites (search for "aws latency test"):
* [CloudPing](https://www.cloudping.cloud/aws)
* [AWS Latency Test](https://aws-latency-test.com/)
* [AWS Speed Test](https://awsspeedtest.com/latency)
* Command-line tools:
* `ping` command (requires ICMP support)
* [httping](https://www.vanheusden.com/httping/) (for HTTP/HTTPS-only networks)
## Important Considerations
* Test results reflect latency from *your* location to AWS regions. If users are in different locations, have them run the same tests.
* Ona is designed to work with multipe regions by installing a runner in each region.
* VPN usage affects test results. Configure your connection to match your planned Ona usage:
* Use VPN if you plan to connect to Ona through VPN
* Disable VPN if you plan to connect directly
# Measuring Network Latency
After deploying Ona Runners, you can monitor latency using:
* JetBrains IDE: Check the "backend status" view when connected to a remote dev environment
# Recommended Latency Thresholds
| Latency | Experience | Recommendation |
| -------- | ---------- | --------------------------------------------------------- |
| \< 70ms | Excellent! | Ideal for all development tasks |
| \< 120ms | Good | Suitable for most development work |
| \< 200ms | Ok | Users may notice some latency in IDE and terminal |
| > 200ms | Poor | Not recommended. Users will experience significant delays |
# Supported AWS Regions
Ona AWS Runners are available in select regions across North America, Europe, Asia Pacific, and South America.
### North America
* `us-east-1` (N. Virginia)
* `us-east-2` (Ohio)
* `us-west-1` (N. California)
* `us-west-2` (Oregon)
* `ca-central-1` (Canada Central)
### Europe
* `eu-west-1` (Ireland)
* `eu-west-2` (London)
* `eu-central-1` (Frankfurt)
* `il-central-1` (Israel Central)
### Asia Pacific
* `ap-southeast-1` (Singapore)
* `ap-southeast-2` (Sydney)
* `ap-northeast-1` (Tokyo)
### South America
* `sa-east-1` (São Paulo)
Need support for additional regions? Please [contact Ona](https://www.ona.com/contact/sales) for assistance.
# Costs & Budgeting for AWS Runner
Source: https://ona.com/docs/ona/runners/aws/aws-runner-costs
This guide outlines the costs associated with the AWS runner infrastructure. It does not include development environment costs or license fees.
> Note: AWS costs mentioned in this document are subject to change and may vary by region. Please check the latest pricing on the AWS pricing pages.
## What is an AWS runner?
An AWS Runner is an orchestrator for development environments deployed within an AWS account.
The key characteristics of a runner are:
* Shared resource serving multiple users (not personal)
* Designed for "always-on" operation with optimized cost efficiency
* Suitable for small to medium-sized organizations with a single runner architecture
* Support for multiple runners to:
* Enhance availability
* Reduce latency for end users
* Ensure data residency and compliance
## Billable AWS Resources
The following are the billable resources deployed by the AWS runner:
* **AWS::ECS::Service**: Used to manage the environments.
* **AWS::DynamoDB::Table**: Used to store state related to the reconciler of environments.
* **AWS::S3::Bucket**: Used to store user image and build Docker caches for performance.
* **AWS::ECR::Repository**: Used to store cached dev container images for faster environment startup (when [dev container image cache](/ona/runners/aws/devcontainer-image-cache) is enabled).
* **AWS::Logs::LogGroup**: Used to store logs related to the runner ECS task.
## Baseline Costs of a Runner
The primary cost associated with a runner is the ECS task.
* **Monthly Cost for ECS**: Less than \$8 per month, which is covered by the AWS free tier. This cost is fixed and does not vary with the number of environments.
* **Other services**: Costs for DynamoDB, S3, and CloudWatch typically account for less than 1% of the overall runner cost.
## Controls for Managing Costs
### Viewing Runner Costs
To view isolated runner costs in **AWS Cost Explorer**:
1. **Navigate to AWS Cost Explorer**.
2. **Group by Usage Type** to analyze the breakdown of costs.
3. **Filter by the CloudFormation stack** name, which can be found on your runner card in the Settings > Runners section.
* **CloudFormation Stack**: Use the `aws:cloudformation:stack-name` tag.
# Regions and Latency
Source: https://ona.com/docs/ona/runners/aws/aws-regions
For the best user experience, users need low network latency between their dev environment and their local machine.
Many operations in the IDE or terminal require network packets to be sent between the local machine and dev environment.
High network latency can make the IDE and terminal feel sluggish.
Follow these steps to optimize your setup:
1. Identify regions offering the best latency for your users
2. Verify these regions are among the supported regions
3. Contact Ona support if you need support for additional regions
# Predicting Network Latency
Before deploying Ona Runners, you can measure network latency using these tools:
## Latency Testing Tools
* Third-party websites (search for "aws latency test"):
* [CloudPing](https://www.cloudping.cloud/aws)
* [AWS Latency Test](https://aws-latency-test.com/)
* [AWS Speed Test](https://awsspeedtest.com/latency)
* Command-line tools:
* `ping` command (requires ICMP support)
* [httping](https://www.vanheusden.com/httping/) (for HTTP/HTTPS-only networks)
## Important Considerations
* Test results reflect latency from *your* location to AWS regions. If users are in different locations, have them run the same tests.
* Ona is designed to work with multipe regions by installing a runner in each region.
* VPN usage affects test results. Configure your connection to match your planned Ona usage:
* Use VPN if you plan to connect to Ona through VPN
* Disable VPN if you plan to connect directly
# Measuring Network Latency
After deploying Ona Runners, you can monitor latency using:
* JetBrains IDE: Check the "backend status" view when connected to a remote dev environment
# Recommended Latency Thresholds
| Latency | Experience | Recommendation |
| -------- | ---------- | --------------------------------------------------------- |
| \< 70ms | Excellent! | Ideal for all development tasks |
| \< 120ms | Good | Suitable for most development work |
| \< 200ms | Ok | Users may notice some latency in IDE and terminal |
| > 200ms | Poor | Not recommended. Users will experience significant delays |
# Supported AWS Regions
Ona AWS Runners are available in select regions across North America, Europe, Asia Pacific, and South America.
### North America
* `us-east-1` (N. Virginia)
* `us-east-2` (Ohio)
* `us-west-1` (N. California)
* `us-west-2` (Oregon)
* `ca-central-1` (Canada Central)
### Europe
* `eu-west-1` (Ireland)
* `eu-west-2` (London)
* `eu-central-1` (Frankfurt)
* `il-central-1` (Israel Central)
### Asia Pacific
* `ap-southeast-1` (Singapore)
* `ap-southeast-2` (Sydney)
* `ap-northeast-1` (Tokyo)
### South America
* `sa-east-1` (São Paulo)
Need support for additional regions? Please [contact Ona](https://www.ona.com/contact/sales) for assistance.
# Costs & Budgeting for AWS Runner
Source: https://ona.com/docs/ona/runners/aws/aws-runner-costs
This guide outlines the costs associated with the AWS runner infrastructure. It does not include development environment costs or license fees.
> Note: AWS costs mentioned in this document are subject to change and may vary by region. Please check the latest pricing on the AWS pricing pages.
## What is an AWS runner?
An AWS Runner is an orchestrator for development environments deployed within an AWS account.
The key characteristics of a runner are:
* Shared resource serving multiple users (not personal)
* Designed for "always-on" operation with optimized cost efficiency
* Suitable for small to medium-sized organizations with a single runner architecture
* Support for multiple runners to:
* Enhance availability
* Reduce latency for end users
* Ensure data residency and compliance
## Billable AWS Resources
The following are the billable resources deployed by the AWS runner:
* **AWS::ECS::Service**: Used to manage the environments.
* **AWS::DynamoDB::Table**: Used to store state related to the reconciler of environments.
* **AWS::S3::Bucket**: Used to store user image and build Docker caches for performance.
* **AWS::ECR::Repository**: Used to store cached dev container images for faster environment startup (when [dev container image cache](/ona/runners/aws/devcontainer-image-cache) is enabled).
* **AWS::Logs::LogGroup**: Used to store logs related to the runner ECS task.
## Baseline Costs of a Runner
The primary cost associated with a runner is the ECS task.
* **Monthly Cost for ECS**: Less than \$8 per month, which is covered by the AWS free tier. This cost is fixed and does not vary with the number of environments.
* **Other services**: Costs for DynamoDB, S3, and CloudWatch typically account for less than 1% of the overall runner cost.
## Controls for Managing Costs
### Viewing Runner Costs
To view isolated runner costs in **AWS Cost Explorer**:
1. **Navigate to AWS Cost Explorer**.
2. **Group by Usage Type** to analyze the breakdown of costs.
3. **Filter by the CloudFormation stack** name, which can be found on your runner card in the Settings > Runners section.
* **CloudFormation Stack**: Use the `aws:cloudformation:stack-name` tag.
 * **Cluster Name**: Alternatively, filter by the `aws:ecs:clusterName` tag.
 ### Viewing Environment Costs
To view isolated runner costs in **AWS Cost Explorer**:
1. **Navigate to AWS Cost Explorer**.
2. **Group by Usage Type** to analyze the breakdown of costs.
3. **Filter by the environment ID** using the **Name** tag:
* **Tag**: `Name`
* **Value**: `gitpod-environment-
### Viewing Environment Costs
To view isolated runner costs in **AWS Cost Explorer**:
1. **Navigate to AWS Cost Explorer**.
2. **Group by Usage Type** to analyze the breakdown of costs.
3. **Filter by the environment ID** using the **Name** tag:
* **Tag**: `Name`
* **Value**: `gitpod-environment- ## EC2 Instance Tagging
All EC2 instances launched by Ona AWS runners automatically inherit tags from the CloudFormation template. This means:
* Any tags you add to the CloudFormation template will be propagated to the EC2 instances created for environments
* This allows for consistent resource tagging across your AWS infrastructure
* Tags can be used for cost allocation, resource grouping, and access control
### Adding Tags to EC2 Instances
To add tags to EC2 instances launched by Ona:
1. Navigate to the CloudFormation stack for your runner in the AWS console
2. Select **Update** from the stack actions
3. Choose **Use current template**
4. In the **Parameters** section, locate the **Tags** parameter (or add tags directly to the stack)
5. Add your desired tags in the format `Key=Value`
6. Complete the stack update process
All new EC2 instances launched after the update will include these tags.
> Note: When you update CloudFormation stack tags, the changes don't immediately apply to the existing runner ECS task. To force the runner to pick up the new tags immediately, you need to trigger a new deployment:
>
> 1. In the AWS console, navigate to **Amazon ECS** > **Clusters**
> 2. Select the cluster for your runner
> 3. Select the runner service
> 4. Click the arrow next to **Update** and select **Force new deployment**
> 5. Click **Update** to apply the changes
>
> This will redeploy the runner service with the updated tags without affecting running development environments.
# Capacity Planning
Source: https://ona.com/docs/ona/runners/aws/capacity-planning
Planning your AWS infrastructure for Ona requires careful consideration of your organization's network requirements and future growth. This guide helps you plan the required AWS account, regions, availability zones, and subnets for your deployment.
When planning your AWS infrastructure, consider these key objectives:
* Identify regions that offer optimal latency for your users
* Plan network capacity based on anticipated user count and growth
* Ensure system robustness through strategic availability zone selection
* Minimize future infrastructure changes by planning for scale
We'll create a planning table that will serve as input to set up your [AWS Runner](/ona/runners/aws/overview). AWS Runners require additional load balancer subnet planning due to their dual-subnet architecture.
# Quick Start: Basic Setup
For a basic setup (single runner, single region, fewer than 1000 users):
1. Select your region based on the [recommended latency](/ona/runners/aws/aws-regions#recommended-latency-thresholds)
2. Use the following configuration:
**Enterprise Runner**
| Runner Name | Max Users | Region | Number of AZs | EC2 Subnet Size | Load Balancer Subnet Size | Total Capacity |
| ----------- | --------- | --------- | ------------- | --------------- | ------------------------- | -------------- |
| us-east | 1000 | us-east-1 | 2 | /23 (512 IPs) | /28 (16 IPs) | 1019 |
> Note: **Enterprise runners** require both EC2 subnets (for environments) and load balancer subnets (must be routable from your internal network).
If this **Basic Setup** is sufficient for your needs, feel free to **skip the rest of this chapter** and proceed to set up your [AWS Runner](/ona/runners/aws/setup).
# Example Planning Table
The following table demonstrates how to plan your AWS Runner infrastructure. We'll use this format to help you plan your specific deployment.
**Enterprise Runner Example**
| Runner Name | Users | Region | Number of AZs | EC2 Subnet Size | Load Balancer Subnet Size | Capacity |
| ----------- | ----- | --------- | ------------- | --------------- | ------------------------- | -------- |
| us-east | 500 | us-east-1 | 3 | /22 (1024 IPs) | /28 (16 IPs) | 3068 |
| us-west | 100 | us-west-1 | 2 | /23 (512 IPs) | /28 (16 IPs) | 1019 |
| europe | 300 | eu-west-1 | 2 | /21 (2048 IPs) | /28 (16 IPs) | 4091 |
**Table Column Definitions**
* **Runner Name**: Choose a meaningful identifier for your runner
* **Users**: Maximum number of users expected to use the runner, including planned growth
* **Region**: AWS region where the runner will be deployed
* **Number of AZs**: Number of Availability Zones for the runner deployment
* **EC2 Subnet Size**: CIDR block size for EC2 subnets (where environments run)
* **Load Balancer Subnet Size (for Enterprise Runners only)**: CIDR block size for load balancer subnets. Load balancer must be routable from your internal network.
* **Capacity**: [Maximum number](#step-4%3A-plan-subnet-sizes) of dev environments the runner can support.
# Your Planning Table
Please create your own table and fill in the columns with your values.
### Infrastructure Considerations
Before creating your planning table, consider these important points:
* Ona AWS Runners can share AWS accounts, VPCs, regions, and subnets with other AWS runners
* Runners operate independently and can be deployed across multiple AWS accounts and VPCs
* For multiple runners, you can (but don't have to) use separate AWS accounts
* If using multiple AWS accounts, add an "AWS Account" column to your planning table
### Step 1: Select Regions
Ona supports multiple runners that can be added or removed as needed. However, it's important to plan your regions carefully as you'll need appropriately sized subnets in each region.
Choose one or more [AWS Regions that provide the best latency for your users](/ona/runners/aws/aws-regions).
### Step 2: Estimate Users per Region
For each selected region, estimate the maximum number of users, considering:
* Current number of users
* Expected growth over time
* Peak usage patterns
* Geographic distribution of your team
### Step 3: Determine Availability Zones
Each AWS Runner requires at least one Availability Zone (AZ) and can utilize all AZs within a region. Key points:
* One subnet is required per AZ
* We recommend using 2-3 AZs per region for optimal availability
* More AZs provide better fault tolerance but increase complexity
* Consider your organization's high availability requirements
### Step 4: Plan Subnet Sizes
Subnet sizing is crucial for your Ona deployment's functionality and depends on the workload you are likely to have. Proper planning ensures you have sufficient IP addresses for your development environments while avoiding over-provisioning that wastes resources. Based on your runner type, you'll need to plan different subnet configurations.
#### EC2 Subnets (Enterprise Runners)
These subnets host your development environments and require careful capacity planning.
* Each environment requires one IP address
* Each AZ requires one subnet
* Management services need fewer than five IP addresses
* For Enterprise Runners, EC2 subnets can use non-routable CIDR ranges (such as CGNAT ranges) since they don't need direct access from your internal network
* Ona does not use Network Address Translation (NAT) for environments
* The minimum subnet size is `/28` (supports 10 environments)
* If multiple runners share subnets, they share the available IP address pool
* Maximum capacity = (Total subnet IPs × Number of AZs) - Management IPs
* **For public subnets** If using public subnets with internet gateway routing, ensure the subnet is configured to auto-assign public IP addresses. See [AWS documentation on auto-assign public IP](https://docs.aws.amazon.com/vpc/latest/userguide/subnet-public-ip.html) for configuration details.
* Note that it's best practice to choose subnet sizes generously, as expanding a subnet later can be more complex and costly than planning for growth upfront
#### Load Balancer Subnets (Enterprise Runners Only)
Enterprise Runners require additional subnets for their Network Load Balancer infrastructure, which provides direct connectivity to your environments.
* Required for Network Load Balancer deployment
* Must be routable from your internal network (unlike EC2 subnets which can use non-routable CIDR ranges)
* Typically `/28` (16 IPs) is sufficient for most deployments
* Need one subnet per AZ for high availability
* Do not affect environment capacity calculations
# Configuring Repository Access
Source: https://ona.com/docs/ona/runners/aws/configuring-repository-access
Repository access configuration is only required if you want to create Environments from repositories (GitHub, GitLab, etc.). If you only need to create empty Environments, you can skip this configuration. However, to launch Environments from any repository, the Runner **must** be configured with a provider that can access your repos (this includes public repositories).
Press **Add a provider** and select one of the supported providers such as GitHub:
## EC2 Instance Tagging
All EC2 instances launched by Ona AWS runners automatically inherit tags from the CloudFormation template. This means:
* Any tags you add to the CloudFormation template will be propagated to the EC2 instances created for environments
* This allows for consistent resource tagging across your AWS infrastructure
* Tags can be used for cost allocation, resource grouping, and access control
### Adding Tags to EC2 Instances
To add tags to EC2 instances launched by Ona:
1. Navigate to the CloudFormation stack for your runner in the AWS console
2. Select **Update** from the stack actions
3. Choose **Use current template**
4. In the **Parameters** section, locate the **Tags** parameter (or add tags directly to the stack)
5. Add your desired tags in the format `Key=Value`
6. Complete the stack update process
All new EC2 instances launched after the update will include these tags.
> Note: When you update CloudFormation stack tags, the changes don't immediately apply to the existing runner ECS task. To force the runner to pick up the new tags immediately, you need to trigger a new deployment:
>
> 1. In the AWS console, navigate to **Amazon ECS** > **Clusters**
> 2. Select the cluster for your runner
> 3. Select the runner service
> 4. Click the arrow next to **Update** and select **Force new deployment**
> 5. Click **Update** to apply the changes
>
> This will redeploy the runner service with the updated tags without affecting running development environments.
# Capacity Planning
Source: https://ona.com/docs/ona/runners/aws/capacity-planning
Planning your AWS infrastructure for Ona requires careful consideration of your organization's network requirements and future growth. This guide helps you plan the required AWS account, regions, availability zones, and subnets for your deployment.
When planning your AWS infrastructure, consider these key objectives:
* Identify regions that offer optimal latency for your users
* Plan network capacity based on anticipated user count and growth
* Ensure system robustness through strategic availability zone selection
* Minimize future infrastructure changes by planning for scale
We'll create a planning table that will serve as input to set up your [AWS Runner](/ona/runners/aws/overview). AWS Runners require additional load balancer subnet planning due to their dual-subnet architecture.
# Quick Start: Basic Setup
For a basic setup (single runner, single region, fewer than 1000 users):
1. Select your region based on the [recommended latency](/ona/runners/aws/aws-regions#recommended-latency-thresholds)
2. Use the following configuration:
**Enterprise Runner**
| Runner Name | Max Users | Region | Number of AZs | EC2 Subnet Size | Load Balancer Subnet Size | Total Capacity |
| ----------- | --------- | --------- | ------------- | --------------- | ------------------------- | -------------- |
| us-east | 1000 | us-east-1 | 2 | /23 (512 IPs) | /28 (16 IPs) | 1019 |
> Note: **Enterprise runners** require both EC2 subnets (for environments) and load balancer subnets (must be routable from your internal network).
If this **Basic Setup** is sufficient for your needs, feel free to **skip the rest of this chapter** and proceed to set up your [AWS Runner](/ona/runners/aws/setup).
# Example Planning Table
The following table demonstrates how to plan your AWS Runner infrastructure. We'll use this format to help you plan your specific deployment.
**Enterprise Runner Example**
| Runner Name | Users | Region | Number of AZs | EC2 Subnet Size | Load Balancer Subnet Size | Capacity |
| ----------- | ----- | --------- | ------------- | --------------- | ------------------------- | -------- |
| us-east | 500 | us-east-1 | 3 | /22 (1024 IPs) | /28 (16 IPs) | 3068 |
| us-west | 100 | us-west-1 | 2 | /23 (512 IPs) | /28 (16 IPs) | 1019 |
| europe | 300 | eu-west-1 | 2 | /21 (2048 IPs) | /28 (16 IPs) | 4091 |
**Table Column Definitions**
* **Runner Name**: Choose a meaningful identifier for your runner
* **Users**: Maximum number of users expected to use the runner, including planned growth
* **Region**: AWS region where the runner will be deployed
* **Number of AZs**: Number of Availability Zones for the runner deployment
* **EC2 Subnet Size**: CIDR block size for EC2 subnets (where environments run)
* **Load Balancer Subnet Size (for Enterprise Runners only)**: CIDR block size for load balancer subnets. Load balancer must be routable from your internal network.
* **Capacity**: [Maximum number](#step-4%3A-plan-subnet-sizes) of dev environments the runner can support.
# Your Planning Table
Please create your own table and fill in the columns with your values.
### Infrastructure Considerations
Before creating your planning table, consider these important points:
* Ona AWS Runners can share AWS accounts, VPCs, regions, and subnets with other AWS runners
* Runners operate independently and can be deployed across multiple AWS accounts and VPCs
* For multiple runners, you can (but don't have to) use separate AWS accounts
* If using multiple AWS accounts, add an "AWS Account" column to your planning table
### Step 1: Select Regions
Ona supports multiple runners that can be added or removed as needed. However, it's important to plan your regions carefully as you'll need appropriately sized subnets in each region.
Choose one or more [AWS Regions that provide the best latency for your users](/ona/runners/aws/aws-regions).
### Step 2: Estimate Users per Region
For each selected region, estimate the maximum number of users, considering:
* Current number of users
* Expected growth over time
* Peak usage patterns
* Geographic distribution of your team
### Step 3: Determine Availability Zones
Each AWS Runner requires at least one Availability Zone (AZ) and can utilize all AZs within a region. Key points:
* One subnet is required per AZ
* We recommend using 2-3 AZs per region for optimal availability
* More AZs provide better fault tolerance but increase complexity
* Consider your organization's high availability requirements
### Step 4: Plan Subnet Sizes
Subnet sizing is crucial for your Ona deployment's functionality and depends on the workload you are likely to have. Proper planning ensures you have sufficient IP addresses for your development environments while avoiding over-provisioning that wastes resources. Based on your runner type, you'll need to plan different subnet configurations.
#### EC2 Subnets (Enterprise Runners)
These subnets host your development environments and require careful capacity planning.
* Each environment requires one IP address
* Each AZ requires one subnet
* Management services need fewer than five IP addresses
* For Enterprise Runners, EC2 subnets can use non-routable CIDR ranges (such as CGNAT ranges) since they don't need direct access from your internal network
* Ona does not use Network Address Translation (NAT) for environments
* The minimum subnet size is `/28` (supports 10 environments)
* If multiple runners share subnets, they share the available IP address pool
* Maximum capacity = (Total subnet IPs × Number of AZs) - Management IPs
* **For public subnets** If using public subnets with internet gateway routing, ensure the subnet is configured to auto-assign public IP addresses. See [AWS documentation on auto-assign public IP](https://docs.aws.amazon.com/vpc/latest/userguide/subnet-public-ip.html) for configuration details.
* Note that it's best practice to choose subnet sizes generously, as expanding a subnet later can be more complex and costly than planning for growth upfront
#### Load Balancer Subnets (Enterprise Runners Only)
Enterprise Runners require additional subnets for their Network Load Balancer infrastructure, which provides direct connectivity to your environments.
* Required for Network Load Balancer deployment
* Must be routable from your internal network (unlike EC2 subnets which can use non-routable CIDR ranges)
* Typically `/28` (16 IPs) is sufficient for most deployments
* Need one subnet per AZ for high availability
* Do not affect environment capacity calculations
# Configuring Repository Access
Source: https://ona.com/docs/ona/runners/aws/configuring-repository-access
Repository access configuration is only required if you want to create Environments from repositories (GitHub, GitLab, etc.). If you only need to create empty Environments, you can skip this configuration. However, to launch Environments from any repository, the Runner **must** be configured with a provider that can access your repos (this includes public repositories).
Press **Add a provider** and select one of the supported providers such as GitHub:
 Configure the host, or leave the default if using github.com. If you want to support multiple hosts, you can add a separate provider for each host.
 Next, choose at least one of OAuth or Personal Access Token support. You can set up an **OAuth** app to make it easy for users to sign in quickly. **Personal Access Token** allows users to provide their own PAT to sign in. Users will be prompted to authenticate before they start a new Environment on the Runner.
 Press **Save** once done. You can now start Environments for repos on the specified host:
 Whenever a user starts an Environment for the first time for that host, they will get prompted to authenticate first, and get the option to authenticate through the OAuth app or using a PAT token (whichever is configured in the integration). Once authenticated, the token is encrypted and stored to be remembered for the next time the user creates an Environment for this host.
When an admin disables OAuth/PAT support in an integration, or deletes an integration entirely for a host, any existing tokens obtained for the host through the disabled/deleted authentication method will get deleted and users might have to re-authenticate before they can create Environments again for that host.
# Deleting a runner
Source: https://ona.com/docs/ona/runners/aws/delete-runner
Learn how to delete runners in Ona.
To delete a runner, go to the runners page, and select **Delete** from the overflow menu.
Whenever a user starts an Environment for the first time for that host, they will get prompted to authenticate first, and get the option to authenticate through the OAuth app or using a PAT token (whichever is configured in the integration). Once authenticated, the token is encrypted and stored to be remembered for the next time the user creates an Environment for this host.
When an admin disables OAuth/PAT support in an integration, or deletes an integration entirely for a host, any existing tokens obtained for the host through the disabled/deleted authentication method will get deleted and users might have to re-authenticate before they can create Environments again for that host.
# Deleting a runner
Source: https://ona.com/docs/ona/runners/aws/delete-runner
Learn how to delete runners in Ona.
To delete a runner, go to the runners page, and select **Delete** from the overflow menu.
 *Delete a runner*
This will start deletion of the runner and all its environments. The runner will move into a **Pending deletion** phase, and stop + delete any existing environments on the runner. Once all environments are deleted, the runner itself will get deleted, which can take a few more minutes.
Once deleted, you can clean up the CloudFormation stack in your AWS account associated with the runner.
# Access Requirements
Source: https://ona.com/docs/ona/runners/aws/detailed-access-requirements
Configure your firewall and network security groups to allow outbound connections to these endpoints for Ona to function properly.
> Note: **Enterprise Runner Proxy Support**: Enterprise runners support HTTP proxy configuration for environments behind corporate firewalls. When using a proxy, ensure that `.internal`, `169.254.0.0/16`, `app.gitpod.io`, and `.amazonaws.com` are added to the NO\_PROXY list. See the [AWS Runner setup guide](/ona/runners/aws/setup#proxy-configuration-optional) for detailed proxy configuration.
## Ona Services
### Management Plane
Controls Runner and Environment orchestration by communicating with Ona's control plane.
* `https://app.gitpod.io`
* `https://app.ona.com`
## VS Code
Required for VS Code IDE functionality including server downloads and extension marketplace access.
* `https://update.code.visualstudio.com/api/commits/stable/server-linux-x64-web`
* `https://update.code.visualstudio.com/api/commits/stable/server-linux-arm64-web`
* `https://update.code.visualstudio.com/commit:*/server-linux-x64/stable`
* `https://update.code.visualstudio.com/commit:*/server-linux-arm64/stable`
* `https://*.vscode-unpkg.net`
* `https://marketplace.visualstudio.com`
* `https://*.gallerycdn.vsassets.io`
* `https://vscode.gitpod.io` (required for VS Code Web functionality)
## JetBrains
Required for JetBrains IDE functionality including IDE downloads and services.
* `https://download.jetbrains.com`
* `https://download-cf.jetbrains.com`
* `https://download-cdn.jetbrains.com`
* `https://data.services.jetbrains.com`
## Release Artifacts
Downloads Ona updates, CLI binaries, and agent components necessary for Runner and Environment operation.
* `https://releases.gitpod.io/ec2/stable/manifest.json`
* `https://releases.gitpod.io/ec2/stable/supervisor-amd64.xz`
* `https://releases.gitpod.io/ec2/stable/gitpod-ec2-runner.json`
* `https://releases.gitpod.io/ec2/stable/gitpod-ec2-runner-enterprise.json`
* `https://releases.gitpod.io/ec2/stable/gitpod-ec2-multi-org-runner.json`
* `https://releases.gitpod.io/cli/stable/manifest.json`
* `https://releases.gitpod.io/cli/stable/gitpod-linux-amd64`
* `https://releases.gitpod.io/cli/stable/gitpod-linux-amd64.exe`
* `https://releases.gitpod.io/cli/stable/gitpod-linux-amd64.sha256`
* `https://releases.gitpod.io/cli/stable/gitpod-linux-arm64`
* `https://releases.gitpod.io/cli/stable/gitpod-linux-arm64.sha256`
* `https://releases.gitpod.io/vscode/releases/*/vscode-remote.vsix`
* `https://releases.gitpod.io/vscode/releases/*/vscode-agent-amd64`
* `https://releases.gitpod.io/vscode/releases/*/vscode-agent-arm64`
* `https://releases.gitpod.io/jetbrains/releases/*/jetbrains-agent-amd64`
* `https://releases.gitpod.io/jetbrains/releases/*/jetbrains-agent-arm64`
## Container Registries
Downloads container images used by development environments and Runner infrastructure.
**Ona default devcontainer image:**
* `https://mcr.microsoft.com/devcontainers/base:ubuntu-24.04`
**AWS Public ECR (Runner images):**
* `https://public.ecr.aws`
* `https://*.cloudfront.net` (used by public ECR)
## Your Infrastructure
### SCM and SSO Providers
Access to your source code repositories and authentication providers for user login and code access.
Configure access to your specific providers (complete HTTPS URLs):
* GitHub, GitLab, Bitbucket URLs
* SSO provider URLs (Okta, Azure AD, etc.)
## Optional Services
### Prometheus Remote Write
Optional metrics collection endpoint for monitoring Runner and Environment performance.
* Your metrics endpoint URL (HTTPS 443)
### Additional Container Registries
Optional access to custom container registries for pulling private or organization-specific images.
**Common registries (allow those you use):**
* `https://index.docker.io`
* `https://registry-1.docker.io`
* `https://auth.docker.io`
* `https://ghcr.io`
* Your private registry URLs (HTTPS 443)
## AWS Services
Replace `
*Delete a runner*
This will start deletion of the runner and all its environments. The runner will move into a **Pending deletion** phase, and stop + delete any existing environments on the runner. Once all environments are deleted, the runner itself will get deleted, which can take a few more minutes.
Once deleted, you can clean up the CloudFormation stack in your AWS account associated with the runner.
# Access Requirements
Source: https://ona.com/docs/ona/runners/aws/detailed-access-requirements
Configure your firewall and network security groups to allow outbound connections to these endpoints for Ona to function properly.
> Note: **Enterprise Runner Proxy Support**: Enterprise runners support HTTP proxy configuration for environments behind corporate firewalls. When using a proxy, ensure that `.internal`, `169.254.0.0/16`, `app.gitpod.io`, and `.amazonaws.com` are added to the NO\_PROXY list. See the [AWS Runner setup guide](/ona/runners/aws/setup#proxy-configuration-optional) for detailed proxy configuration.
## Ona Services
### Management Plane
Controls Runner and Environment orchestration by communicating with Ona's control plane.
* `https://app.gitpod.io`
* `https://app.ona.com`
## VS Code
Required for VS Code IDE functionality including server downloads and extension marketplace access.
* `https://update.code.visualstudio.com/api/commits/stable/server-linux-x64-web`
* `https://update.code.visualstudio.com/api/commits/stable/server-linux-arm64-web`
* `https://update.code.visualstudio.com/commit:*/server-linux-x64/stable`
* `https://update.code.visualstudio.com/commit:*/server-linux-arm64/stable`
* `https://*.vscode-unpkg.net`
* `https://marketplace.visualstudio.com`
* `https://*.gallerycdn.vsassets.io`
* `https://vscode.gitpod.io` (required for VS Code Web functionality)
## JetBrains
Required for JetBrains IDE functionality including IDE downloads and services.
* `https://download.jetbrains.com`
* `https://download-cf.jetbrains.com`
* `https://download-cdn.jetbrains.com`
* `https://data.services.jetbrains.com`
## Release Artifacts
Downloads Ona updates, CLI binaries, and agent components necessary for Runner and Environment operation.
* `https://releases.gitpod.io/ec2/stable/manifest.json`
* `https://releases.gitpod.io/ec2/stable/supervisor-amd64.xz`
* `https://releases.gitpod.io/ec2/stable/gitpod-ec2-runner.json`
* `https://releases.gitpod.io/ec2/stable/gitpod-ec2-runner-enterprise.json`
* `https://releases.gitpod.io/ec2/stable/gitpod-ec2-multi-org-runner.json`
* `https://releases.gitpod.io/cli/stable/manifest.json`
* `https://releases.gitpod.io/cli/stable/gitpod-linux-amd64`
* `https://releases.gitpod.io/cli/stable/gitpod-linux-amd64.exe`
* `https://releases.gitpod.io/cli/stable/gitpod-linux-amd64.sha256`
* `https://releases.gitpod.io/cli/stable/gitpod-linux-arm64`
* `https://releases.gitpod.io/cli/stable/gitpod-linux-arm64.sha256`
* `https://releases.gitpod.io/vscode/releases/*/vscode-remote.vsix`
* `https://releases.gitpod.io/vscode/releases/*/vscode-agent-amd64`
* `https://releases.gitpod.io/vscode/releases/*/vscode-agent-arm64`
* `https://releases.gitpod.io/jetbrains/releases/*/jetbrains-agent-amd64`
* `https://releases.gitpod.io/jetbrains/releases/*/jetbrains-agent-arm64`
## Container Registries
Downloads container images used by development environments and Runner infrastructure.
**Ona default devcontainer image:**
* `https://mcr.microsoft.com/devcontainers/base:ubuntu-24.04`
**AWS Public ECR (Runner images):**
* `https://public.ecr.aws`
* `https://*.cloudfront.net` (used by public ECR)
## Your Infrastructure
### SCM and SSO Providers
Access to your source code repositories and authentication providers for user login and code access.
Configure access to your specific providers (complete HTTPS URLs):
* GitHub, GitLab, Bitbucket URLs
* SSO provider URLs (Okta, Azure AD, etc.)
## Optional Services
### Prometheus Remote Write
Optional metrics collection endpoint for monitoring Runner and Environment performance.
* Your metrics endpoint URL (HTTPS 443)
### Additional Container Registries
Optional access to custom container registries for pulling private or organization-specific images.
**Common registries (allow those you use):**
* `https://index.docker.io`
* `https://registry-1.docker.io`
* `https://auth.docker.io`
* `https://ghcr.io`
* Your private registry URLs (HTTPS 443)
## AWS Services
Replace ` ### Disabling the cache
To disable caching:
1. Go to **Settings → Runners** in your Gitpod organization
2. Select your AWS runner
3. Toggle **Dev container image cache** to disabled
4. Click **Save**
### Disabling the cache
To disable caching:
1. Go to **Settings → Runners** in your Gitpod organization
2. Select your AWS runner
3. Toggle **Dev container image cache** to disabled
4. Click **Save**
 *Add a new environment class*
### Modifying environment classes
Once an environment class is created, only its name and description can be updated. To change configuration values like disk size or instance type, you must:
1. Create a new environment class with the desired specifications
2. Optionally disable the previous class
### Disabling environment classes
When you disable an environment class:
* Existing environments using this class will continue to run
* Users cannot create new environments with this class
* Scheduled or automated processes cannot create new environments with this class
## Using environment classes
Users can select environment classes when creating new development environments by:
* Manually selecting the environment class during environment creation
* Using a project that's configured to use a specific environment class
## Supported instance types
AWS runners support any instance type that meets the following requirements:
* Any EC2 instance with EBS volume support
* X64 architecture (Intel or AMD processors)
This gives you flexibility to choose from a wide range of compute options based on your development needs, including:
* General purpose: `t3.medium`, `t3.large`, `m5.large`, `m5.xlarge`
* Compute optimized: `c5.large`, `c5.xlarge`
* Memory optimized: `r5.large`, `r5.xlarge`
* Storage optimized: `i3.large`, `d2.xlarge`
Select an instance type that aligns with your workload requirements for CPU, memory, and cost efficiency.
### Considerations
* **Regional availability**: Not all instance types are available in every AWS region
* **Quotas**: Ensure your AWS account has sufficient quota for your chosen instance types
* **Costs**: Different instance families have varying pricing models
* **Instance generations**: Newer generations generally offer better price-performance ratio
* **Storage**: Use an instance type which has more storage than RAM.
For more information, see:
* [AWS EC2 Instance Types](https://aws.amazon.com/ec2/instance-types/)
* [Amazon EC2 Instance Type Families](https://aws.amazon.com/ec2/instance-types/#Instance_Types)
## Best practices
* Be prescriptive with your environment classes to standardize resources across your organization
* Limit the environment classes to what your teams actually need
* Create specialized classes for specific workloads (e.g., data processing, frontend development)
* Review usage patterns regularly and adjust available classes accordingly
# Overview
Source: https://ona.com/docs/ona/runners/aws/overview
AWS Runners allow you to deploy Ona's runner infrastructure directly within your own AWS VPC, giving you complete control over your development environments while maintaining security and compliance requirements.
When you deploy an AWS Runner, development environments are created as EC2 instances that are automatically sized based on your environment class requirements. The runner orchestrator itself runs as an ECS service within a dedicated ECS cluster in your AWS account. The entire deployment is automated through CloudFormation templates that we provide, making setup straightforward while ensuring best practices for security and scalability.
*Add a new environment class*
### Modifying environment classes
Once an environment class is created, only its name and description can be updated. To change configuration values like disk size or instance type, you must:
1. Create a new environment class with the desired specifications
2. Optionally disable the previous class
### Disabling environment classes
When you disable an environment class:
* Existing environments using this class will continue to run
* Users cannot create new environments with this class
* Scheduled or automated processes cannot create new environments with this class
## Using environment classes
Users can select environment classes when creating new development environments by:
* Manually selecting the environment class during environment creation
* Using a project that's configured to use a specific environment class
## Supported instance types
AWS runners support any instance type that meets the following requirements:
* Any EC2 instance with EBS volume support
* X64 architecture (Intel or AMD processors)
This gives you flexibility to choose from a wide range of compute options based on your development needs, including:
* General purpose: `t3.medium`, `t3.large`, `m5.large`, `m5.xlarge`
* Compute optimized: `c5.large`, `c5.xlarge`
* Memory optimized: `r5.large`, `r5.xlarge`
* Storage optimized: `i3.large`, `d2.xlarge`
Select an instance type that aligns with your workload requirements for CPU, memory, and cost efficiency.
### Considerations
* **Regional availability**: Not all instance types are available in every AWS region
* **Quotas**: Ensure your AWS account has sufficient quota for your chosen instance types
* **Costs**: Different instance families have varying pricing models
* **Instance generations**: Newer generations generally offer better price-performance ratio
* **Storage**: Use an instance type which has more storage than RAM.
For more information, see:
* [AWS EC2 Instance Types](https://aws.amazon.com/ec2/instance-types/)
* [Amazon EC2 Instance Type Families](https://aws.amazon.com/ec2/instance-types/#Instance_Types)
## Best practices
* Be prescriptive with your environment classes to standardize resources across your organization
* Limit the environment classes to what your teams actually need
* Create specialized classes for specific workloads (e.g., data processing, frontend development)
* Review usage patterns regularly and adjust available classes accordingly
# Overview
Source: https://ona.com/docs/ona/runners/aws/overview
AWS Runners allow you to deploy Ona's runner infrastructure directly within your own AWS VPC, giving you complete control over your development environments while maintaining security and compliance requirements.
When you deploy an AWS Runner, development environments are created as EC2 instances that are automatically sized based on your environment class requirements. The runner orchestrator itself runs as an ECS service within a dedicated ECS cluster in your AWS account. The entire deployment is automated through CloudFormation templates that we provide, making setup straightforward while ensuring best practices for security and scalability.
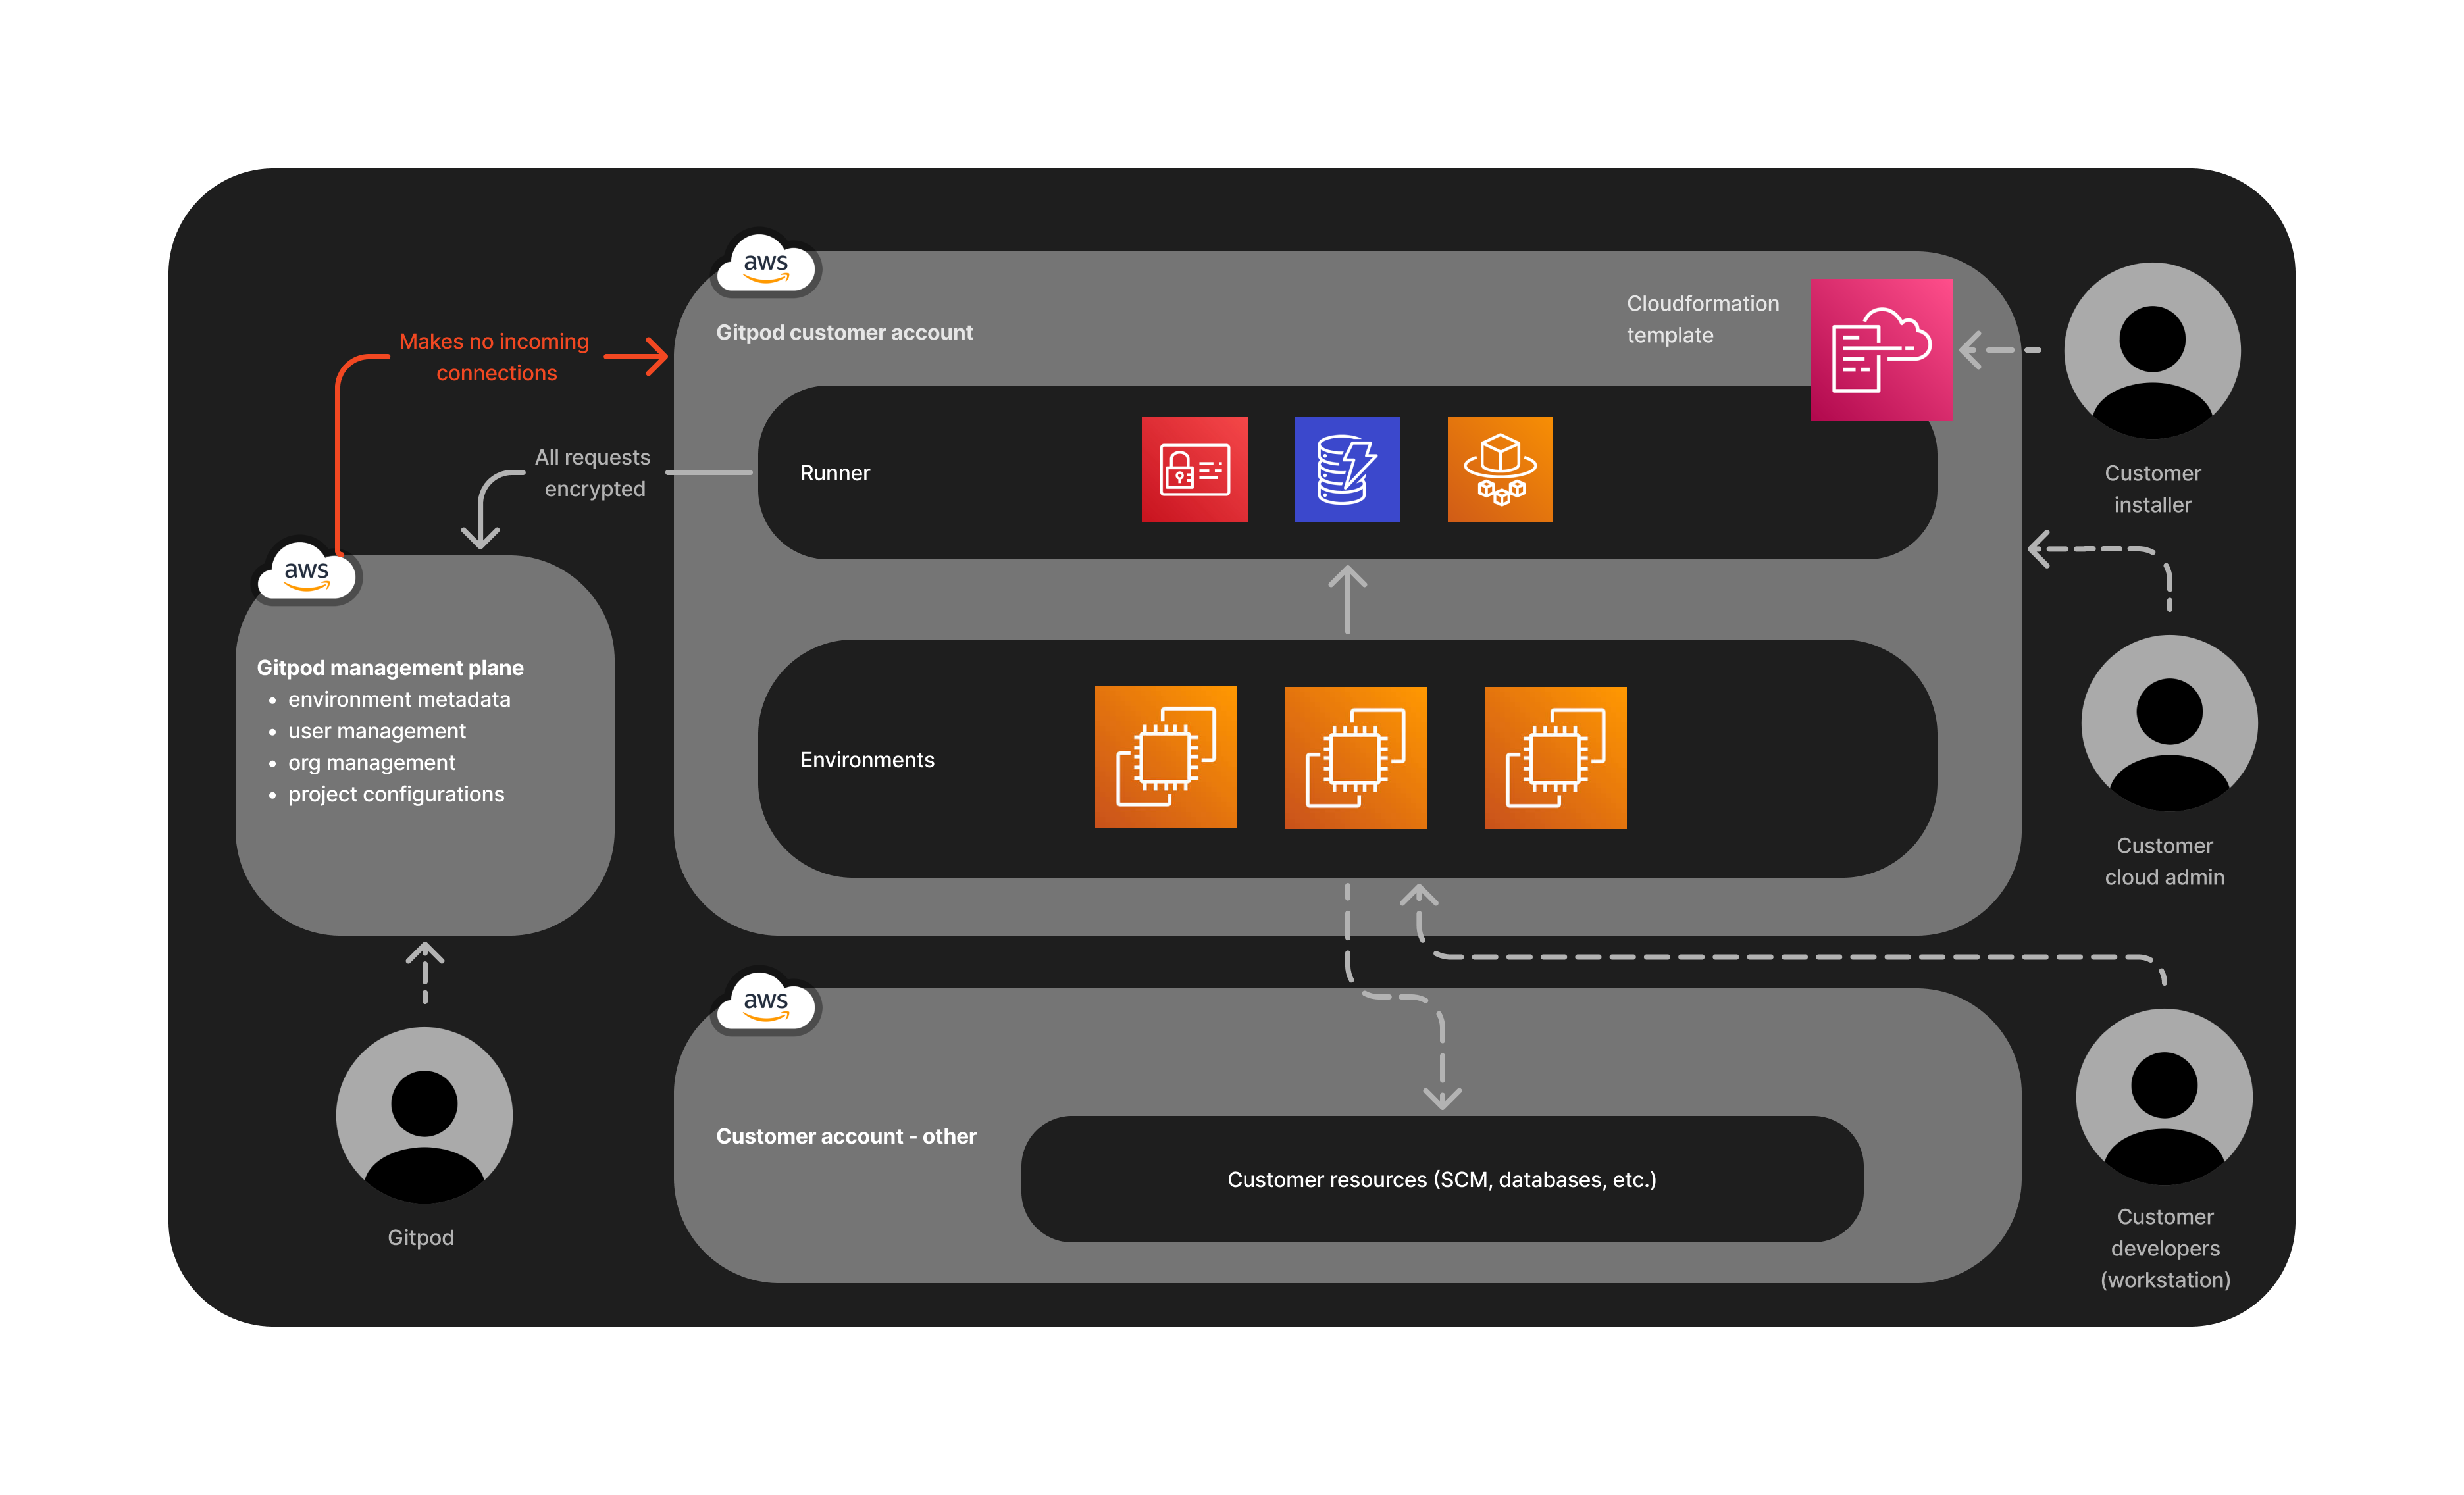 *Overview of AWS runner architecture*
## Benefits of AWS Runner
AWS Runners let you run Ona environments inside your AWS account with enterprise‑grade controls. Key benefits include:
* Direct connectivity using your own Network Load Balancer with your domain and SSL/TLS certificate
* AI agent integration for accelerated development workflows (Enterprise tier)
* Private connectivity to the management plane via AWS PrivateLink (no public internet traversal)
* Fine‑grained IAM with permission boundaries to meet enterprise security requirements
* HTTP proxy support for environments behind corporate firewalls
* Custom CA certificate support for enterprise CAs and certificate chains
*Overview of AWS runner architecture*
## Benefits of AWS Runner
AWS Runners let you run Ona environments inside your AWS account with enterprise‑grade controls. Key benefits include:
* Direct connectivity using your own Network Load Balancer with your domain and SSL/TLS certificate
* AI agent integration for accelerated development workflows (Enterprise tier)
* Private connectivity to the management plane via AWS PrivateLink (no public internet traversal)
* Fine‑grained IAM with permission boundaries to meet enterprise security requirements
* HTTP proxy support for environments behind corporate firewalls
* Custom CA certificate support for enterprise CAs and certificate chains
 *Enterprise Runner architecture*
## Prerequisites
Before deploying your Enterprise AWS Runner, ensure you have:
1. **AWS Account** with elevated permissions for enterprise features
2. **Capacity Planning** - Follow our [Capacity Planning](/ona/runners/aws/capacity-planning) guide to determine your infrastructure requirements
3. **AMI Access** - If your organization restricts AMI usage, allowlist the AMIs runners and environments run on
| AMI Name | Owner Account ID | Owner | Purpose |
| -------------------------------------------- | ---------------- | ------ | ------------------------ |
| `bottlerocket-aws-ecs-1-x86_64` | `149721548608` | Amazon | Runner service |
| `gitpod/images/gitpod-next/ec2-runner-ami-*` | `995913728426` | Gitpod | Development environments |
For more details, review our [AMI Requirements](/ona/runners/aws/detailed-access-requirements#ami-requirements) guide
4. **Domain Name** that you control with DNS modification capabilities
5. **SSL/TLS Certificate** provisioned in AWS Certificate Manager (ACM). Your SSL certificate must include both Subject Alternative Names (SANs):
* `yourdomain.com` (root domain)
* `*.yourdomain.com` (wildcard subdomain)
## Network Requirements
The Enterprise Runner requires a custom VPC with specific networking setup for enhanced security and direct connectivity.
*Enterprise Runner architecture*
## Prerequisites
Before deploying your Enterprise AWS Runner, ensure you have:
1. **AWS Account** with elevated permissions for enterprise features
2. **Capacity Planning** - Follow our [Capacity Planning](/ona/runners/aws/capacity-planning) guide to determine your infrastructure requirements
3. **AMI Access** - If your organization restricts AMI usage, allowlist the AMIs runners and environments run on
| AMI Name | Owner Account ID | Owner | Purpose |
| -------------------------------------------- | ---------------- | ------ | ------------------------ |
| `bottlerocket-aws-ecs-1-x86_64` | `149721548608` | Amazon | Runner service |
| `gitpod/images/gitpod-next/ec2-runner-ami-*` | `995913728426` | Gitpod | Development environments |
For more details, review our [AMI Requirements](/ona/runners/aws/detailed-access-requirements#ami-requirements) guide
4. **Domain Name** that you control with DNS modification capabilities
5. **SSL/TLS Certificate** provisioned in AWS Certificate Manager (ACM). Your SSL certificate must include both Subject Alternative Names (SANs):
* `yourdomain.com` (root domain)
* `*.yourdomain.com` (wildcard subdomain)
## Network Requirements
The Enterprise Runner requires a custom VPC with specific networking setup for enhanced security and direct connectivity.
 *Network Configuration Diagram*
## Next Steps
* [Setup](/ona/runners/aws/setup) - Deploy your AWS Runner
* [Capacity Planning](/ona/runners/aws/capacity-planning) - Plan your infrastructure needs
* [Access Requirements](/ona/runners/aws/detailed-access-requirements) - Configure network access
# Setup
Source: https://ona.com/docs/ona/runners/aws/setup
*Network Configuration Diagram*
## Next Steps
* [Setup](/ona/runners/aws/setup) - Deploy your AWS Runner
* [Capacity Planning](/ona/runners/aws/capacity-planning) - Plan your infrastructure needs
* [Access Requirements](/ona/runners/aws/detailed-access-requirements) - Configure network access
# Setup
Source: https://ona.com/docs/ona/runners/aws/setup
 After choosing AWS from the list of available providers, continue with the **Enterprise Runner template**.
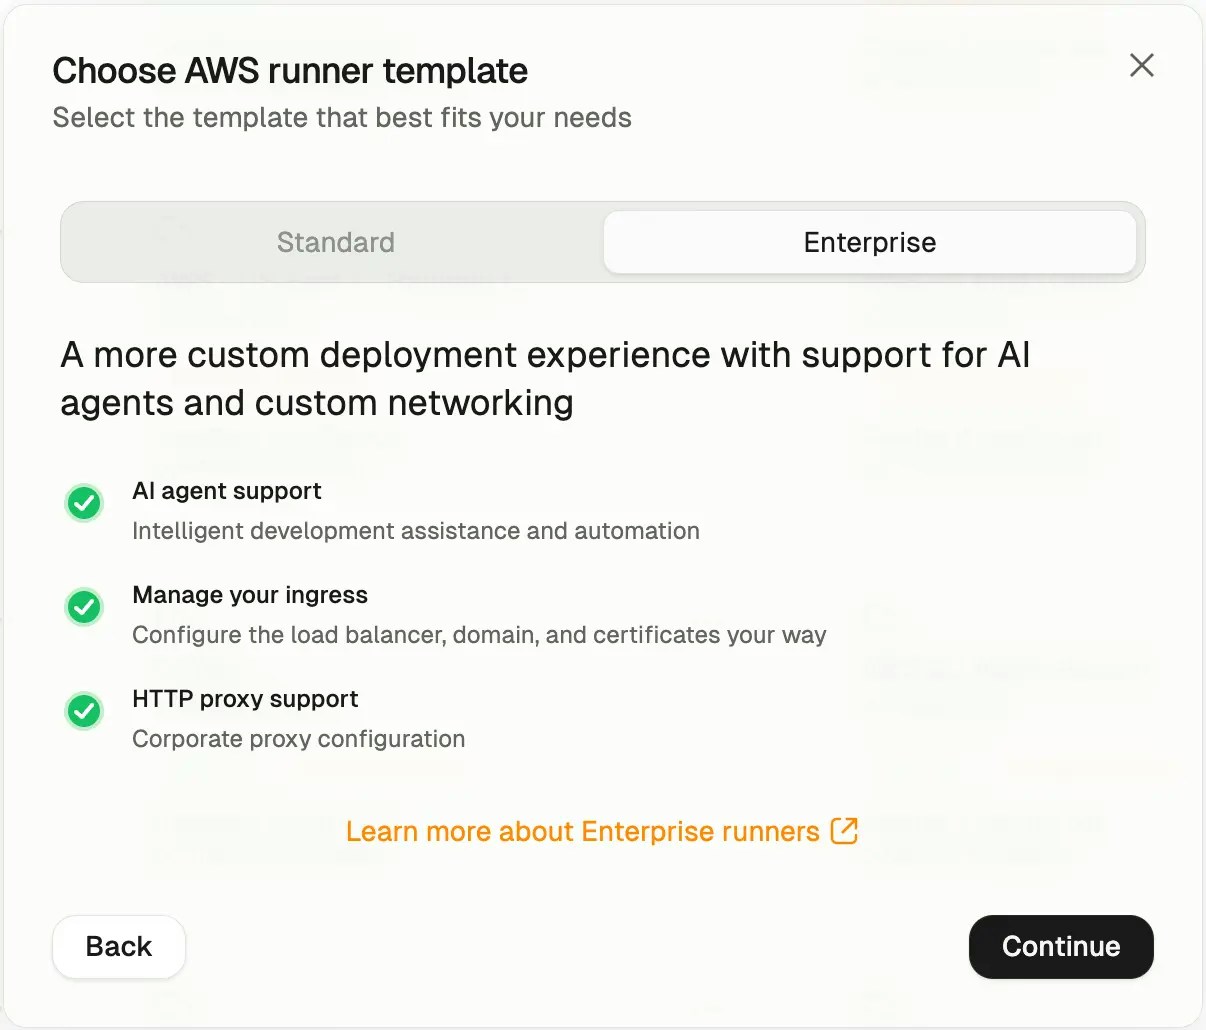 Choose the **Enterprise Runner template**, provide a **name** and select the **AWS region** to deploy the Runner into, then press **Create**. This creates the Runner reference in Ona.
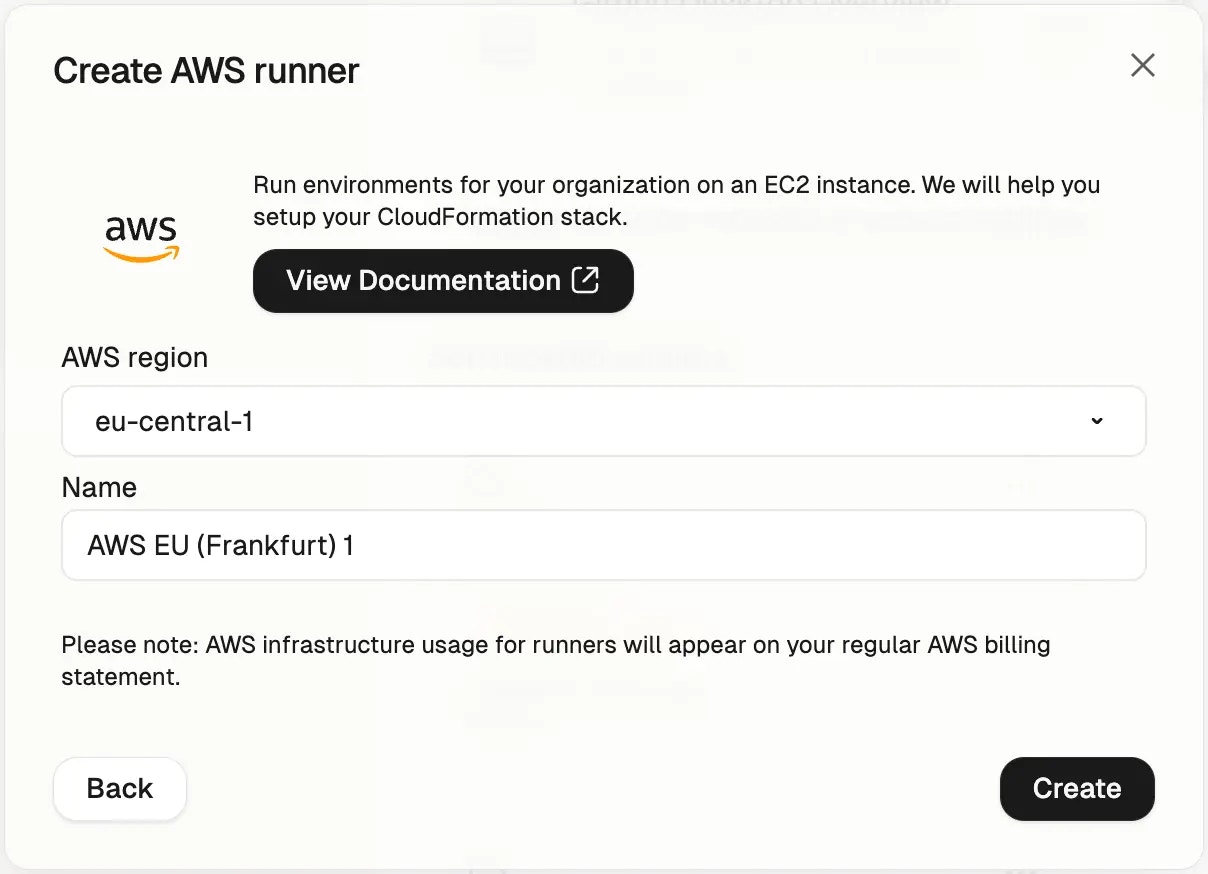
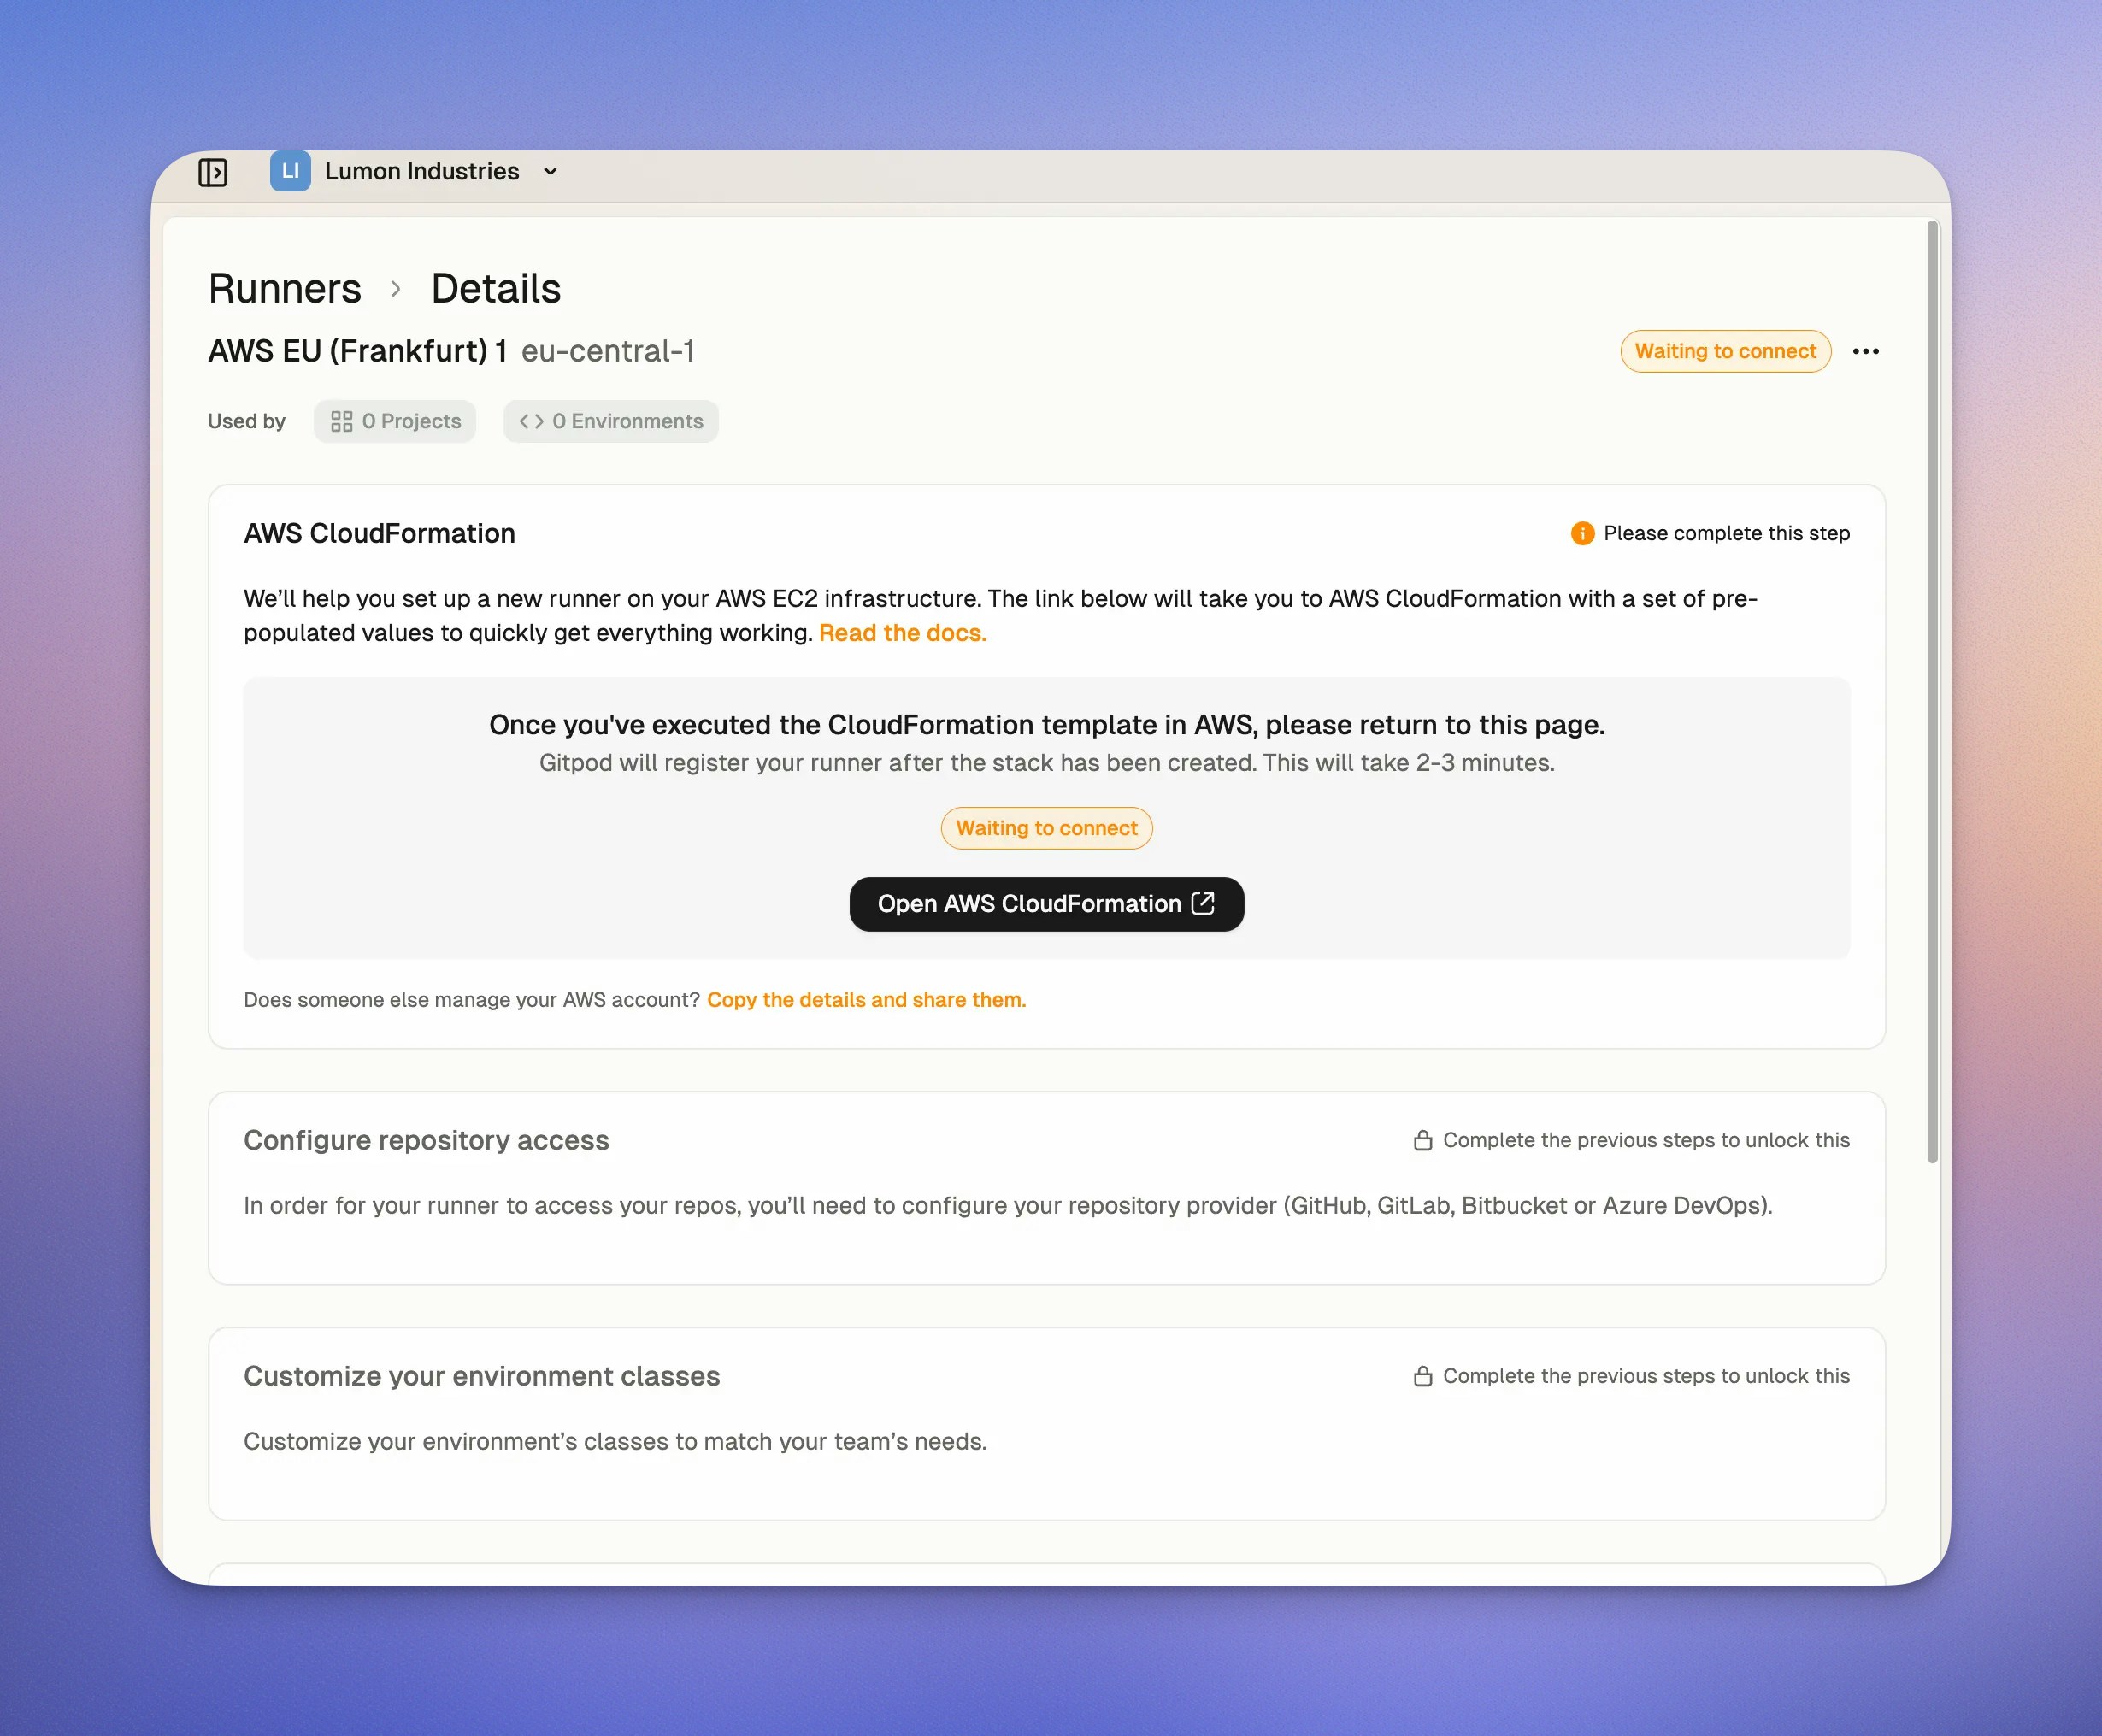 ## CloudFormation Template Deployment
Next, ensure you are signed into the right AWS account in the AWS console, and then press **Open AWS CloudFormation** to start deploying the Runner into your AWS account. This will link you to the AWS console to create the CloudFormation stack:
## CloudFormation Template Deployment
Next, ensure you are signed into the right AWS account in the AWS console, and then press **Open AWS CloudFormation** to start deploying the Runner into your AWS account. This will link you to the AWS console to create the CloudFormation stack:
 Most parameters are auto-filled already. The template is organized into several parameter groups and has to be filled out carefully.
#### Ona Configuration
Core authentication and API connection settings for your Runner.
| Parameter | Description | Required |
| ------------------ | -------------------------------------------------------- | -------- |
| **Runner ID** | Unique identifier for your Runner (auto-generated) | ✅ Yes |
| **Exchange Token** | Authentication token for the EC2 Runner (auto-generated) | ✅ Yes |
| **API Endpoint** | URL of the API (auto-generated) | ✅ Yes |
⚠️ **Important**: These values are automatically generated when you create a Runner configuration. Do not modify these values manually.
#### Network Configuration (Mandatory)
VPC and subnet settings for deploying the Runner infrastructure.
| Parameter | Description | Example Value | Required |
| ------------------------ | -------------------------------------------------------------------------------------------------------------- | ------------------------------ | -------- |
| **VPC** | The VPC where the Runner will be deployed | `vpc-12345abcd` | ✅ Yes |
| **Availability Zones** | AZs for high availability (select 2-3) | `us-east-1a, us-east-1b` | ✅ Yes |
| **EC2 Instances Subnet** | Private subnets for EC2 instances (can be non-routable from internal network). Should match the number of AZs | `subnet-123abc, subnet-456def` | ✅ Yes |
| **Loadbalance Subnets** | Subnets for load balancer with CIDR ranges routable from your internal network. Should match the number of AZs | `subnet-123abc, subnet-456def` | ✅ Yes |
**Recommendations:**
* Select 2-3 Availability Zones for high availability
* **EC2 subnets**: Use private subnets, must be sufficiently large for your expected workload
* **Load balancer subnets**: Must have CIDR ranges routable from your internal network for user access
* Ensure connectivity from user locations via VPN, Direct Connect, or Transit Gateway
#### DNS Configuration
Domain name, SSL certificate, and load balancer visibility settings.
| Parameter | Description | Example Value | Required |
| ---------------------------- | ---------------------------------------------- | ---------------------------------------------------------- | -------- |
| **Load Balancer Visibility** | Choose between `internal` or `internet-facing` | `internal` | ✅ Yes |
| **Domain Name** | Your domain name for access | `yourdomain.com` | ✅ Yes |
| **Certificate ARN** | ARN of your SSL certificate from ACM | `arn:aws:acm:us-east-1:123456789012:certificate/abc123...` | ✅ Yes |
**Load Balancer Visibility Options:**
* **internal**: Load balancer is only accessible from within your VPC (recommended for private deployments)
* **internet-facing**: Load balancer is accessible from the internet (only if using public subnets)
#### Network Configuration (Optional)
Configure additional network settings for enterprise security requirements.
| Parameter | Description | Example Value | Required |
| ------------------------------------------- | ----------------------------------------------------------------- | --------------------------------- | ------------------------------- |
| **Custom Security Group for Load Balancer** | Security group to attach to the load balancer for traffic control | `sg-abcdef123` | ❌ Optional |
| **HTTP Proxy** | HTTP proxy server URL | `http://proxy.company.com:8080` | ❌ Optional |
| **HTTPS Proxy** | HTTPS proxy server URL | `https://proxy.company.com:8080` | ❌ Optional |
| **No Proxy** | Comma-separated list of hosts to bypass proxy | `.internal,169.254.0.0/16,...` | ⚠️ Required if proxy configured |
| **Custom CA Certificate** | Custom certificate authority from SSM Parameter Store | `{{resolve:ssm:/gitpod/ca-cert}}` | ❌ Optional |
**Security Group Behavior:**
* **If not provided**: An automatic security group will be created that allows all traffic (0.0.0.0/0) to ports 80 and 443
* **If provided**: You can specify a custom security group to narrow down the allowed traffic sources for enhanced security
**Proxy Configuration:**
When configuring HTTP/HTTPS proxy, NO\_PROXY must include: `.internal`, `169.254.0.0/16`, `app.gitpod.io`, and `.amazonaws.com`.
**Proxy Update Behavior:**
* **Runner infrastructure**: Changes take effect immediately after CloudFormation update
* **Component-specific timing**:
* Content initialization: Effective after environment restart
* Devcontainer: Effective after rebuild
* Docker in Docker: Effective after container recreation
**Custom CA Certificate:**
Use CloudFormation dynamic references to retrieve certificates from AWS SSM Parameter Store. For syntax details, see [SSM Parameter Store](https://docs.aws.amazon.com/AWSCloudFormation/latest/UserGuide/dynamic-references-ssm.html) documentation.
Most parameters are auto-filled already. The template is organized into several parameter groups and has to be filled out carefully.
#### Ona Configuration
Core authentication and API connection settings for your Runner.
| Parameter | Description | Required |
| ------------------ | -------------------------------------------------------- | -------- |
| **Runner ID** | Unique identifier for your Runner (auto-generated) | ✅ Yes |
| **Exchange Token** | Authentication token for the EC2 Runner (auto-generated) | ✅ Yes |
| **API Endpoint** | URL of the API (auto-generated) | ✅ Yes |
⚠️ **Important**: These values are automatically generated when you create a Runner configuration. Do not modify these values manually.
#### Network Configuration (Mandatory)
VPC and subnet settings for deploying the Runner infrastructure.
| Parameter | Description | Example Value | Required |
| ------------------------ | -------------------------------------------------------------------------------------------------------------- | ------------------------------ | -------- |
| **VPC** | The VPC where the Runner will be deployed | `vpc-12345abcd` | ✅ Yes |
| **Availability Zones** | AZs for high availability (select 2-3) | `us-east-1a, us-east-1b` | ✅ Yes |
| **EC2 Instances Subnet** | Private subnets for EC2 instances (can be non-routable from internal network). Should match the number of AZs | `subnet-123abc, subnet-456def` | ✅ Yes |
| **Loadbalance Subnets** | Subnets for load balancer with CIDR ranges routable from your internal network. Should match the number of AZs | `subnet-123abc, subnet-456def` | ✅ Yes |
**Recommendations:**
* Select 2-3 Availability Zones for high availability
* **EC2 subnets**: Use private subnets, must be sufficiently large for your expected workload
* **Load balancer subnets**: Must have CIDR ranges routable from your internal network for user access
* Ensure connectivity from user locations via VPN, Direct Connect, or Transit Gateway
#### DNS Configuration
Domain name, SSL certificate, and load balancer visibility settings.
| Parameter | Description | Example Value | Required |
| ---------------------------- | ---------------------------------------------- | ---------------------------------------------------------- | -------- |
| **Load Balancer Visibility** | Choose between `internal` or `internet-facing` | `internal` | ✅ Yes |
| **Domain Name** | Your domain name for access | `yourdomain.com` | ✅ Yes |
| **Certificate ARN** | ARN of your SSL certificate from ACM | `arn:aws:acm:us-east-1:123456789012:certificate/abc123...` | ✅ Yes |
**Load Balancer Visibility Options:**
* **internal**: Load balancer is only accessible from within your VPC (recommended for private deployments)
* **internet-facing**: Load balancer is accessible from the internet (only if using public subnets)
#### Network Configuration (Optional)
Configure additional network settings for enterprise security requirements.
| Parameter | Description | Example Value | Required |
| ------------------------------------------- | ----------------------------------------------------------------- | --------------------------------- | ------------------------------- |
| **Custom Security Group for Load Balancer** | Security group to attach to the load balancer for traffic control | `sg-abcdef123` | ❌ Optional |
| **HTTP Proxy** | HTTP proxy server URL | `http://proxy.company.com:8080` | ❌ Optional |
| **HTTPS Proxy** | HTTPS proxy server URL | `https://proxy.company.com:8080` | ❌ Optional |
| **No Proxy** | Comma-separated list of hosts to bypass proxy | `.internal,169.254.0.0/16,...` | ⚠️ Required if proxy configured |
| **Custom CA Certificate** | Custom certificate authority from SSM Parameter Store | `{{resolve:ssm:/gitpod/ca-cert}}` | ❌ Optional |
**Security Group Behavior:**
* **If not provided**: An automatic security group will be created that allows all traffic (0.0.0.0/0) to ports 80 and 443
* **If provided**: You can specify a custom security group to narrow down the allowed traffic sources for enhanced security
**Proxy Configuration:**
When configuring HTTP/HTTPS proxy, NO\_PROXY must include: `.internal`, `169.254.0.0/16`, `app.gitpod.io`, and `.amazonaws.com`.
**Proxy Update Behavior:**
* **Runner infrastructure**: Changes take effect immediately after CloudFormation update
* **Component-specific timing**:
* Content initialization: Effective after environment restart
* Devcontainer: Effective after rebuild
* Docker in Docker: Effective after container recreation
**Custom CA Certificate:**
Use CloudFormation dynamic references to retrieve certificates from AWS SSM Parameter Store. For syntax details, see [SSM Parameter Store](https://docs.aws.amazon.com/AWSCloudFormation/latest/UserGuide/dynamic-references-ssm.html) documentation.
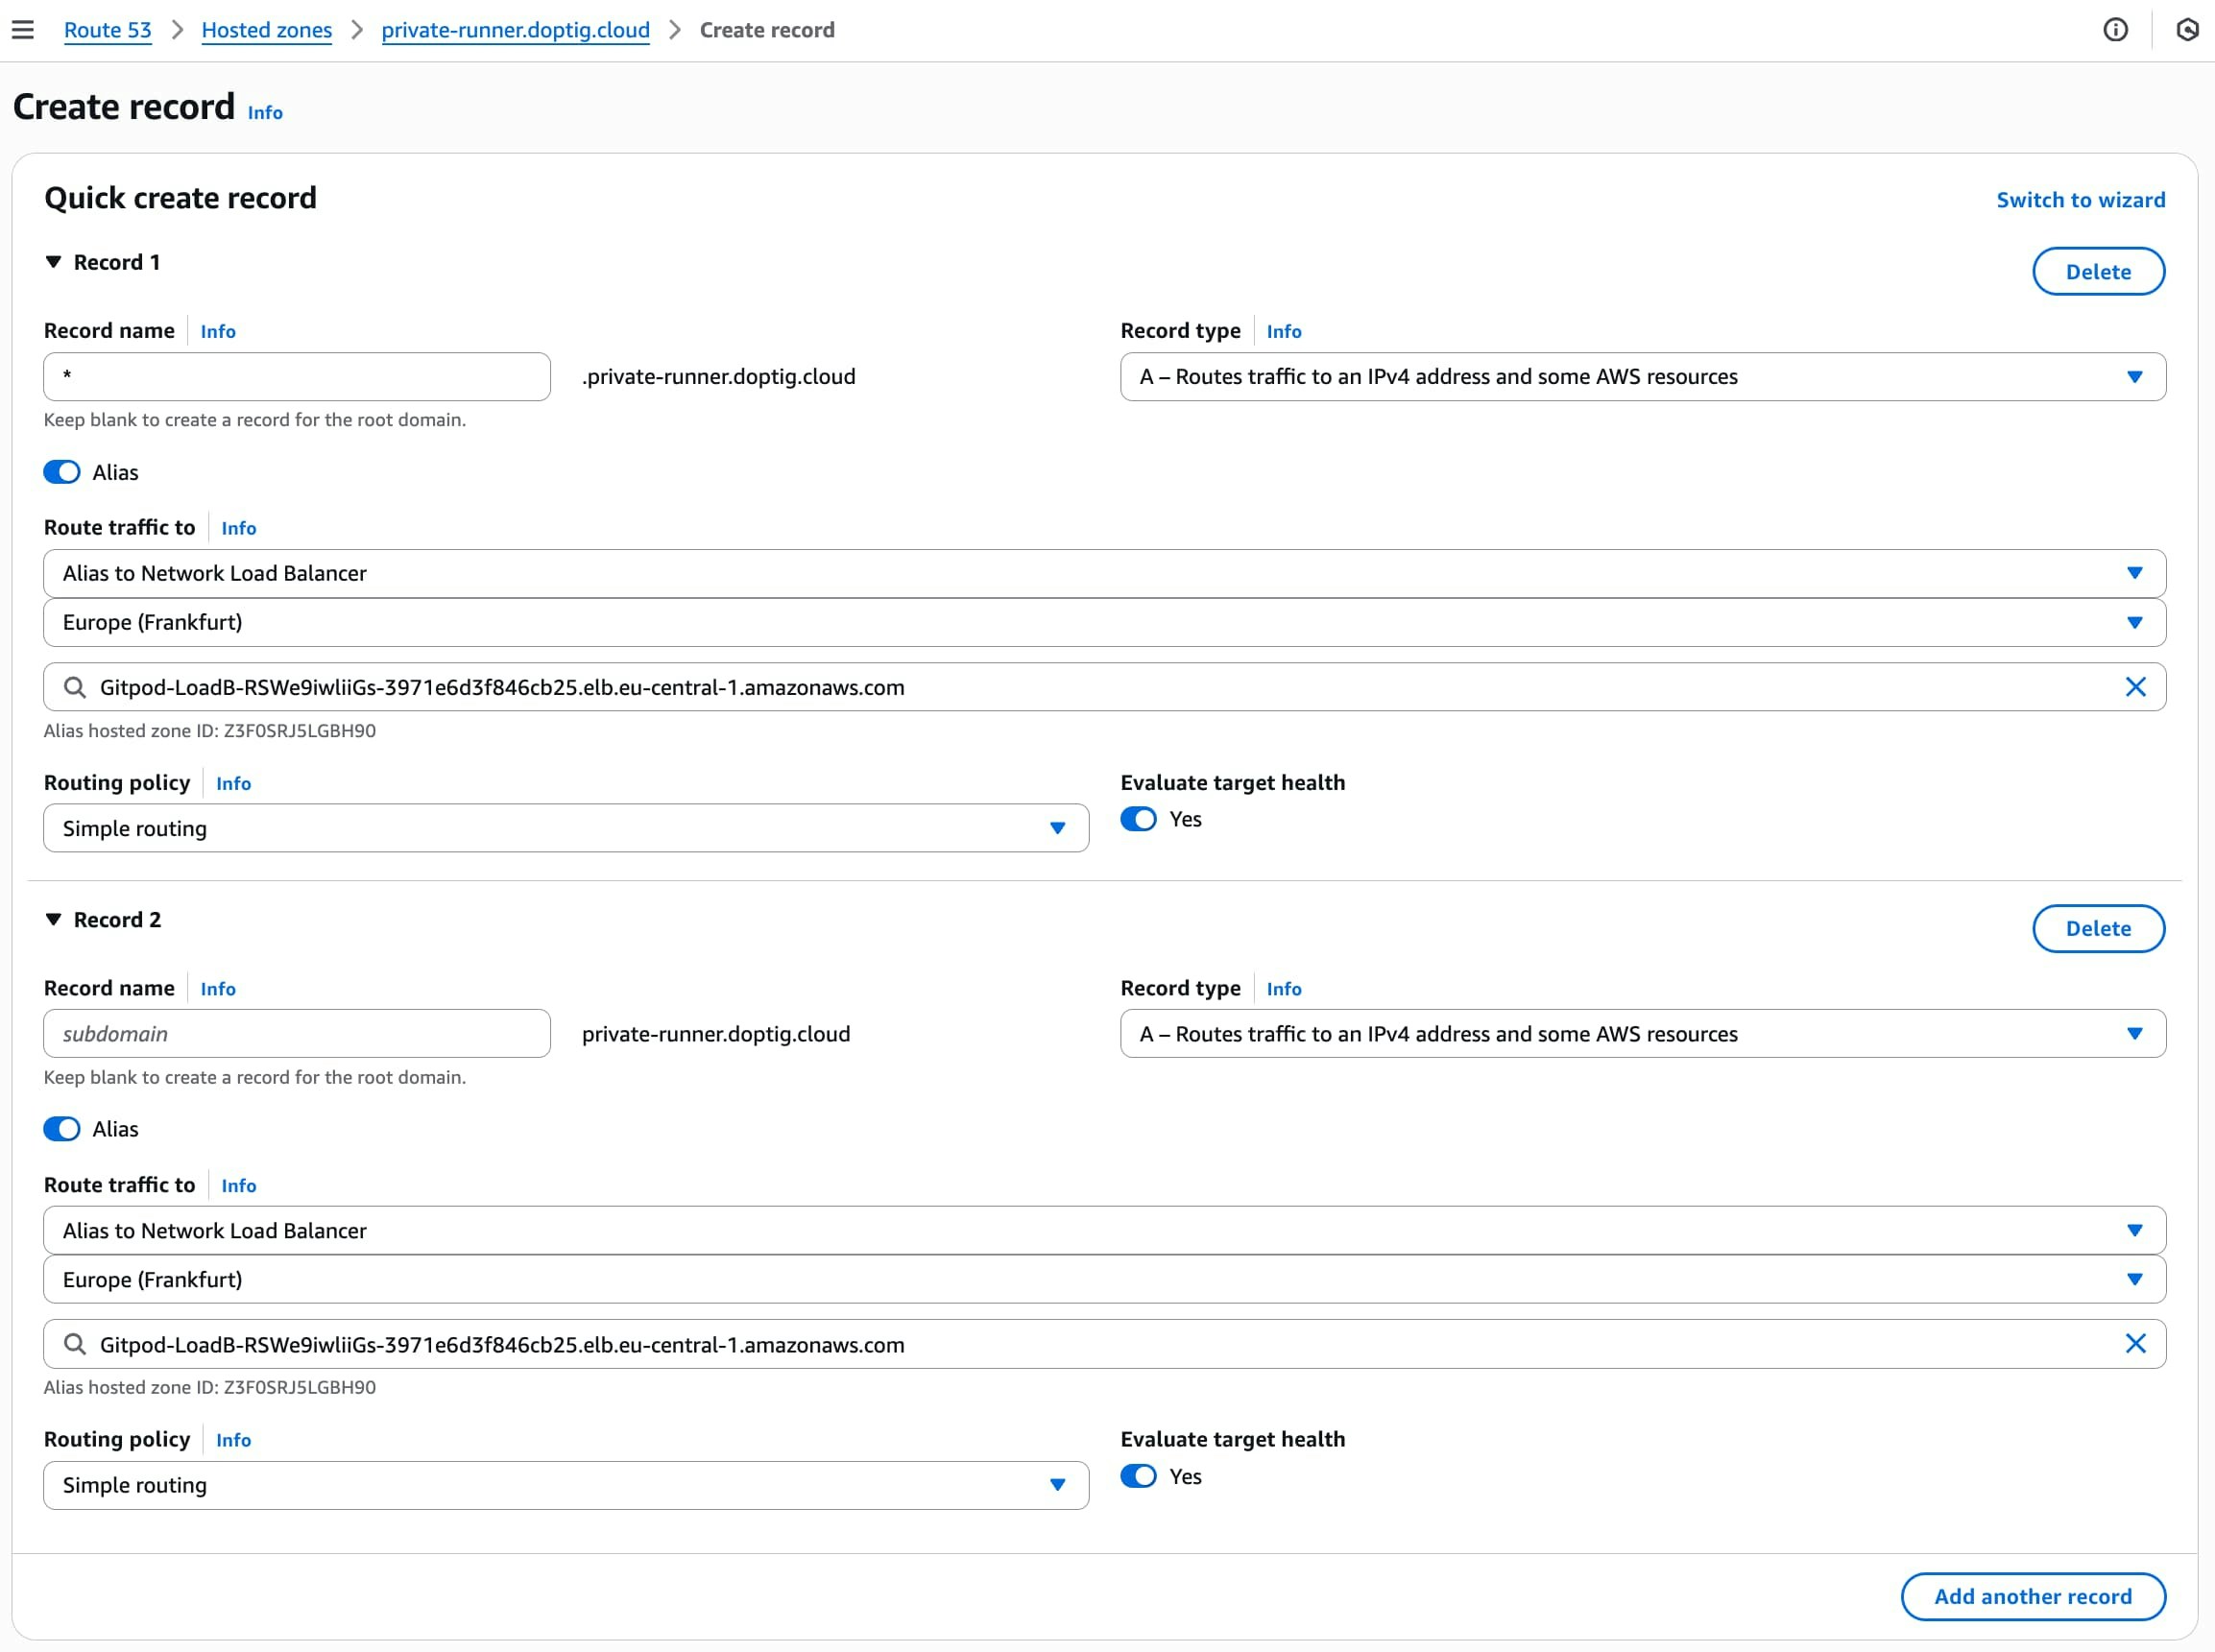 **Advantages of Route 53 Alias Records:**
* No additional charges for alias queries
* Automatic health checking
* Better performance with shorter resolution times
* AWS-native integration with load balancers
#### Standard DNS Providers (CNAME Records)
For other DNS providers or if you prefer CNAME records:
| Type | Name | Value | TTL |
| ----- | ------------------ | ------------------------------------------------------------- | --- |
| CNAME | `yourdomain.com` | `internal-LoadBa-XXXXX-123456789.us-east-1.elb.amazonaws.com` | 300 |
| CNAME | `*.yourdomain.com` | `internal-LoadBa-XXXXX-123456789.us-east-1.elb.amazonaws.com` | 300 |
**Example DNS Configuration:**
If you entered `yourdomain.com` as your domain name parameter, configure:
```
yourdomain.com. CNAME internal-LoadBa-XXXXX-123456789.us-east-1.elb.amazonaws.com.
*.yourdomain.com. CNAME internal-LoadBa-XXXXX-123456789.us-east-1.elb.amazonaws.com.
```
**Advantages of Route 53 Alias Records:**
* No additional charges for alias queries
* Automatic health checking
* Better performance with shorter resolution times
* AWS-native integration with load balancers
#### Standard DNS Providers (CNAME Records)
For other DNS providers or if you prefer CNAME records:
| Type | Name | Value | TTL |
| ----- | ------------------ | ------------------------------------------------------------- | --- |
| CNAME | `yourdomain.com` | `internal-LoadBa-XXXXX-123456789.us-east-1.elb.amazonaws.com` | 300 |
| CNAME | `*.yourdomain.com` | `internal-LoadBa-XXXXX-123456789.us-east-1.elb.amazonaws.com` | 300 |
**Example DNS Configuration:**
If you entered `yourdomain.com` as your domain name parameter, configure:
```
yourdomain.com. CNAME internal-LoadBa-XXXXX-123456789.us-east-1.elb.amazonaws.com.
*.yourdomain.com. CNAME internal-LoadBa-XXXXX-123456789.us-east-1.elb.amazonaws.com.
```
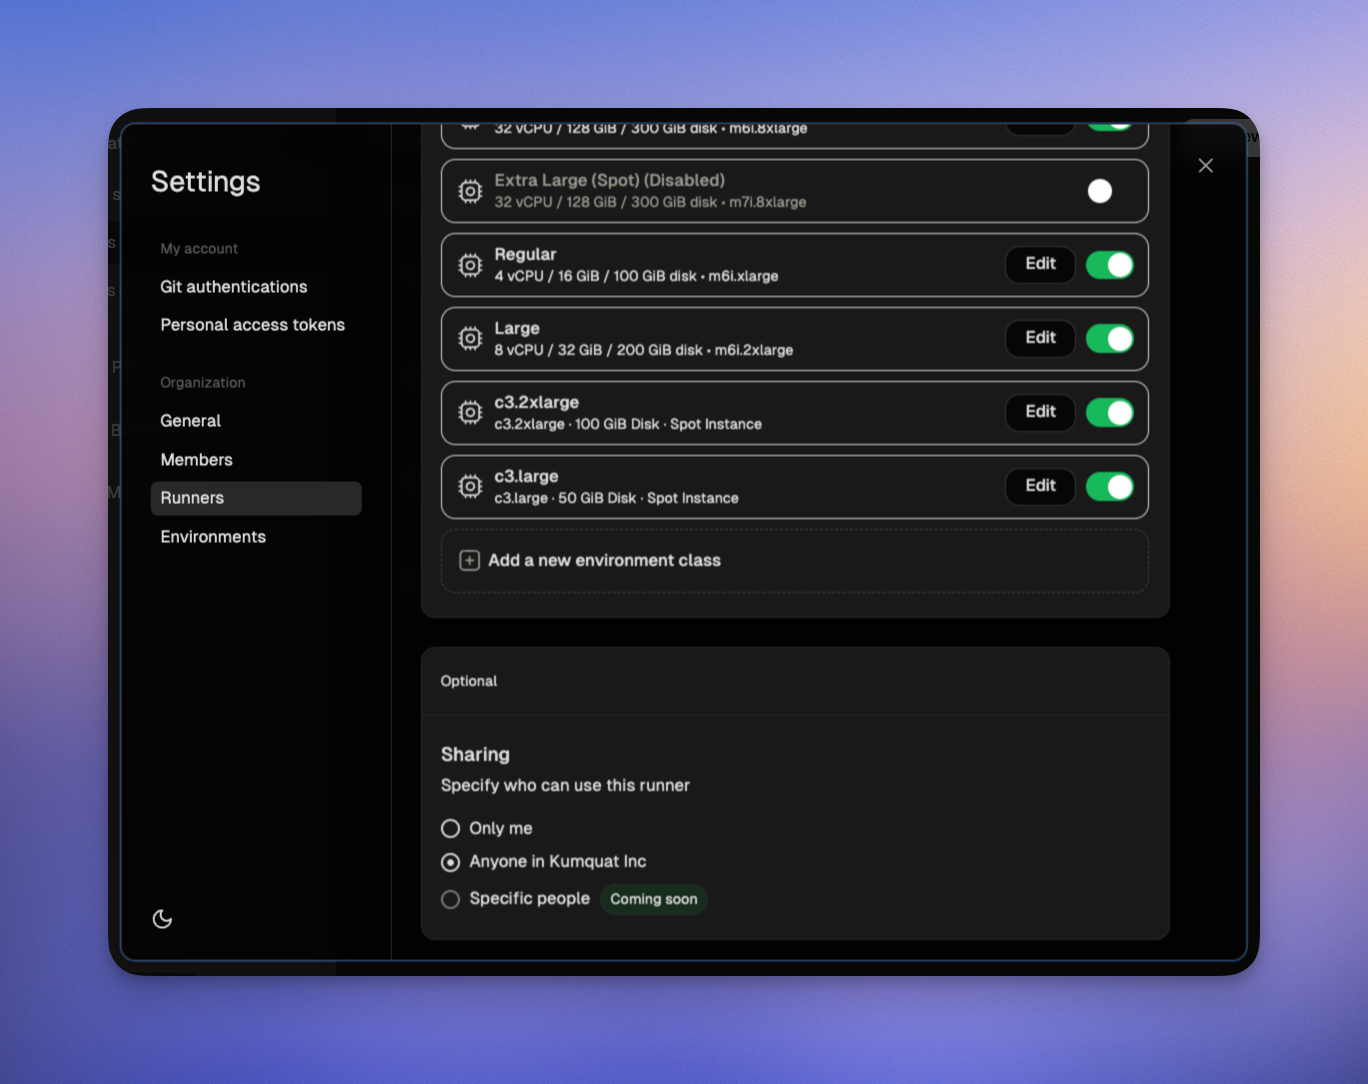 *Sharing a runner*
# Troubleshooting AWS runners
Source: https://ona.com/docs/ona/runners/aws/troubleshooting-runners
Learn how to troubleshoot AWS runners.
If you encounter any issues while setting up or operating a Runner, please follow these steps:
* Review [the common problems](#common-problems).
* If the issue persists, [reach out to support](#contacting-support).
## Contacting Support
To start a support chat, use the bubble icon located in the bottom right corner of the application. When contacting support, please include the following information:
* Any error messages and relevant screenshots.
* [Runner ID and Version](#copy-runner-id-and-version) and [AWS Region](#find-cloudformation-stack).
* [Runner Logs](#retrieve-runner-logs-ecs-task-logs).
*Sharing a runner*
# Troubleshooting AWS runners
Source: https://ona.com/docs/ona/runners/aws/troubleshooting-runners
Learn how to troubleshoot AWS runners.
If you encounter any issues while setting up or operating a Runner, please follow these steps:
* Review [the common problems](#common-problems).
* If the issue persists, [reach out to support](#contacting-support).
## Contacting Support
To start a support chat, use the bubble icon located in the bottom right corner of the application. When contacting support, please include the following information:
* Any error messages and relevant screenshots.
* [Runner ID and Version](#copy-runner-id-and-version) and [AWS Region](#find-cloudformation-stack).
* [Runner Logs](#retrieve-runner-logs-ecs-task-logs).
 ### Copy Runner ID and Version
* Navigate to **Settings > Runners**.
* Locate your Runner card.
* Click `...` in the top right corner and select `Copy ID`.
* The Runner Version is displayed as the last item in the menu.
### Copy Runner ID and Version
* Navigate to **Settings > Runners**.
* Locate your Runner card.
* Click `...` in the top right corner and select `Copy ID`.
* The Runner Version is displayed as the last item in the menu.
 ### Find CloudFormation Stack
* Navigate to **Settings > Runners**.
* Open the Runner card to find the Stack Name, URL, and region.
### Retrieve Runner Logs (ECS Task Logs)
You can adjust the log level of your Runner from the Runner Configuration section to get more detailed logs for troubleshooting. See [AWS Runner setup](/ona/runners/aws/setup) for log level configuration options.
#### Using ECS Console
To view the logs for the Runner using the ECS console:
* Navigate to [the AWS ECS console](https://console.aws.amazon.com/ecs).
* Locate the cluster by [the stack name](#find-cloudformation-stack).
* Select the service associated with the Runner.
* Go to the **Tasks** tab and find the most recent failed or active task.
* Click the task ID to open the details.
* Check the **Logs** tab or find the CloudWatch log stream.
> Note that each task has two log groups: one for the Runner itself and another for Prometheus (monitoring); we need the former.
#### Using AWS CLI
To look up the cluster name and task ID using AWS CLI, follow these commands:
1. To list all clusters and find your cluster name by [the stack name](#find-cloudformation-stack):
```sh
aws ecs list-clusters
```
2. To list tasks in a specific cluster and find your task ID:
```sh
aws ecs list-tasks --cluster
### Find CloudFormation Stack
* Navigate to **Settings > Runners**.
* Open the Runner card to find the Stack Name, URL, and region.
### Retrieve Runner Logs (ECS Task Logs)
You can adjust the log level of your Runner from the Runner Configuration section to get more detailed logs for troubleshooting. See [AWS Runner setup](/ona/runners/aws/setup) for log level configuration options.
#### Using ECS Console
To view the logs for the Runner using the ECS console:
* Navigate to [the AWS ECS console](https://console.aws.amazon.com/ecs).
* Locate the cluster by [the stack name](#find-cloudformation-stack).
* Select the service associated with the Runner.
* Go to the **Tasks** tab and find the most recent failed or active task.
* Click the task ID to open the details.
* Check the **Logs** tab or find the CloudWatch log stream.
> Note that each task has two log groups: one for the Runner itself and another for Prometheus (monitoring); we need the former.
#### Using AWS CLI
To look up the cluster name and task ID using AWS CLI, follow these commands:
1. To list all clusters and find your cluster name by [the stack name](#find-cloudformation-stack):
```sh
aws ecs list-clusters
```
2. To list tasks in a specific cluster and find your task ID:
```sh
aws ecs list-tasks --cluster  4. Review and adjust the parameters as needed.
5. Follow the remaining steps in the wizard to update the stack.
## Updating CloudFormation Parameters
To update only the CloudFormation (CF) parameters, such as VPC, subnets, or other configuration settings, follow these steps:
1. Open the CloudFormation stack used for the runner in the AWS console.
2. Select **Update** to modify the stack configuration.
3. Choose **Use existing template** when prompted, as shown below:
4. Review and adjust the parameters as needed.
5. Follow the remaining steps in the wizard to update the stack.
## Updating CloudFormation Parameters
To update only the CloudFormation (CF) parameters, such as VPC, subnets, or other configuration settings, follow these steps:
1. Open the CloudFormation stack used for the runner in the AWS console.
2. Select **Update** to modify the stack configuration.
3. Choose **Use existing template** when prompted, as shown below:
 4. Adjust the parameters in the update wizard to reflect the desired changes (e.g., updating VPC or subnet configurations).
5. Complete the remaining steps in the wizard to update the stack.
### Expanding Availability Zones
When expanding to additional availability zones, keep in mind that availability is determined by the subnets where your EC2 instances are running. The availability zones parameter helps you identify available subnets, but modifying this parameter alone will not impact availability. Ensure that your subnets are correctly configured to support the desired availability zones.
Use the **VPC Resource Map** in the AWS console to find subnets corresponding to your desired availability zones.
4. Adjust the parameters in the update wizard to reflect the desired changes (e.g., updating VPC or subnet configurations).
5. Complete the remaining steps in the wizard to update the stack.
### Expanding Availability Zones
When expanding to additional availability zones, keep in mind that availability is determined by the subnets where your EC2 instances are running. The availability zones parameter helps you identify available subnets, but modifying this parameter alone will not impact availability. Ensure that your subnets are correctly configured to support the desired availability zones.
Use the **VPC Resource Map** in the AWS console to find subnets corresponding to your desired availability zones.
 # Ona Cloud
Source: https://ona.com/docs/ona/runners/ona-cloud
Ona Cloud provides multi-tenant compute infrastructure managed by us, available for Free and Core tier users. This option allows you to start developing immediately without setting up your own infrastructure.
## What is Ona Cloud?
Ona Cloud is Ona's managed infrastructure solution that provides:
* **Multi-tenant compute environments** in Ona-managed infrastructure
* **Integrated LLM capabilities** for AI-powered development
* **Multiple regional options** for optimal performance
* **Zero setup required** - start coding immediately
This is ideal for individual developers, small teams, and organizations that want to get started quickly without managing their own infrastructure. If you require stricter compliance rules or need access to development resources in a private network, consider [upgrading to Enterprise](#upgrading-to-enterprise).
Ona Cloud uses Ona's managed runners - the same flexible orchestrators that power self-hosted environments, but running in Ona's multi-tenant infrastructure. For more information about runners, see [Runners Overview](/ona/runners/overview).
## Billing and Usage
Manage subscriptions, top-ups, and credit consumption:
* [Billing Overview](/ona/billing/overview)
* [Usage & Credits](/ona/billing/usage)
## Supported Regions
Ona Cloud is currently hosted in two regions:
* Europe
* USA
On sign-up, Ona automatically selects the region closest to your location. You can add additional regions at any time through your settings.
## How It Works
### Initial Setup
When you create your Ona account in the Free or Core tier, Ona Cloud runners in available regions are automatically added to your organization.
### Using Ona Cloud
When creating a new environment:
1. Open the environment creation modal. Ona Cloud options will be marked as such
2. Select your preferred Ona Cloud region from the dropdown
3. Your environment will start in the selected region
# Ona Cloud
Source: https://ona.com/docs/ona/runners/ona-cloud
Ona Cloud provides multi-tenant compute infrastructure managed by us, available for Free and Core tier users. This option allows you to start developing immediately without setting up your own infrastructure.
## What is Ona Cloud?
Ona Cloud is Ona's managed infrastructure solution that provides:
* **Multi-tenant compute environments** in Ona-managed infrastructure
* **Integrated LLM capabilities** for AI-powered development
* **Multiple regional options** for optimal performance
* **Zero setup required** - start coding immediately
This is ideal for individual developers, small teams, and organizations that want to get started quickly without managing their own infrastructure. If you require stricter compliance rules or need access to development resources in a private network, consider [upgrading to Enterprise](#upgrading-to-enterprise).
Ona Cloud uses Ona's managed runners - the same flexible orchestrators that power self-hosted environments, but running in Ona's multi-tenant infrastructure. For more information about runners, see [Runners Overview](/ona/runners/overview).
## Billing and Usage
Manage subscriptions, top-ups, and credit consumption:
* [Billing Overview](/ona/billing/overview)
* [Usage & Credits](/ona/billing/usage)
## Supported Regions
Ona Cloud is currently hosted in two regions:
* Europe
* USA
On sign-up, Ona automatically selects the region closest to your location. You can add additional regions at any time through your settings.
## How It Works
### Initial Setup
When you create your Ona account in the Free or Core tier, Ona Cloud runners in available regions are automatically added to your organization.
### Using Ona Cloud
When creating a new environment:
1. Open the environment creation modal. Ona Cloud options will be marked as such
2. Select your preferred Ona Cloud region from the dropdown
3. Your environment will start in the selected region
 ## Upgrading to Enterprise
For organizations requiring single-tenant infrastructure that runs in your VPC, consider upgrading to Enterprise. Enterprise provides:
* **Single-tenant infrastructure** - Dedicated resources running in your own cloud
* **Bring your own cloud** - Deploy in your AWS, GCP, or Azure account
* **Enhanced security and compliance** - Complete control over your infrastructure
* **Private networking** - Access to internal resources and private networks
* **Custom repository access** - Connect to self-hosted Git providers (GitHub Enterprise, GitLab self-hosted, Azure DevOps, Bitbucket)
* **Custom regions and environment classes** - Deploy in any supported cloud region on any type of VM
* **Priority support** - Dedicated support for your organization
[Learn more about self-hosted runners](/ona/runners/overview) or [contact sales](https://www.ona.com/contact/sales) to discuss your requirements.
# Overview
Source: https://ona.com/docs/ona/runners/overview
Runners are flexible orchestrators of remote development environments. They can be self-hosted in order to compartmentalize any sensitive information related to your development environments. Runners are responsible for operational tasks like
* Scaling
* Backup
* Caching
To reduce operational overhead, runners offload all non-sensitive administration responsibilities to the management plane.
Ona offers two types of runners:
1. **Ona Cloud** `managed`: Managed by Ona. No need to install anything - get going right away. Ideal for individual developers, small teams, and organizations that want to get started quickly without managing their own infrastructure:
* Multi-tenant compute environments in Ona-managed infrastructure
* Integrated LLM capabilities for AI-powered development
* Multiple regional options for optimal performance
* Zero setup required - start coding immediately
2. **AWS Runner** `self-hosted`: Deploy into your AWS VPC using a CloudFormation template, ideal for production use and larger teams. It provides:
* Horizontal scaling capabilities
* Full AWS infrastructure integration
* Dev container image build caching for faster environment startup
* Deployment in any region or availability zone, in any AWS Account
* Runners can be deployed into multiple different AWS Accounts
* Supports GPU-enabled environments
Organizations can have as many runners as needed, deploying them in different locations to support remote teams in different timezones, adhere to data sovereignty, and other compliance requirements.
To create or modify runners, you must have an admin role inside your Ona organization.
Once deployed, you don’t need to interact with the infrastructure directly. Through the Ona dashboard you can configure:
* which repositories a runner can access
* what environment classes are supported
* share it with your organization to allow any member to use it when creating environments
# Slash Commands
Source: https://ona.com/docs/ona/slash-commands
Use slash commands in Ona Agent to standardize common prompts across your organization
Slash commands provide a quick way to execute predefined prompts through Ona Agent's chat interface. Type `/` followed by a command name to access organization-wide custom prompts.
## Upgrading to Enterprise
For organizations requiring single-tenant infrastructure that runs in your VPC, consider upgrading to Enterprise. Enterprise provides:
* **Single-tenant infrastructure** - Dedicated resources running in your own cloud
* **Bring your own cloud** - Deploy in your AWS, GCP, or Azure account
* **Enhanced security and compliance** - Complete control over your infrastructure
* **Private networking** - Access to internal resources and private networks
* **Custom repository access** - Connect to self-hosted Git providers (GitHub Enterprise, GitLab self-hosted, Azure DevOps, Bitbucket)
* **Custom regions and environment classes** - Deploy in any supported cloud region on any type of VM
* **Priority support** - Dedicated support for your organization
[Learn more about self-hosted runners](/ona/runners/overview) or [contact sales](https://www.ona.com/contact/sales) to discuss your requirements.
# Overview
Source: https://ona.com/docs/ona/runners/overview
Runners are flexible orchestrators of remote development environments. They can be self-hosted in order to compartmentalize any sensitive information related to your development environments. Runners are responsible for operational tasks like
* Scaling
* Backup
* Caching
To reduce operational overhead, runners offload all non-sensitive administration responsibilities to the management plane.
Ona offers two types of runners:
1. **Ona Cloud** `managed`: Managed by Ona. No need to install anything - get going right away. Ideal for individual developers, small teams, and organizations that want to get started quickly without managing their own infrastructure:
* Multi-tenant compute environments in Ona-managed infrastructure
* Integrated LLM capabilities for AI-powered development
* Multiple regional options for optimal performance
* Zero setup required - start coding immediately
2. **AWS Runner** `self-hosted`: Deploy into your AWS VPC using a CloudFormation template, ideal for production use and larger teams. It provides:
* Horizontal scaling capabilities
* Full AWS infrastructure integration
* Dev container image build caching for faster environment startup
* Deployment in any region or availability zone, in any AWS Account
* Runners can be deployed into multiple different AWS Accounts
* Supports GPU-enabled environments
Organizations can have as many runners as needed, deploying them in different locations to support remote teams in different timezones, adhere to data sovereignty, and other compliance requirements.
To create or modify runners, you must have an admin role inside your Ona organization.
Once deployed, you don’t need to interact with the infrastructure directly. Through the Ona dashboard you can configure:
* which repositories a runner can access
* what environment classes are supported
* share it with your organization to allow any member to use it when creating environments
# Slash Commands
Source: https://ona.com/docs/ona/slash-commands
Use slash commands in Ona Agent to standardize common prompts across your organization
Slash commands provide a quick way to execute predefined prompts through Ona Agent's chat interface. Type `/` followed by a command name to access organization-wide custom prompts.
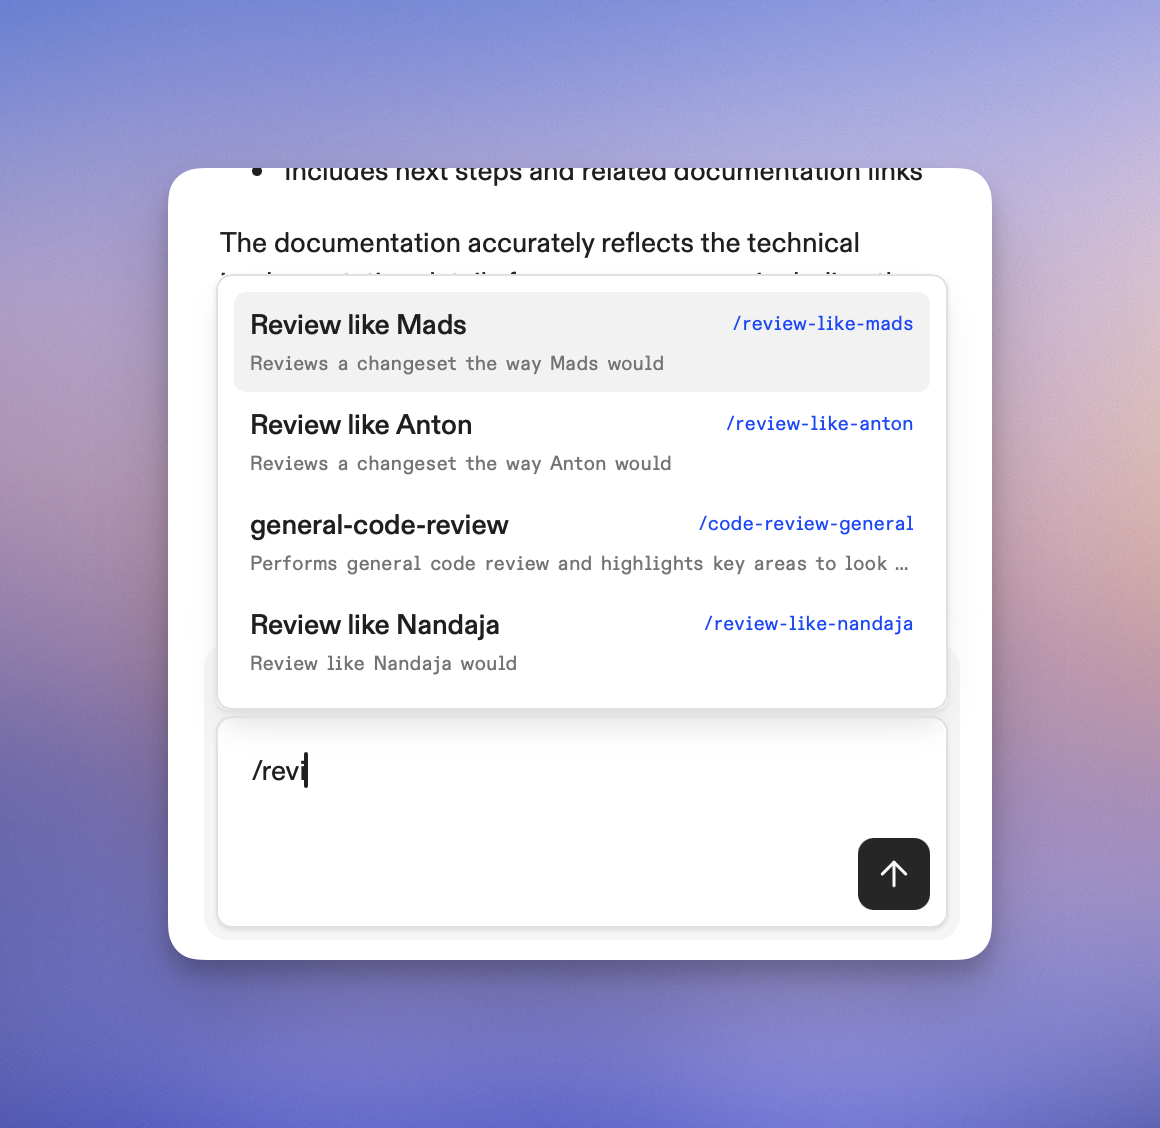 ## How slash commands work
When you type `/` in the chat interface, Ona Agent displays available organization commands that you can execute. These commands are created and managed by administrators.
The system automatically filters and displays relevant commands as you type, making it easy to find and execute the right command for your task.
## Custom commands
Organization administrators can create custom slash commands that execute predefined prompts. These commands help standardize common development tasks and provide quick access to frequently used prompts.
### Creating custom commands
1. Navigate to [Settings > Agents](https://app.gitpod.io/settings/agents)
2. Click **New Command**
3. Configure your command:
* **Name**: The display name shown in your command list
* **Command**: The slash trigger word (e.g., `review-code`)
* **Description**: Brief explanation of what the command does
* **Prompt**: The prompt that will be sent to the AI agent
4. Click **Create Command**
## How slash commands work
When you type `/` in the chat interface, Ona Agent displays available organization commands that you can execute. These commands are created and managed by administrators.
The system automatically filters and displays relevant commands as you type, making it easy to find and execute the right command for your task.
## Custom commands
Organization administrators can create custom slash commands that execute predefined prompts. These commands help standardize common development tasks and provide quick access to frequently used prompts.
### Creating custom commands
1. Navigate to [Settings > Agents](https://app.gitpod.io/settings/agents)
2. Click **New Command**
3. Configure your command:
* **Name**: The display name shown in your command list
* **Command**: The slash trigger word (e.g., `review-code`)
* **Description**: Brief explanation of what the command does
* **Prompt**: The prompt that will be sent to the AI agent
4. Click **Create Command**
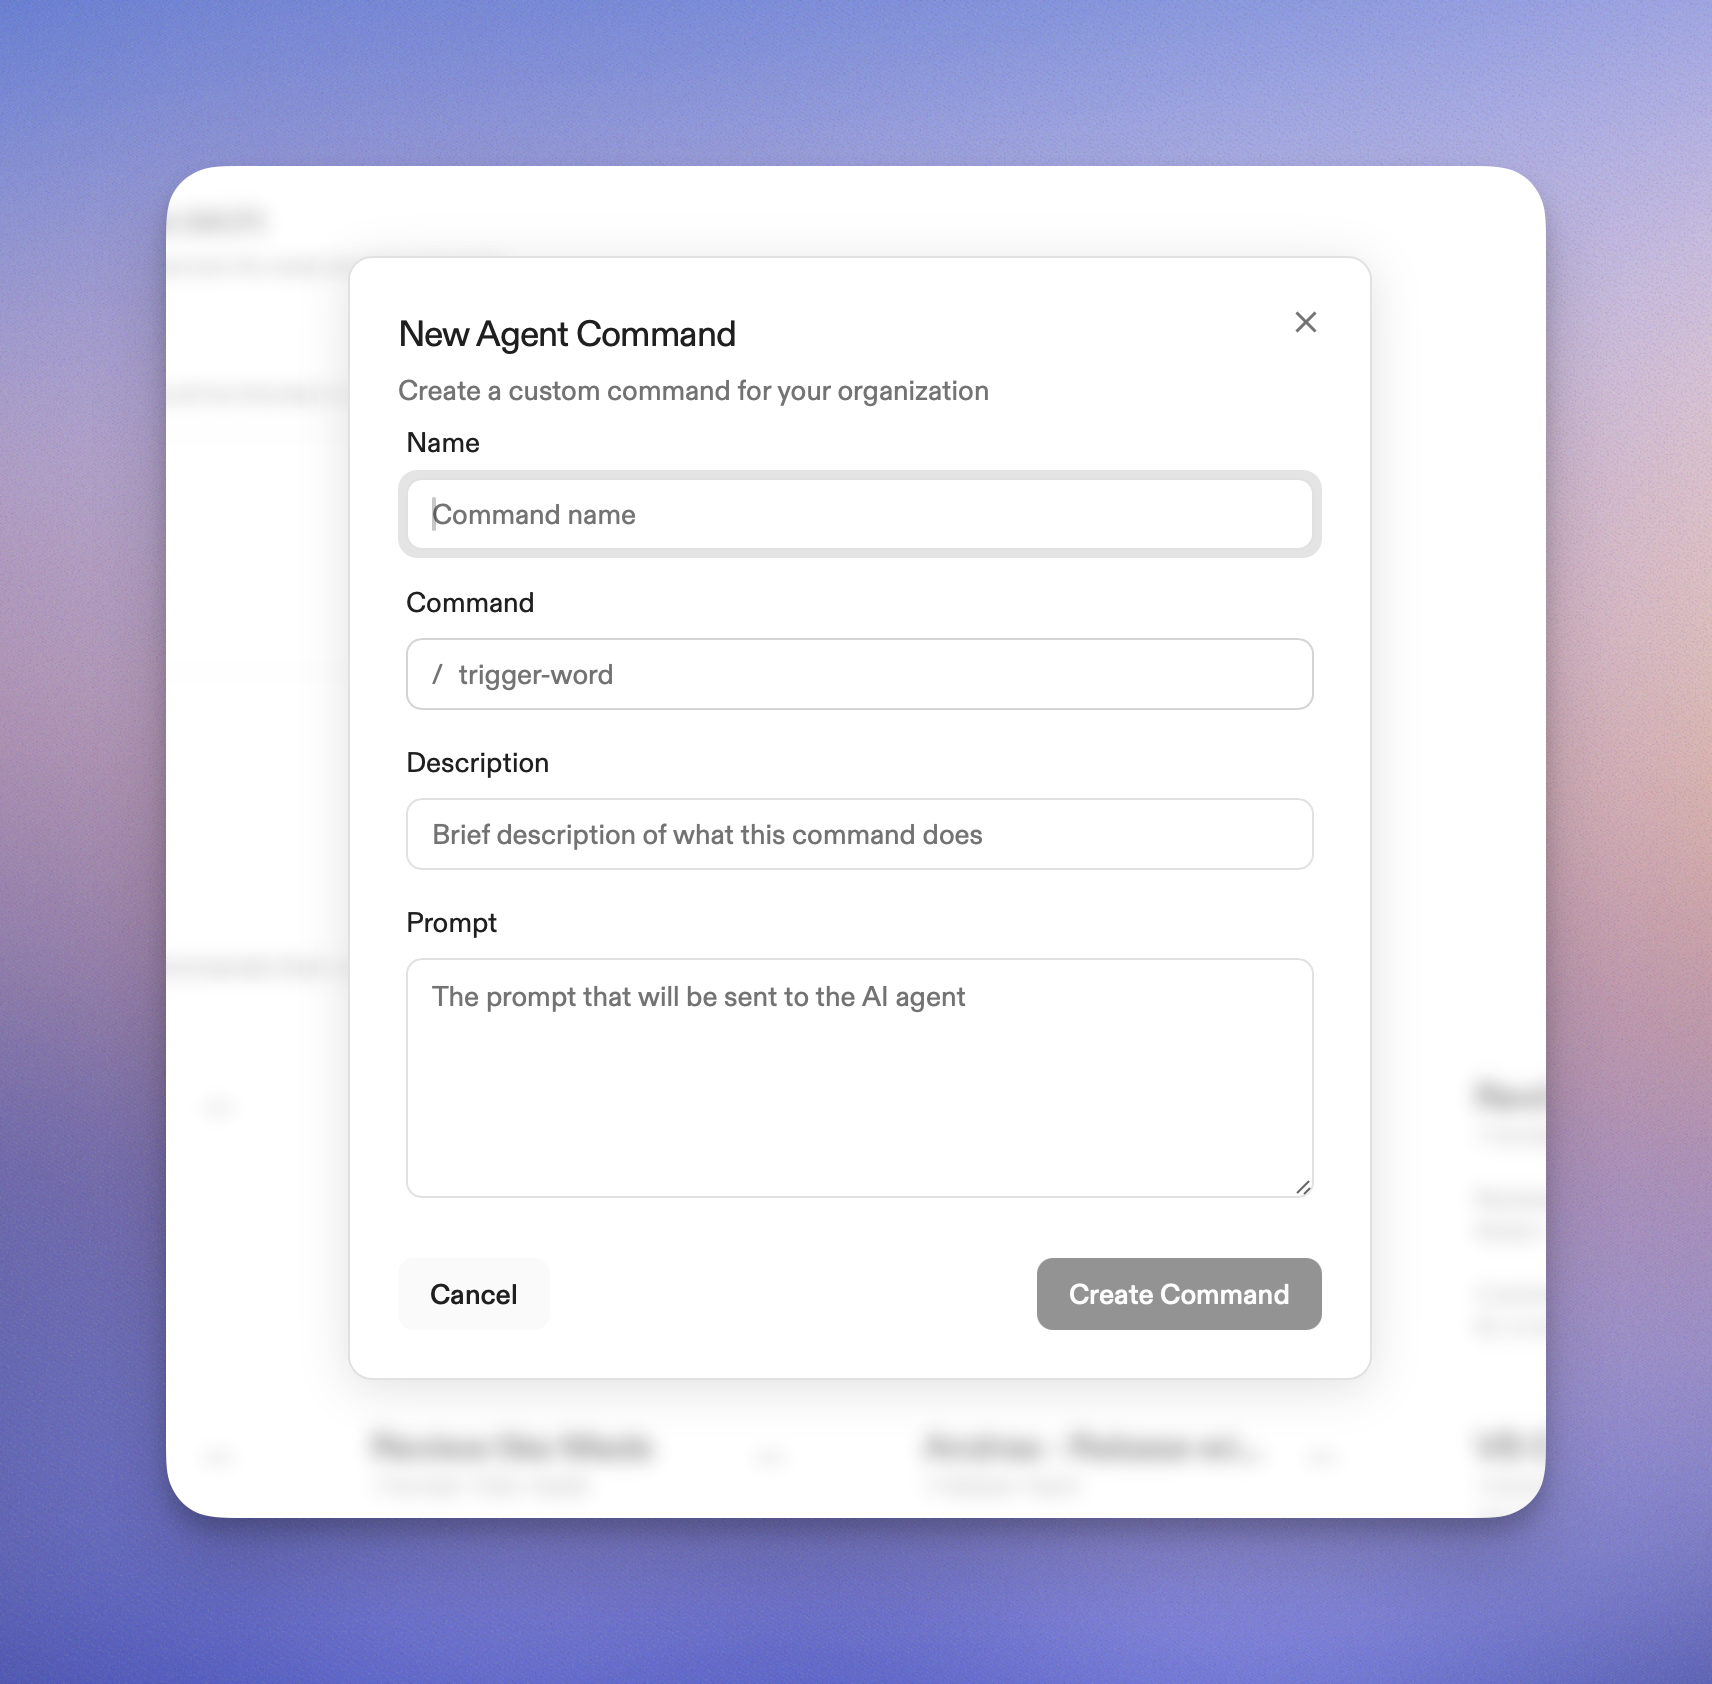 ## Using slash commands
### Basic usage
1. Open the Ona Agent chat interface in your environment (or from the Ona home screen).
2. Type `/` to see available commands
3. Start typing to filter commands
4. Select a command using:
* **Arrow keys** and **Enter** to navigate and select
* **Mouse click** to select directly
* **Enter** to autocomplete
### Command execution
When you execute a slash command:
1. The command appears in the chat as you typed it (e.g., `/review-code`)
2. The system resolves the command to its underlying prompt content
3. The display shows your command, but the AI receives the full prompt text
4. The AI processes the complete prompt and responds accordingly
### Adding context
You can add context after a slash command to provide additional information:
```
/review-code
Here's the function I'd like reviewed:
function calculateTotal(items) {
return items.reduce((sum, item) => sum + item.price, 0);
}
```
Ona Agent will combine your custom prompt with the additional context you provide, giving you targeted assistance based on both the predefined prompt and your specific input.
## Command management
### Organization scope
* All custom commands are scoped to your organization
* Commands are visible to all organization members
* Only administrators can create, edit, or delete commands
### Permissions
* **Members**: Can view and execute all organization commands
* **Administrators**: Can create, edit, and delete commands in settings
### Best practices
* **Use descriptive names**: Make command purposes clear (e.g., `/test-strategy` vs `/ts`)
* **Provide good descriptions**: Help team members understand when to use each command
* **Keep prompts focused**: Each command should have a specific, well-defined purpose
* **Test thoroughly**: Verify commands work as expected before sharing with the team
## Troubleshooting
### Command not found
If a slash command doesn't appear in the suggestions:
* Verify the command name is spelled correctly
* Check that you have the necessary permissions
* Ensure the command exists in your organization (administrators can verify in settings)
### Command execution issues
If a command doesn't execute properly:
* Check that the prompt content is valid
* Verify template variables are properly formatted
* Ensure the command hasn't been modified or deleted
### Performance considerations
* Commands are cached for better performance
* Large organizations may experience slight delays in command loading
* Use specific command names to reduce filtering time
## Next steps
* [Manage organization settings](/docs/ona/organizations/manage-organization)
* [Configure organization policies](/docs/ona/organizations/policies)
Need help with slash commands? Reach out to your account manager.
# Azure DevOps
Source: https://ona.com/docs/ona/source-control/azuredevops
Source control integrations can be configured for [Self-Hosted Runners](/ona/runners/aws/overview). You can set up an Azure DevOps integration during runner creation or in the runner settings. Self-hosted Azure DevOps instances are supported by changing the Host during setup.
## Configuring Azure DevOps Access
## Using slash commands
### Basic usage
1. Open the Ona Agent chat interface in your environment (or from the Ona home screen).
2. Type `/` to see available commands
3. Start typing to filter commands
4. Select a command using:
* **Arrow keys** and **Enter** to navigate and select
* **Mouse click** to select directly
* **Enter** to autocomplete
### Command execution
When you execute a slash command:
1. The command appears in the chat as you typed it (e.g., `/review-code`)
2. The system resolves the command to its underlying prompt content
3. The display shows your command, but the AI receives the full prompt text
4. The AI processes the complete prompt and responds accordingly
### Adding context
You can add context after a slash command to provide additional information:
```
/review-code
Here's the function I'd like reviewed:
function calculateTotal(items) {
return items.reduce((sum, item) => sum + item.price, 0);
}
```
Ona Agent will combine your custom prompt with the additional context you provide, giving you targeted assistance based on both the predefined prompt and your specific input.
## Command management
### Organization scope
* All custom commands are scoped to your organization
* Commands are visible to all organization members
* Only administrators can create, edit, or delete commands
### Permissions
* **Members**: Can view and execute all organization commands
* **Administrators**: Can create, edit, and delete commands in settings
### Best practices
* **Use descriptive names**: Make command purposes clear (e.g., `/test-strategy` vs `/ts`)
* **Provide good descriptions**: Help team members understand when to use each command
* **Keep prompts focused**: Each command should have a specific, well-defined purpose
* **Test thoroughly**: Verify commands work as expected before sharing with the team
## Troubleshooting
### Command not found
If a slash command doesn't appear in the suggestions:
* Verify the command name is spelled correctly
* Check that you have the necessary permissions
* Ensure the command exists in your organization (administrators can verify in settings)
### Command execution issues
If a command doesn't execute properly:
* Check that the prompt content is valid
* Verify template variables are properly formatted
* Ensure the command hasn't been modified or deleted
### Performance considerations
* Commands are cached for better performance
* Large organizations may experience slight delays in command loading
* Use specific command names to reduce filtering time
## Next steps
* [Manage organization settings](/docs/ona/organizations/manage-organization)
* [Configure organization policies](/docs/ona/organizations/policies)
Need help with slash commands? Reach out to your account manager.
# Azure DevOps
Source: https://ona.com/docs/ona/source-control/azuredevops
Source control integrations can be configured for [Self-Hosted Runners](/ona/runners/aws/overview). You can set up an Azure DevOps integration during runner creation or in the runner settings. Self-hosted Azure DevOps instances are supported by changing the Host during setup.
## Configuring Azure DevOps Access
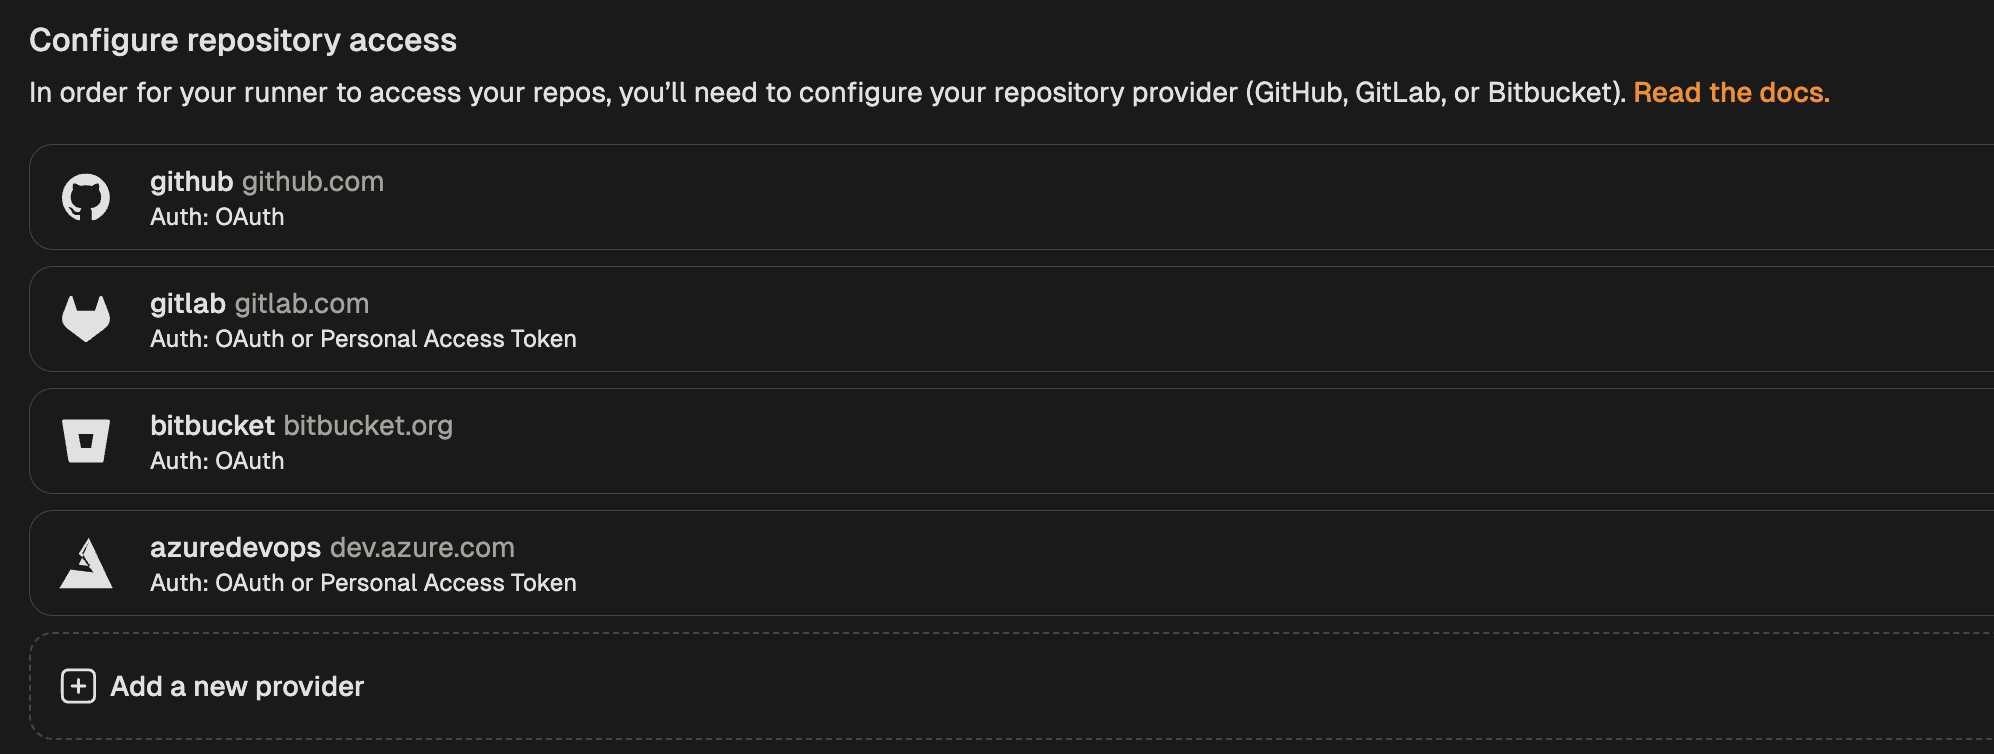 3. Select **Azure DevOps (Entra ID)** from the list of providers.
4. In the "Configure repository access" modal, select "Enable OAuth".
* Copy the callback URL and use it to create a new OAuth app in Microsoft Entra ID.
* The *Client ID* and *Client Secret* will be created in the following steps.
* The *Issuer URL* is specific to your Entra ID tenant:
* for example: `https://login.microsoftonline.com/00000000-0000-0000-0000-000000000000/oauth2/v2.0`
3. Select **Azure DevOps (Entra ID)** from the list of providers.
4. In the "Configure repository access" modal, select "Enable OAuth".
* Copy the callback URL and use it to create a new OAuth app in Microsoft Entra ID.
* The *Client ID* and *Client Secret* will be created in the following steps.
* The *Issuer URL* is specific to your Entra ID tenant:
* for example: `https://login.microsoftonline.com/00000000-0000-0000-0000-000000000000/oauth2/v2.0`
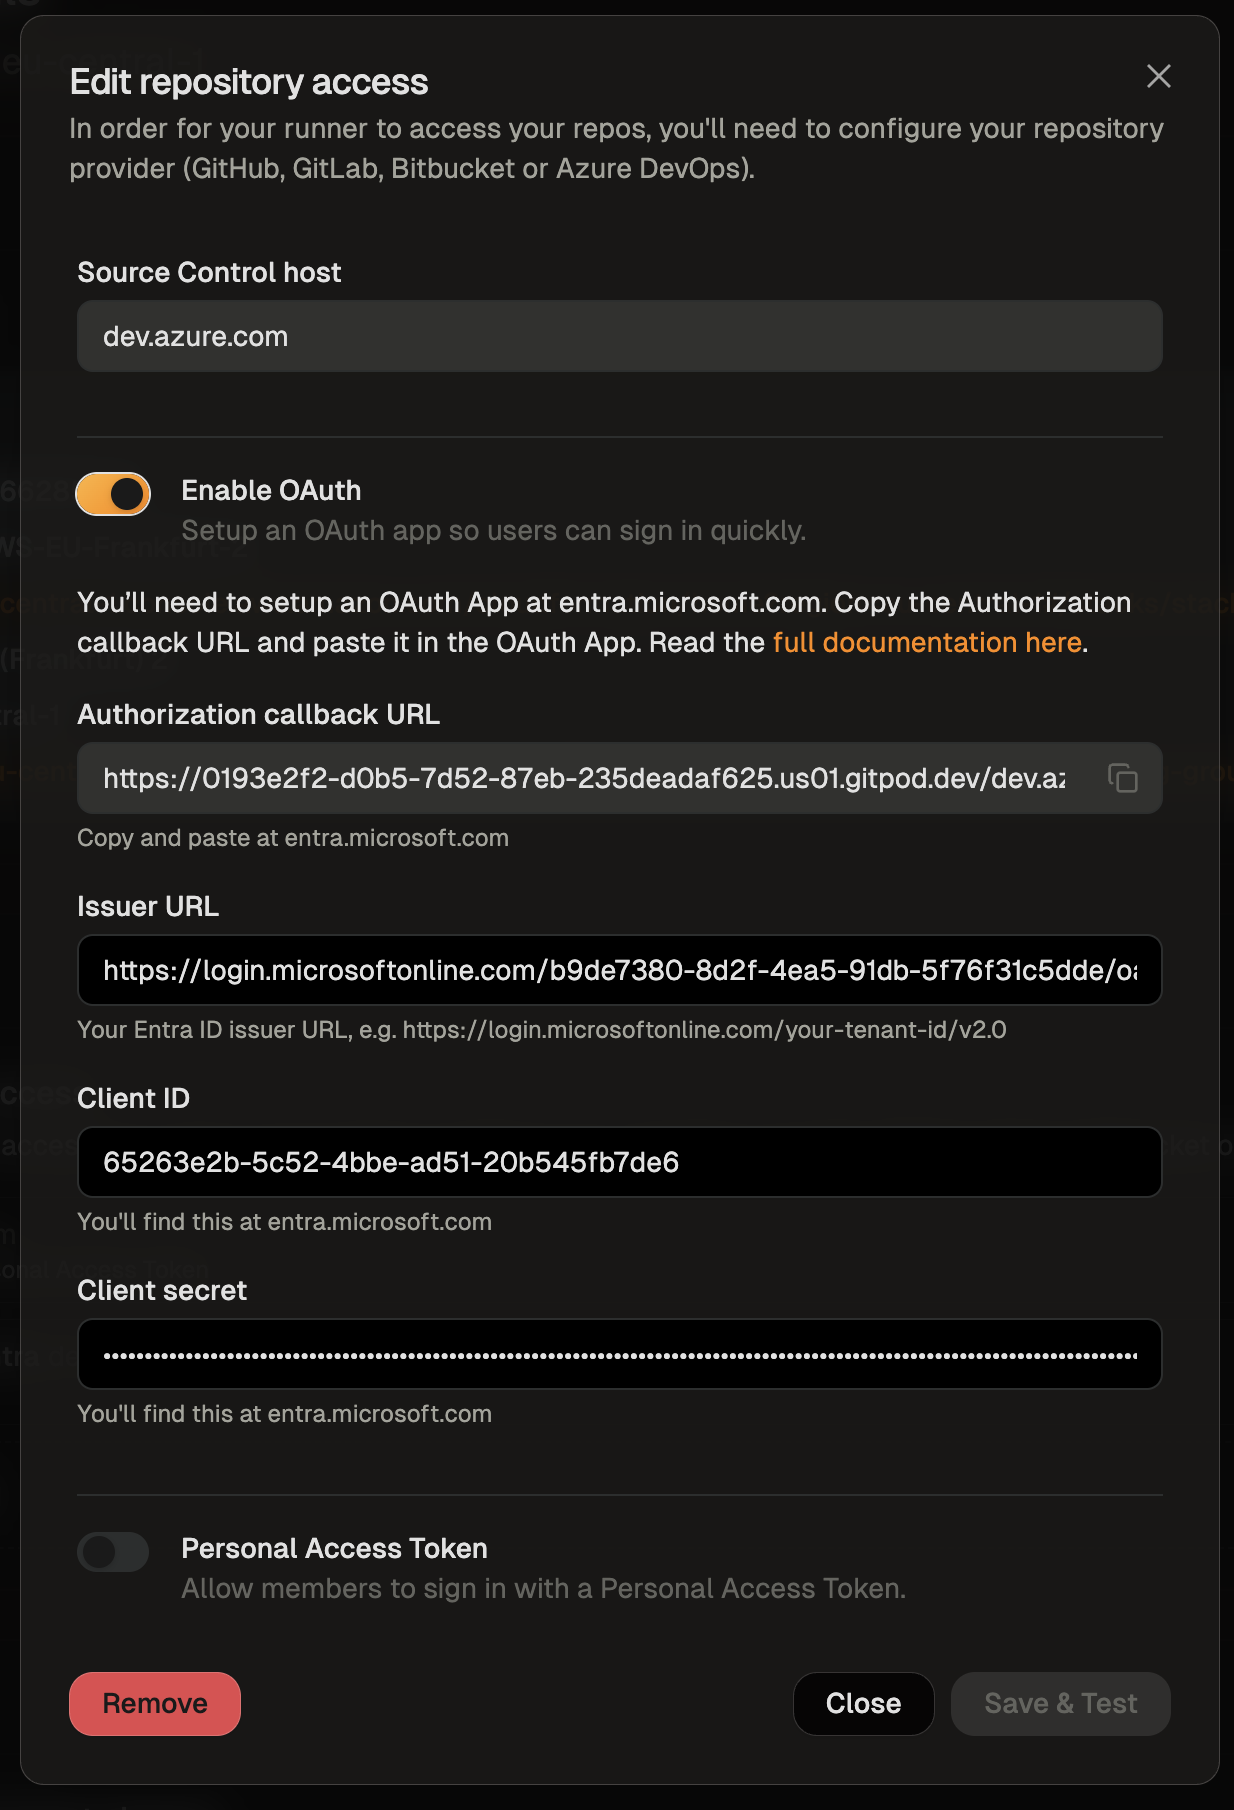 5. Create a Microsoft Entra ID OAuth app by following these steps:
**Create OAuth App Registration in Microsoft Entra ID:**
* Go to the [Azure Portal](https://portal.azure.com) and navigate to Microsoft Entra ID
* Select **App registrations** and click **New registration**
* Provide a name for your application (e.g., "Ona Azure DevOps Integration")
* Copy the *Client ID* from the **Overview** page and enter it in Ona's "Configure repository access" dialog
* Obtain the *Issuer URL* to be entered in Ona's "Configure repository access" dialog from **Overview > Endpoints**
* Use the v2.0 URL, e.g. `https://login.microsoftonline.com/00000000-0000-0000-0000-000000000000/oauth2/v2.0`
**Configure Authentication Settings:**
* In your app registration, go to **Manage > Authentication**
* Ensure **Web** platform is selected
* Enable **ID tokens** under the *Implicit grant and hybrid flows* section
5. Create a Microsoft Entra ID OAuth app by following these steps:
**Create OAuth App Registration in Microsoft Entra ID:**
* Go to the [Azure Portal](https://portal.azure.com) and navigate to Microsoft Entra ID
* Select **App registrations** and click **New registration**
* Provide a name for your application (e.g., "Ona Azure DevOps Integration")
* Copy the *Client ID* from the **Overview** page and enter it in Ona's "Configure repository access" dialog
* Obtain the *Issuer URL* to be entered in Ona's "Configure repository access" dialog from **Overview > Endpoints**
* Use the v2.0 URL, e.g. `https://login.microsoftonline.com/00000000-0000-0000-0000-000000000000/oauth2/v2.0`
**Configure Authentication Settings:**
* In your app registration, go to **Manage > Authentication**
* Ensure **Web** platform is selected
* Enable **ID tokens** under the *Implicit grant and hybrid flows* section
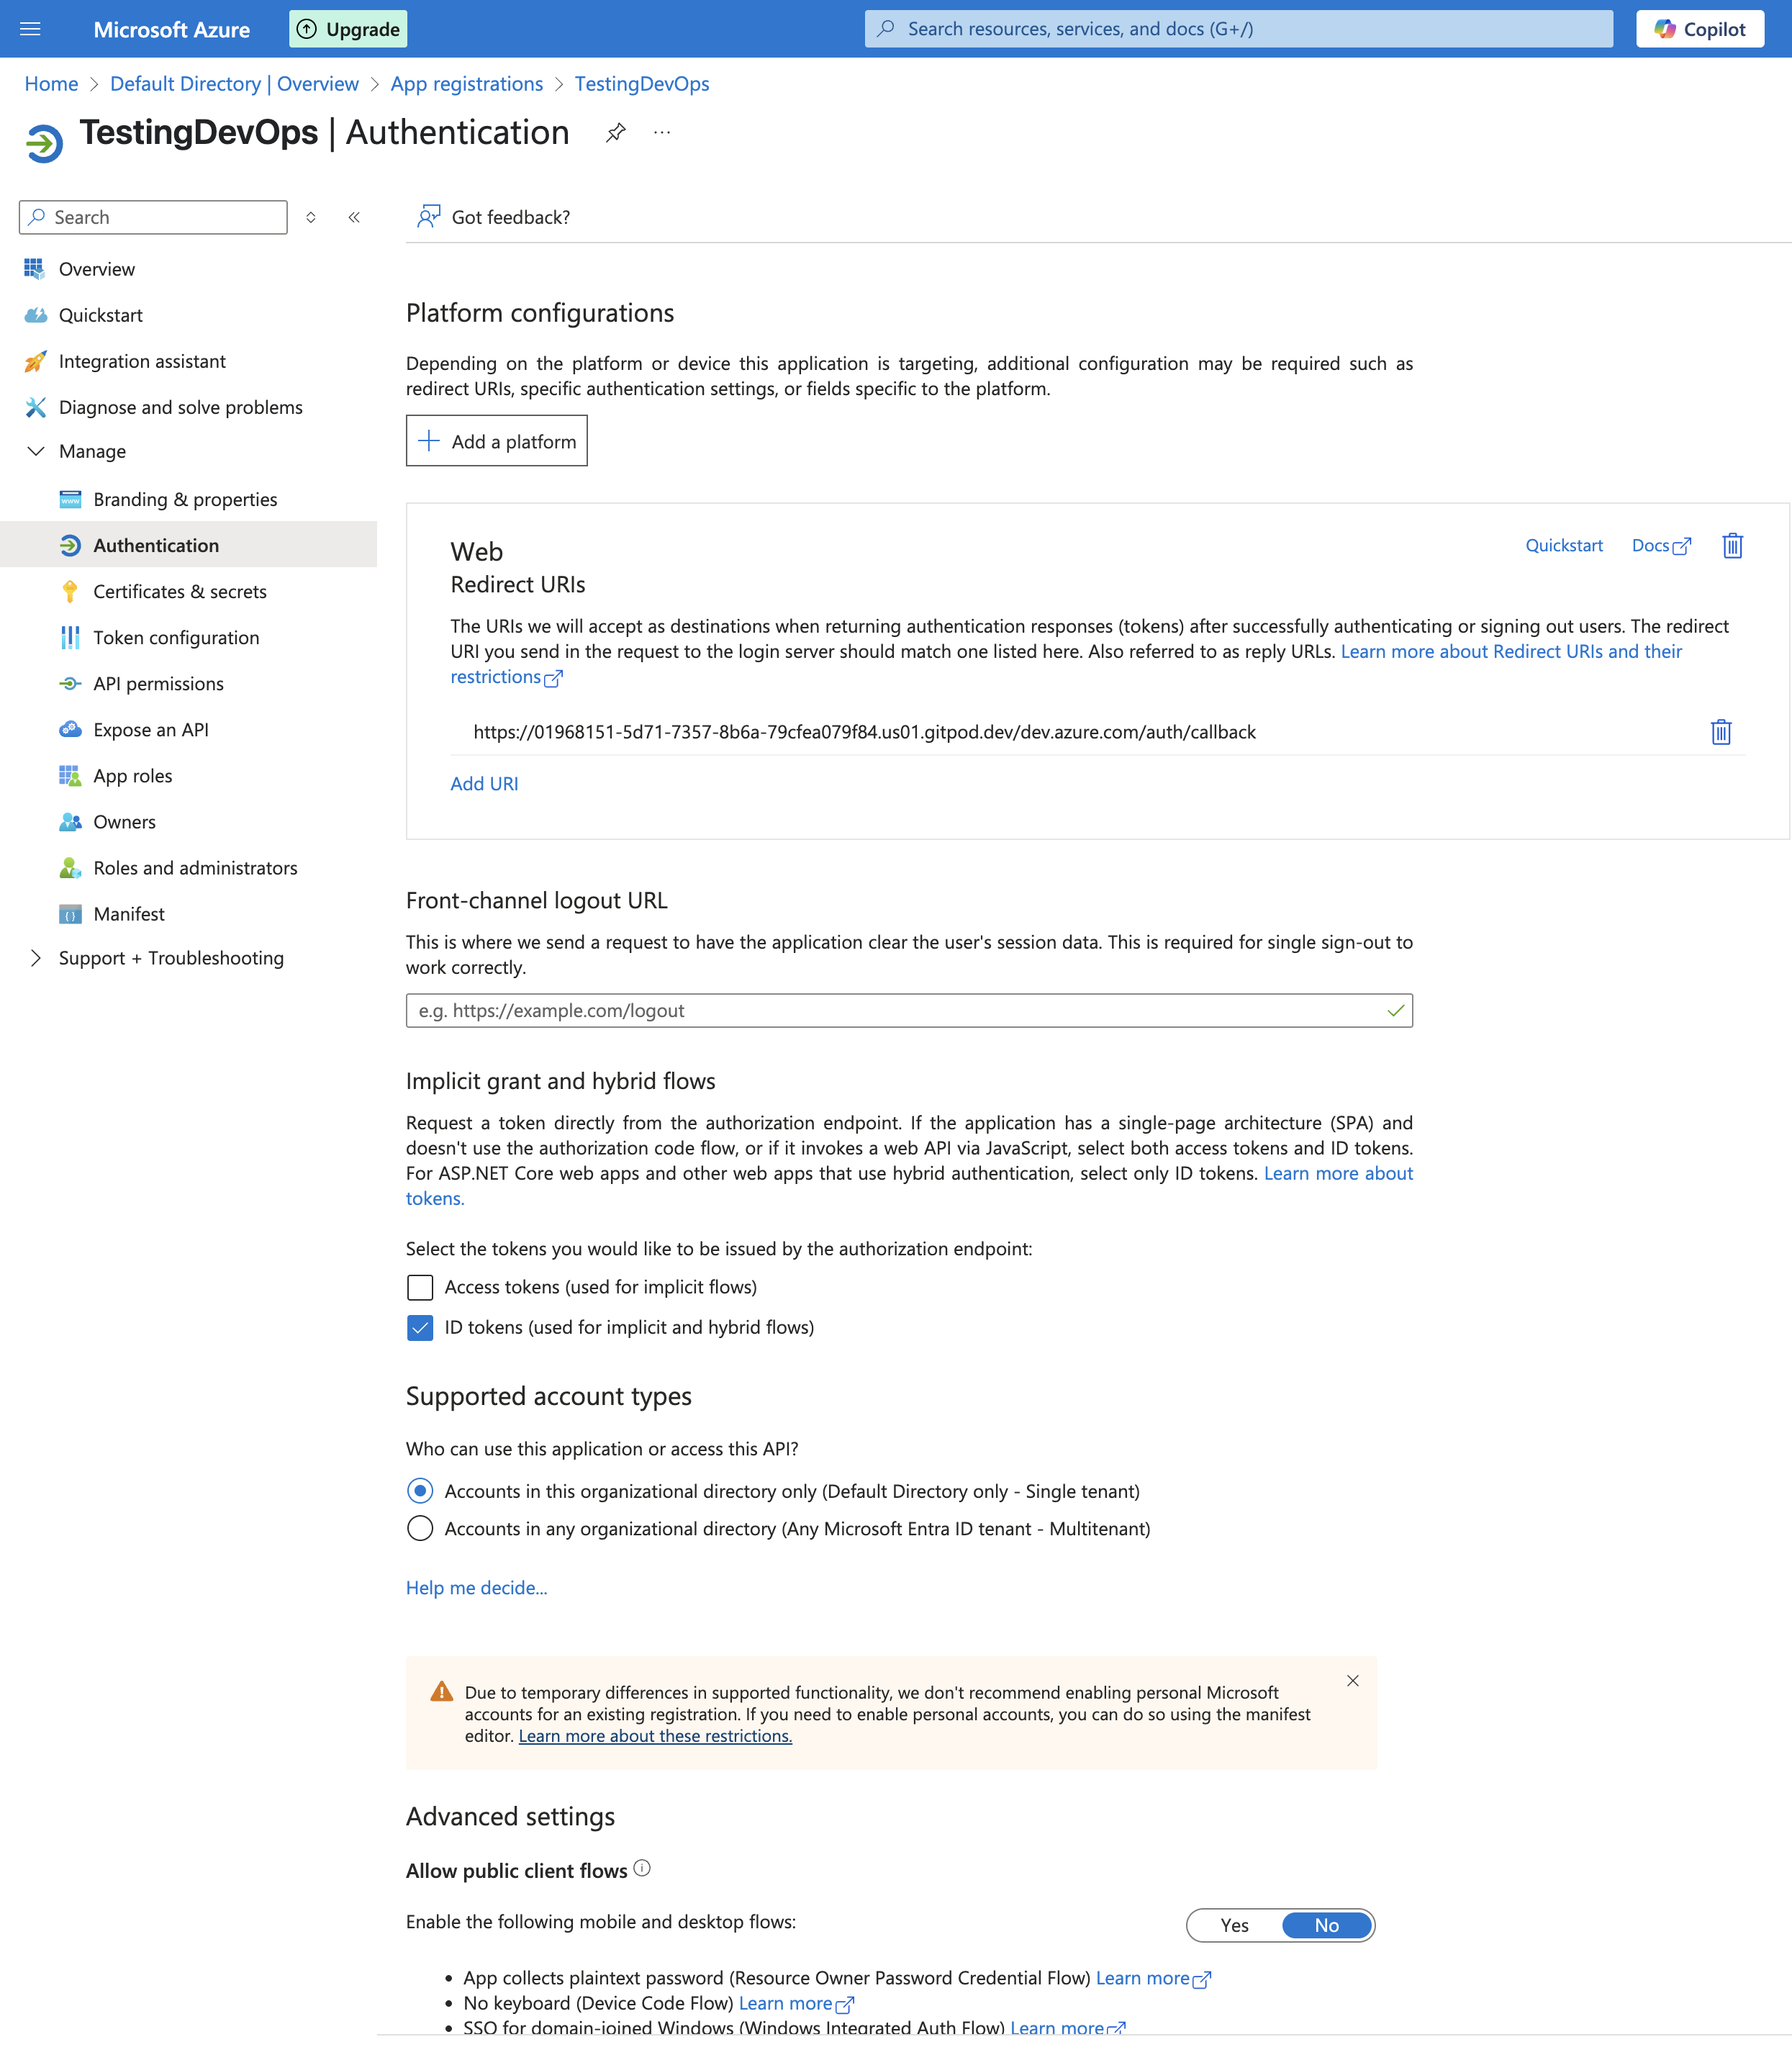 **Create Client Secret:**
* Navigate to **Manage > Certificates & secrets**
* Click **New client secret**
* Add a description and set expiration as needed
* Copy the **Value** and use it to enter the Client Secret in Ona's "Configure repository access" dialog
**Create Client Secret:**
* Navigate to **Manage > Certificates & secrets**
* Click **New client secret**
* Add a description and set expiration as needed
* Copy the **Value** and use it to enter the Client Secret in Ona's "Configure repository access" dialog
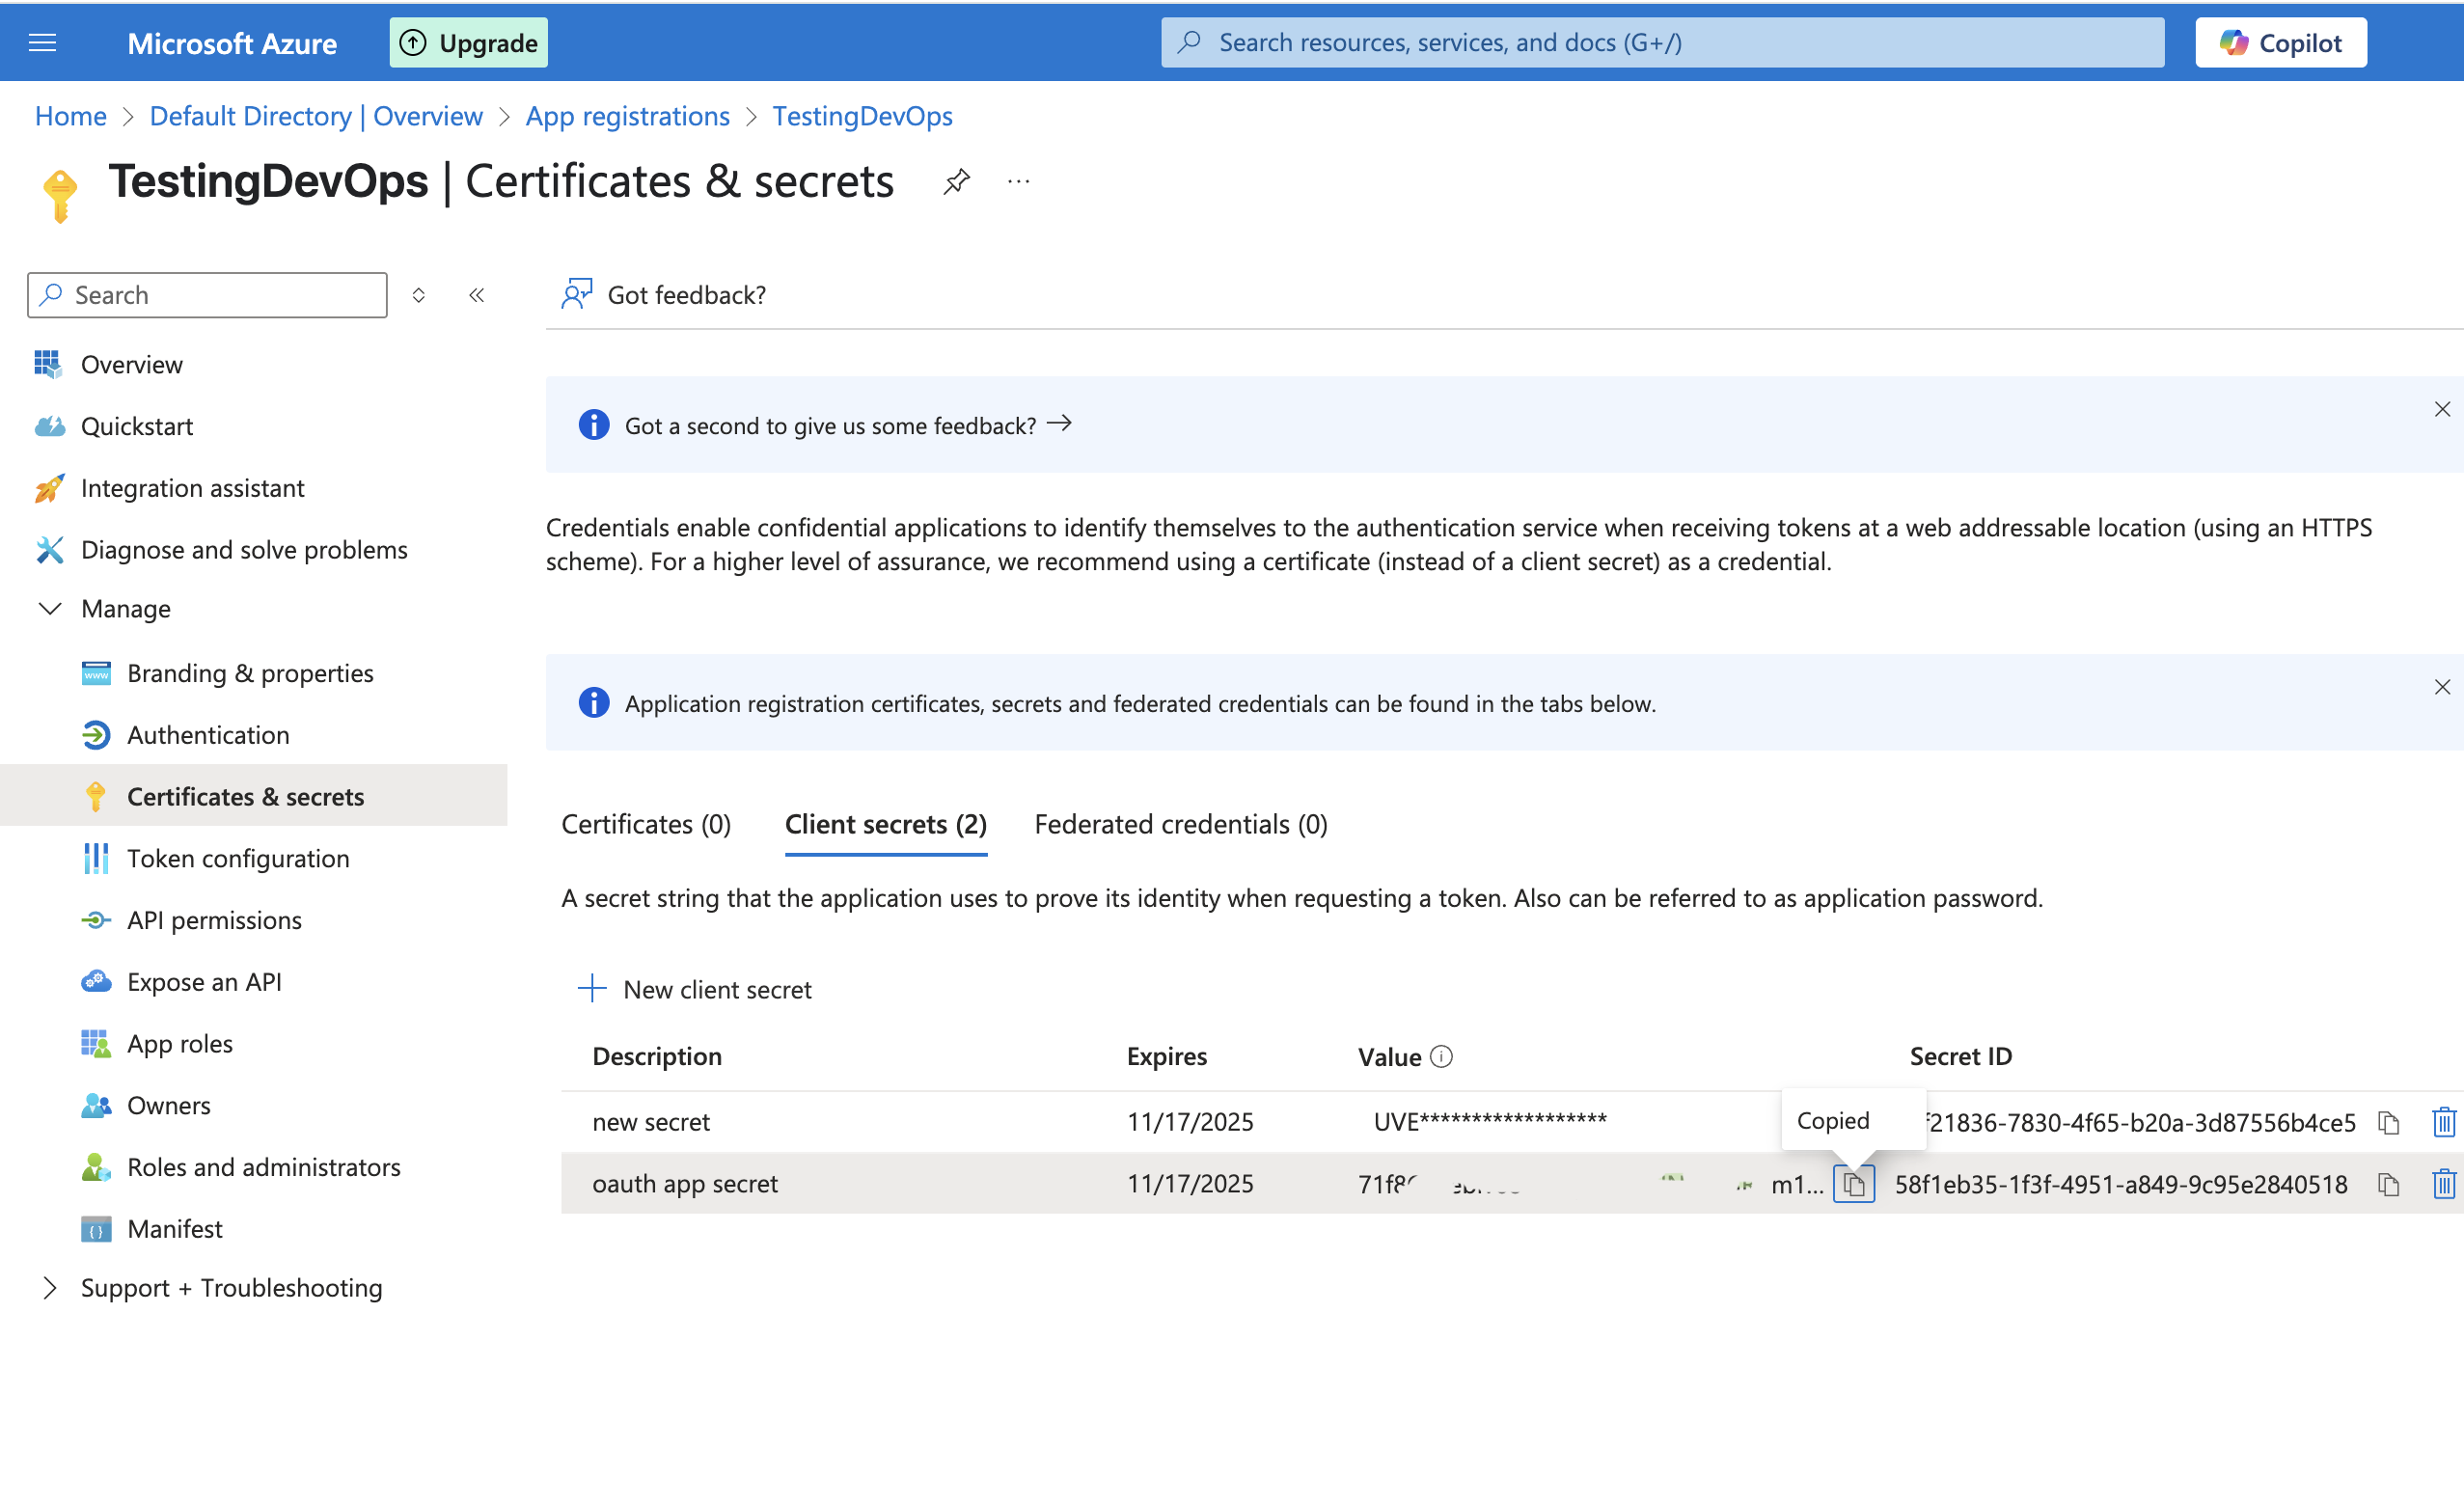 **Configure API Permissions:**
* Go to **Manage > API permissions**
* Click **Add a permission** and configure the following scopes:
**For Microsoft Graph (Authentication):**
* `openid` - Required for OpenID Connect authentication
* `offline_access` - Needed for refresh tokens
**For Azure DevOps API:**
* `vso.code` - For read operations (repositories, commits, pull requests, refs, branches)
* `vso.code_write` - Required for commit and push operations
**Configure API Permissions:**
* Go to **Manage > API permissions**
* Click **Add a permission** and configure the following scopes:
**For Microsoft Graph (Authentication):**
* `openid` - Required for OpenID Connect authentication
* `offline_access` - Needed for refresh tokens
**For Azure DevOps API:**
* `vso.code` - For read operations (repositories, commits, pull requests, refs, branches)
* `vso.code_write` - Required for commit and push operations
 **Prepare Azure DevOps for Entra ID Integration:**
* In Azure DevOps, go to **Organization Settings > Security > Policies**
* Enable "Third-party application access via OAuth"
**Prepare Azure DevOps for Entra ID Integration:**
* In Azure DevOps, go to **Organization Settings > Security > Policies**
* Enable "Third-party application access via OAuth"
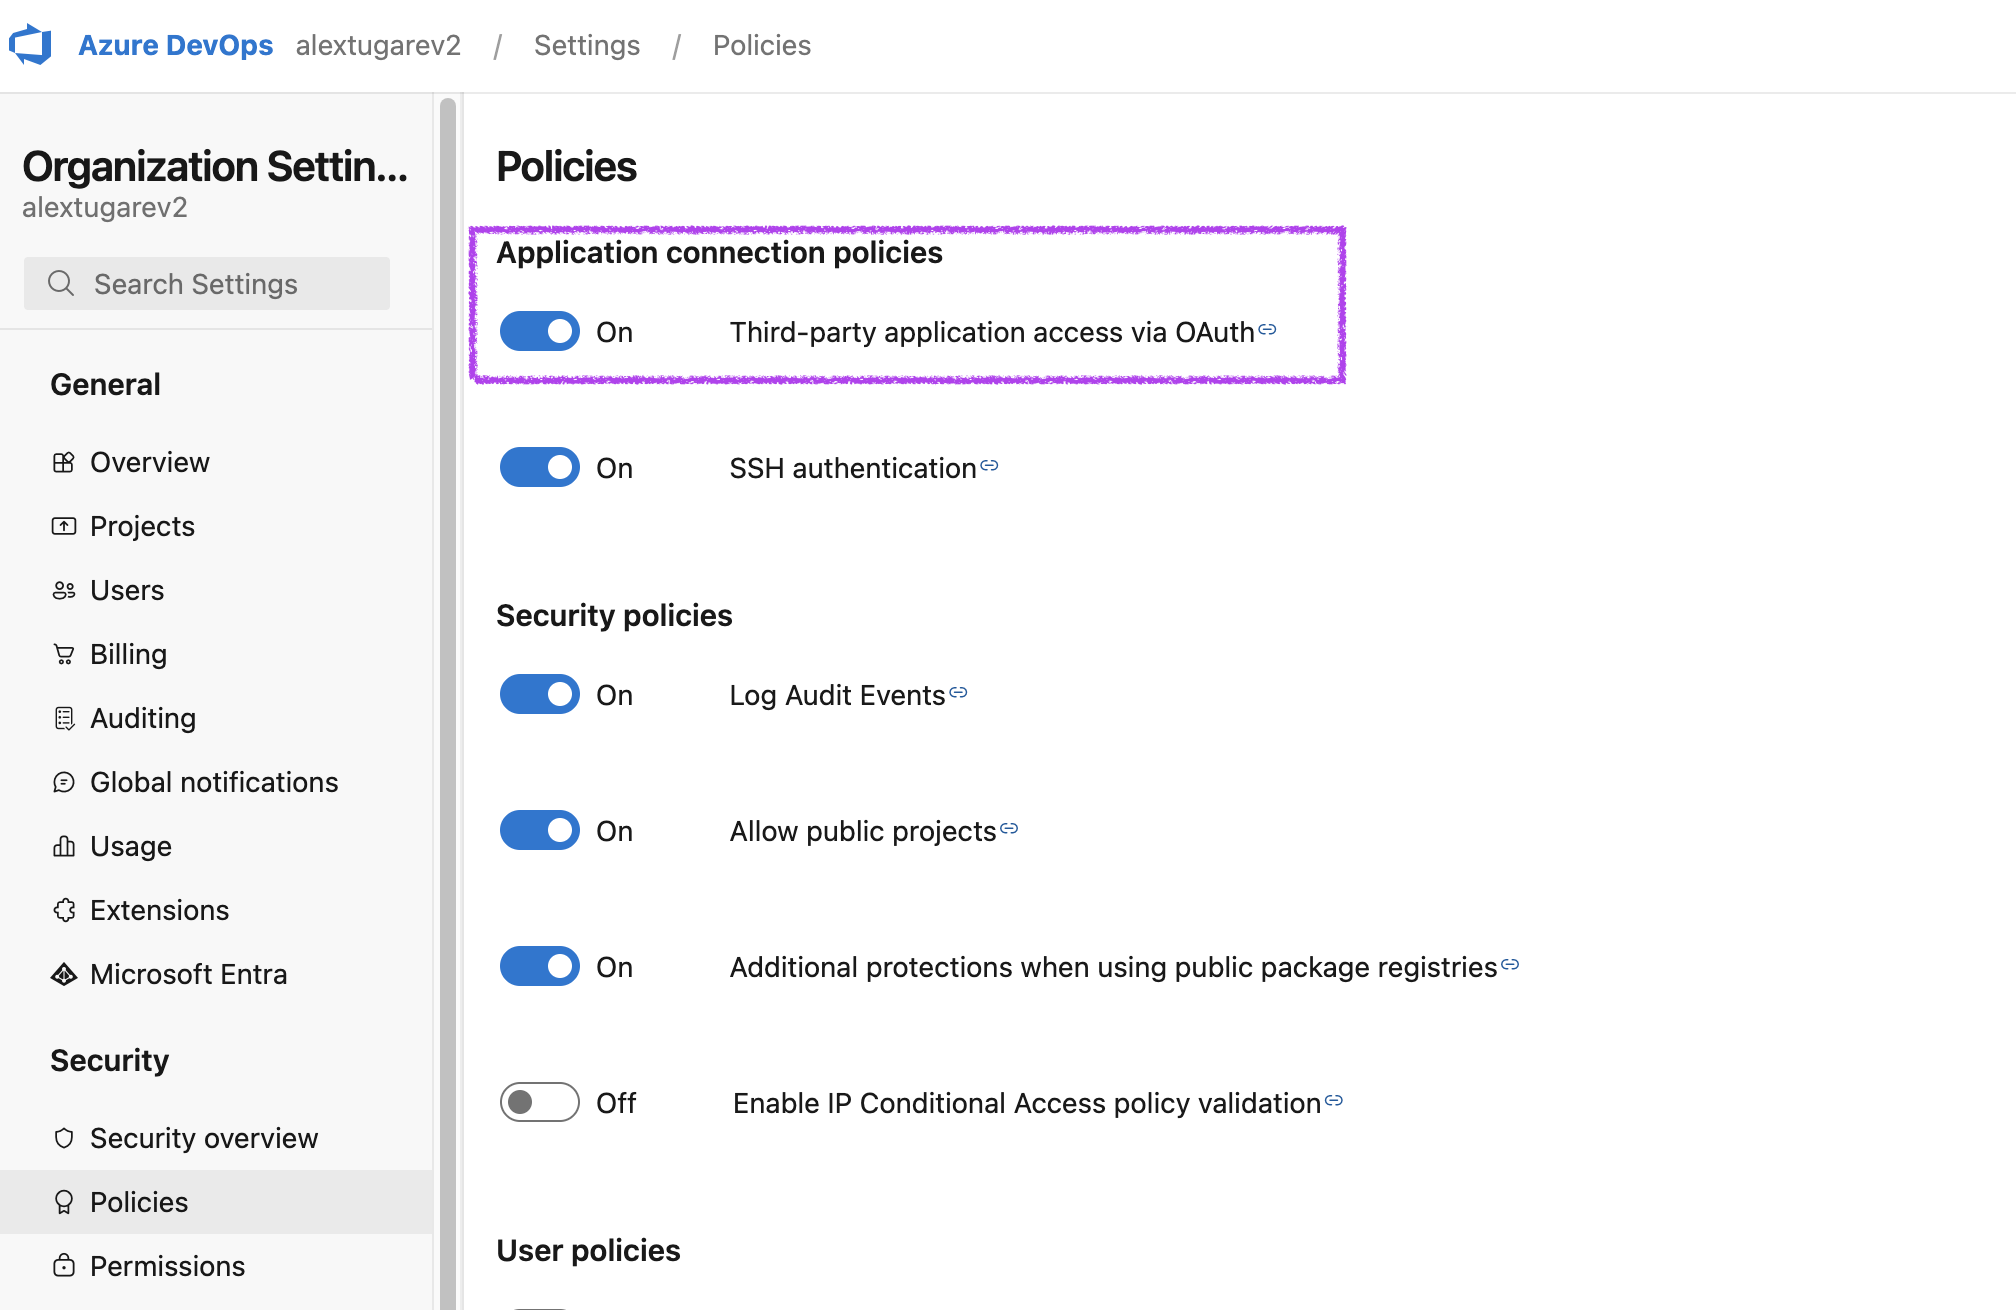 * Navigate to **Organization Settings > General**
* Connect your Microsoft Entra ID tenant
* Navigate to **Organization Settings > General**
* Connect your Microsoft Entra ID tenant
 6. Once you've created the OAuth app in Entra ID, provide the **Issuer URL**, **Client ID**, and **Client Secret** in Ona.
The client secret will be encrypted using the runner's public key and stored securely, ensuring that only the designated runner can decrypt and access the sensitive credentials.
7. Save your changes.
This will also try to connect with Entra ID to verify the OAuth app.
#### Using Personal Access Tokens (PATs)
1. Go to **Settings > Runners** and select the runner for which you want to configure the PAT.
2. Navigate to the "Configure repository access" section and click "Add a new provider".
3. Select **Azure DevOps** from the list of providers.
4. In the modal that opens, toggle "Enable Personal Access Token".
6. Once you've created the OAuth app in Entra ID, provide the **Issuer URL**, **Client ID**, and **Client Secret** in Ona.
The client secret will be encrypted using the runner's public key and stored securely, ensuring that only the designated runner can decrypt and access the sensitive credentials.
7. Save your changes.
This will also try to connect with Entra ID to verify the OAuth app.
#### Using Personal Access Tokens (PATs)
1. Go to **Settings > Runners** and select the runner for which you want to configure the PAT.
2. Navigate to the "Configure repository access" section and click "Add a new provider".
3. Select **Azure DevOps** from the list of providers.
4. In the modal that opens, toggle "Enable Personal Access Token".
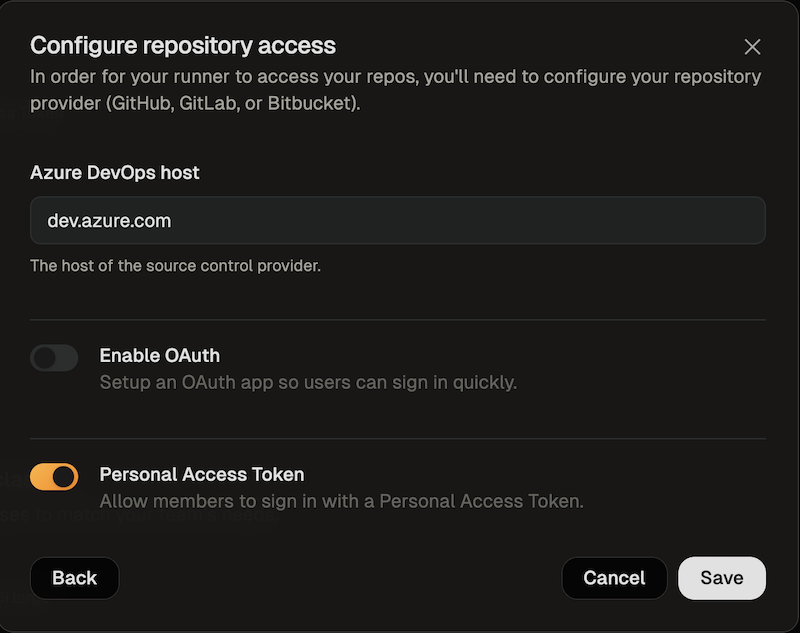 5. Save your changes
## Authorizing Azure DevOps Access
### Using OAuth (Microsoft Entra ID)
1. When creating your first environment, you will be asked to authorize the new application. To use OAuth press the *Connect* button.
5. Save your changes
## Authorizing Azure DevOps Access
### Using OAuth (Microsoft Entra ID)
1. When creating your first environment, you will be asked to authorize the new application. To use OAuth press the *Connect* button.
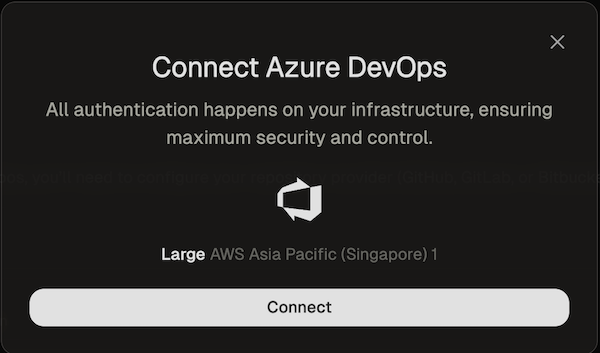 A new window will open that directs you to Microsoft Entra ID to authorize the OAuth app. The requested scopes are grouped as follows:
**Microsoft Graph (Authentication):**
* `openid` - Required for OpenID Connect authentication
* `offline_access` - Needed for refresh tokens
**Azure DevOps API:**
* `vso.code` - Required for read operations (parsing context URLs, cloning repositories, accessing commits, pull requests, refs, and branches)
* `vso.code_write` - Required for write operations (committing and pushing changes from your environment to the repository)
2. After you have authorized, you can close the window. After a few seconds you should get a confirmation that Azure DevOps (Entra ID) is now connected.
A new window will open that directs you to Microsoft Entra ID to authorize the OAuth app. The requested scopes are grouped as follows:
**Microsoft Graph (Authentication):**
* `openid` - Required for OpenID Connect authentication
* `offline_access` - Needed for refresh tokens
**Azure DevOps API:**
* `vso.code` - Required for read operations (parsing context URLs, cloning repositories, accessing commits, pull requests, refs, and branches)
* `vso.code_write` - Required for write operations (committing and pushing changes from your environment to the repository)
2. After you have authorized, you can close the window. After a few seconds you should get a confirmation that Azure DevOps (Entra ID) is now connected.
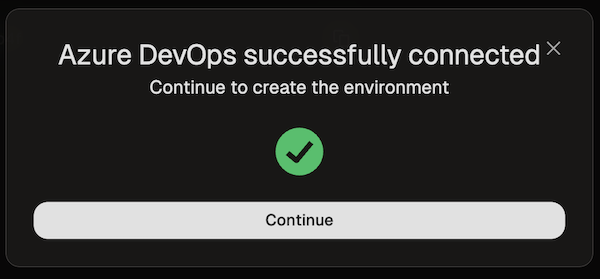 ### Using Personal Access Tokens (PATs)
1. When creating your first environment, you will be asked to authorize the new application. Select *Provide a Personal Access Token*.
### Using Personal Access Tokens (PATs)
1. When creating your first environment, you will be asked to authorize the new application. Select *Provide a Personal Access Token*.
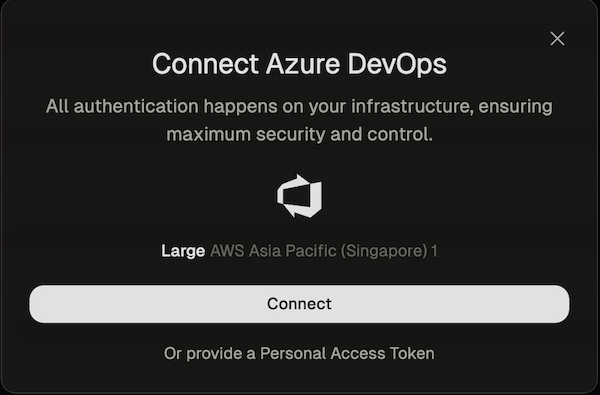 * Follow the instructions of the Azure documentation to create a PAT
* The name of the token and all required scopes are pre-set.
* By default, the token is valid for 30 days, but you can change the duration if needed.
2. After creating the token, return to the dialog and paste the token.
* Follow the instructions of the Azure documentation to create a PAT
* The name of the token and all required scopes are pre-set.
* By default, the token is valid for 30 days, but you can change the duration if needed.
2. After creating the token, return to the dialog and paste the token.
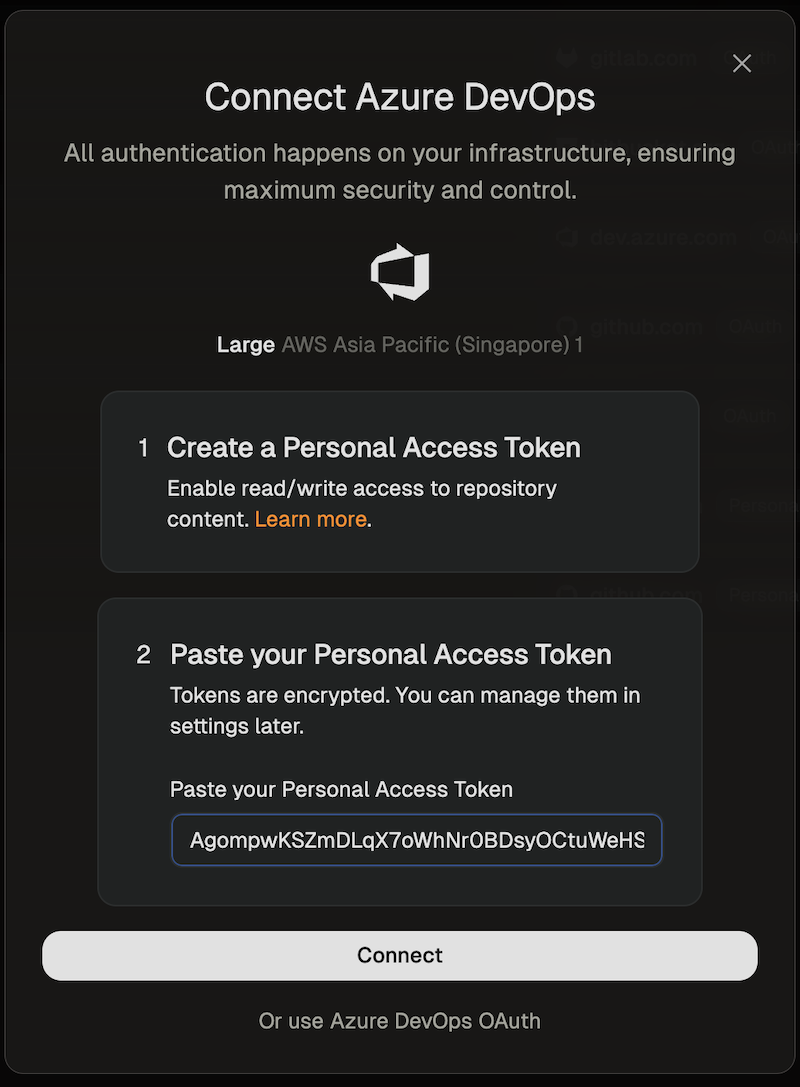 3. The environment will now be created using the provided token.
# Bitbucket Cloud
Source: https://ona.com/docs/ona/source-control/bitbucket
Source control integrations can be configured for [Self-Hosted Runners](/ona/runners/aws/overview). Bitbucket Cloud support on [Ona Cloud](/ona/runners/ona-cloud) is not currently available. You can set up a Bitbucket integration during self-hosted runner creation or in the runner settings. Self-hosted Bitbucket instances are currently not supported.
## Configuring Bitbucket Access
3. Select **Bitbucket** from the list of providers.
4. In the modal that opens, toggle "Enable OAuth".
3. The environment will now be created using the provided token.
# Bitbucket Cloud
Source: https://ona.com/docs/ona/source-control/bitbucket
Source control integrations can be configured for [Self-Hosted Runners](/ona/runners/aws/overview). Bitbucket Cloud support on [Ona Cloud](/ona/runners/ona-cloud) is not currently available. You can set up a Bitbucket integration during self-hosted runner creation or in the runner settings. Self-hosted Bitbucket instances are currently not supported.
## Configuring Bitbucket Access
3. Select **Bitbucket** from the list of providers.
4. In the modal that opens, toggle "Enable OAuth".
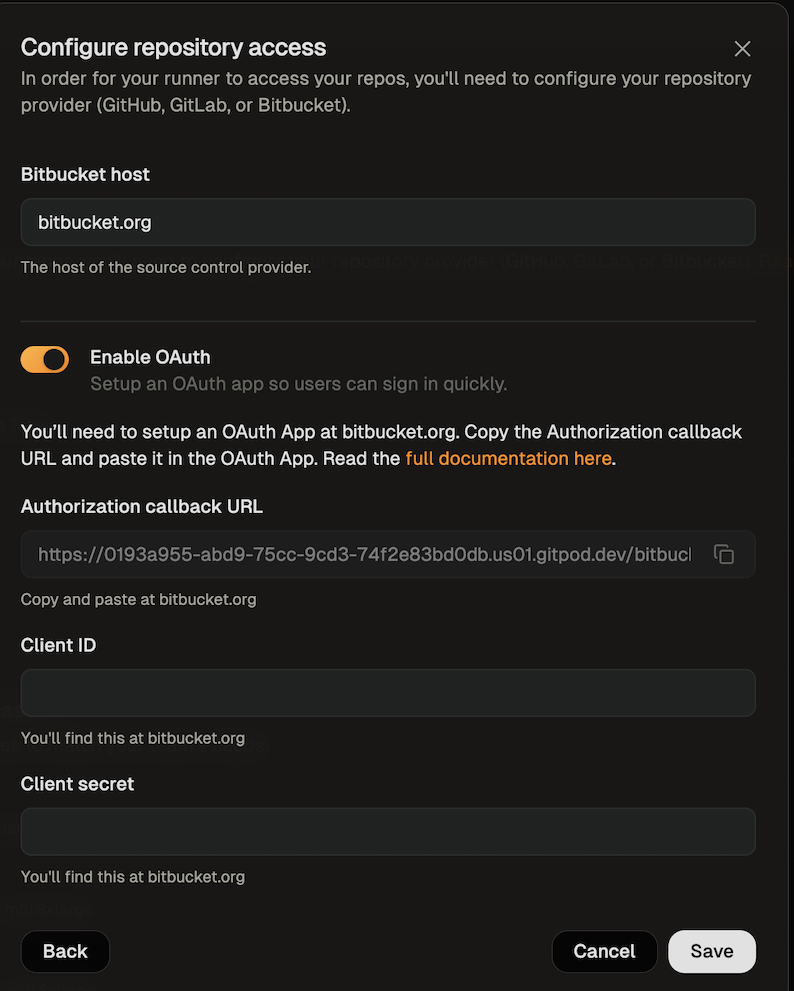 5. Follow the instructions in [Bitbucket's docs](https://support.atlassian.com/bitbucket-cloud/docs/use-oauth-on-bitbucket-cloud/) to create an OAuth app.
* The app name can be any name you like
* You can get the callback URL from the SCM configuration dialog
* Select the required scopes
* The *account* scope is required so that the git author name and git author email can be set in the environment
* The *repository* scope is required so that the repository can be cloned and the context url can be parsed
* The *repository:write* scope is required so that changes can be pushed to the repository from the environment
* The *pullrequests* scope is required so that an environment can be started from a pull request
5. Follow the instructions in [Bitbucket's docs](https://support.atlassian.com/bitbucket-cloud/docs/use-oauth-on-bitbucket-cloud/) to create an OAuth app.
* The app name can be any name you like
* You can get the callback URL from the SCM configuration dialog
* Select the required scopes
* The *account* scope is required so that the git author name and git author email can be set in the environment
* The *repository* scope is required so that the repository can be cloned and the context url can be parsed
* The *repository:write* scope is required so that changes can be pushed to the repository from the environment
* The *pullrequests* scope is required so that an environment can be started from a pull request
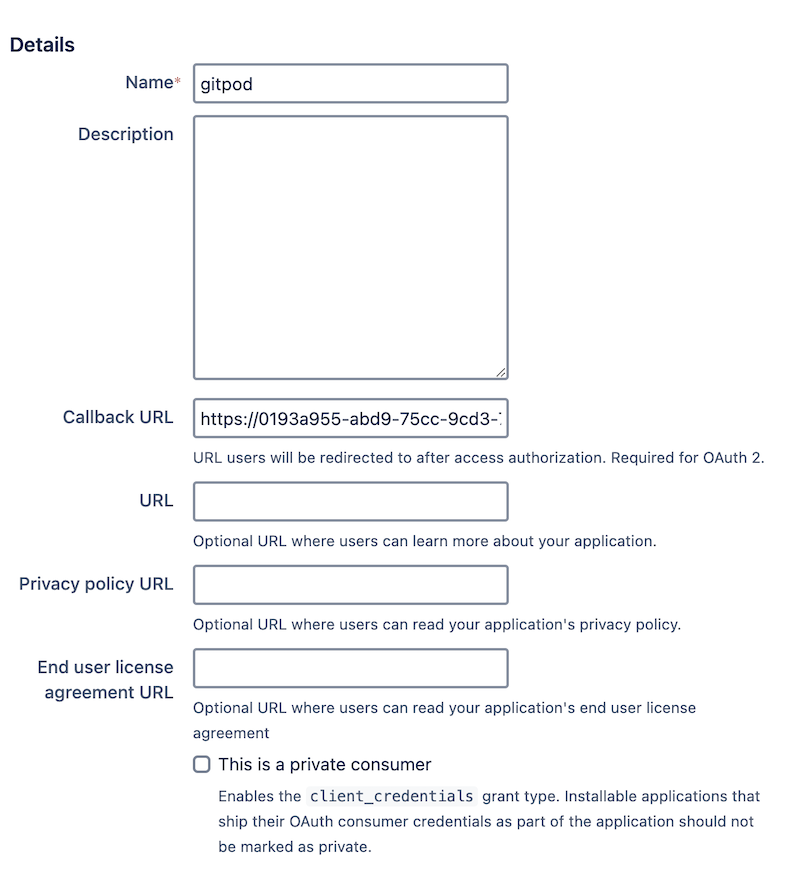 6. After creating the OAuth app, provide the **Client ID** and **Client Secret** in the runner configuration dialog. Bitbucket calls these *Key* and *Secret*. The client secret will be encrypted with the runner's public key, ensuring only the runner can read it.
7. Save your changes
## Authorizing Bitbucket Access
### Using OAuth
1. When creating your first environment, you will be asked to authorize the new application. To use OAuth press the *Connect* button.
6. After creating the OAuth app, provide the **Client ID** and **Client Secret** in the runner configuration dialog. Bitbucket calls these *Key* and *Secret*. The client secret will be encrypted with the runner's public key, ensuring only the runner can read it.
7. Save your changes
## Authorizing Bitbucket Access
### Using OAuth
1. When creating your first environment, you will be asked to authorize the new application. To use OAuth press the *Connect* button.
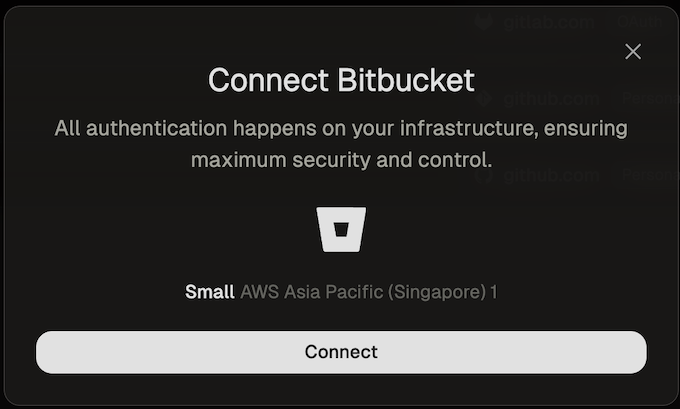 A new window will open that directs you to Bitbucket to authorize the OAuth app. The requested scopes are *account*, *repository*, *repository:write*, *pullrequests* and *issue*.
* The *account* scope is required so that the git author name and git author email can be set in the environment
* The *repository* scope is required so that the repository can be cloned and the context url can be parsed
* The *repository:write* scope is required so that changes can be pushed to the repository from the environment
* The *pullrequests* scope is required so that an environment can be started from a pull request
A new window will open that directs you to Bitbucket to authorize the OAuth app. The requested scopes are *account*, *repository*, *repository:write*, *pullrequests* and *issue*.
* The *account* scope is required so that the git author name and git author email can be set in the environment
* The *repository* scope is required so that the repository can be cloned and the context url can be parsed
* The *repository:write* scope is required so that changes can be pushed to the repository from the environment
* The *pullrequests* scope is required so that an environment can be started from a pull request
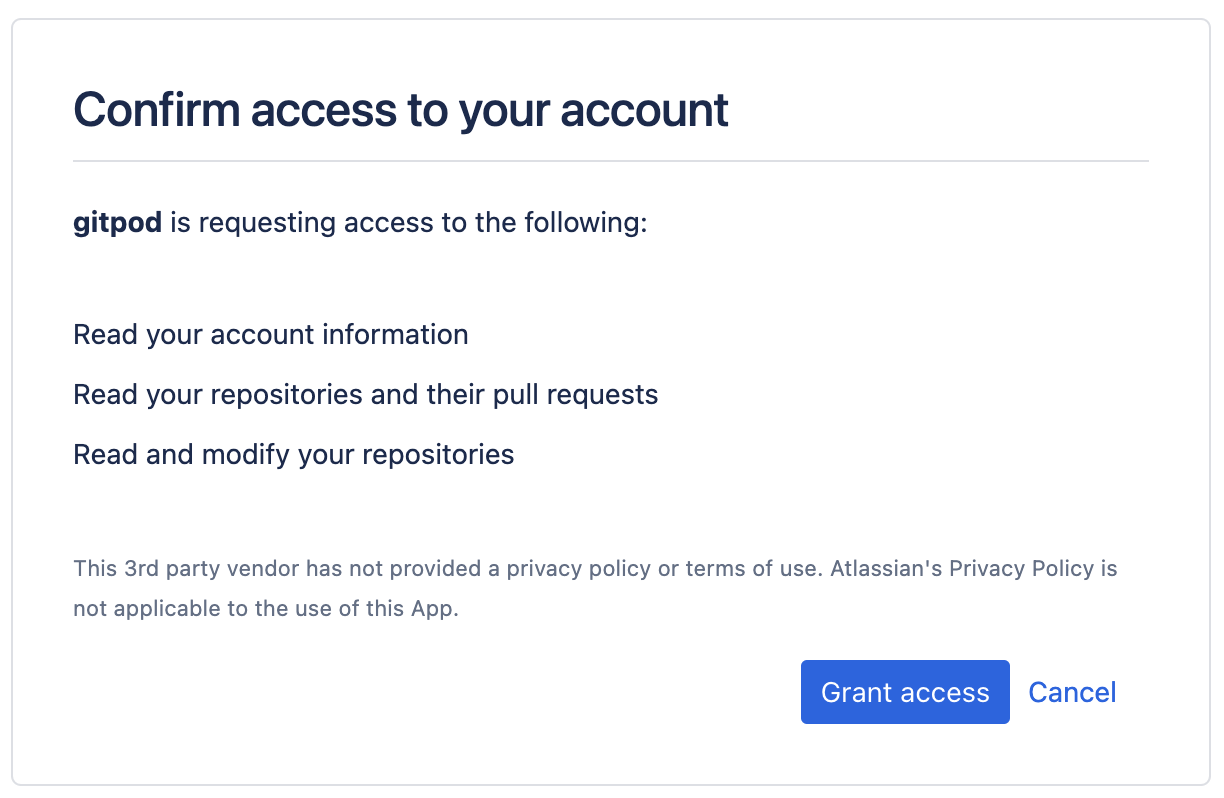 2. After you have authorized, you can close the window. After a few seconds you should get a confirmation that Bitbucket is now connected.
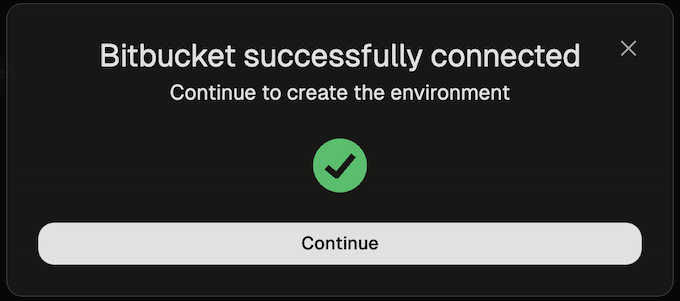 # GitHub
Source: https://ona.com/docs/ona/source-control/github
Source control integrations can be configured for both [Self-Hosted Runners](/ona/runners/aws/overview) and [Ona Cloud](/ona/runners/ona-cloud). You can set up a GitHub integration during runner creation or in the runner settings. Self-hosted GitHub instances are supported by changing the Host during setup.
## Configuring GitHub Access
3. Select **GitHub** from the list of providers.
4. In the modal that opens, toggle "Enable OAuth".
5. Follow the instructions in [GitHub's docs](https://docs.github.com/en/apps/oauth-apps/building-oauth-apps/creating-an-oauth-app) to create an OAuth app.
* The app name can be any name you like
* For the homepage URL, you can use [https://app.gitpod.io/](https://app.gitpod.io/)
* You can get the callback URL from the SCM configuration dialog
6. After creating the OAuth app, provide the **Client ID** and **Client Secret** in the runner configuration dialog. The client secret will be encrypted with the runner's public key, ensuring only the runner can read it.
7. Save your changes
#### Using Personal Access Tokens (PATs)
1. Go to **Settings > Runners** and select the runner for which you want to configure the PAT.
2. Navigate to the "Configure repository access" section and click "Add a new provider".
3. Select **GitHub** from the list of providers.
4. In the modal that opens, toggle "Enable Personal Access Token".
# GitHub
Source: https://ona.com/docs/ona/source-control/github
Source control integrations can be configured for both [Self-Hosted Runners](/ona/runners/aws/overview) and [Ona Cloud](/ona/runners/ona-cloud). You can set up a GitHub integration during runner creation or in the runner settings. Self-hosted GitHub instances are supported by changing the Host during setup.
## Configuring GitHub Access
3. Select **GitHub** from the list of providers.
4. In the modal that opens, toggle "Enable OAuth".
5. Follow the instructions in [GitHub's docs](https://docs.github.com/en/apps/oauth-apps/building-oauth-apps/creating-an-oauth-app) to create an OAuth app.
* The app name can be any name you like
* For the homepage URL, you can use [https://app.gitpod.io/](https://app.gitpod.io/)
* You can get the callback URL from the SCM configuration dialog
6. After creating the OAuth app, provide the **Client ID** and **Client Secret** in the runner configuration dialog. The client secret will be encrypted with the runner's public key, ensuring only the runner can read it.
7. Save your changes
#### Using Personal Access Tokens (PATs)
1. Go to **Settings > Runners** and select the runner for which you want to configure the PAT.
2. Navigate to the "Configure repository access" section and click "Add a new provider".
3. Select **GitHub** from the list of providers.
4. In the modal that opens, toggle "Enable Personal Access Token".
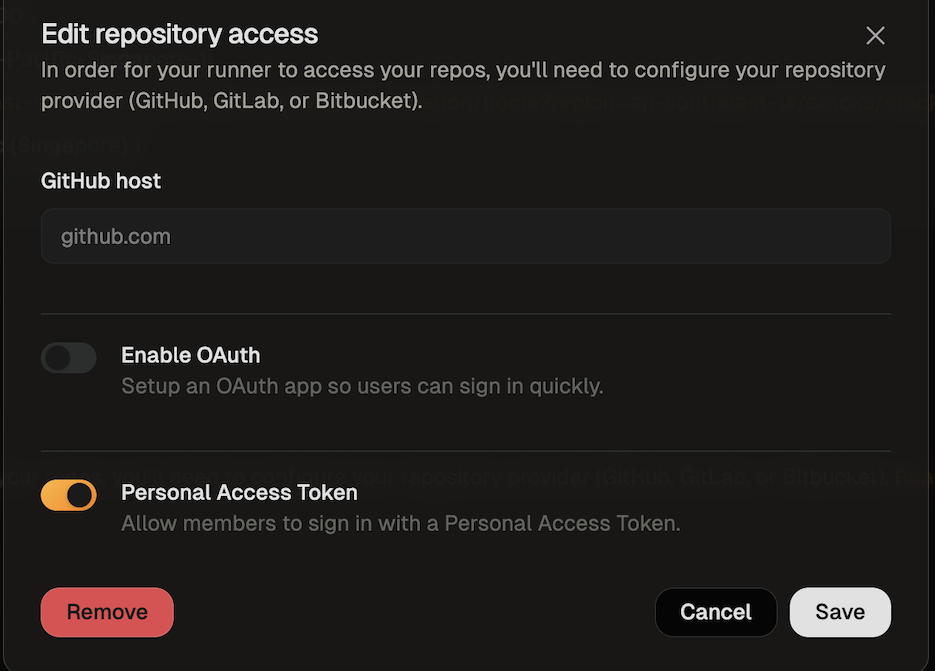 5. Save your changes
### Ona Cloud
Ona Cloud provides built-in GitHub integration with no configuration required:
* **github.com** is supported by default using Ona's managed OAuth application
* **No OAuth app setup needed** - Ona manages the OAuth application for you
* **Automatic authentication** - Users can immediately authenticate with their GitHub accounts
* **Enterprise-grade security** - All authentication flows are handled securely by Ona
For custom GitHub instances or advanced repository access configurations, consider [upgrading to Enterprise](/ona/runners/ona-cloud#upgrading-to-enterprise) with self-hosted runners.
## Authorizing GitHub Access
### Using OAuth
1. When creating your first environment, you will be asked to authorize the new application. A new window will open that directs you to GitHub to authorize the OAuth app.
* The requested scopes are *repo*, *read:user*, *user:email*, and *workflow*.
* The *repo* permission is required so that your environment can clone the repository.
* The *read:user* permission is required so that the git author name can be set in the environment.
* The *user:email* permission is required so that the git author email can be set in the environment.
* The *workflow* permission is required so that GitHub Action YAML files can be edited in the environment.
2. After you have authorized, you can close the window and go back to the environment details screen.
### Using Personal Access Tokens (PATs)
1. The first time a user creates an environment, they will be asked to enter a Personal Access Token.
* Click the link provided on the screen to access the configuration dialog for creating a GitHub token.
* The name of the token and all required scopes are pre-set.
* By default, the token is valid for 30 days, but you can change the duration if needed.
5. Save your changes
### Ona Cloud
Ona Cloud provides built-in GitHub integration with no configuration required:
* **github.com** is supported by default using Ona's managed OAuth application
* **No OAuth app setup needed** - Ona manages the OAuth application for you
* **Automatic authentication** - Users can immediately authenticate with their GitHub accounts
* **Enterprise-grade security** - All authentication flows are handled securely by Ona
For custom GitHub instances or advanced repository access configurations, consider [upgrading to Enterprise](/ona/runners/ona-cloud#upgrading-to-enterprise) with self-hosted runners.
## Authorizing GitHub Access
### Using OAuth
1. When creating your first environment, you will be asked to authorize the new application. A new window will open that directs you to GitHub to authorize the OAuth app.
* The requested scopes are *repo*, *read:user*, *user:email*, and *workflow*.
* The *repo* permission is required so that your environment can clone the repository.
* The *read:user* permission is required so that the git author name can be set in the environment.
* The *user:email* permission is required so that the git author email can be set in the environment.
* The *workflow* permission is required so that GitHub Action YAML files can be edited in the environment.
2. After you have authorized, you can close the window and go back to the environment details screen.
### Using Personal Access Tokens (PATs)
1. The first time a user creates an environment, they will be asked to enter a Personal Access Token.
* Click the link provided on the screen to access the configuration dialog for creating a GitHub token.
* The name of the token and all required scopes are pre-set.
* By default, the token is valid for 30 days, but you can change the duration if needed.
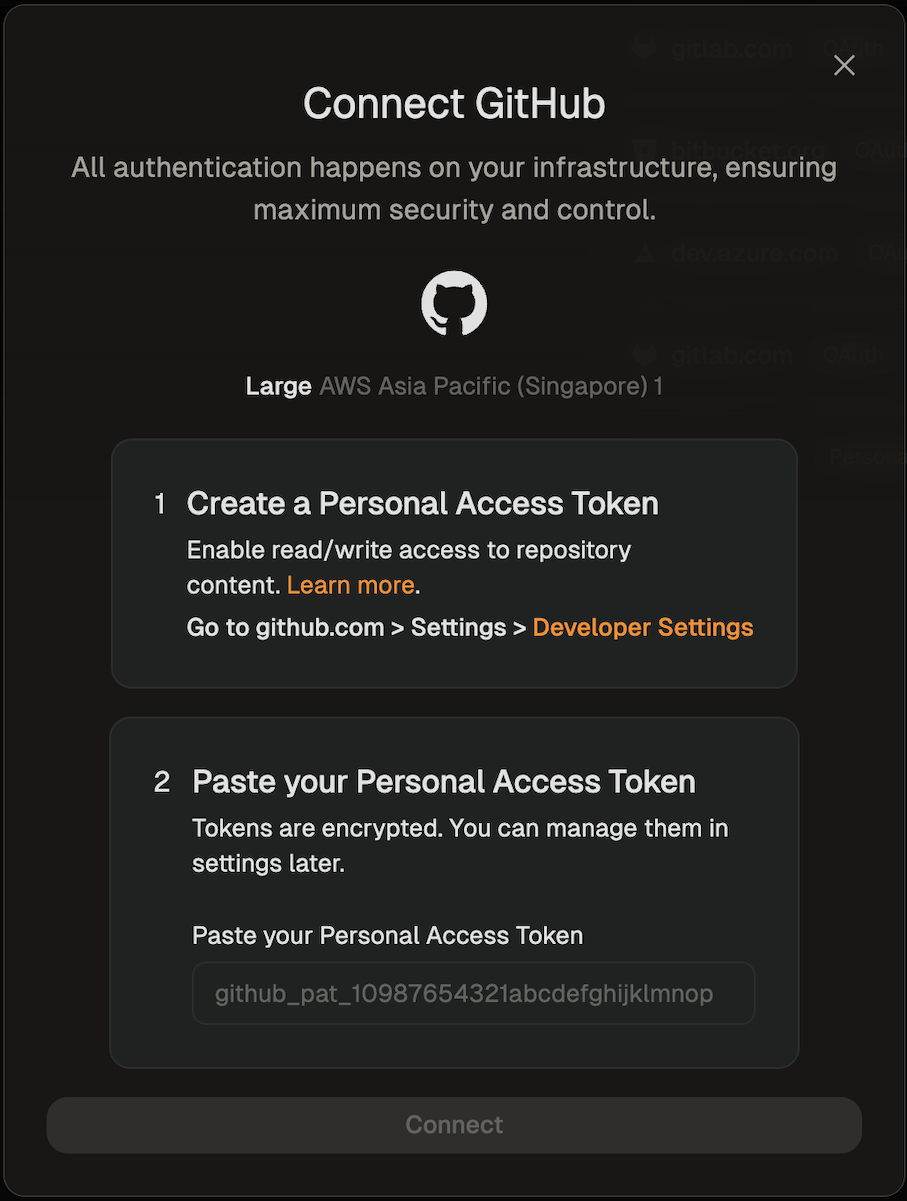 2. After creating the token, return to the dialog and paste the token.
3. The environment will now be created using the provided token.
## Granting Access to Additional GitHub Organizations
After your initial OAuth authorization, you may need to grant Ona access to additional GitHub organizations to work with repositories from those organizations. This is a common scenario when you join new organizations or when organizations are added to your GitHub account after your initial setup.
2. After creating the token, return to the dialog and paste the token.
3. The environment will now be created using the provided token.
## Granting Access to Additional GitHub Organizations
After your initial OAuth authorization, you may need to grant Ona access to additional GitHub organizations to work with repositories from those organizations. This is a common scenario when you join new organizations or when organizations are added to your GitHub account after your initial setup.
 2. **Review Current Organization Access:**
* Click on the Ona Cloud application to view its details
* You'll see a list of organizations and their access status
* Organizations may show as "Granted", "Denied", or "Request access"
2. **Review Current Organization Access:**
* Click on the Ona Cloud application to view its details
* You'll see a list of organizations and their access status
* Organizations may show as "Granted", "Denied", or "Request access"
 3. **Grant Access to New Organizations:**
* For organizations showing "Request access", click the **"Request"** button
* For organizations you own, access will be granted immediately
* For organizations you don't own, an access request will be sent to the organization owners
4. **Organization Owner Approval (if required):**
* If you're not an owner of the organization, the organization owners will receive a notification
* They can approve or deny the request from their organization settings
* You'll receive an email notification once the request is processed
### Troubleshooting Organization Access Issues
**Problem:** "Repository not found" or "Access denied" errors
**Solution:**
* Verify you have access to the repository on GitHub directly
* Check that the organization has granted access to the Ona OAuth application
* Ensure you're a member of the organization with appropriate repository permissions
**Problem:** Organization doesn't appear in the OAuth app settings
**Solution:**
* Confirm you're a member of the organization on GitHub
* Check if the organization has restricted OAuth app access
* Contact your organization administrator to enable third-party application access
**Problem:** Access request is pending for too long
**Solution:**
* Contact your GitHub organization owners/administrators
* Ask them to review pending OAuth application requests in their organization settings
* Provide them with the Ona Cloud application details for easy identification
### Organization Administrator Considerations
If you're a GitHub organization administrator and users are requesting access for Ona:
1. **Review the Application:**
* Go to your organization's Settings > Third-party access
* Review the Ona Cloud application request
* Verify the requested permissions align with your organization's policies
2. **Grant or Deny Access:**
* Click **"Review"** next to the Ona Cloud application
* Review the permissions and user who requested access
* Click **"Grant"** or **"Deny"** based on your organization's policies
3. **Set Organization Policies:**
* Consider setting up organization-wide policies for OAuth applications
* You can require approval for all applications or pre-approve trusted applications
* Configure these settings in your organization's Third-party access settings
# GitLab
Source: https://ona.com/docs/ona/source-control/gitlab
Source control integrations can be configured for both [Self-Hosted Runners](/ona/runners/aws/overview) and [Ona Cloud](/ona/runners/ona-cloud). You can set up a GitLab integration during runner creation or in the runner settings. Self-hosted GitLab instances are supported by changing the Host during setup.
## Configuring GitLab Access
3. Select **GitLab** from the list of providers.
4. In the modal that opens, toggle "Enable OAuth".
3. **Grant Access to New Organizations:**
* For organizations showing "Request access", click the **"Request"** button
* For organizations you own, access will be granted immediately
* For organizations you don't own, an access request will be sent to the organization owners
4. **Organization Owner Approval (if required):**
* If you're not an owner of the organization, the organization owners will receive a notification
* They can approve or deny the request from their organization settings
* You'll receive an email notification once the request is processed
### Troubleshooting Organization Access Issues
**Problem:** "Repository not found" or "Access denied" errors
**Solution:**
* Verify you have access to the repository on GitHub directly
* Check that the organization has granted access to the Ona OAuth application
* Ensure you're a member of the organization with appropriate repository permissions
**Problem:** Organization doesn't appear in the OAuth app settings
**Solution:**
* Confirm you're a member of the organization on GitHub
* Check if the organization has restricted OAuth app access
* Contact your organization administrator to enable third-party application access
**Problem:** Access request is pending for too long
**Solution:**
* Contact your GitHub organization owners/administrators
* Ask them to review pending OAuth application requests in their organization settings
* Provide them with the Ona Cloud application details for easy identification
### Organization Administrator Considerations
If you're a GitHub organization administrator and users are requesting access for Ona:
1. **Review the Application:**
* Go to your organization's Settings > Third-party access
* Review the Ona Cloud application request
* Verify the requested permissions align with your organization's policies
2. **Grant or Deny Access:**
* Click **"Review"** next to the Ona Cloud application
* Review the permissions and user who requested access
* Click **"Grant"** or **"Deny"** based on your organization's policies
3. **Set Organization Policies:**
* Consider setting up organization-wide policies for OAuth applications
* You can require approval for all applications or pre-approve trusted applications
* Configure these settings in your organization's Third-party access settings
# GitLab
Source: https://ona.com/docs/ona/source-control/gitlab
Source control integrations can be configured for both [Self-Hosted Runners](/ona/runners/aws/overview) and [Ona Cloud](/ona/runners/ona-cloud). You can set up a GitLab integration during runner creation or in the runner settings. Self-hosted GitLab instances are supported by changing the Host during setup.
## Configuring GitLab Access
3. Select **GitLab** from the list of providers.
4. In the modal that opens, toggle "Enable OAuth".
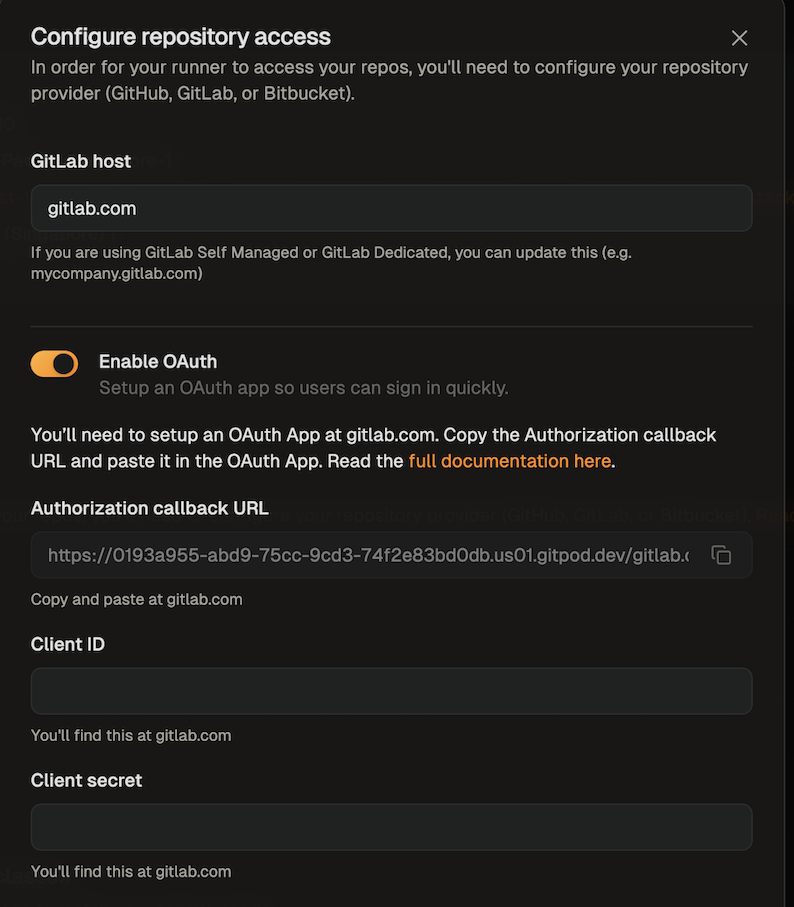 5. Follow the instructions in [GitLab's docs](https://docs.gitlab.com/ee/integration/oauth_provider.html) to create an OAuth app.
* The app name can be any name you like
* You can get the callback URL from the SCM configuration dialog
* Select the required scopes
* The *api scope* is required so that the context url can be parsed
* The *read\_repository* scope is required so that your environment can clone the repository
* The *read\_user scope* is required so that the git author name and git author email can be set in the environment
5. Follow the instructions in [GitLab's docs](https://docs.gitlab.com/ee/integration/oauth_provider.html) to create an OAuth app.
* The app name can be any name you like
* You can get the callback URL from the SCM configuration dialog
* Select the required scopes
* The *api scope* is required so that the context url can be parsed
* The *read\_repository* scope is required so that your environment can clone the repository
* The *read\_user scope* is required so that the git author name and git author email can be set in the environment
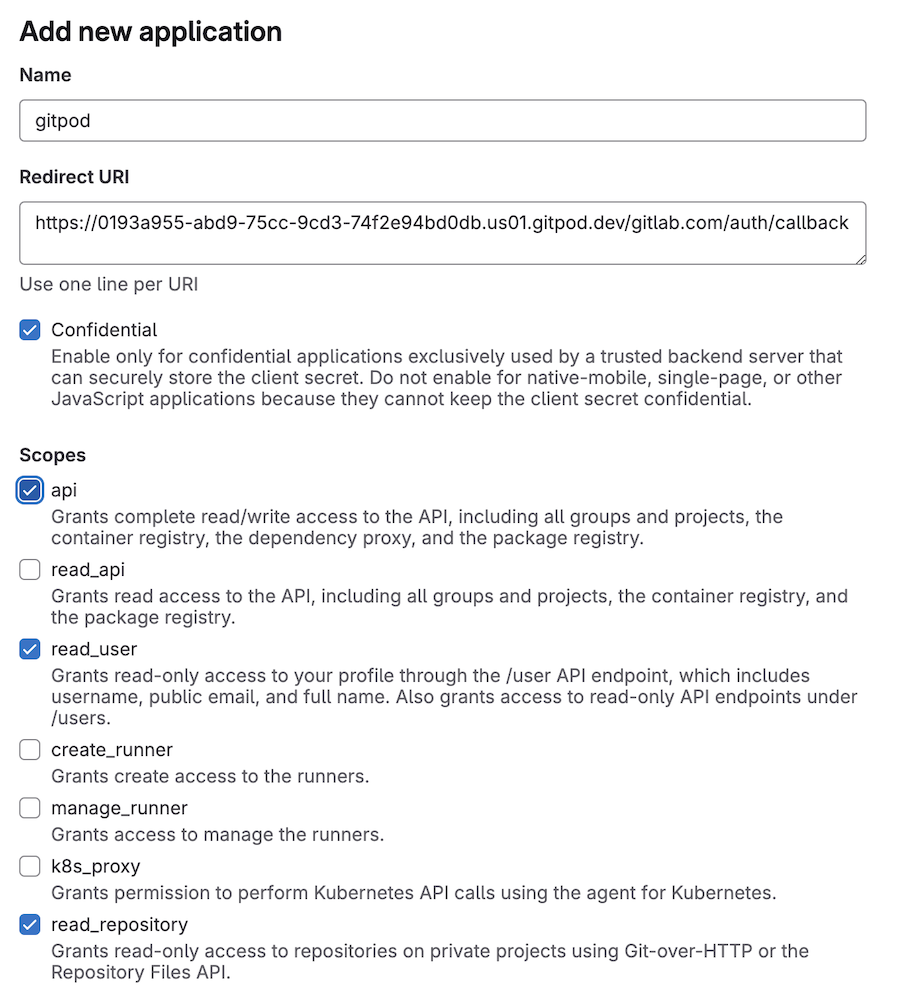 6. After creating the OAuth app, provide the **Client ID** and **Client Secret** in the runner configuration dialog. The client secret will be encrypted with the runner's public key, ensuring only the runner can read it.
7. Save your changes
#### Using Personal Access Tokens (PATs)
1. Go to **Settings > Runners** and select the runner for which you want to configure the PAT.
2. Navigate to the "Configure repository access" section and click "Add a new provider".
3. Select **GitLab** from the list of providers.
4. In the modal that opens, toggle "Enable Personal Access Token".
6. After creating the OAuth app, provide the **Client ID** and **Client Secret** in the runner configuration dialog. The client secret will be encrypted with the runner's public key, ensuring only the runner can read it.
7. Save your changes
#### Using Personal Access Tokens (PATs)
1. Go to **Settings > Runners** and select the runner for which you want to configure the PAT.
2. Navigate to the "Configure repository access" section and click "Add a new provider".
3. Select **GitLab** from the list of providers.
4. In the modal that opens, toggle "Enable Personal Access Token".
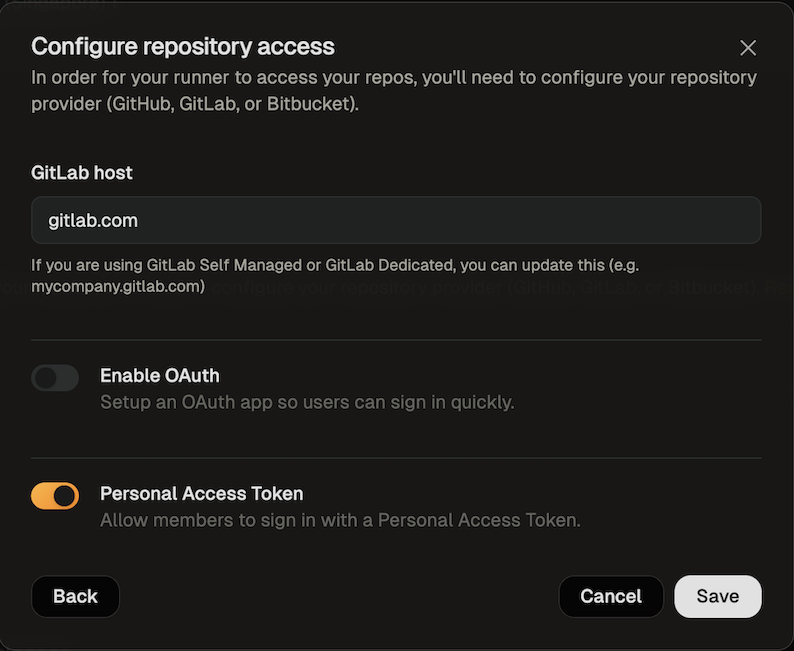 5. Save your changes
### Ona Cloud
Ona Cloud provides built-in GitLab integration with no configuration required:
* **gitlab.com** is supported by default using Ona's managed OAuth application
* **No OAuth app setup needed** - Ona manages the OAuth application for you
* **Automatic authentication** - Users can immediately authenticate with their GitLab accounts
* **Enterprise-grade security** - All authentication flows are handled securely by Ona
For custom GitLab instances or advanced repository access configurations, consider [upgrading to Enterprise](/ona/runners/ona-cloud#upgrading-to-enterprise) with self-hosted runners.
## Authorizing GitLab Access
### Using OAuth
1. When creating your first environment, you will be asked to authorize the new application. To use OAuth press the *Connect* button.
5. Save your changes
### Ona Cloud
Ona Cloud provides built-in GitLab integration with no configuration required:
* **gitlab.com** is supported by default using Ona's managed OAuth application
* **No OAuth app setup needed** - Ona manages the OAuth application for you
* **Automatic authentication** - Users can immediately authenticate with their GitLab accounts
* **Enterprise-grade security** - All authentication flows are handled securely by Ona
For custom GitLab instances or advanced repository access configurations, consider [upgrading to Enterprise](/ona/runners/ona-cloud#upgrading-to-enterprise) with self-hosted runners.
## Authorizing GitLab Access
### Using OAuth
1. When creating your first environment, you will be asked to authorize the new application. To use OAuth press the *Connect* button.
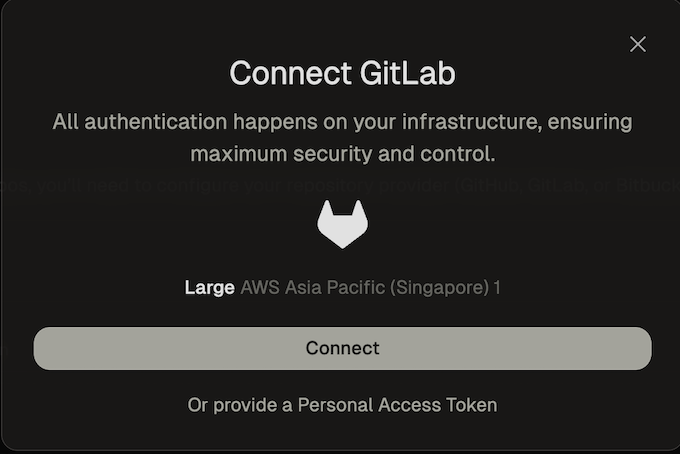 A new window will open that directs you to GitLab to authorize the OAuth app. The requested scopes are *api*, *read\_repository* and *read\_user*.
* The *api* scope is required so that the context url can be parsed
* The *read\_repository* scope is required so that your environment can clone the repository
* The *read\_user scope* is required so that the git author name and git author email can be set in the environment
A new window will open that directs you to GitLab to authorize the OAuth app. The requested scopes are *api*, *read\_repository* and *read\_user*.
* The *api* scope is required so that the context url can be parsed
* The *read\_repository* scope is required so that your environment can clone the repository
* The *read\_user scope* is required so that the git author name and git author email can be set in the environment
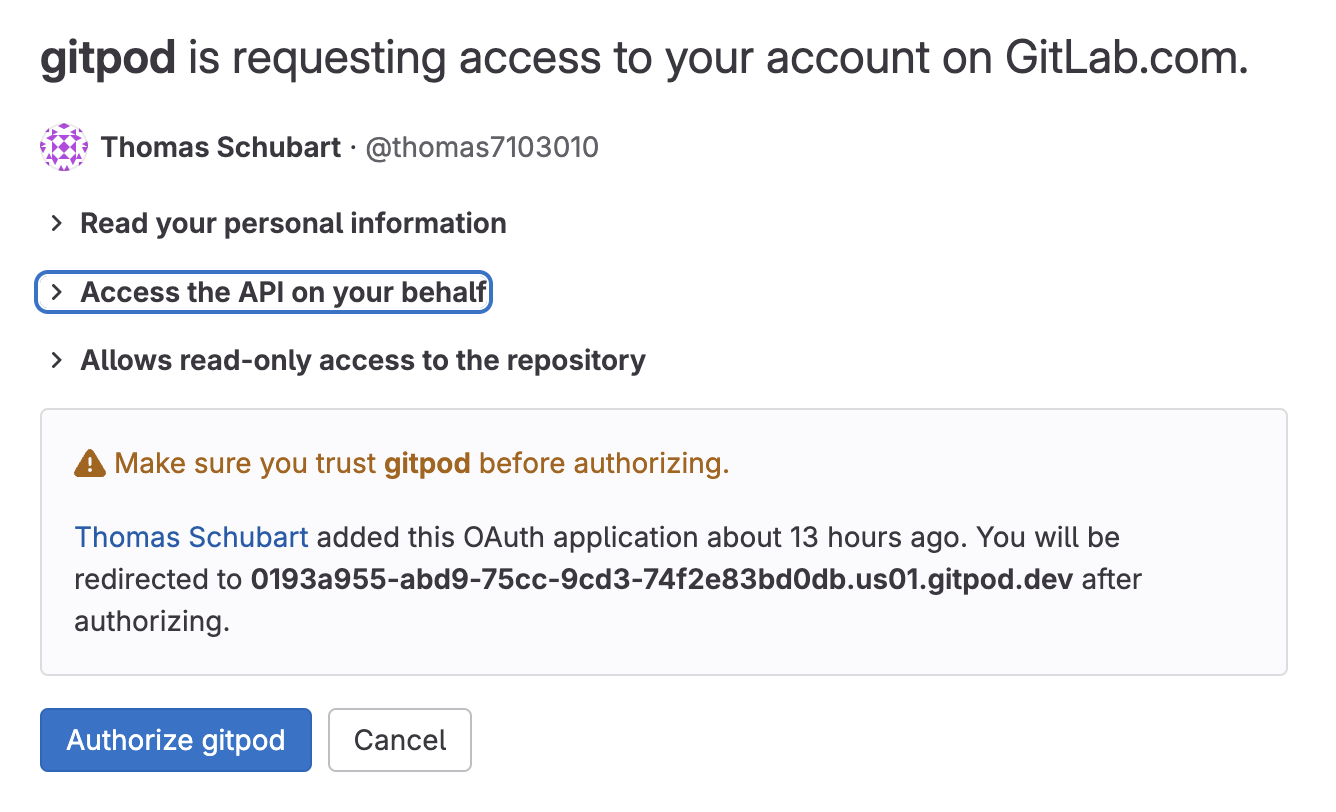 2. After you have authorized, you can close the window. After a few seconds you should get a confirmation that GitLab is now connected.
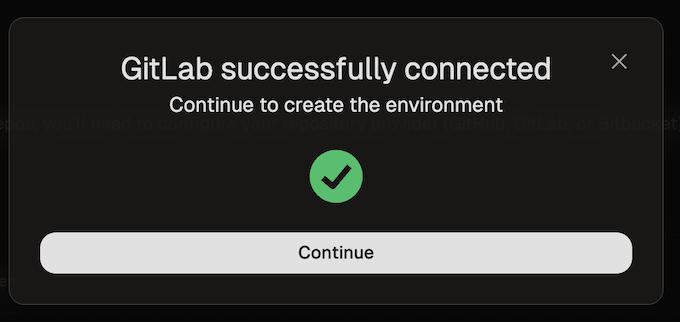 ### Using Personal Access Tokens (PATs)
1. When creating your first environment, you will be asked to authorize the new application. Select *Provide a Personal Access Token*.
### Using Personal Access Tokens (PATs)
1. When creating your first environment, you will be asked to authorize the new application. Select *Provide a Personal Access Token*.
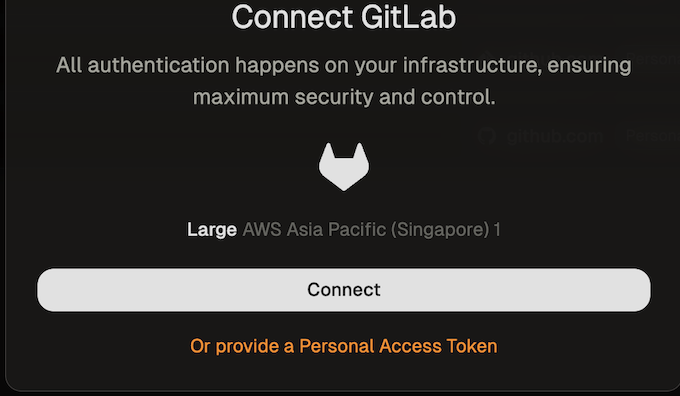 * Click the link provided on the screen to access the configuration dialog for creating a GitLab token.
* The name of the token and all required scopes are pre-set.
* By default, the token is valid for 30 days, but you can change the duration if needed.
2. After creating the token, return to the dialog and paste the token.
* Click the link provided on the screen to access the configuration dialog for creating a GitLab token.
* The name of the token and all required scopes are pre-set.
* By default, the token is valid for 30 days, but you can change the duration if needed.
2. After creating the token, return to the dialog and paste the token.
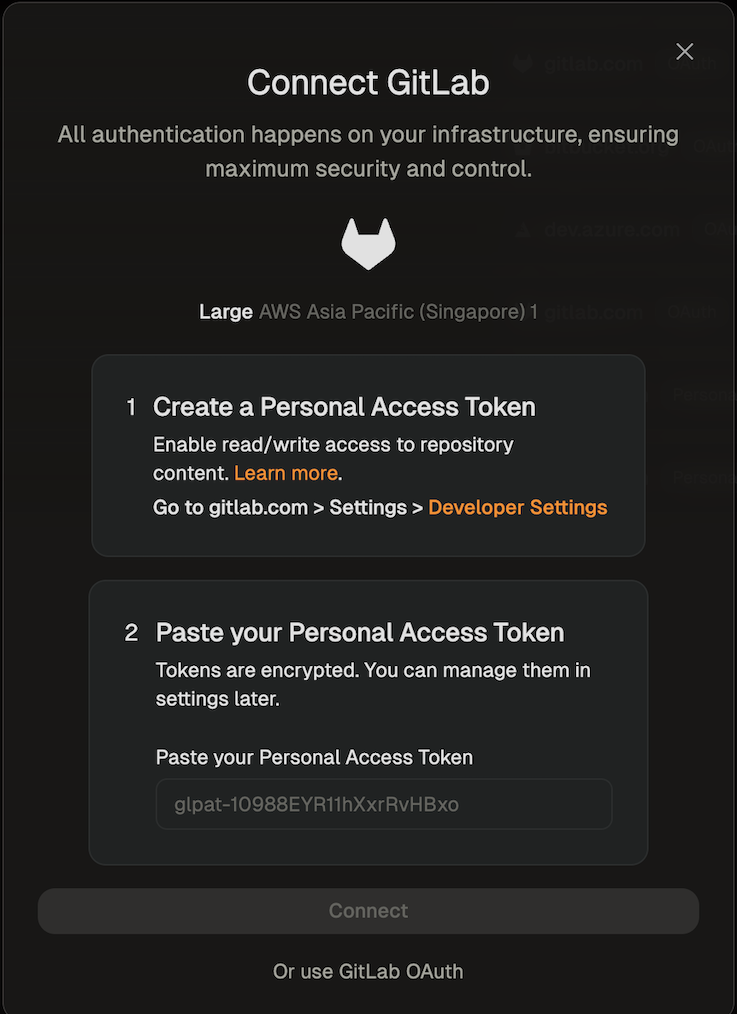 3. The environment will now be created using the provided token.
# Overview
Source: https://ona.com/docs/ona/source-control/overview
Source control integrations in Ona
* [GitHub](/ona/source-control/github)
* [GitLab](/ona/source-control/gitlab)
* [Bitbucket Cloud](/ona/source-control/bitbucket)
* [Azure DevOps](/ona/source-control/azuredevops)
# Amazon Cognito
Source: https://ona.com/docs/ona/sso/cognito
You can set up Single Sign-on (SSO) with Amazon Cognito for your team.
This section helps you to create an OIDC application with Amazon Cognito. The *Client ID*, *Client Secret*, and *Issuer URL* of this OIDC application are required to setup SSO in Ona. See the [Step-by-step guide](/ona/sso/overview#step-by-step-guide-to-set-up-sso) for the general instructions.
## Prerequisites
As prerequisites you will need the following:
* Access to set up a new [Amazon Cognito application](https://console.aws.amazon.com/cognito/home) in your AWS account.
## Create an OIDC application
1. Navigate to [Amazon Cognito](https://console.aws.amazon.com/cognito/home) service page, then select `Set up your application`.
2. Configure the application by filling out the form:
* **Application type**: `Traditional web application`
* **Name**: `Ona`
* **Options for sign-in identifiers**:
* `Email`
* **Required attributes for sign-up**:
* `email`
* `name`
* **Return URL**: `https://app.gitpod.io/auth/oidc/callback`
Click the *Create* button
3. The environment will now be created using the provided token.
# Overview
Source: https://ona.com/docs/ona/source-control/overview
Source control integrations in Ona
* [GitHub](/ona/source-control/github)
* [GitLab](/ona/source-control/gitlab)
* [Bitbucket Cloud](/ona/source-control/bitbucket)
* [Azure DevOps](/ona/source-control/azuredevops)
# Amazon Cognito
Source: https://ona.com/docs/ona/sso/cognito
You can set up Single Sign-on (SSO) with Amazon Cognito for your team.
This section helps you to create an OIDC application with Amazon Cognito. The *Client ID*, *Client Secret*, and *Issuer URL* of this OIDC application are required to setup SSO in Ona. See the [Step-by-step guide](/ona/sso/overview#step-by-step-guide-to-set-up-sso) for the general instructions.
## Prerequisites
As prerequisites you will need the following:
* Access to set up a new [Amazon Cognito application](https://console.aws.amazon.com/cognito/home) in your AWS account.
## Create an OIDC application
1. Navigate to [Amazon Cognito](https://console.aws.amazon.com/cognito/home) service page, then select `Set up your application`.
2. Configure the application by filling out the form:
* **Application type**: `Traditional web application`
* **Name**: `Ona`
* **Options for sign-in identifiers**:
* `Email`
* **Required attributes for sign-up**:
* `email`
* `name`
* **Return URL**: `https://app.gitpod.io/auth/oidc/callback`
Click the *Create* button
 *Amazon Cognito - New Application*
3. Obtain *Client ID*, *Client Secret* from the Overview page
Upon creation of the application, you will be redirected to the then created user pool. Learn more on user pools in Amazon Cognito [here](https://docs.aws.amazon.com/cognito/latest/developerguide/cognito-user-pools.html?icmpid=docs_cognito_console_help_panel).
* Feel free to rename the user pool before proceeding!
* Obtain **Issuer URL**
* You'll find the **User pool ID** here
* The pattern for the *Issuer URL* is:
`https://cognito-idp.
*Amazon Cognito - New Application*
3. Obtain *Client ID*, *Client Secret* from the Overview page
Upon creation of the application, you will be redirected to the then created user pool. Learn more on user pools in Amazon Cognito [here](https://docs.aws.amazon.com/cognito/latest/developerguide/cognito-user-pools.html?icmpid=docs_cognito_console_help_panel).
* Feel free to rename the user pool before proceeding!
* Obtain **Issuer URL**
* You'll find the **User pool ID** here
* The pattern for the *Issuer URL* is:
`https://cognito-idp. *Amazon Cognito - Overview*
4. Configure OIDC Scopes
The default selection of OIDC scopes in Amazon Cognito doesn't meet the requirements for Ona. Please navigate to *App client > Login pages > Edit* to make the necessary changes.
*Amazon Cognito - Overview*
4. Configure OIDC Scopes
The default selection of OIDC scopes in Amazon Cognito doesn't meet the requirements for Ona. Please navigate to *App client > Login pages > Edit* to make the necessary changes.
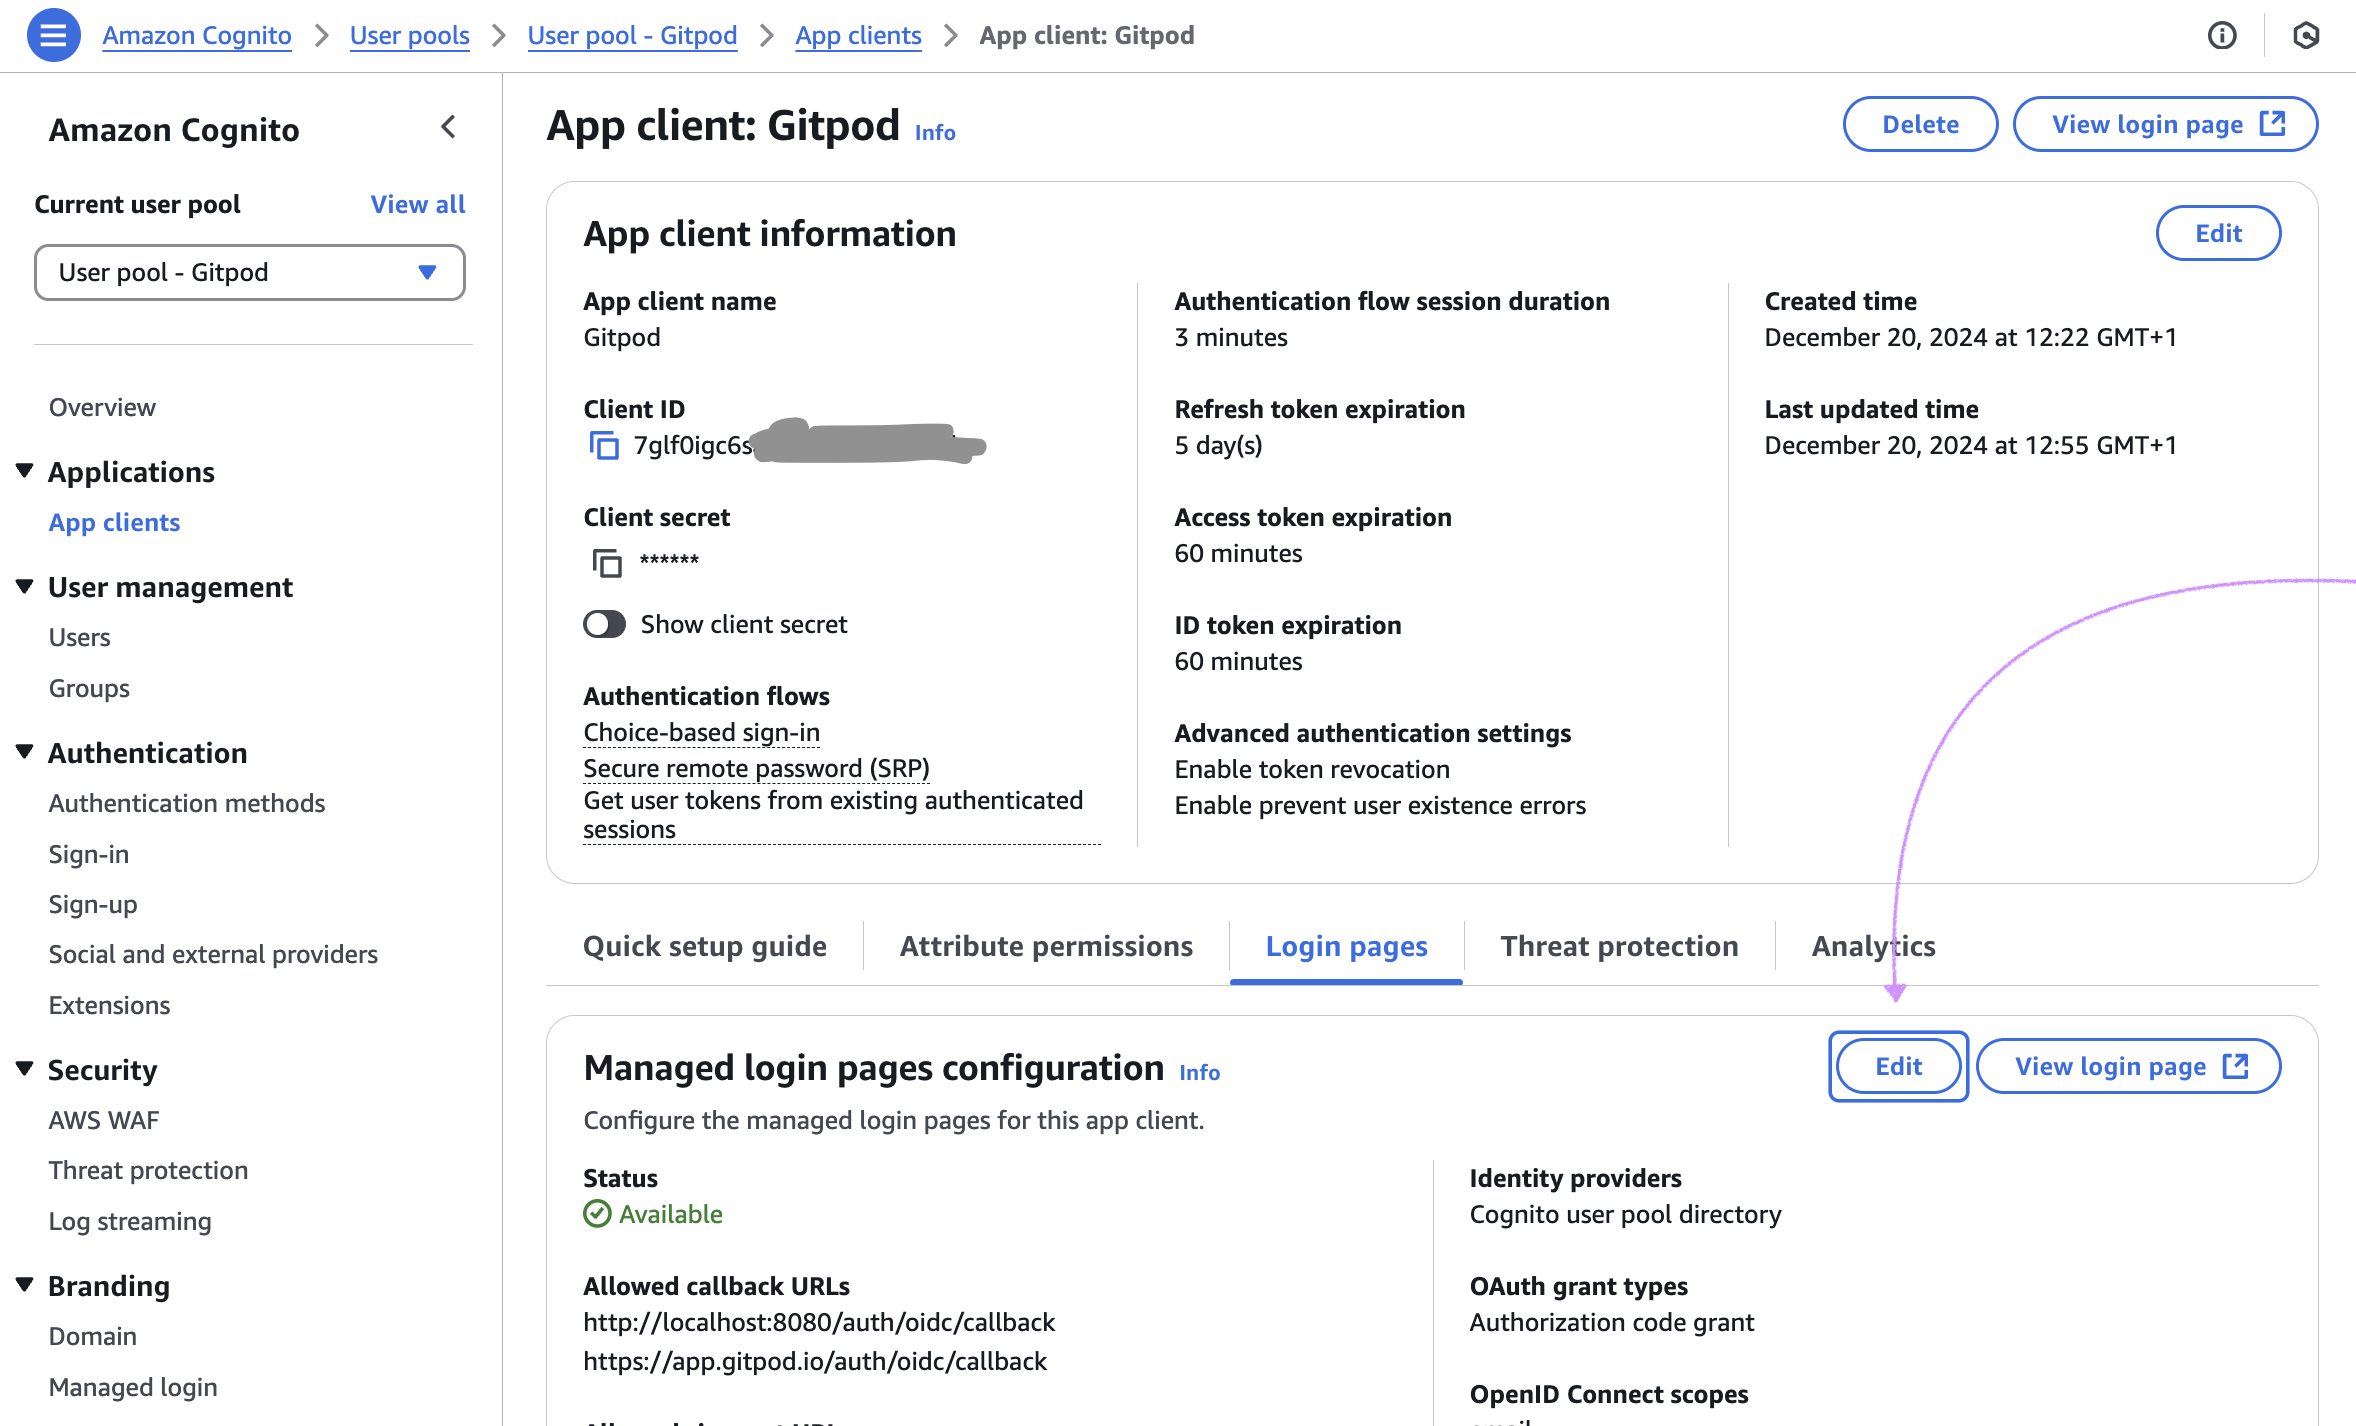 *Amazon Cognito - Edit Scopes*
* Ensure the `Profile` scope is selected here:
*Amazon Cognito - Edit Scopes*
* Ensure the `Profile` scope is selected here:
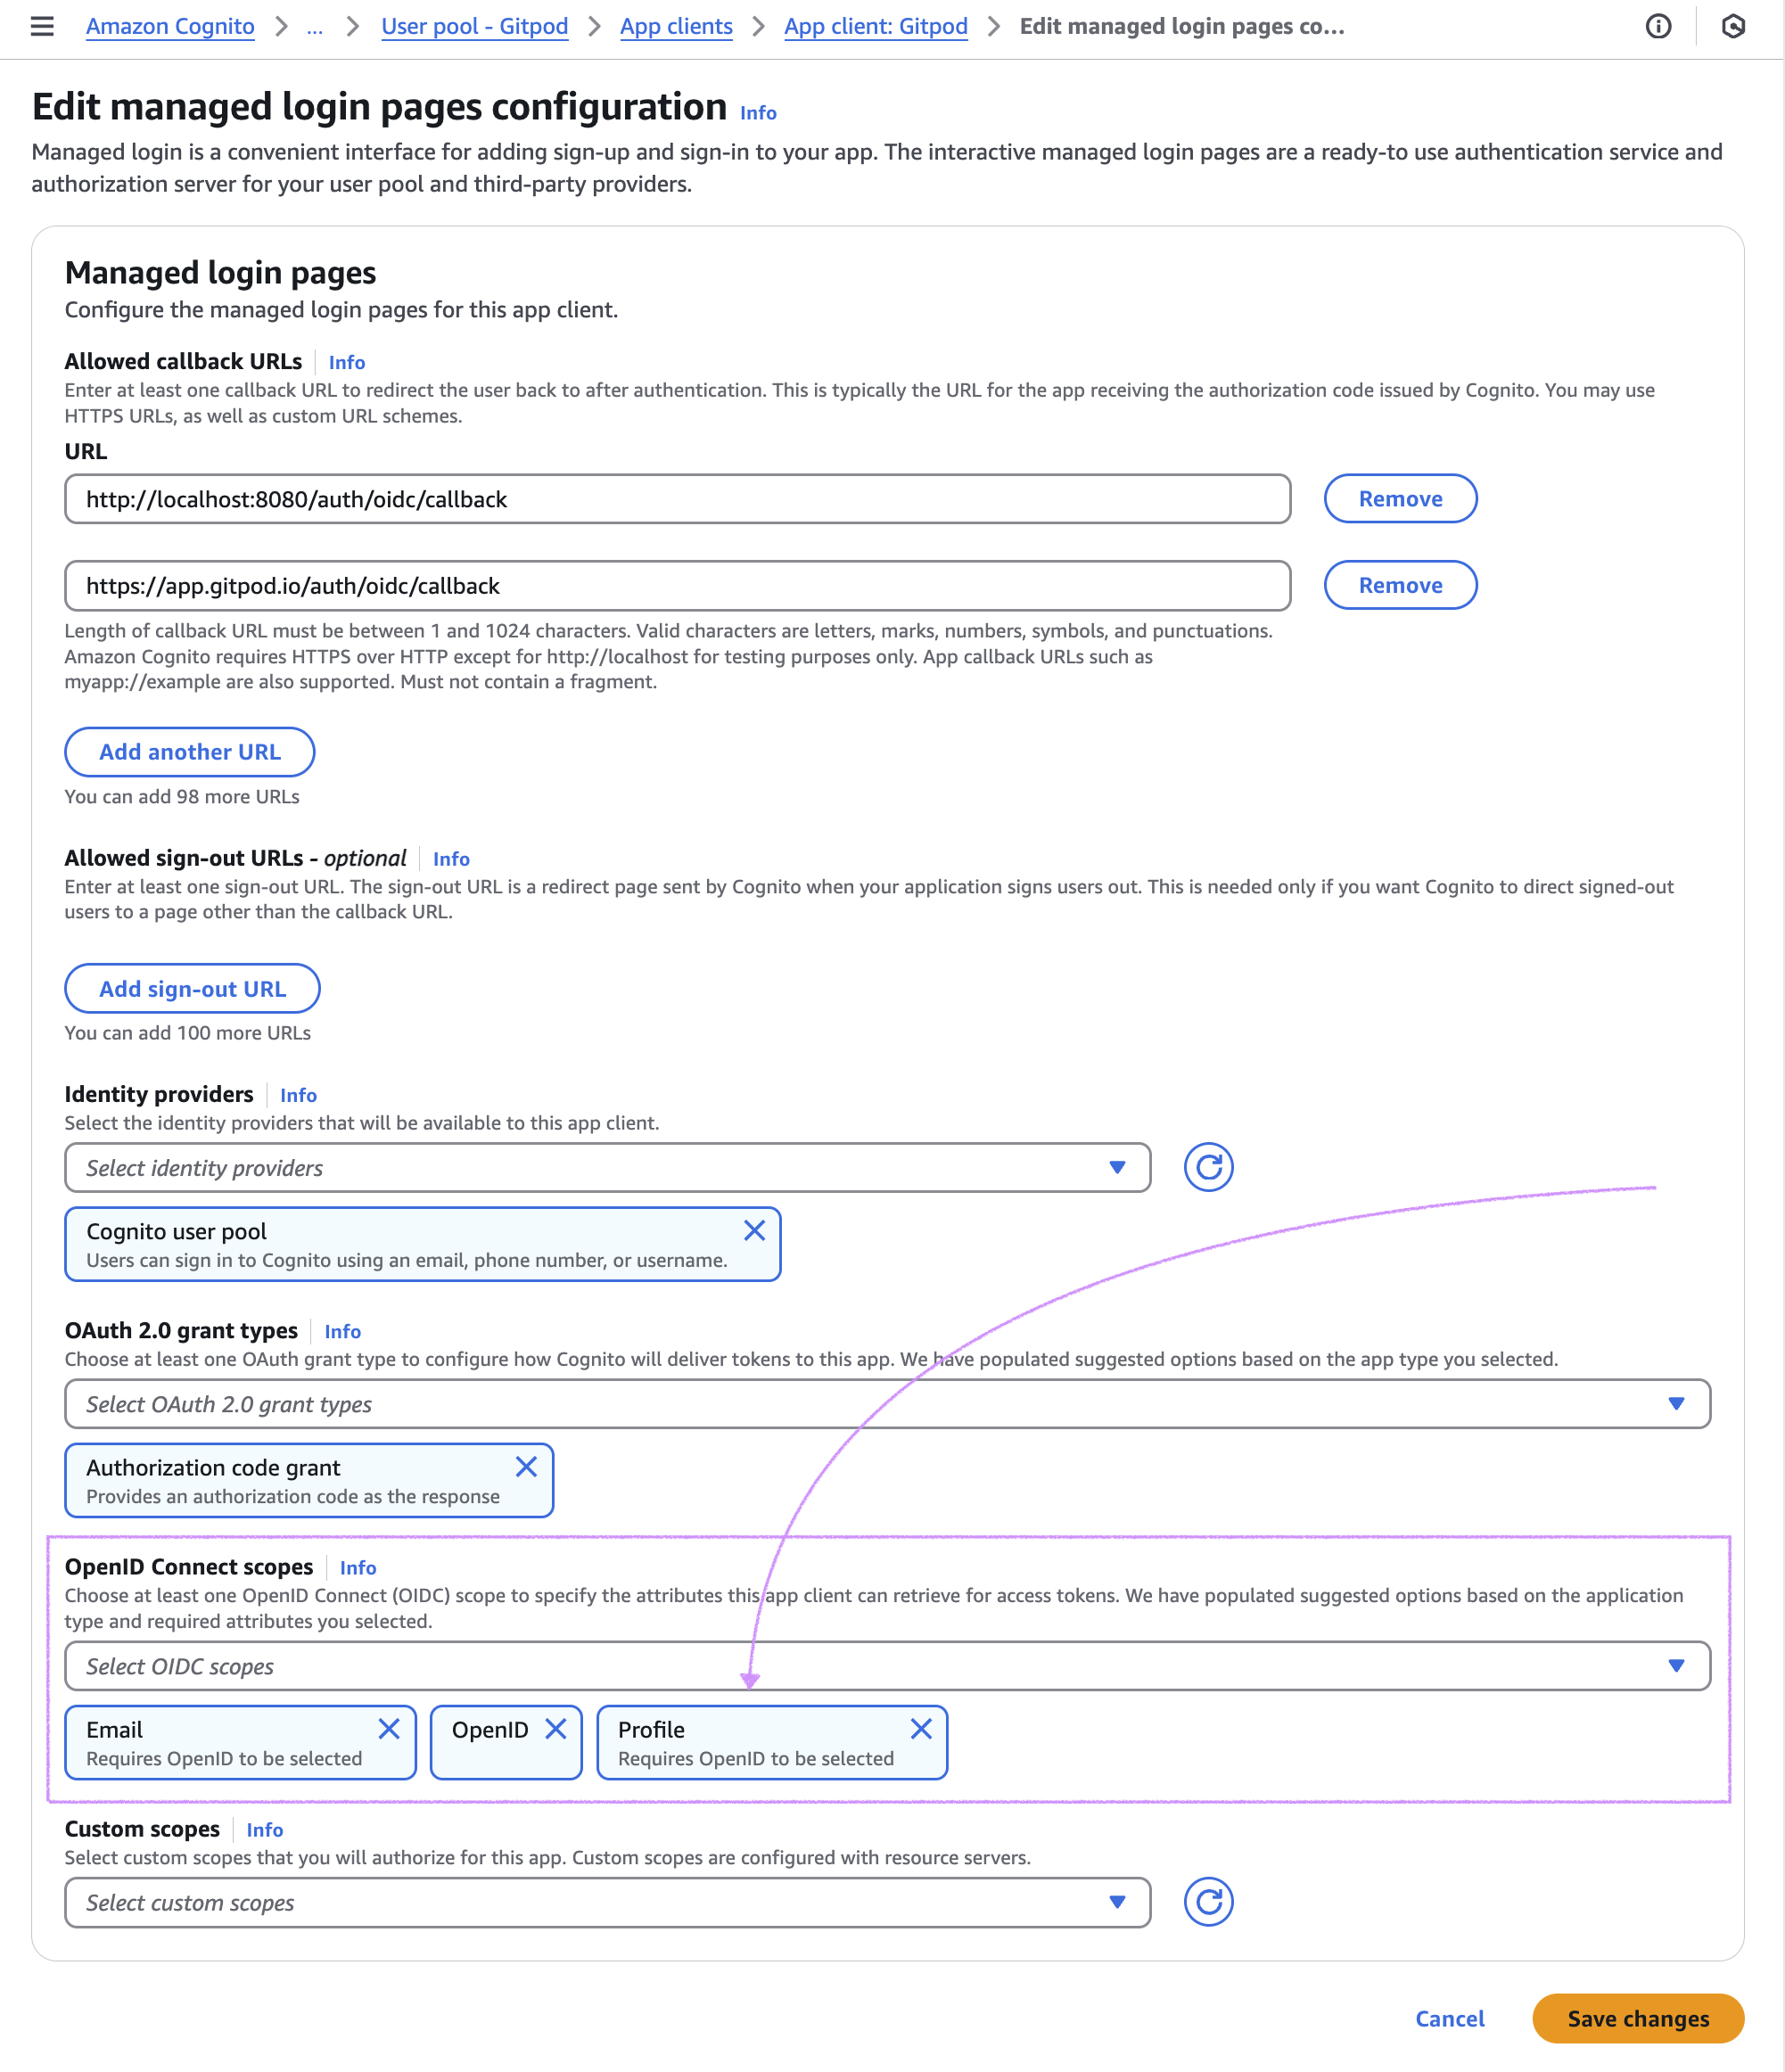 *Amazon Cognito - Scopes*
5. Adjust **Sign-up** settings to your needs
* Disable **Self-registration** if you want to limit access to your application.
* With Sign-up disabled, you may need to manage users under *User management* manually.
*Amazon Cognito - Scopes*
5. Adjust **Sign-up** settings to your needs
* Disable **Self-registration** if you want to limit access to your application.
* With Sign-up disabled, you may need to manage users under *User management* manually.
 *Amazon Cognito - Sign-up*
6. Continue with the SSO configuration in Ona: [Clicking *Save & Test*](/ona/sso/overview#step-by-step-guide-to-set-up-sso)
***
title: 'Amazon Cognito'
og:title: 'Single Sign-on with Amazon Cognito - Gitpod'
og:description: 'Learn how to set up Single Sign-on with Amazon Cognito for your team in Gitpod.'
-------------------------------------------------------------------------------------------------
You can set up Single Sign-on (SSO) with Amazon Cognito for your team.
This section helps you to create an OIDC application with Amazon Cognito. The *Client ID*, *Client Secret*, and *Issuer URL* of this OIDC application are required to setup SSO in Gitpod. See the [Step-by-step guide](/flex/sso#step-by-step-guide-to-set-up-sso) for the general instructions.
## Prerequisites
As prerequisites you will need the following:
* Access to set up a new [Amazon Cognito application](https://console.aws.amazon.com/cognito/home) in your AWS account.
## Create an OIDC application
1. Nagivate to [Amazon Cognito](https://console.aws.amazon.com/cognito/home) service page, then select `Set up your application`.
2. Configure the application by filling out the form:
* **Application type**: `Traditional web application`
* **Name**: `Gitpod`
* **Options for sign-in identifiers**:
* `Email`
* **Required attributes for sign-up**:
* `email`
* `name`
* **Return URL**: `https://app.gitpod.io/auth/oidc/callback`
Click the *Create* button
3. Obtain *Client ID*, *Client Secret* from the Overview page
*Amazon Cognito - Sign-up*
6. Continue with the SSO configuration in Ona: [Clicking *Save & Test*](/ona/sso/overview#step-by-step-guide-to-set-up-sso)
***
title: 'Amazon Cognito'
og:title: 'Single Sign-on with Amazon Cognito - Gitpod'
og:description: 'Learn how to set up Single Sign-on with Amazon Cognito for your team in Gitpod.'
-------------------------------------------------------------------------------------------------
You can set up Single Sign-on (SSO) with Amazon Cognito for your team.
This section helps you to create an OIDC application with Amazon Cognito. The *Client ID*, *Client Secret*, and *Issuer URL* of this OIDC application are required to setup SSO in Gitpod. See the [Step-by-step guide](/flex/sso#step-by-step-guide-to-set-up-sso) for the general instructions.
## Prerequisites
As prerequisites you will need the following:
* Access to set up a new [Amazon Cognito application](https://console.aws.amazon.com/cognito/home) in your AWS account.
## Create an OIDC application
1. Nagivate to [Amazon Cognito](https://console.aws.amazon.com/cognito/home) service page, then select `Set up your application`.
2. Configure the application by filling out the form:
* **Application type**: `Traditional web application`
* **Name**: `Gitpod`
* **Options for sign-in identifiers**:
* `Email`
* **Required attributes for sign-up**:
* `email`
* `name`
* **Return URL**: `https://app.gitpod.io/auth/oidc/callback`
Click the *Create* button
3. Obtain *Client ID*, *Client Secret* from the Overview pageUpon creation of the application, you will be redirected to then also created user pool. Learn more on user pools in Amazon Cognito [here](https://docs.aws.amazon.com/cognito/latest/developerguide/cognito-user-pools.html?icmpid=docs_cognito_console_help_panel). * Feel free to rename the user pool before proceeding! * Obtain **Issuer URL** * You'll find the **User pool ID** here * The pattern for the *Issuer URL* is:
`https://cognito-idp.
4. Configure OIDC ScopesThe default selection of OIDC scopes in Amazon Cognito doesn't meet the requirements for Gitpod. Please navigate to *App client > Login pages > Edit* to make the necessary changes.
* Ensure the `Profile` scope is selected here:
5. Adjust **Sign-up** settings to your needs
* Disable **Self-registration** if you want to limit access to your application.
* With the Sign-up disabled , you may need to manage users under *User management* manually.
6. Continue with the SSO configuration in Gitpod: [Clicking *Save & Test*](/flex/sso#3-save-and-test-the-configuration)
# Microsoft Entra ID
Source: https://ona.com/docs/ona/sso/entra
You can set up Single Sign-on (SSO) with Microsoft Entra ID for your team.
This section helps you to create an OIDC application with Microsoft Entra ID. The *Client ID*, *Client Secret*, and *Issuer URL* of this OIDC application are required to setup SSO in Ona. See the [Step-by-step guide](/ona/sso/overview#step-by-step-guide-to-set-up-sso) for the general instructions.
## Prerequisites
As prerequisites you will need the following:
* Access to [Microsoft Entra admin center](https://entra.microsoft.com/)
## Create an OIDC application
1. On the [Microsoft Entra admin center](https://entra.microsoft.com/), navigate to *Identity > Applications*
2. Select `New Registration`
 *New Registration*
3. Specify General Settings
* App name, e.g. `Ona`
* Platform: `Web`
* Redirect URI: `https://app.gitpod.io/auth/oidc/callback`
*New Registration*
3. Specify General Settings
* App name, e.g. `Ona`
* Platform: `Web`
* Redirect URI: `https://app.gitpod.io/auth/oidc/callback`
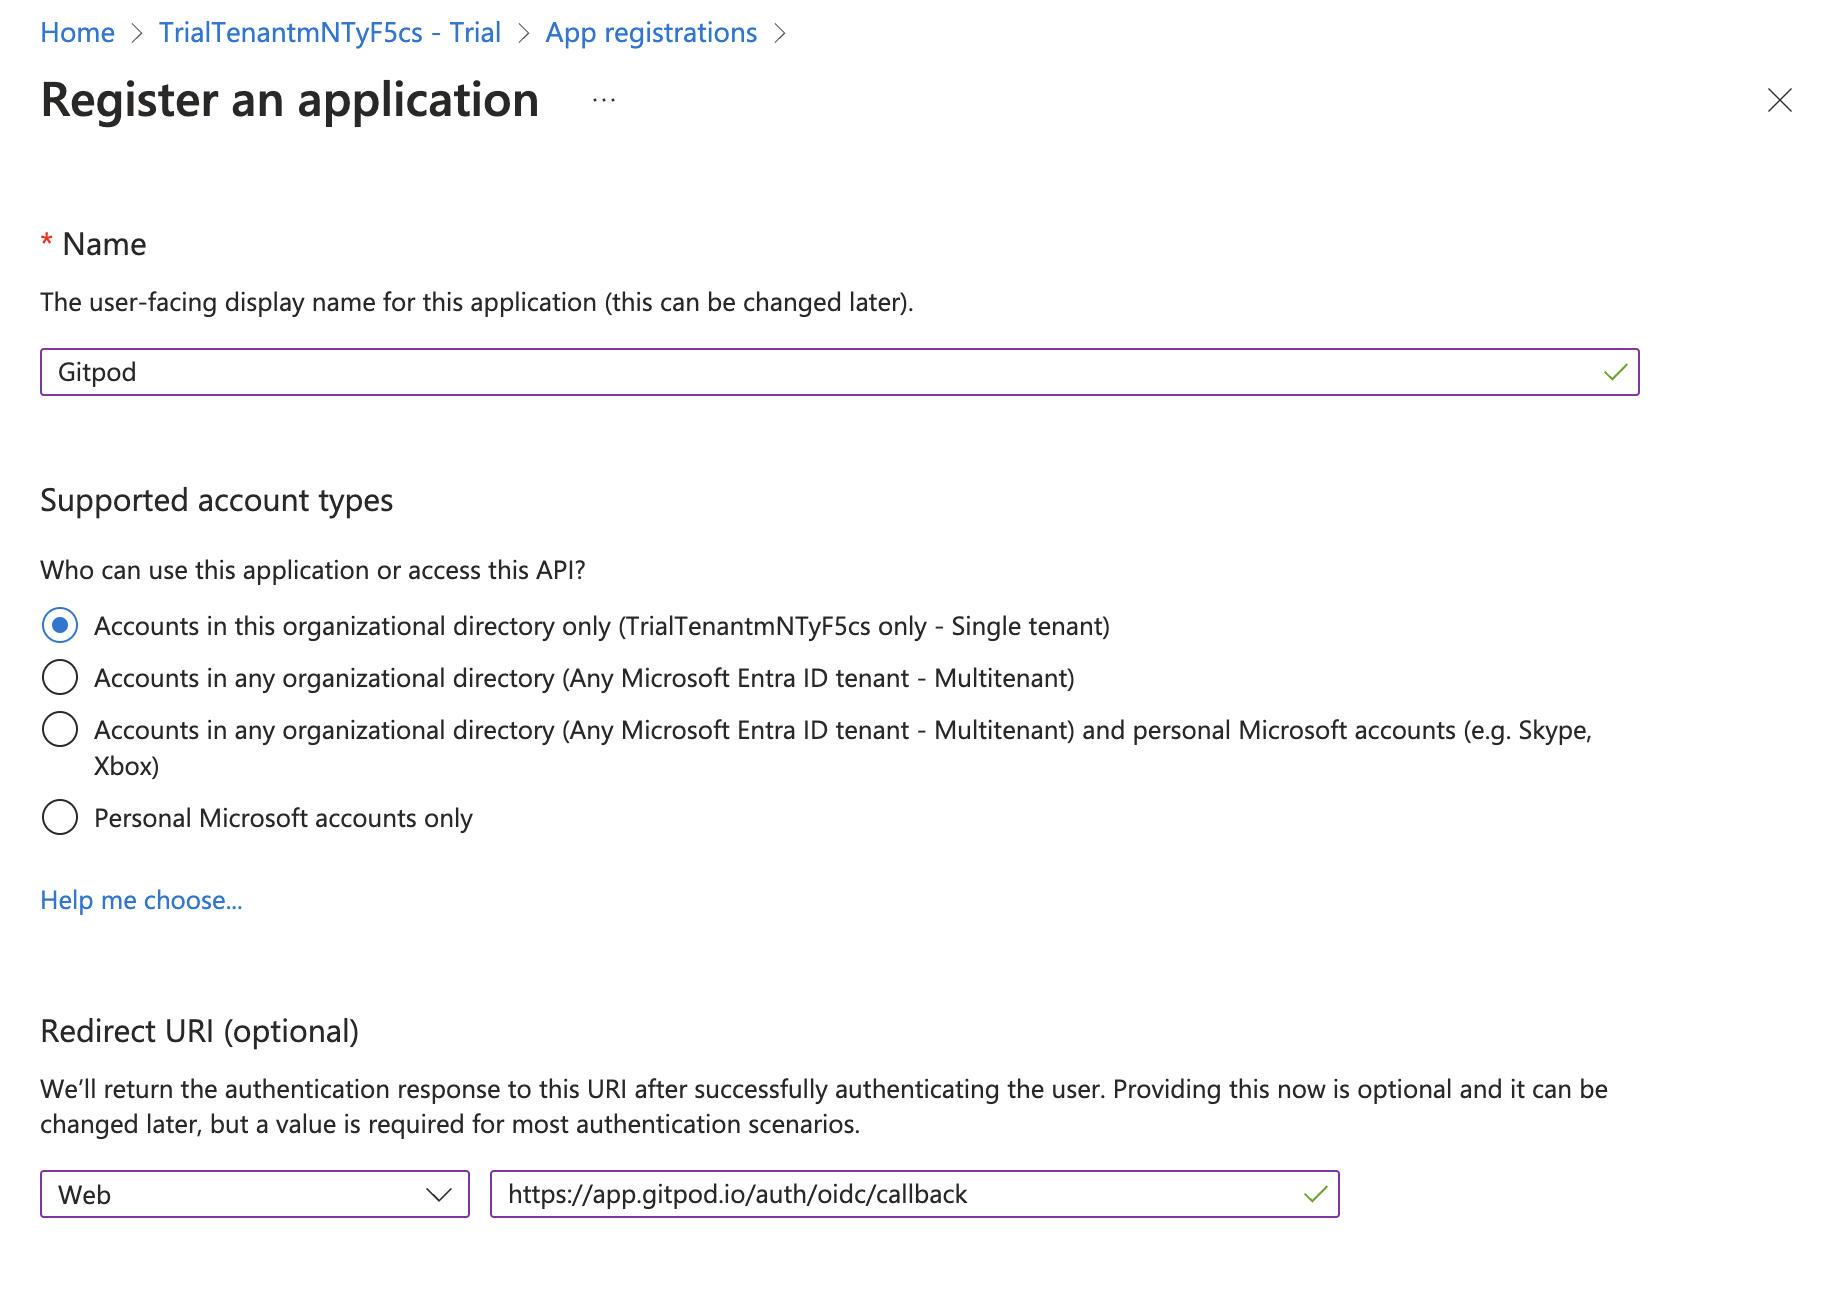 *Register Application*
4. Obtain *Client Secret* from the *Certificates & secrets* page
* Once the application is registered, navigate to the subpage *Certificates & secrets* to create and obtain a new client secret.
* Click the *New client secret* button
*Register Application*
4. Obtain *Client Secret* from the *Certificates & secrets* page
* Once the application is registered, navigate to the subpage *Certificates & secrets* to create and obtain a new client secret.
* Click the *New client secret* button
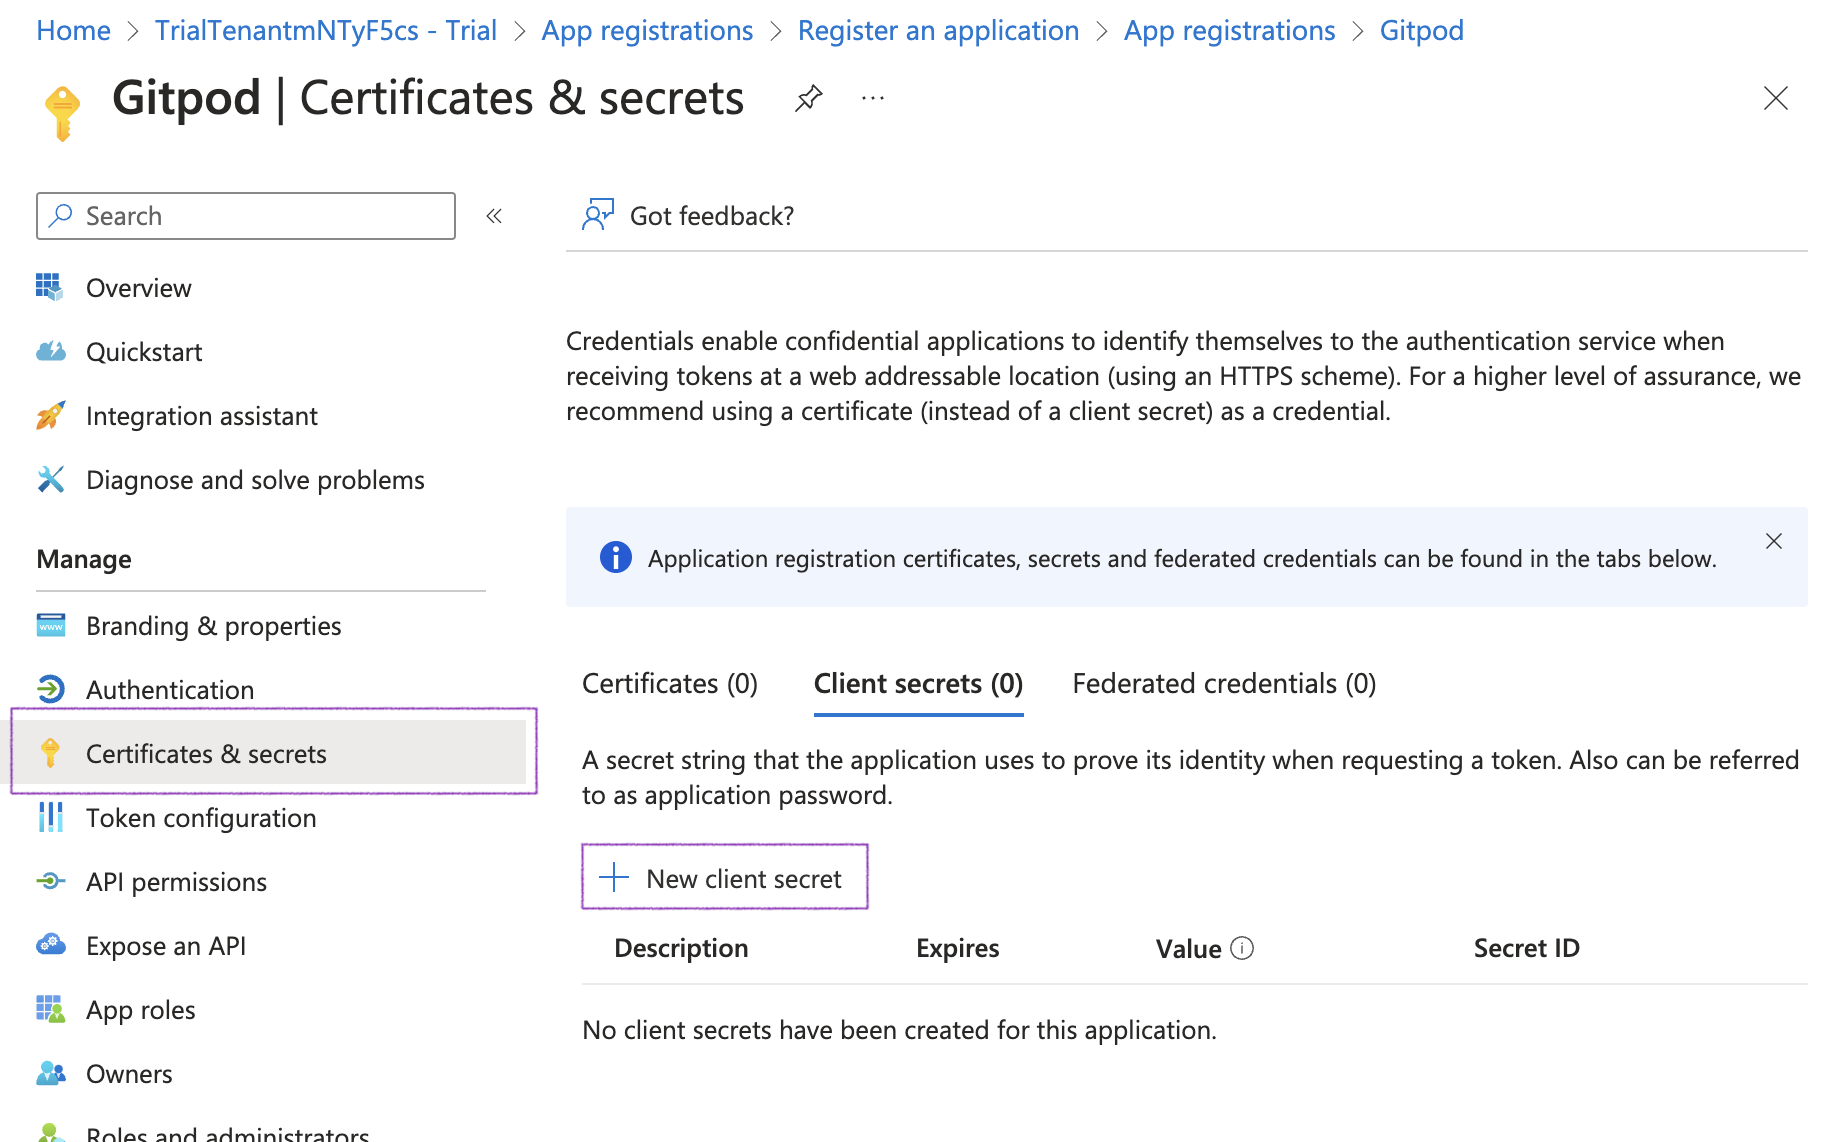 *New client secret*
* Adjust the expiry of the client secret
*New client secret*
* Adjust the expiry of the client secret
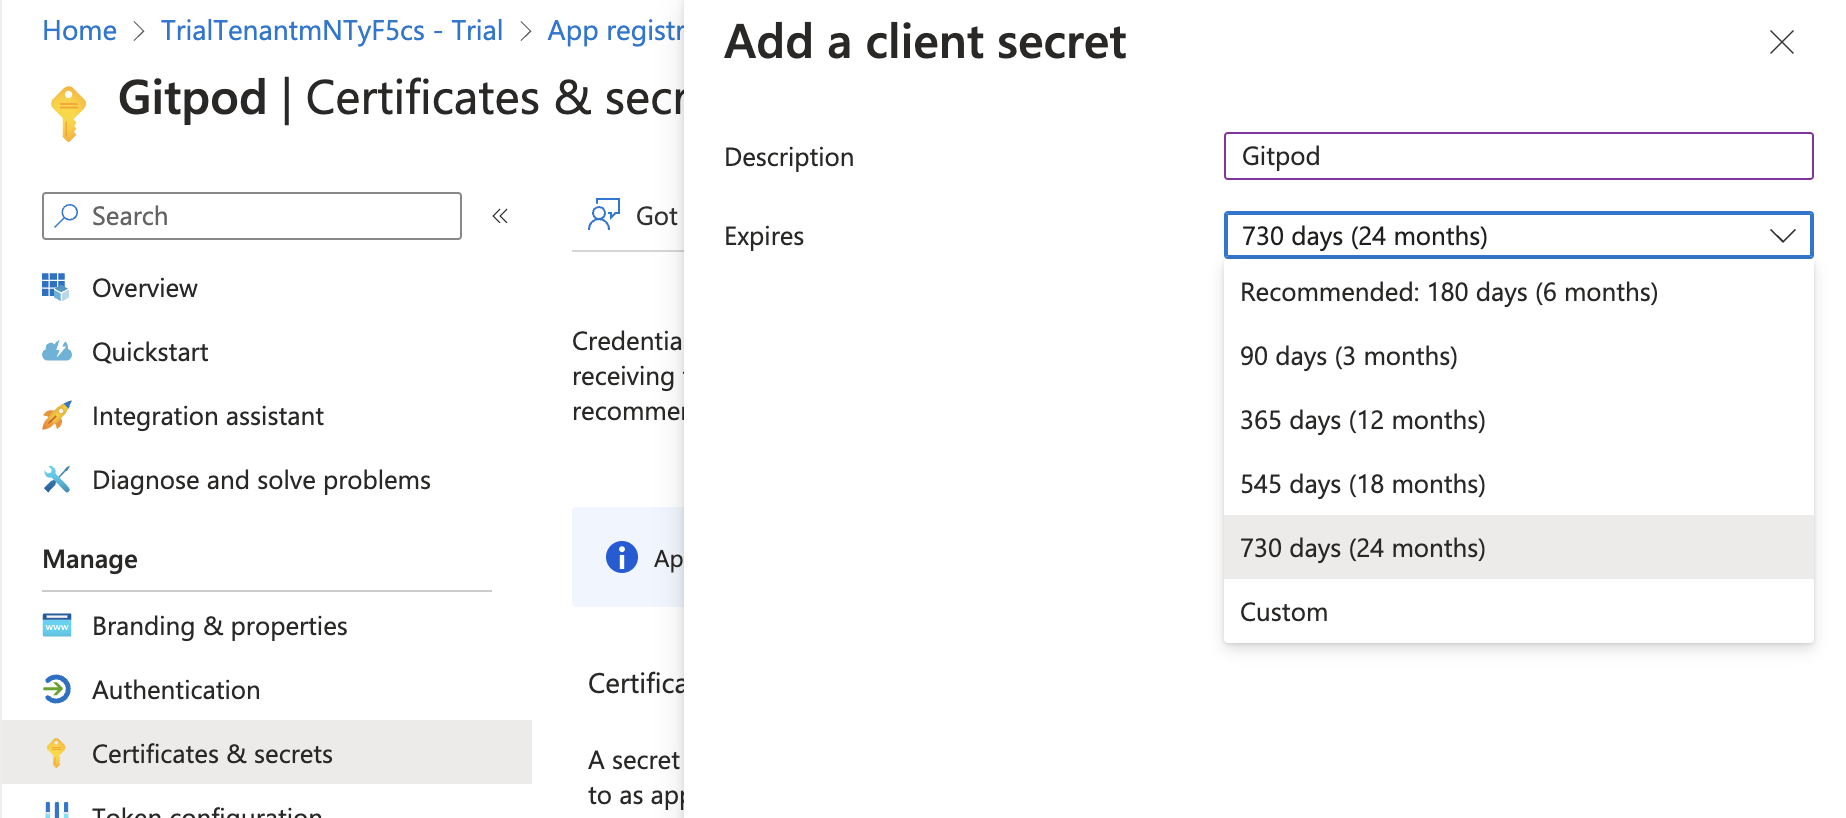 *Client secret expiry*
* Then copy the value of the client secret to be pasted in Ona's SSO setup
*Client secret expiry*
* Then copy the value of the client secret to be pasted in Ona's SSO setup
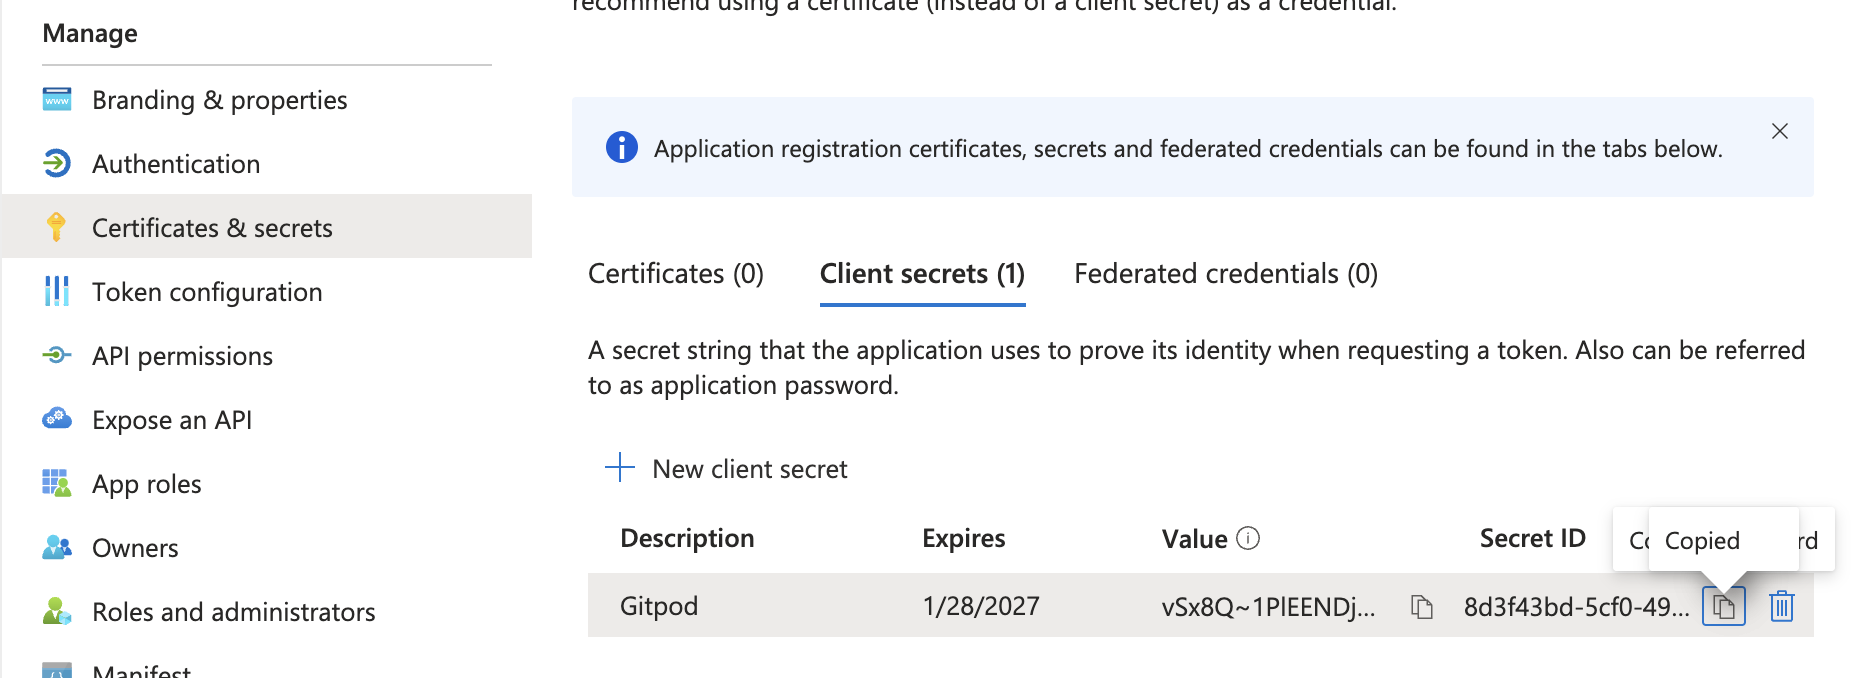 *Client secret copy*
5. Configure OIDC Scopes
* The default selection of OIDC scopes in Microsoft Entra ID doesn't meet the requirements for Ona. Please navigate to *API permissions > Add a permission* to make the necessary changes.
*Client secret copy*
5. Configure OIDC Scopes
* The default selection of OIDC scopes in Microsoft Entra ID doesn't meet the requirements for Ona. Please navigate to *API permissions > Add a permission* to make the necessary changes.
 *Add a permission*
* Select *Delegated permissions* and *OpenId*, then ensure to enable the following scopes:
* `email`
* `openid`
* `profile`
*Add a permission*
* Select *Delegated permissions* and *OpenId*, then ensure to enable the following scopes:
* `email`
* `openid`
* `profile`
 *OpenID Scopes*
* Although the `email` claim is part of the standard OIDC specification, depending on the setup, Microsoft Entra ID does not include it by default in ID tokens. Under *Manage*, select *Token configuration* and fix this:
* Click *Add optional claim*
* Add the `email` scope
*OpenID Scopes*
* Although the `email` claim is part of the standard OIDC specification, depending on the setup, Microsoft Entra ID does not include it by default in ID tokens. Under *Manage*, select *Token configuration* and fix this:
* Click *Add optional claim*
* Add the `email` scope
 *Add email scope*
6. Obtain *Issuer URL* from *Endpoints* tab
* Navigate to the *Overview* page and select *Endpoints*
*Add email scope*
6. Obtain *Issuer URL* from *Endpoints* tab
* Navigate to the *Overview* page and select *Endpoints*
 *Endpoints tab*
* Copy the *Authority URL* to be used as *Issuer URL* in Ona's SSO setup
*Endpoints tab*
* Copy the *Authority URL* to be used as *Issuer URL* in Ona's SSO setup
 *Endpoints issuer*
> **Note**: Validate the **Issuer URL** by checking the [OIDC Discovery](https://learn.microsoft.com/en-us/entra/identity-platform/v2-protocols-oidc#find-your-apps-openid-configuration-document-uri) location. In some configurations, the **Issuer URL** needs to be adjusted.
* If the *Authority URL* reads like `https://login.microsoftonline.com/{tenant}/v2.0`, the OIDC Discovery location is `https://login.microsoftonline.com/{tenant}/v2.0/.well-known/openid-configuration`. Open this URL in your browser and check the `issuer` field.
* Check the `issuer` field in the OIDC Discovery output and ensure this matches the *Authority URL* (*Issuer URL*).
If not, e.g. if it reads like `https://sts.windows.net/{tenant}`, please try again with`{authority_url}/v2.0/.well-known/openid-configuration` and use `{authority_url}/v2.0` as **Issuer URL** in Ona's SSO setup.
7. Obtain the *Client ID* from the *Overview* page
* Navigate to the *Overview* page and copy the *Application (client) ID* value to be used as *Client ID* in Ona's SSO setup
*Endpoints issuer*
> **Note**: Validate the **Issuer URL** by checking the [OIDC Discovery](https://learn.microsoft.com/en-us/entra/identity-platform/v2-protocols-oidc#find-your-apps-openid-configuration-document-uri) location. In some configurations, the **Issuer URL** needs to be adjusted.
* If the *Authority URL* reads like `https://login.microsoftonline.com/{tenant}/v2.0`, the OIDC Discovery location is `https://login.microsoftonline.com/{tenant}/v2.0/.well-known/openid-configuration`. Open this URL in your browser and check the `issuer` field.
* Check the `issuer` field in the OIDC Discovery output and ensure this matches the *Authority URL* (*Issuer URL*).
If not, e.g. if it reads like `https://sts.windows.net/{tenant}`, please try again with`{authority_url}/v2.0/.well-known/openid-configuration` and use `{authority_url}/v2.0` as **Issuer URL** in Ona's SSO setup.
7. Obtain the *Client ID* from the *Overview* page
* Navigate to the *Overview* page and copy the *Application (client) ID* value to be used as *Client ID* in Ona's SSO setup
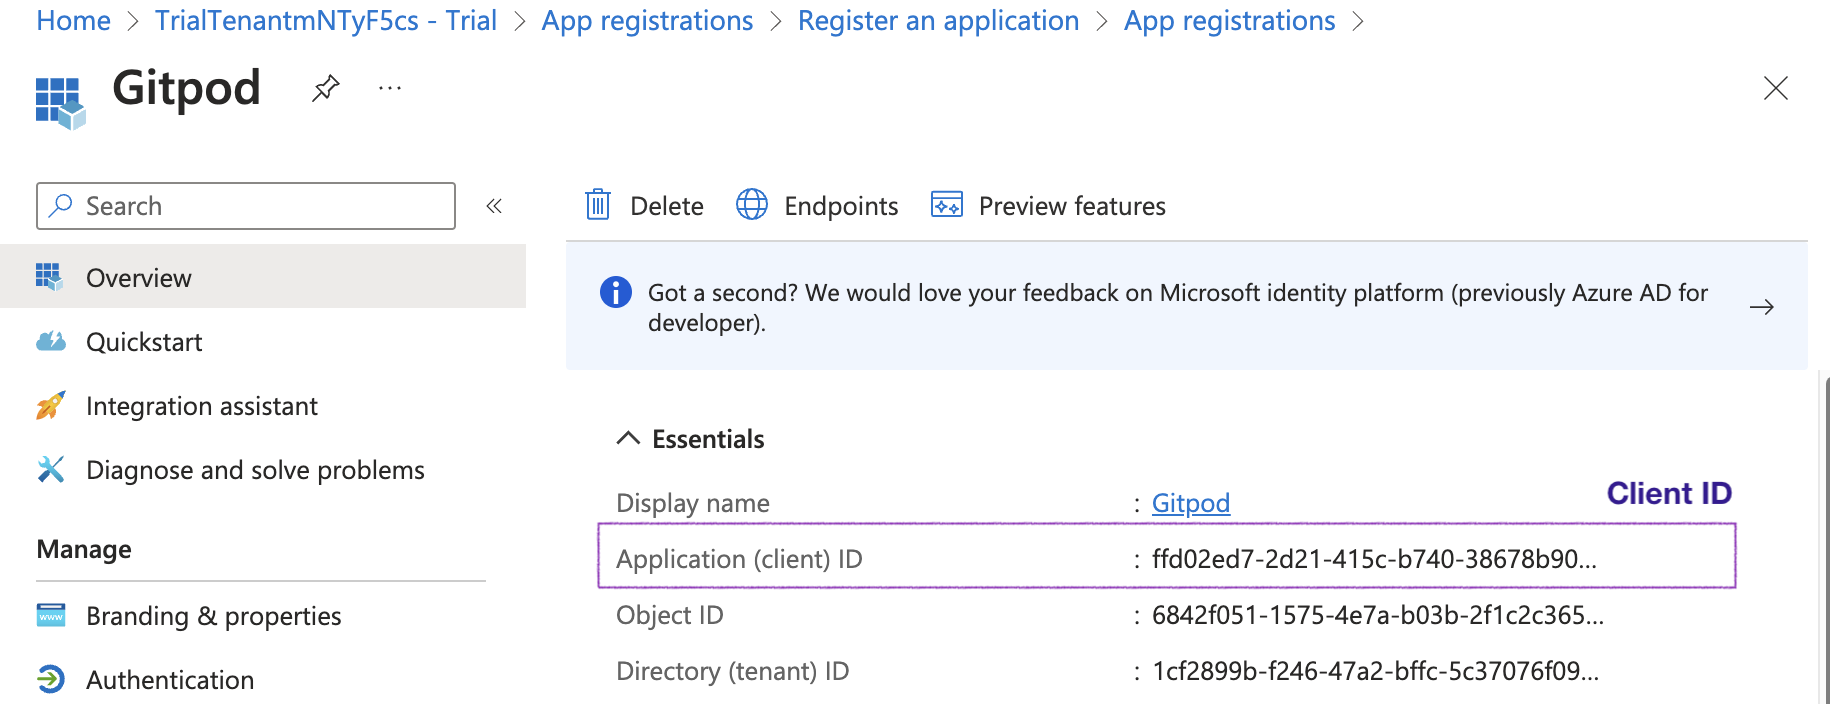 *Client ID*
8. Continue with the SSO configuration in Ona: [Clicking *Save & Test*](/ona/sso/overview#step-by-step-guide-to-set-up-sso)
# GitLab
Source: https://ona.com/docs/ona/sso/gitlab
You can set up Single Sign-on (SSO) with GitLab SaaS or a self-hosted GitLab for your team.
This section helps you to create an OIDC application with GitLab. The *Client ID*, *Client Secret*, and *Issuer URL* of this OIDC application are required to setup SSO in Ona. See the [Step-by-step guide](/ona/sso/overview#step-by-step-guide-to-set-up-sso) for the general instructions.
## Prerequisites
As prerequisites you will need the following:
* If you are setting up SSO with a self-hosted GitLab, make sure you have Admin permissions on that GitLab installation, or work together with the administrator.
* If you are setting up SSO with GitLab SaaS (gitlab.com), it is advised to create the OIDC application in a group, so please make sure you have Group Admin permissions on that group.
## Create an OIDC application
The OIDC application allows you to integrate with Ona.
1. Navigate to *Groups > My Awesome Group > Settings > Applications* (for SaaS) or *Admin Area > Application* (for self-hosted).
2. Click the *Add new application* button.
*Client ID*
8. Continue with the SSO configuration in Ona: [Clicking *Save & Test*](/ona/sso/overview#step-by-step-guide-to-set-up-sso)
# GitLab
Source: https://ona.com/docs/ona/sso/gitlab
You can set up Single Sign-on (SSO) with GitLab SaaS or a self-hosted GitLab for your team.
This section helps you to create an OIDC application with GitLab. The *Client ID*, *Client Secret*, and *Issuer URL* of this OIDC application are required to setup SSO in Ona. See the [Step-by-step guide](/ona/sso/overview#step-by-step-guide-to-set-up-sso) for the general instructions.
## Prerequisites
As prerequisites you will need the following:
* If you are setting up SSO with a self-hosted GitLab, make sure you have Admin permissions on that GitLab installation, or work together with the administrator.
* If you are setting up SSO with GitLab SaaS (gitlab.com), it is advised to create the OIDC application in a group, so please make sure you have Group Admin permissions on that group.
## Create an OIDC application
The OIDC application allows you to integrate with Ona.
1. Navigate to *Groups > My Awesome Group > Settings > Applications* (for SaaS) or *Admin Area > Application* (for self-hosted).
2. Click the *Add new application* button.
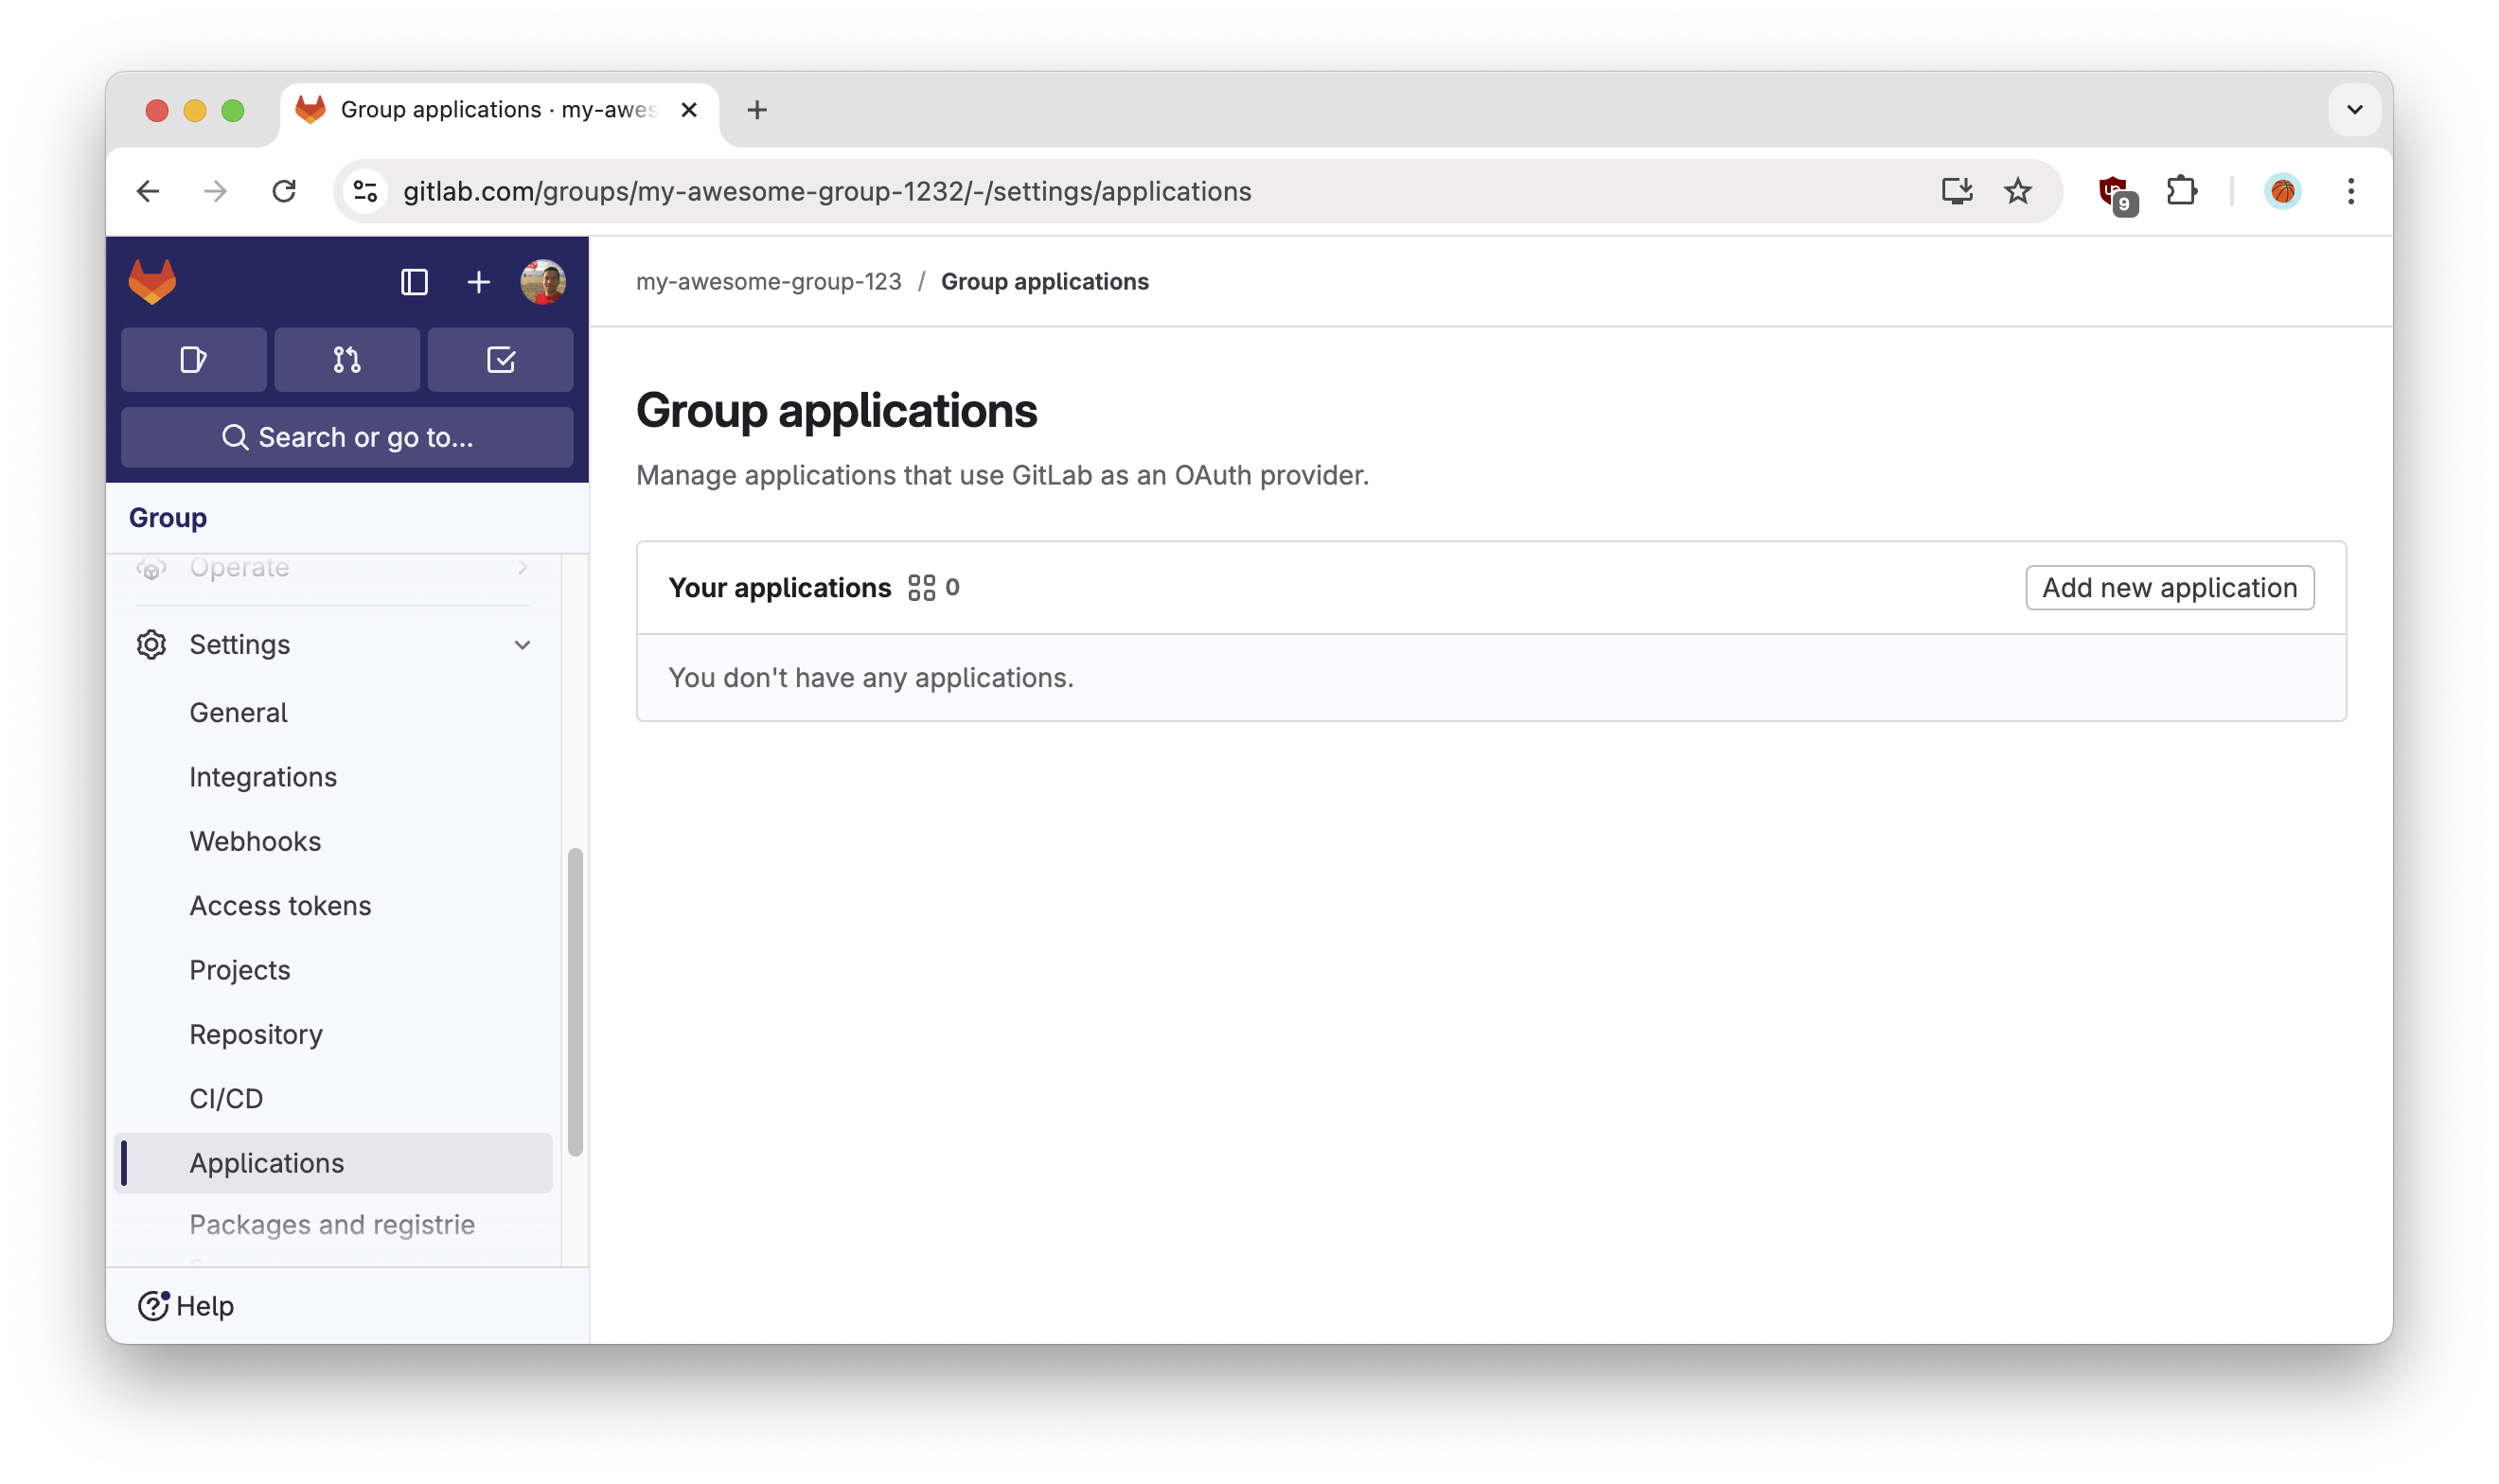 *GitLab - Add new application*
3. Configure the OIDC application by filling out the form:
* **Name**: Ona
* **Redirect URI**: `https://app.gitpod.io/auth/oidc/callback`
* **Confidential**: `Yes`
* **Scopes**:
* `read_user`
* `openid`
* `profile`
* `email`
Then click the `Save Application` button.
*GitLab - Add new application*
3. Configure the OIDC application by filling out the form:
* **Name**: Ona
* **Redirect URI**: `https://app.gitpod.io/auth/oidc/callback`
* **Confidential**: `Yes`
* **Scopes**:
* `read_user`
* `openid`
* `profile`
* `email`
Then click the `Save Application` button.
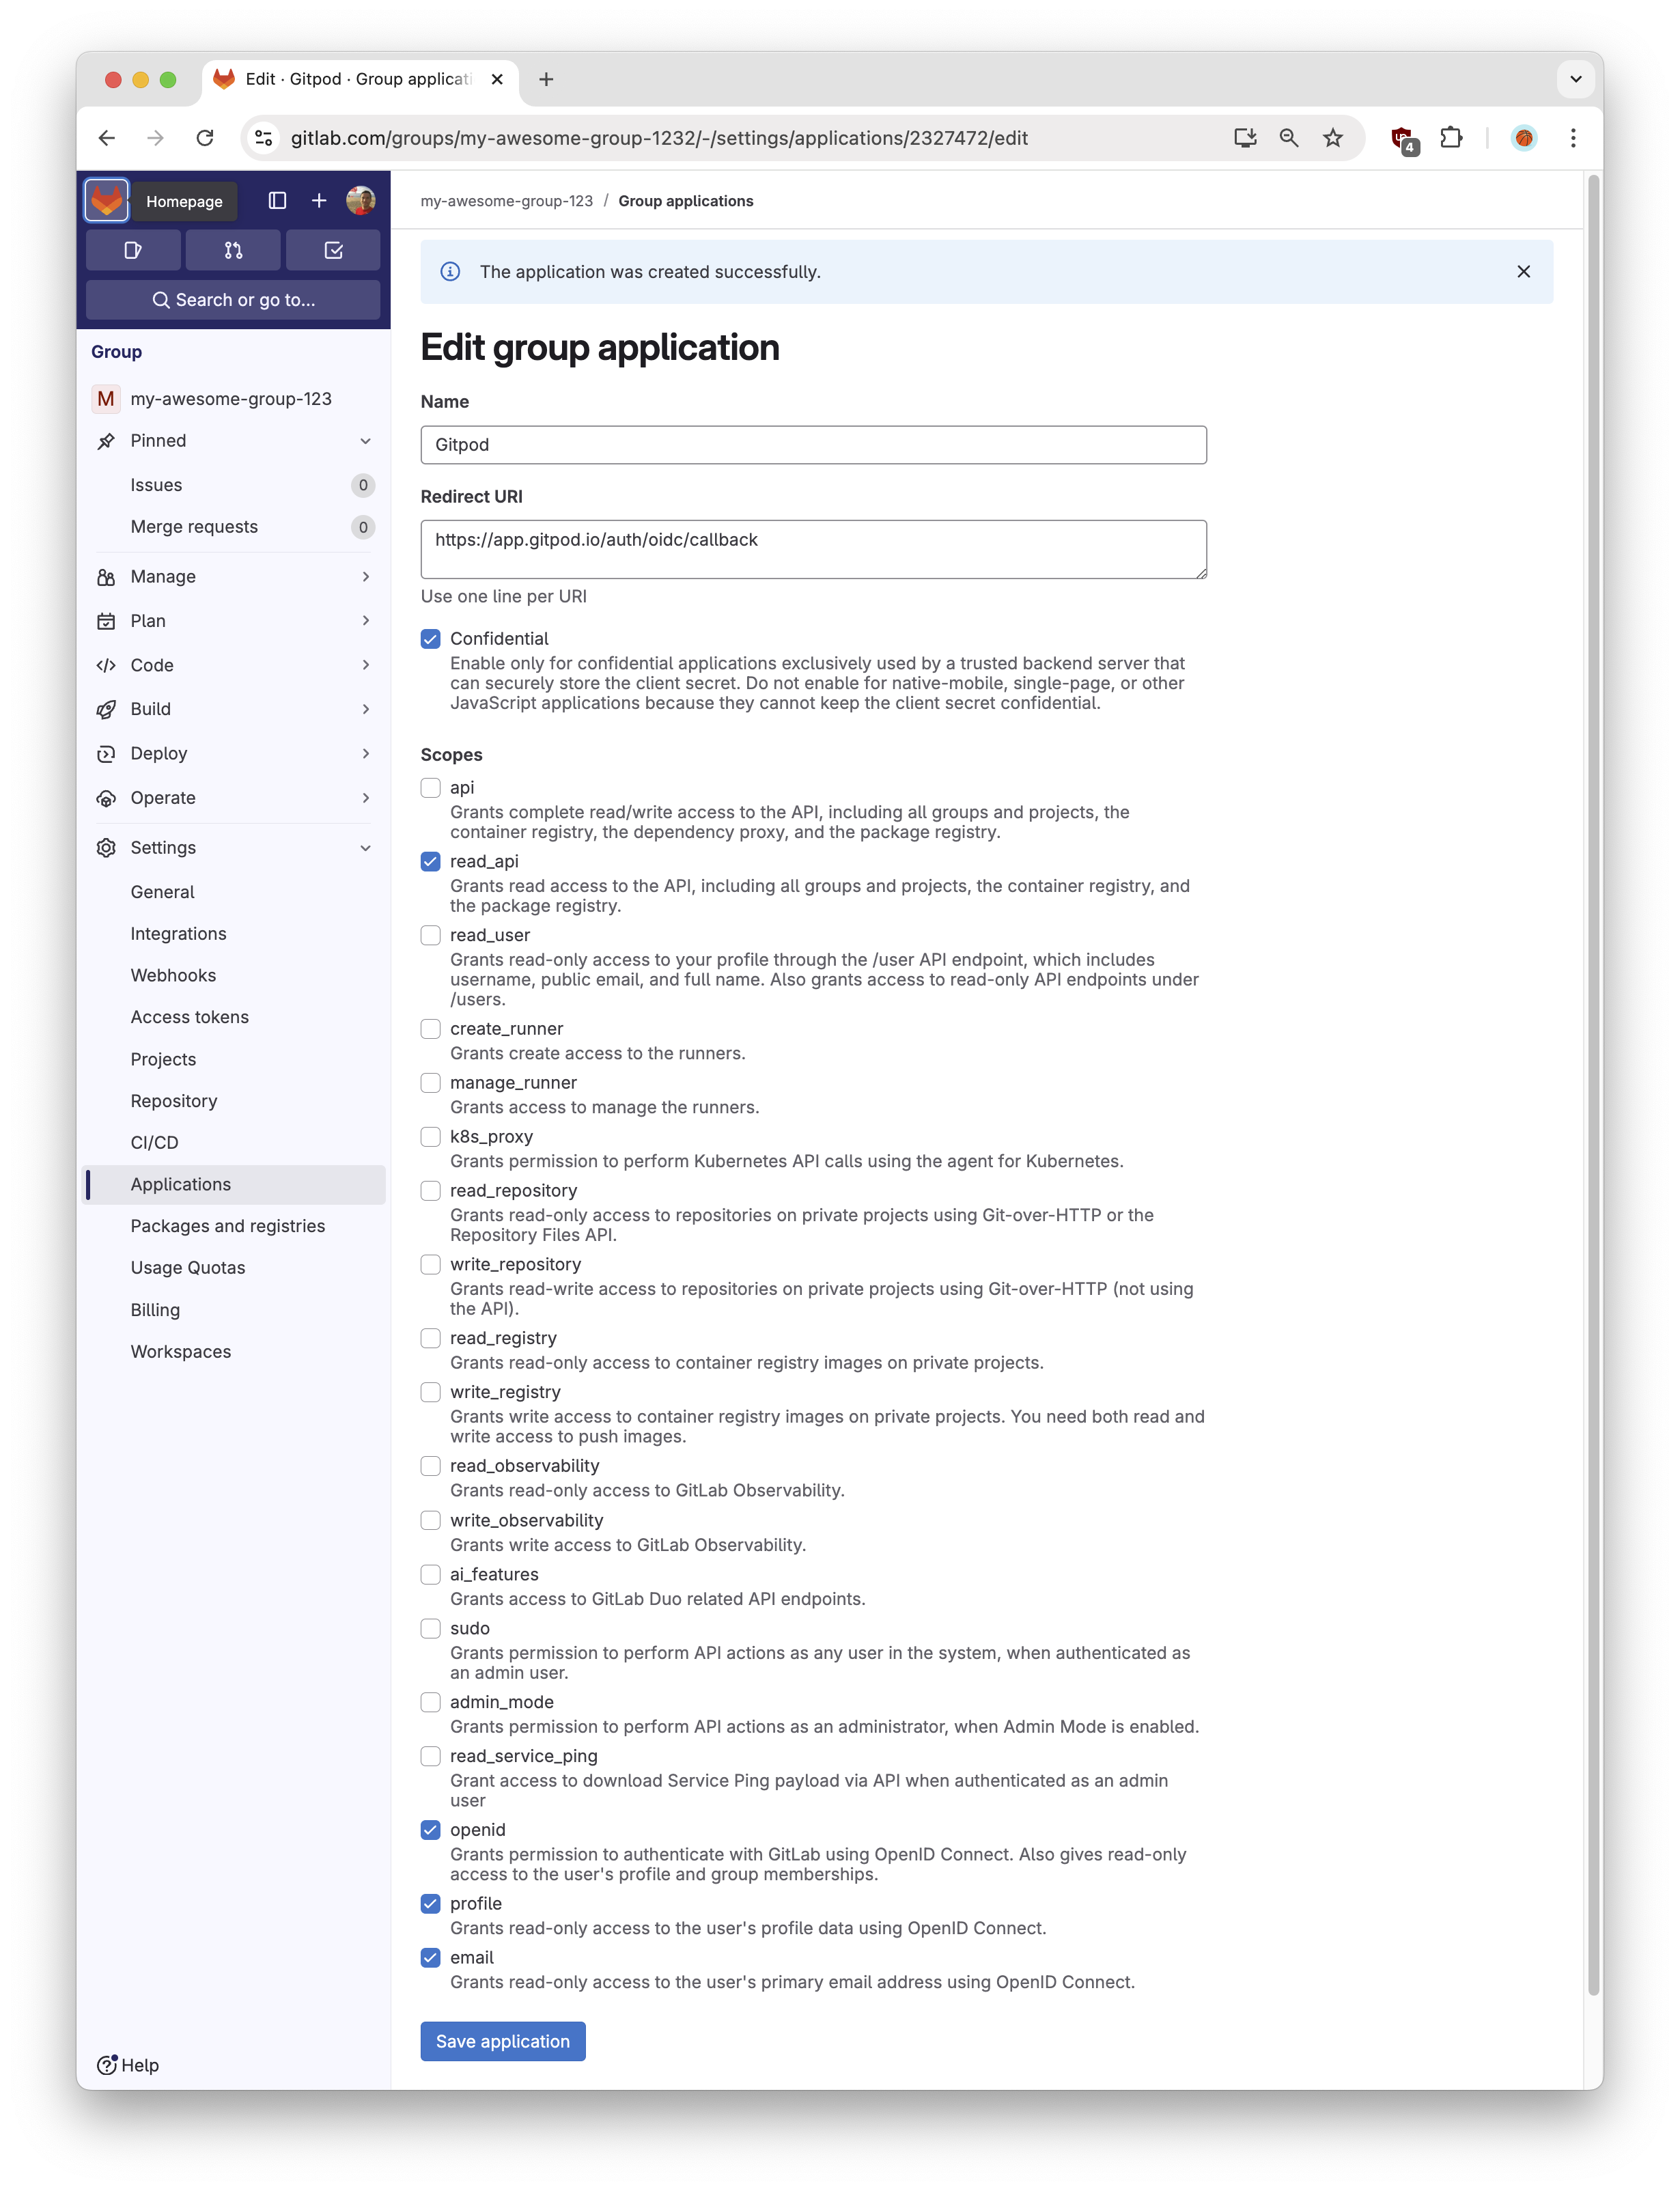 *GitLab - Application scopes*
4. Obtain the *Client ID* & *Client Secret* from the following confirmation screen, which you'll need for the Ona SSO configuration in the following step. This is how to interpret the information:
* **Application ID**: *Client ID*
* **Secret**: *Client Secret*
*GitLab - Application scopes*
4. Obtain the *Client ID* & *Client Secret* from the following confirmation screen, which you'll need for the Ona SSO configuration in the following step. This is how to interpret the information:
* **Application ID**: *Client ID*
* **Secret**: *Client Secret*
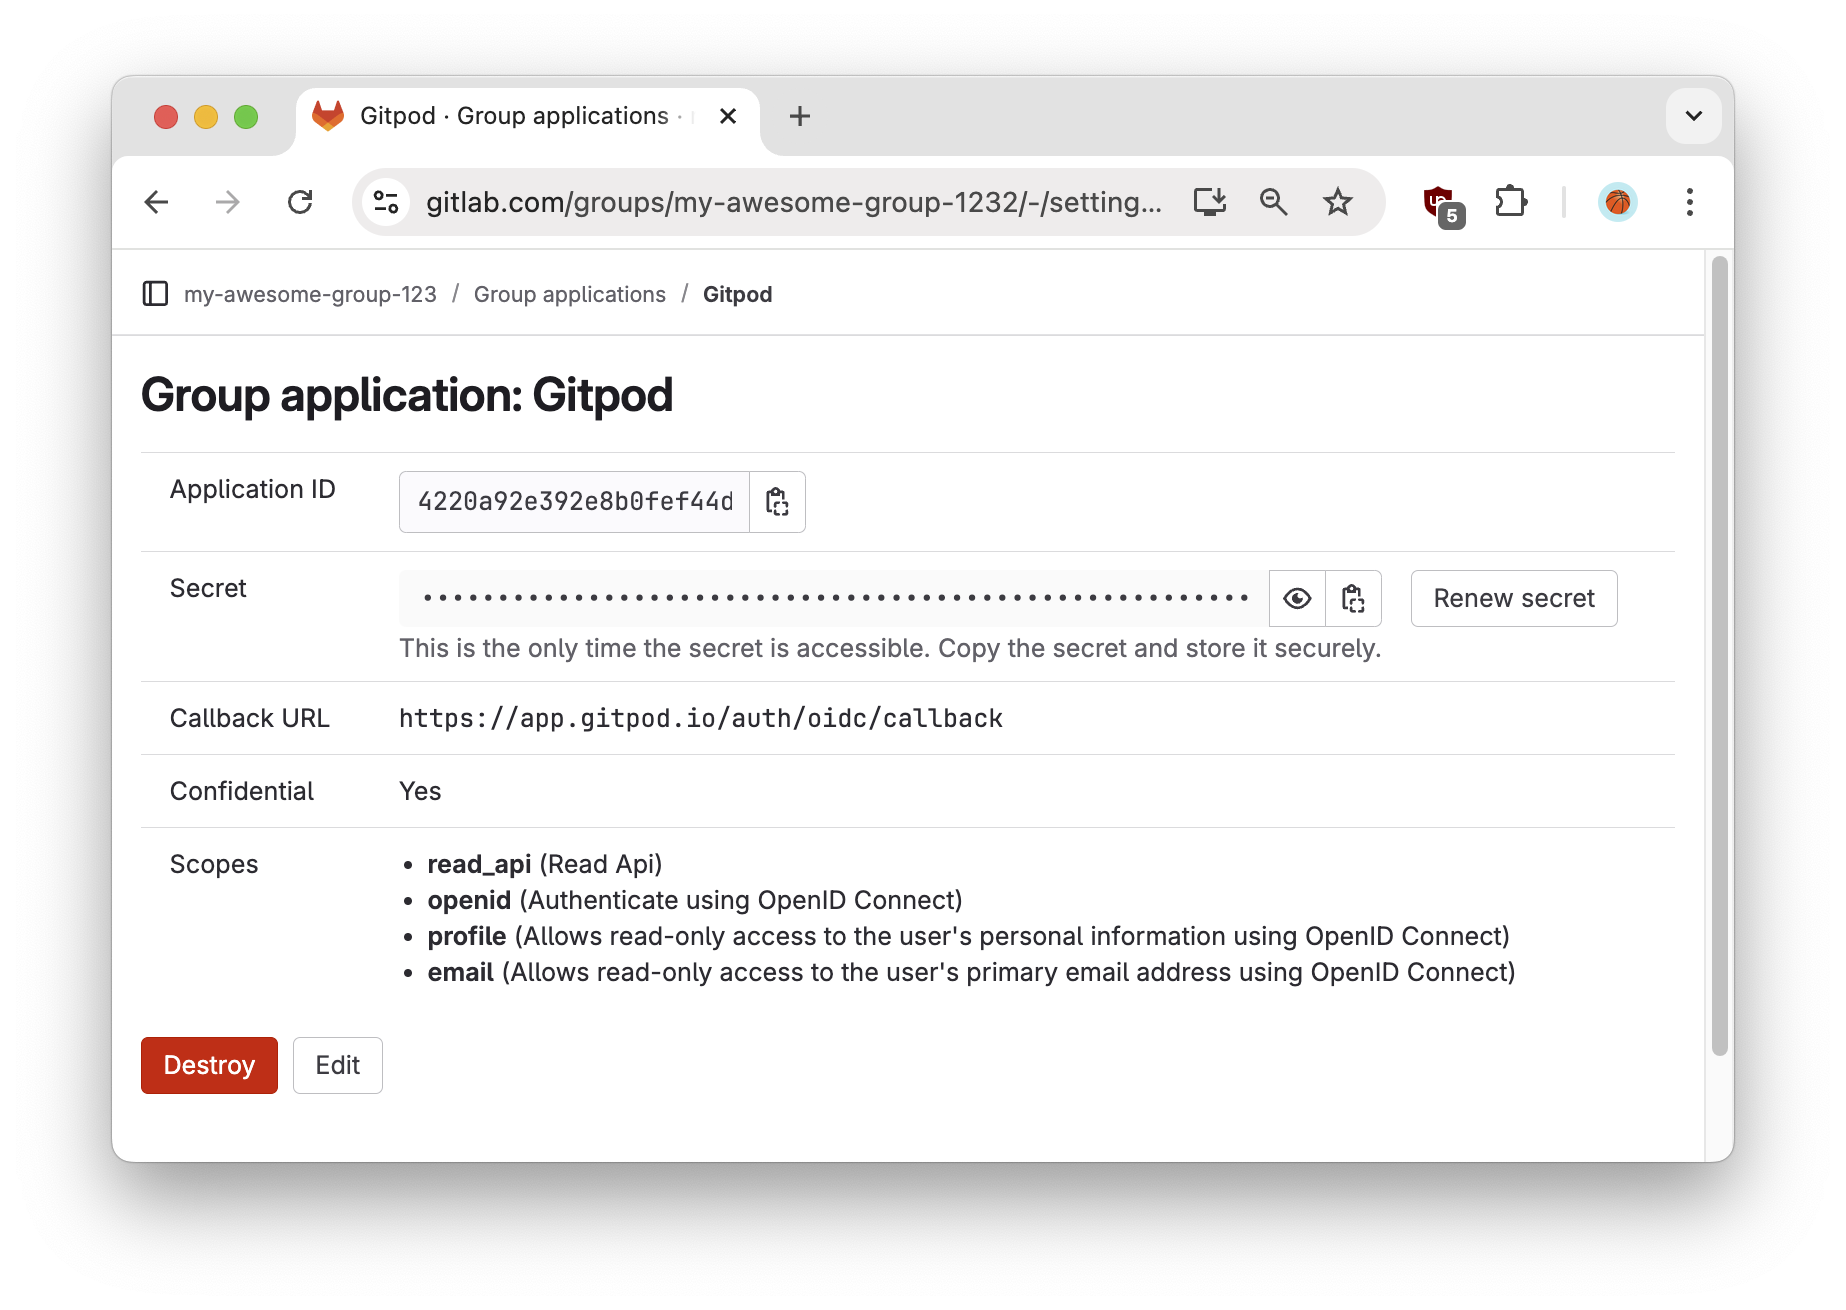 *GitLab - Application secret*
5. Which *Issuer URL* to use?
* For self-hosted GitLab: `https://your-gitlab-installation.org`
* For GitLab Saas: `https://gitlab.com`
6. Continue with the SSO configuration in Ona: [Clicking *Save & Test*](/ona/sso/overview#step-by-step-guide-to-set-up-sso)
# Google
Source: https://ona.com/docs/ona/sso/google
You can set up Single Sign-on (SSO) with Google for your team.
This section helps you to create an OIDC application with Google. The *Client ID*, *Client Secret*, and *Issuer URL* of this OIDC application are required to setup SSO in Ona. See the [Step-by-step guide](/ona/sso/overview#step-by-step-guide-to-set-up-sso) for the general instructions.
## Prerequisites
As prerequisites you will need the following:
* Access to setup a new [API Credentials](https://console.cloud.google.com/apis/credentials) in your GCP Account
## Create an OAuth/OIDC application
The OAuth/OIDC application allows you to integrate with Ona.
1. Navigate to your *Google Cloud Console > API Credentials*
2. Select *Create Credentials*, and choose *OAuth Client ID*
*GitLab - Application secret*
5. Which *Issuer URL* to use?
* For self-hosted GitLab: `https://your-gitlab-installation.org`
* For GitLab Saas: `https://gitlab.com`
6. Continue with the SSO configuration in Ona: [Clicking *Save & Test*](/ona/sso/overview#step-by-step-guide-to-set-up-sso)
# Google
Source: https://ona.com/docs/ona/sso/google
You can set up Single Sign-on (SSO) with Google for your team.
This section helps you to create an OIDC application with Google. The *Client ID*, *Client Secret*, and *Issuer URL* of this OIDC application are required to setup SSO in Ona. See the [Step-by-step guide](/ona/sso/overview#step-by-step-guide-to-set-up-sso) for the general instructions.
## Prerequisites
As prerequisites you will need the following:
* Access to setup a new [API Credentials](https://console.cloud.google.com/apis/credentials) in your GCP Account
## Create an OAuth/OIDC application
The OAuth/OIDC application allows you to integrate with Ona.
1. Navigate to your *Google Cloud Console > API Credentials*
2. Select *Create Credentials*, and choose *OAuth Client ID*
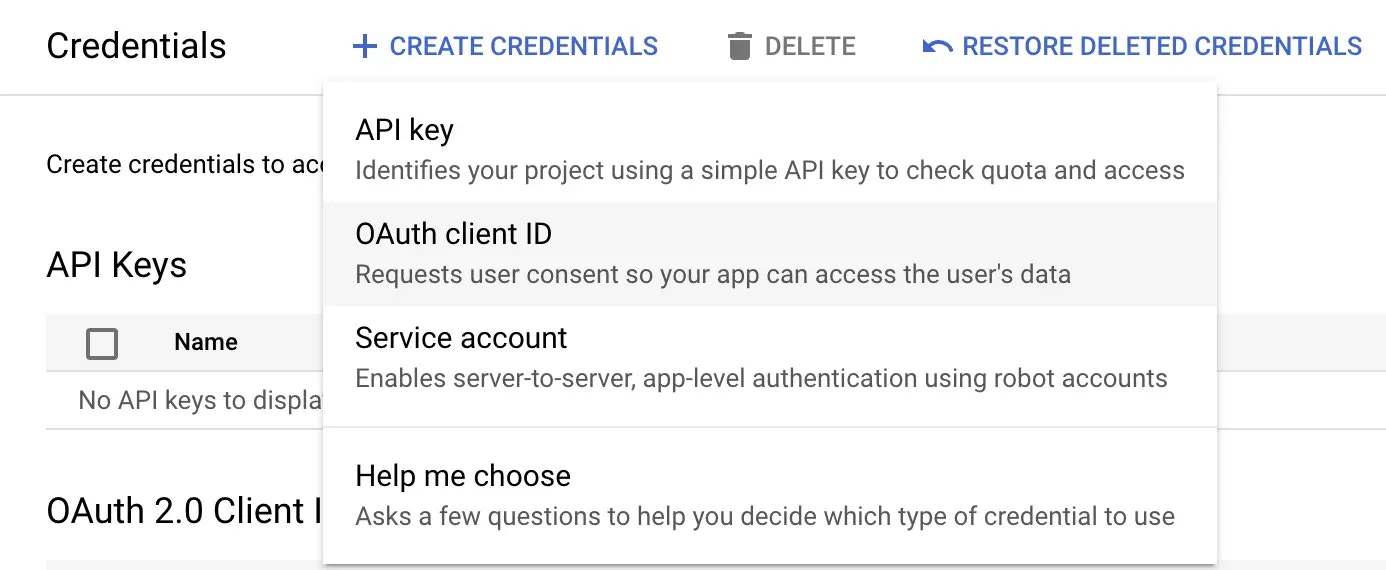 *Create credentials - Google Cloud Dashboard*
3. Configure your *OAuth Client ID* by specifying the *Authorized Redirect URI*: `https://app.gitpod.io/auth/oidc/callback`
4. Obtain the *Client ID* & *Client Secret* and input these into your Ona Setup page
*Create credentials - Google Cloud Dashboard*
3. Configure your *OAuth Client ID* by specifying the *Authorized Redirect URI*: `https://app.gitpod.io/auth/oidc/callback`
4. Obtain the *Client ID* & *Client Secret* and input these into your Ona Setup page
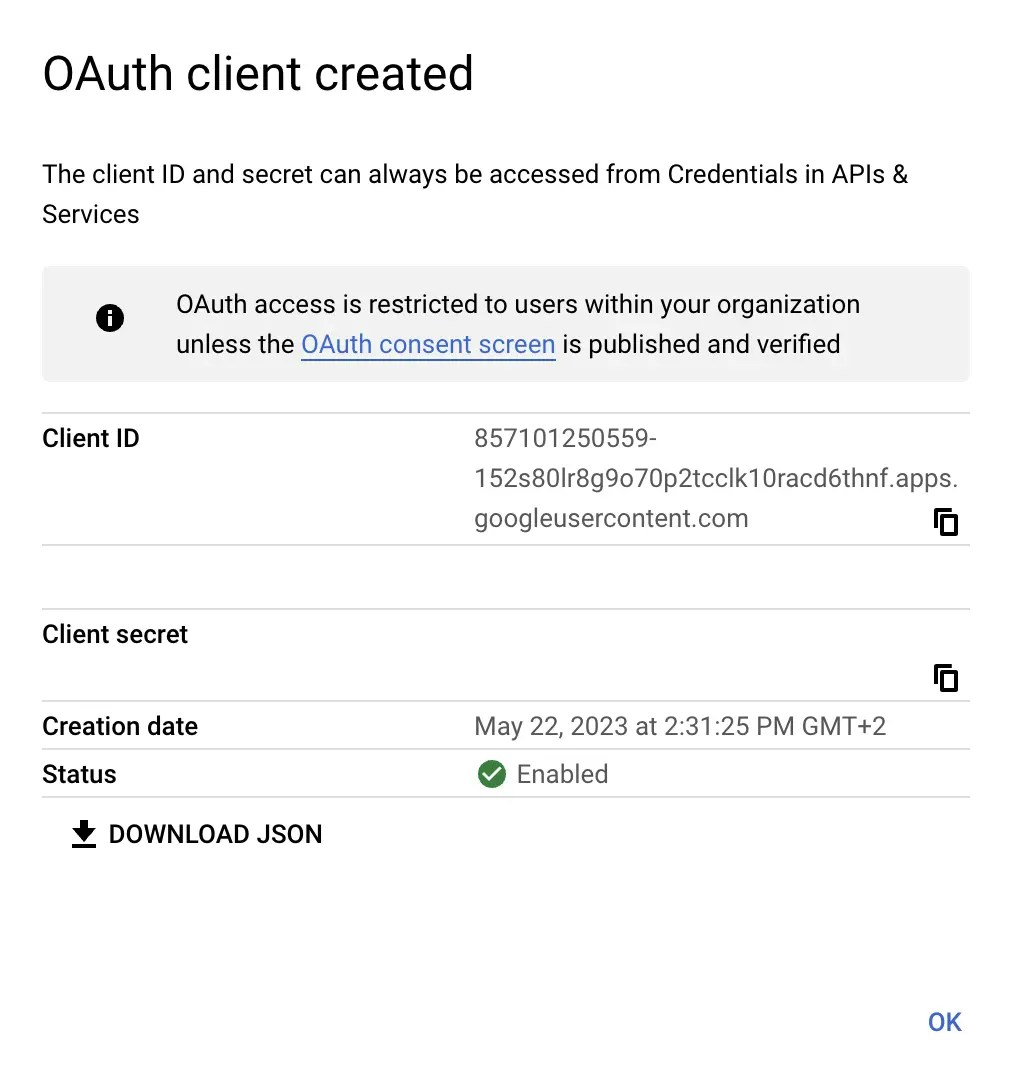 *OAuth Client Created - Google Cloud Dashboard*
5. Use Google's global *Issuer URL*: `https://accounts.google.com`
6. Continue with the SSO configuration in Ona: [Clicking *Save & Test*](/ona/sso/overview#step-by-step-guide-to-set-up-sso)
# Okta
Source: https://ona.com/docs/ona/sso/okta
You can set up Single Sign-on (SSO) with Okta for your team.
This section helps you to create an OIDC application with Okta. The *Client ID*, *Client Secret*, and *Issuer URL* of this OIDC application are required to setup SSO in Ona. See the [Step-by-step guide](/ona/sso/overview#step-by-step-guide-to-set-up-sso) for the general instructions.
## Prerequisites
As prerequisites you will need the following:
* Access to your Okta instance
* Permission to create an [app integration](https://help.okta.com/oie/en-us/Content/Topics/Apps/apps-overview-get-started.htm)
## Create an OIDC application
1. On the Okta Admin dashboard, navigate to Applications
2. Select `Create App Integration`
*OAuth Client Created - Google Cloud Dashboard*
5. Use Google's global *Issuer URL*: `https://accounts.google.com`
6. Continue with the SSO configuration in Ona: [Clicking *Save & Test*](/ona/sso/overview#step-by-step-guide-to-set-up-sso)
# Okta
Source: https://ona.com/docs/ona/sso/okta
You can set up Single Sign-on (SSO) with Okta for your team.
This section helps you to create an OIDC application with Okta. The *Client ID*, *Client Secret*, and *Issuer URL* of this OIDC application are required to setup SSO in Ona. See the [Step-by-step guide](/ona/sso/overview#step-by-step-guide-to-set-up-sso) for the general instructions.
## Prerequisites
As prerequisites you will need the following:
* Access to your Okta instance
* Permission to create an [app integration](https://help.okta.com/oie/en-us/Content/Topics/Apps/apps-overview-get-started.htm)
## Create an OIDC application
1. On the Okta Admin dashboard, navigate to Applications
2. Select `Create App Integration`
 *Applications - Okta Dashboard*
3. Select the following options and click *Next*
* Sign-in method: `OIDC - Open ID Connect`
* Application type: `Web Application`
*Applications - Okta Dashboard*
3. Select the following options and click *Next*
* Sign-in method: `OIDC - Open ID Connect`
* Application type: `Web Application`
 *Create App Integration - Okta Dashboard*
4. Specify General Settings
* App integration name, e.g. `Ona`
* Sign-in redirect URIs: `https://app.gitpod.io/auth/oidc/callback`
* Sign-out redirect URIs: `none`
*Create App Integration - Okta Dashboard*
4. Specify General Settings
* App integration name, e.g. `Ona`
* Sign-in redirect URIs: `https://app.gitpod.io/auth/oidc/callback`
* Sign-out redirect URIs: `none`
 *Specify Okta settings - Okta Dashboard*
5. Assignments
* You have to select Okta users or groups which would be allowed to use the integration with Ona.
* Okta lets you [import and synchronize directories](https://help.okta.com/oie/en-us/content/topics/directory/directory-integrations-main.htm?cshid=csh-directory-integrations-main), which then can be assigned to use the integration.
*Specify Okta settings - Okta Dashboard*
5. Assignments
* You have to select Okta users or groups which would be allowed to use the integration with Ona.
* Okta lets you [import and synchronize directories](https://help.okta.com/oie/en-us/content/topics/directory/directory-integrations-main.htm?cshid=csh-directory-integrations-main), which then can be assigned to use the integration.
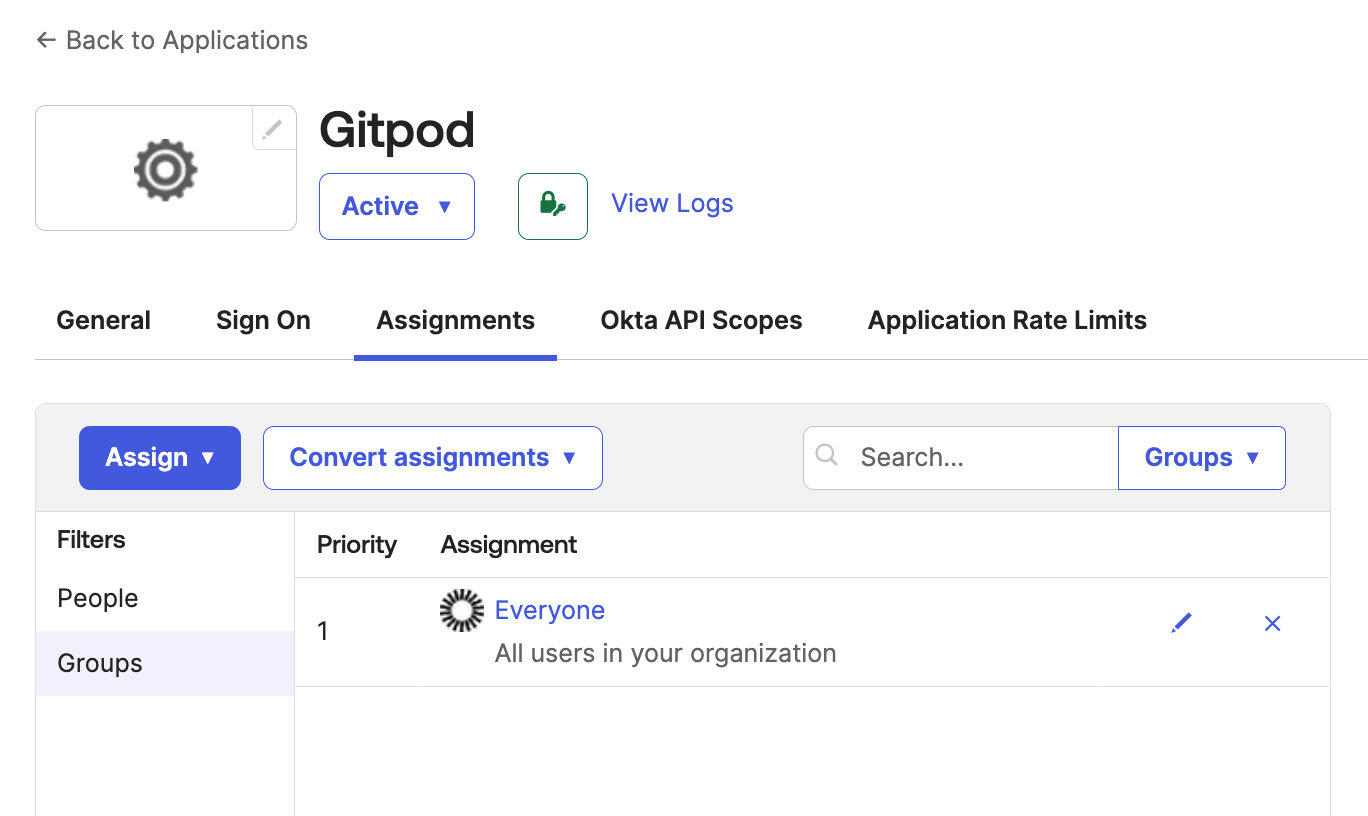 *Specify Assignments - Okta Dashboard*
6. Obtain *Client ID*, *Client Secret* from General tab
*Specify Assignments - Okta Dashboard*
6. Obtain *Client ID*, *Client Secret* from General tab
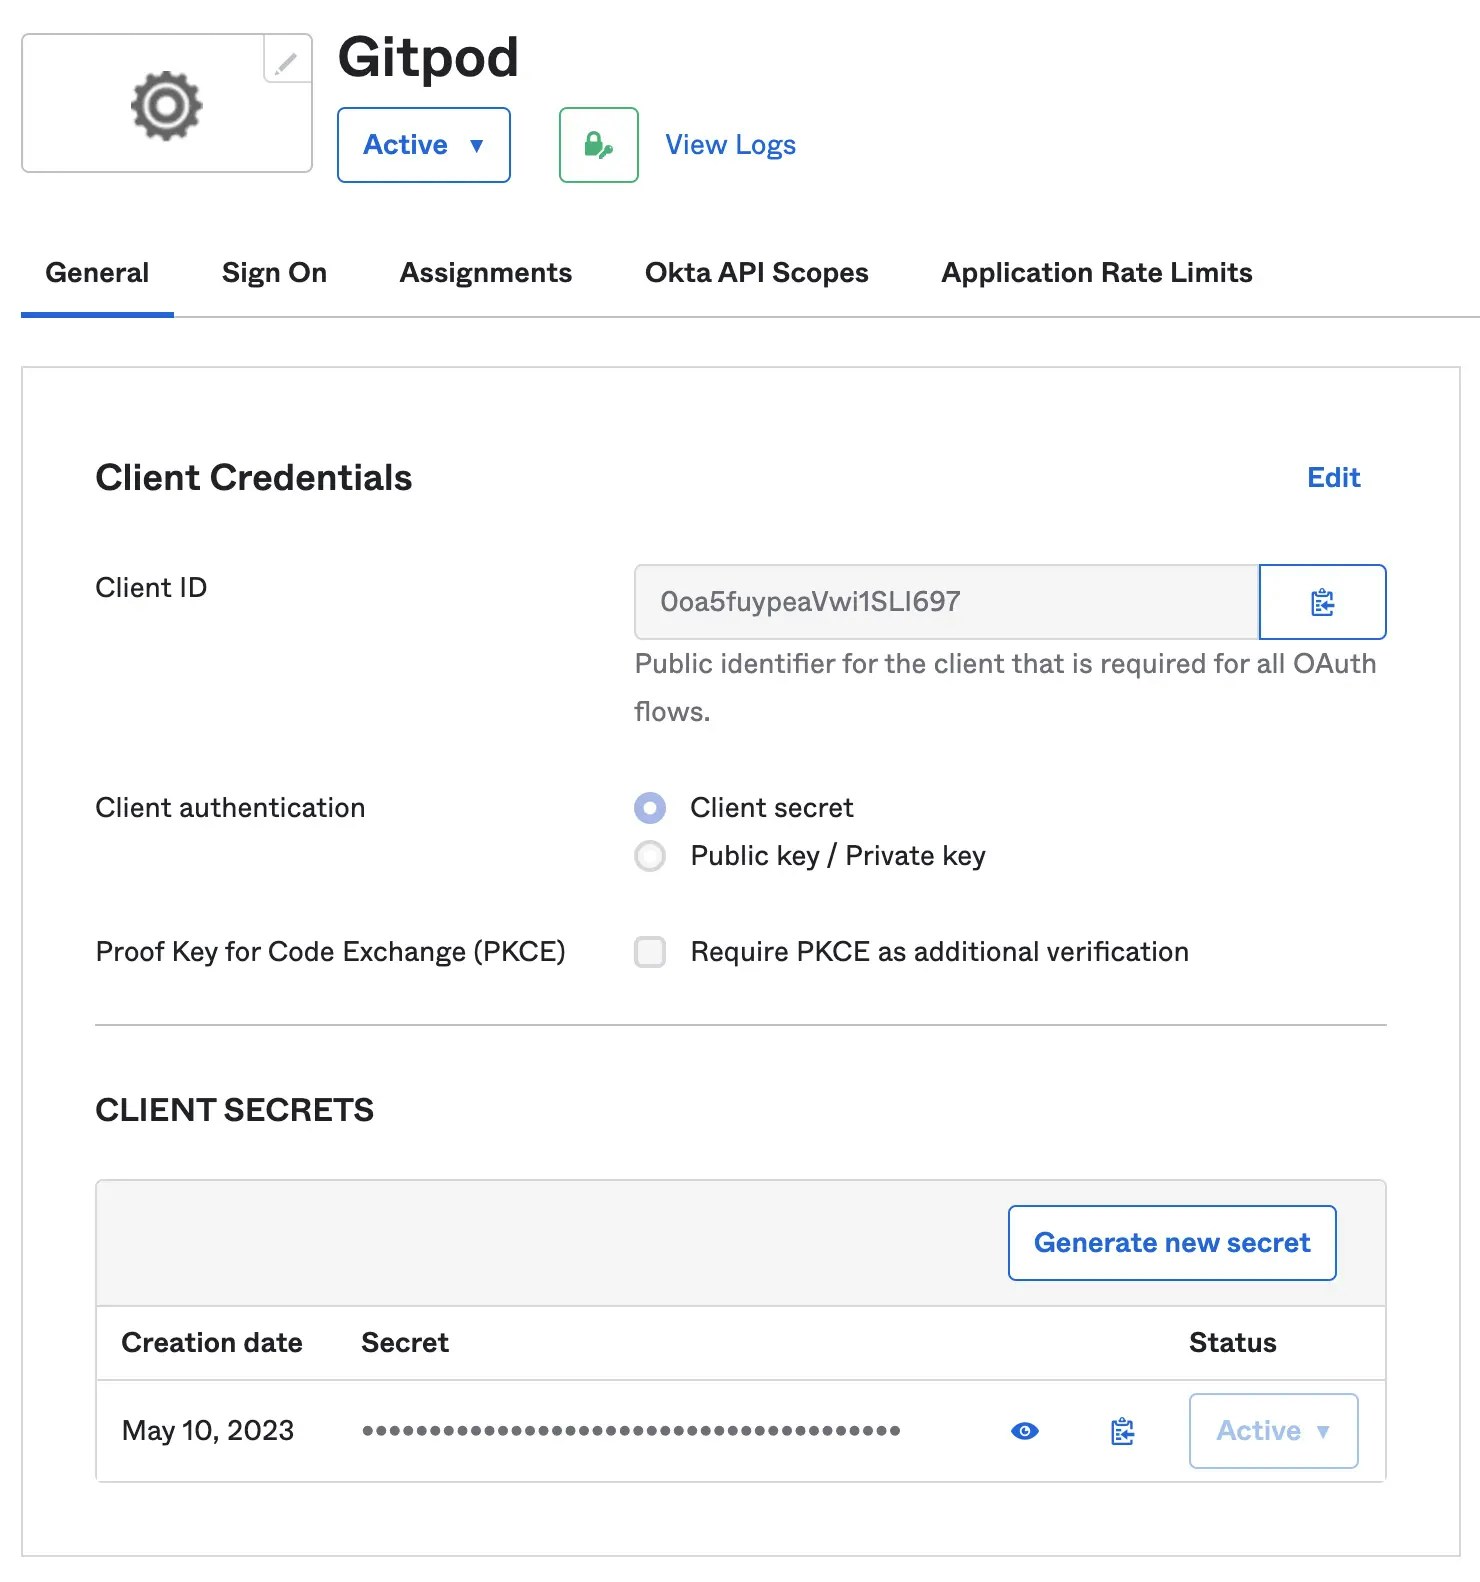 *Configure Client Secrets - Okta Dashboard*
7. Obtain *Issuer URL*
*Configure Client Secrets - Okta Dashboard*
7. Obtain *Issuer URL*
 *Issuer - Okta Dashboard*
8. Continue with the SSO configuration in Ona: [Clicking *Save & Test*](/ona/sso/overview#step-by-step-guide-to-set-up-sso)
# Single sign-on (SSO)
Source: https://ona.com/docs/ona/sso/overview
Overview of SSO options for Ona
This section helps you, as an Organization Admin, set up and manage Single Sign-On (SSO) for your team. You'll learn how to enable SSO, control access, and troubleshoot common issues to keep your team logging in smoothly and securely.
## Overview
Single Sign-On (SSO) lets your team log in to your organization using their existing session with an external Identity Provider (IdP), such as Okta or Azure AD, through OpenID Connect (OIDC). This simplifies user authentication, enhances security, and streamlines access management across your organization.
## Setup Single Sign-on for the organization
### Prerequisites
This is what you will need to have in order to enable SSO:
* Admin-level access to your organization settings.
* Domain/DNS admin privileges so you can add a DNS TXT record. This TXT record is used by Ona to verify ownership of the domain associated with your organization.
* Access to an Identity Provider (e.g. Google, Gitlab, Okta, Microsoft Entra ID) that supports OpenID Connect (OIDC).
* You'll need to create an OIDC application with your Identity Provider and obtain the **Client ID**, **Client Secret**, and **Issuer URL**.
## Step-by-step guide to set up SSO
To begin setting up Single Sign-On, navigate to **Organization Settings** and choose *Log in and security* from the left-hand menu. Next, click on the *Setup* button.
*Issuer - Okta Dashboard*
8. Continue with the SSO configuration in Ona: [Clicking *Save & Test*](/ona/sso/overview#step-by-step-guide-to-set-up-sso)
# Single sign-on (SSO)
Source: https://ona.com/docs/ona/sso/overview
Overview of SSO options for Ona
This section helps you, as an Organization Admin, set up and manage Single Sign-On (SSO) for your team. You'll learn how to enable SSO, control access, and troubleshoot common issues to keep your team logging in smoothly and securely.
## Overview
Single Sign-On (SSO) lets your team log in to your organization using their existing session with an external Identity Provider (IdP), such as Okta or Azure AD, through OpenID Connect (OIDC). This simplifies user authentication, enhances security, and streamlines access management across your organization.
## Setup Single Sign-on for the organization
### Prerequisites
This is what you will need to have in order to enable SSO:
* Admin-level access to your organization settings.
* Domain/DNS admin privileges so you can add a DNS TXT record. This TXT record is used by Ona to verify ownership of the domain associated with your organization.
* Access to an Identity Provider (e.g. Google, Gitlab, Okta, Microsoft Entra ID) that supports OpenID Connect (OIDC).
* You'll need to create an OIDC application with your Identity Provider and obtain the **Client ID**, **Client Secret**, and **Issuer URL**.
## Step-by-step guide to set up SSO
To begin setting up Single Sign-On, navigate to **Organization Settings** and choose *Log in and security* from the left-hand menu. Next, click on the *Setup* button.
 *Log in and security*
### Step 1. Configure SSO
Let's first configure how Ona will connect with your Identity Provider.
Enter your organization's **email domain**. This is important because your team members will use their email addresses from this domain when they [sign in](#log-in-with-single-sign-on).
Now, it's time to set up the connection with your Identity Provider. We've created detailed guides for the most popular providers to make this easier for you:
* **[Okta](/ona/sso/okta)**
* **[Google](/ona/sso/google)**
* **[GitLab](/ona/sso/gitlab)**
* **[Entra ID](/ona/sso/entra)**
* **[Amazon Cognito](/ona/sso/cognito)**
* **[PingFederate](/ona/sso/pingfederate)**
After following the guide for your provider, you'll need three important pieces of information to complete the form:
* **Client ID**: The identifier for your OIDC application.
* **Client Secret**: Secret key for authenticating with the IdP.
* **Issuer URL**: Endpoint of the OIDC server.
Copy the **Callback URL** from the bottom of this form, and paste it into the settings of the OIDC application with the IdP.
*Log in and security*
### Step 1. Configure SSO
Let's first configure how Ona will connect with your Identity Provider.
Enter your organization's **email domain**. This is important because your team members will use their email addresses from this domain when they [sign in](#log-in-with-single-sign-on).
Now, it's time to set up the connection with your Identity Provider. We've created detailed guides for the most popular providers to make this easier for you:
* **[Okta](/ona/sso/okta)**
* **[Google](/ona/sso/google)**
* **[GitLab](/ona/sso/gitlab)**
* **[Entra ID](/ona/sso/entra)**
* **[Amazon Cognito](/ona/sso/cognito)**
* **[PingFederate](/ona/sso/pingfederate)**
After following the guide for your provider, you'll need three important pieces of information to complete the form:
* **Client ID**: The identifier for your OIDC application.
* **Client Secret**: Secret key for authenticating with the IdP.
* **Issuer URL**: Endpoint of the OIDC server.
Copy the **Callback URL** from the bottom of this form, and paste it into the settings of the OIDC application with the IdP.
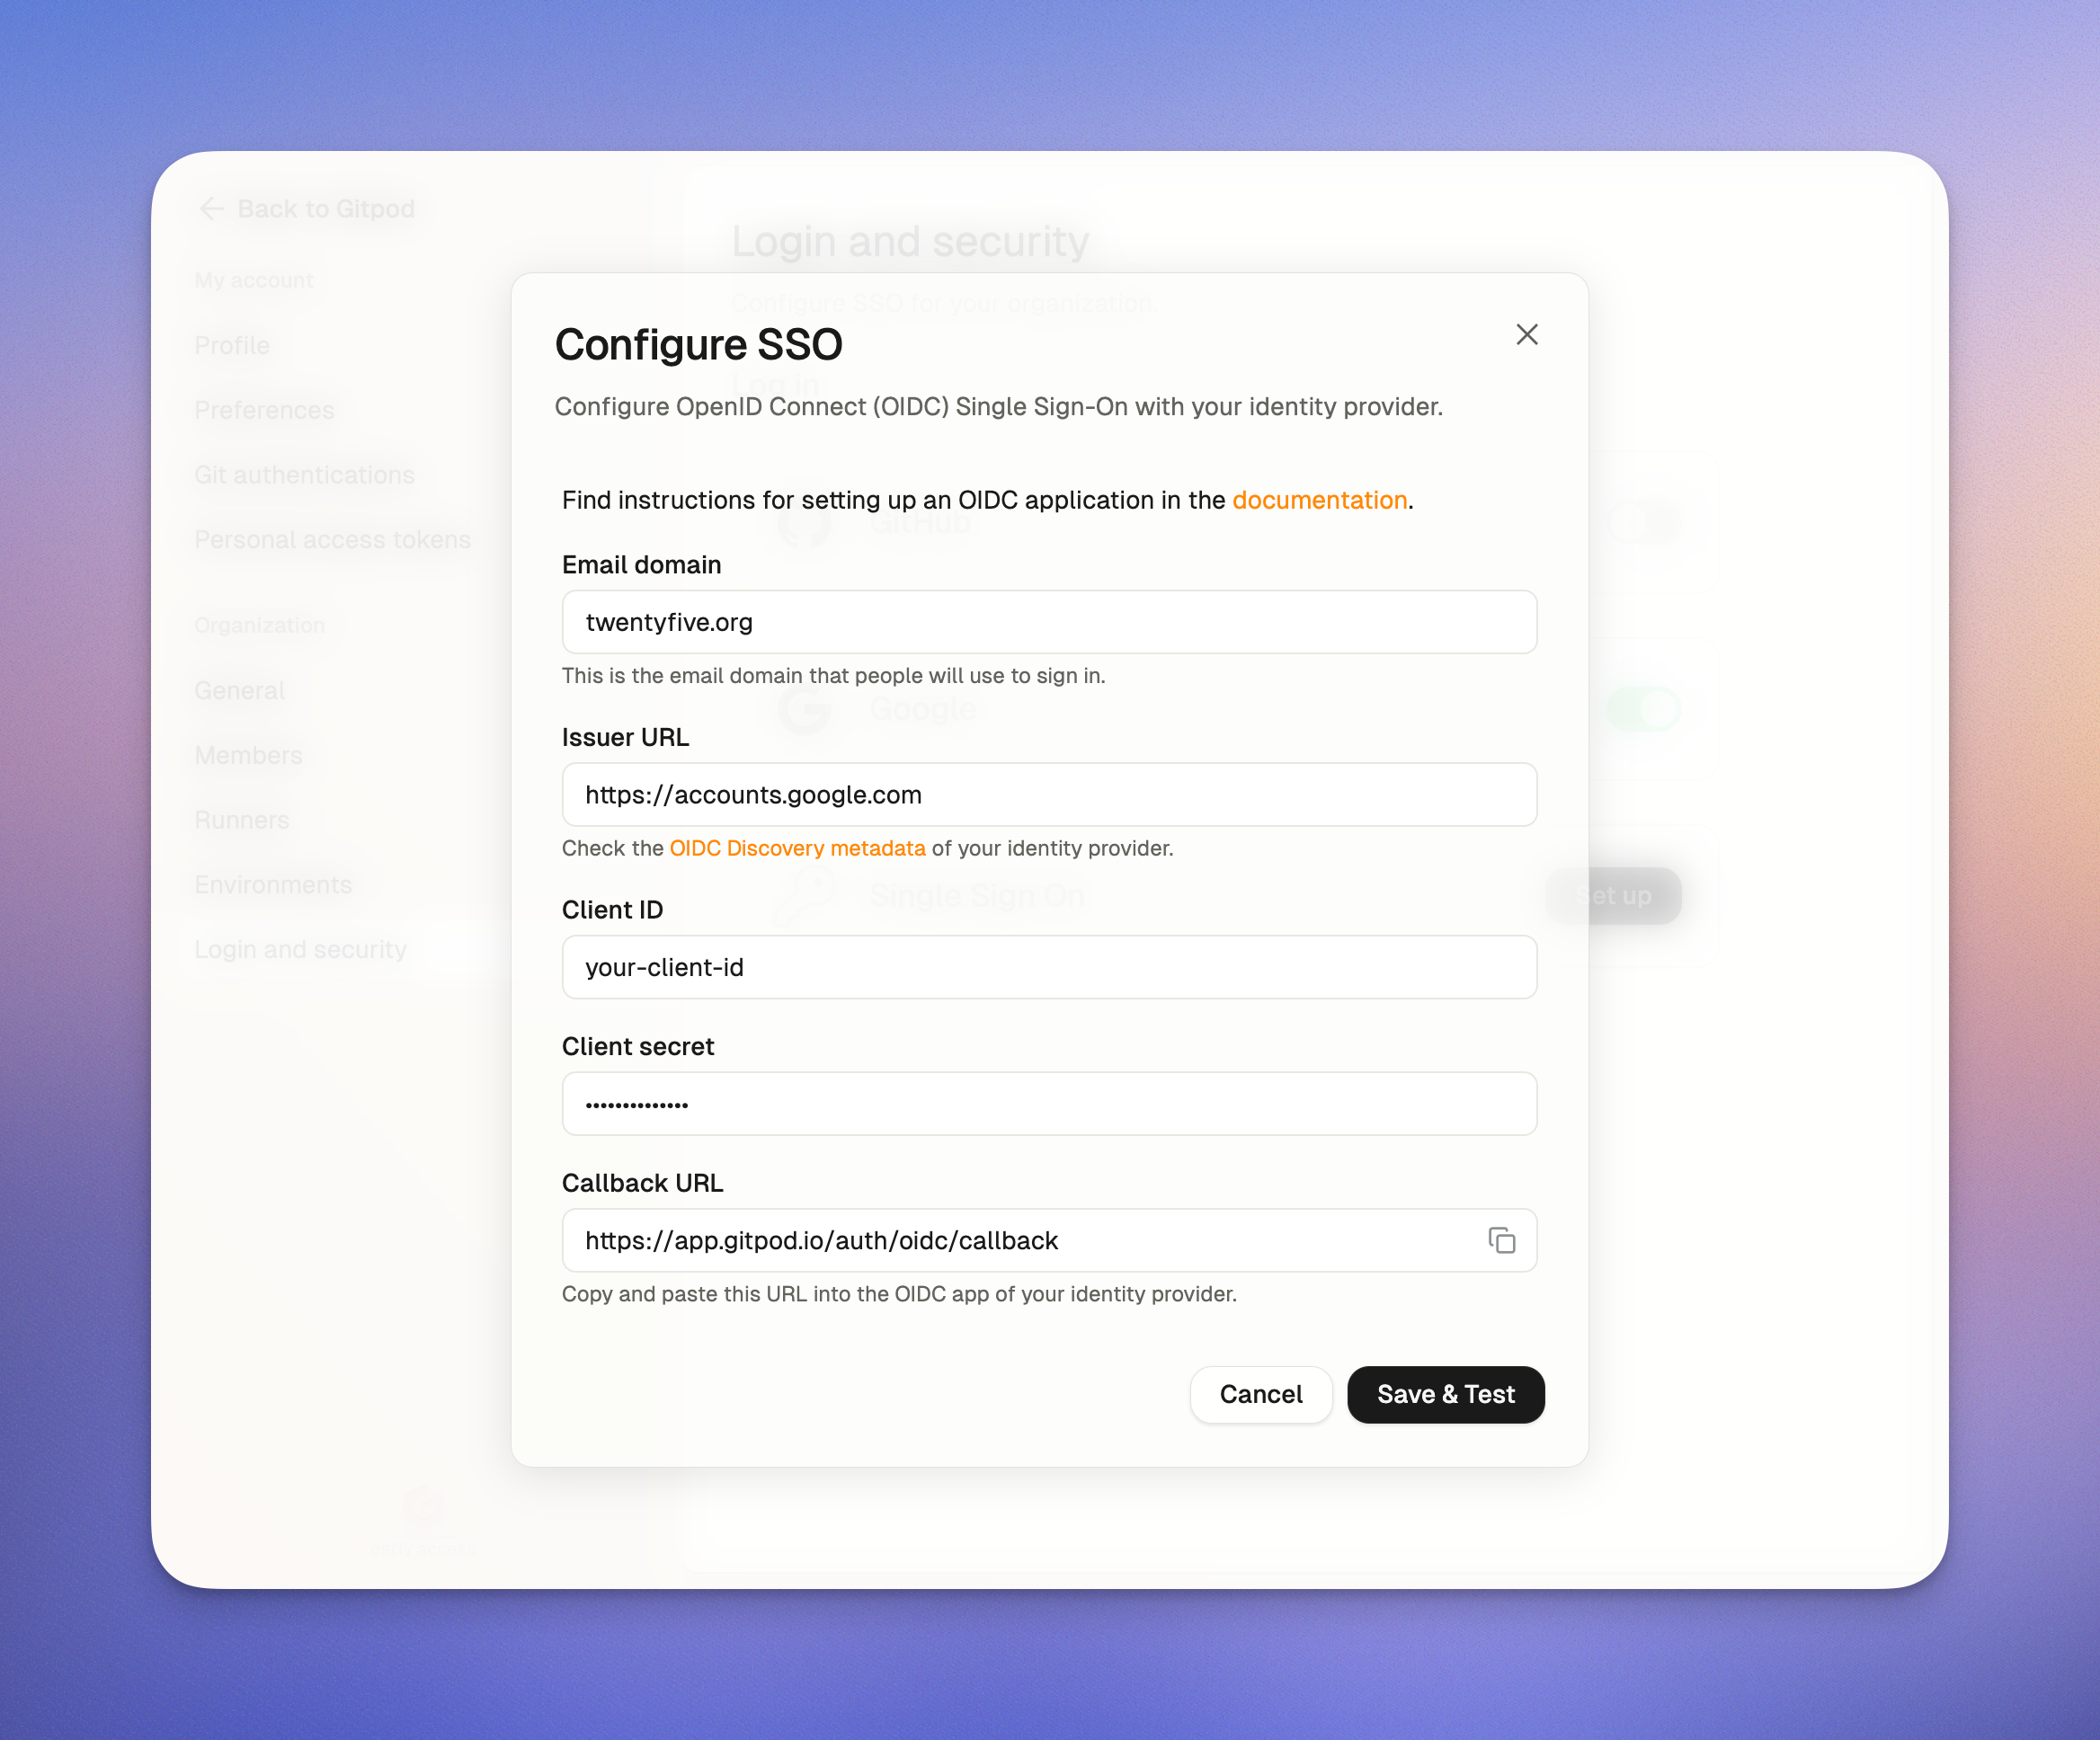 *Setup SSO*
#### Testing your configuration
Before rolling this out to your team, let's make sure everything is working properly:
Test the OIDC application by clicking **Test & Continue**
* The authentication flow with your Identity Provider should open in a new browser window.
* Please verify the authentication flow works for you before inviting your team to use the SSO login.
*Setup SSO*
#### Testing your configuration
Before rolling this out to your team, let's make sure everything is working properly:
Test the OIDC application by clicking **Test & Continue**
* The authentication flow with your Identity Provider should open in a new browser window.
* Please verify the authentication flow works for you before inviting your team to use the SSO login.
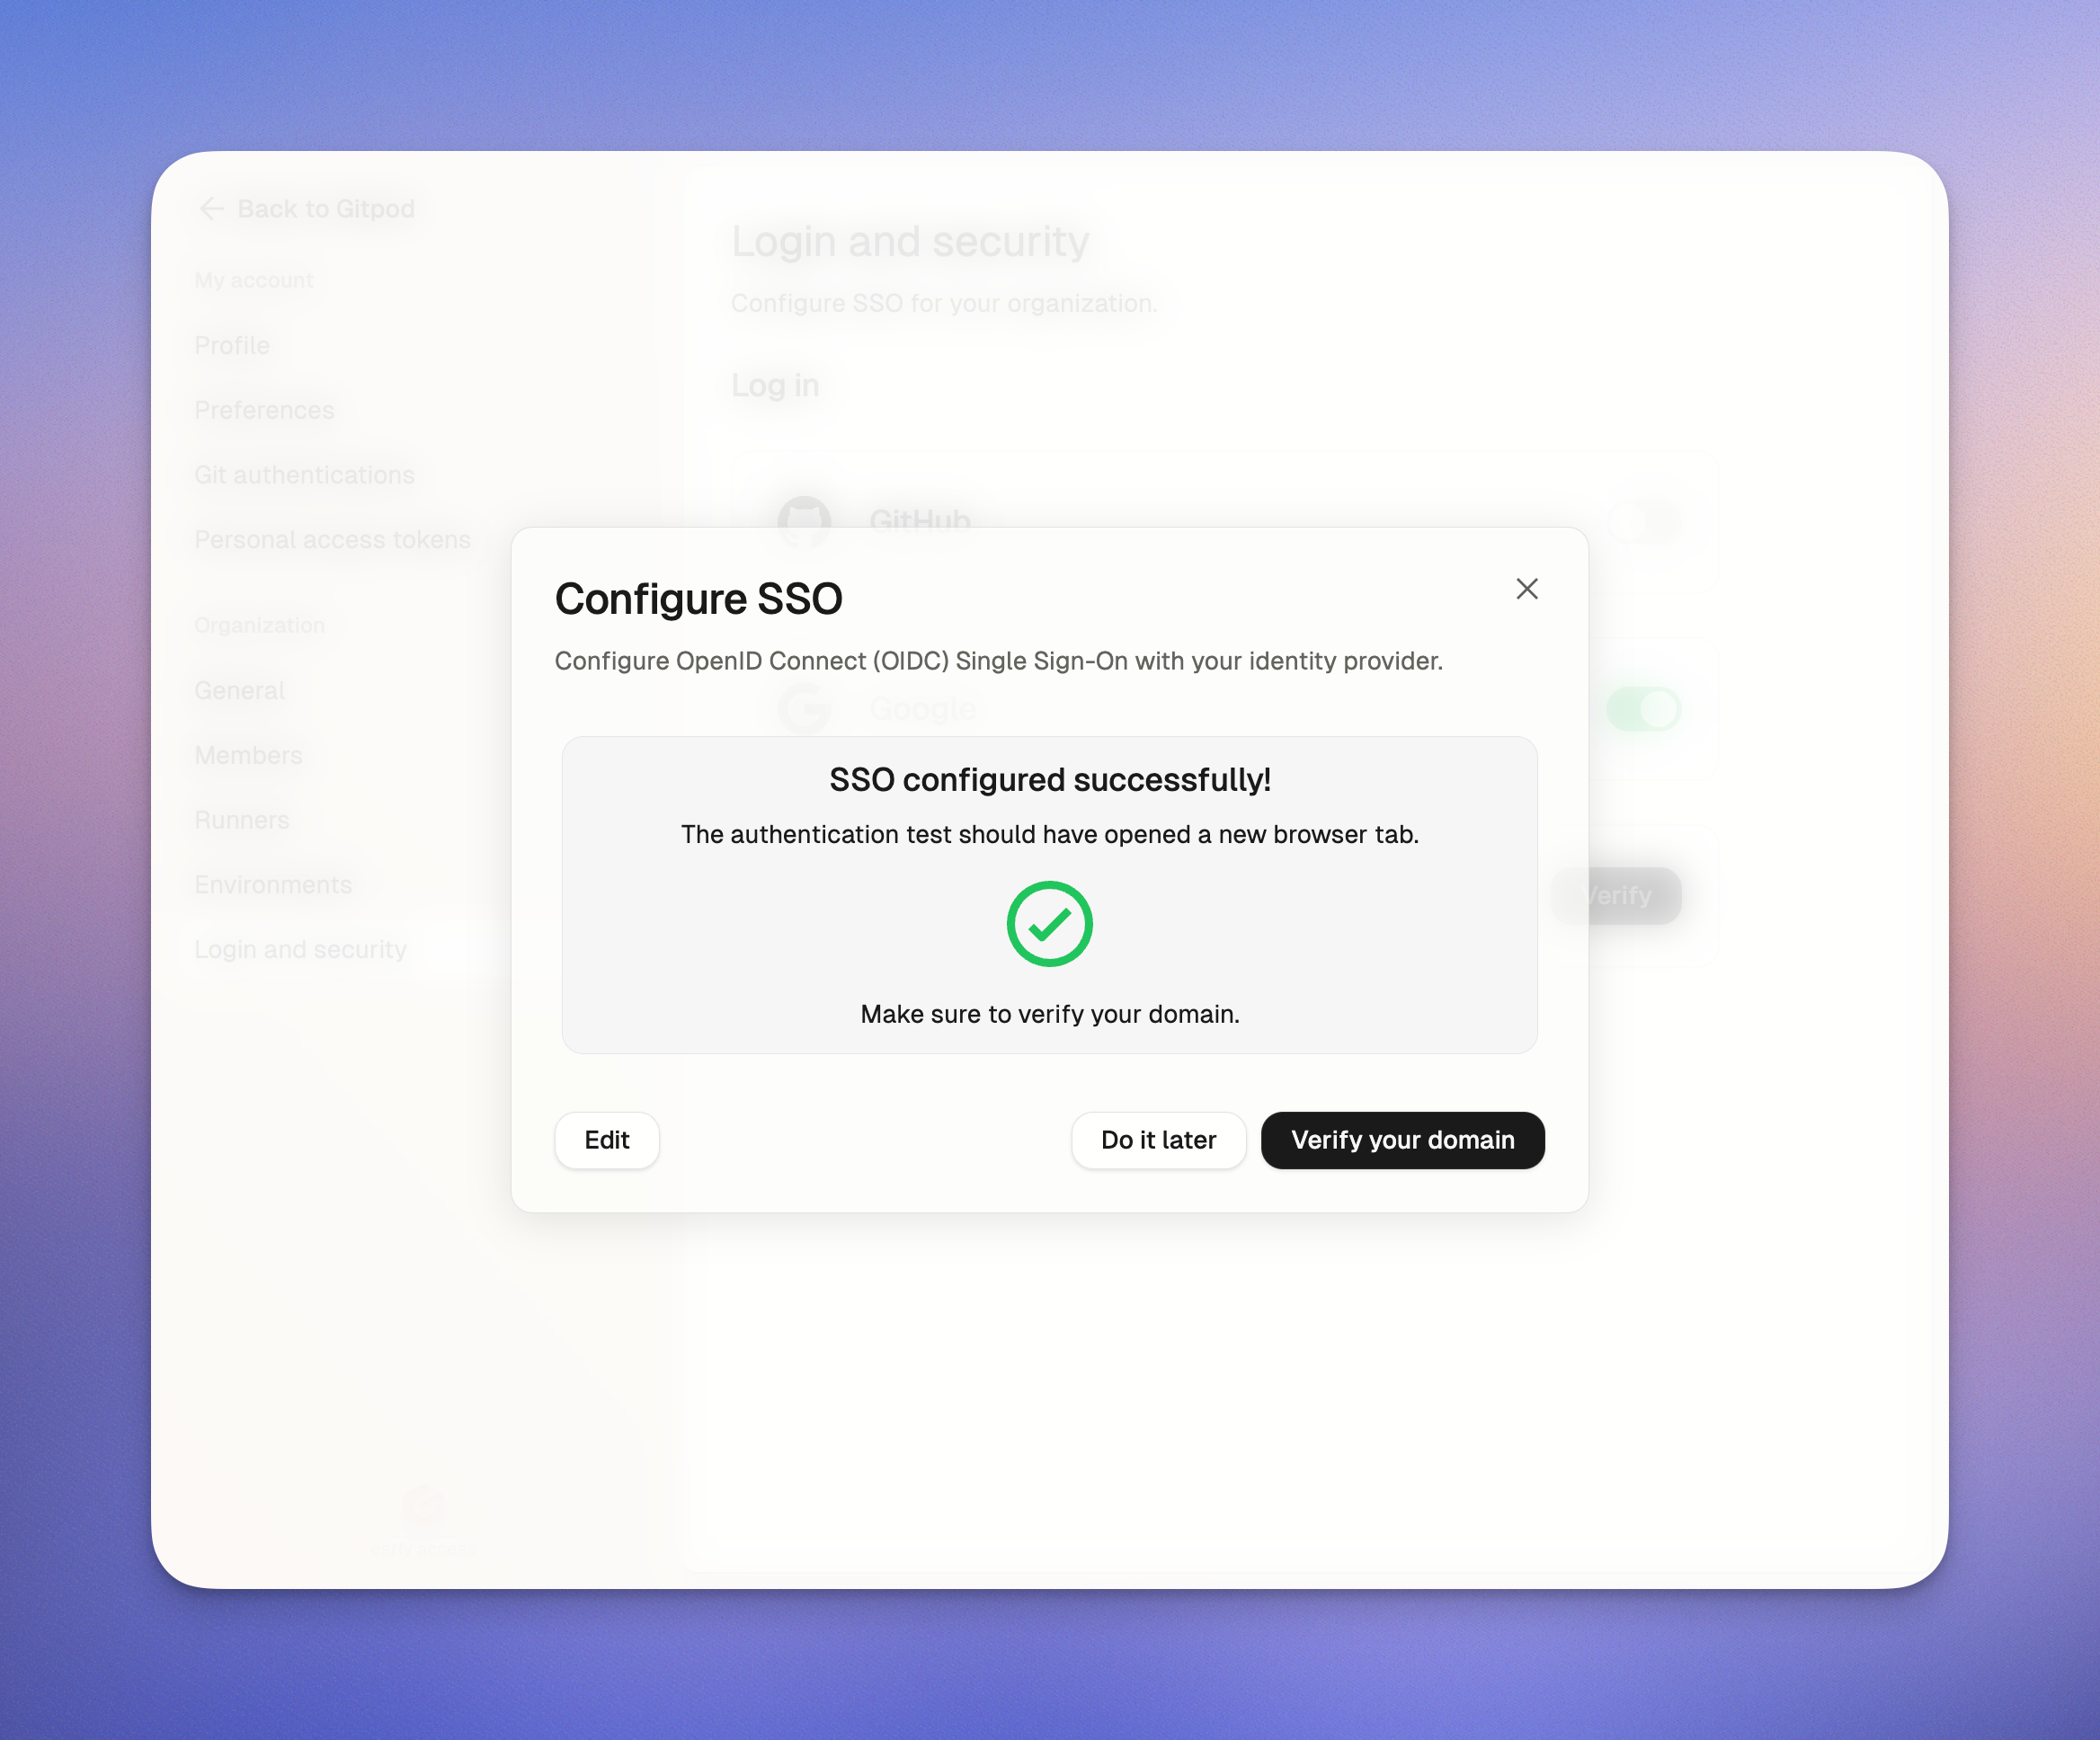 *Test the OIDC application*
If everything looks good, click **Verify your domain** to continue to the next step.
### Step 2. Verify your domain
In the second step, you'll need to verify your organization's email domain. This is done by adding a **TXT record** to your domain's DNS settings. Copy the name and value for the TXT record from this view.
*Test the OIDC application*
If everything looks good, click **Verify your domain** to continue to the next step.
### Step 2. Verify your domain
In the second step, you'll need to verify your organization's email domain. This is done by adding a **TXT record** to your domain's DNS settings. Copy the name and value for the TXT record from this view.
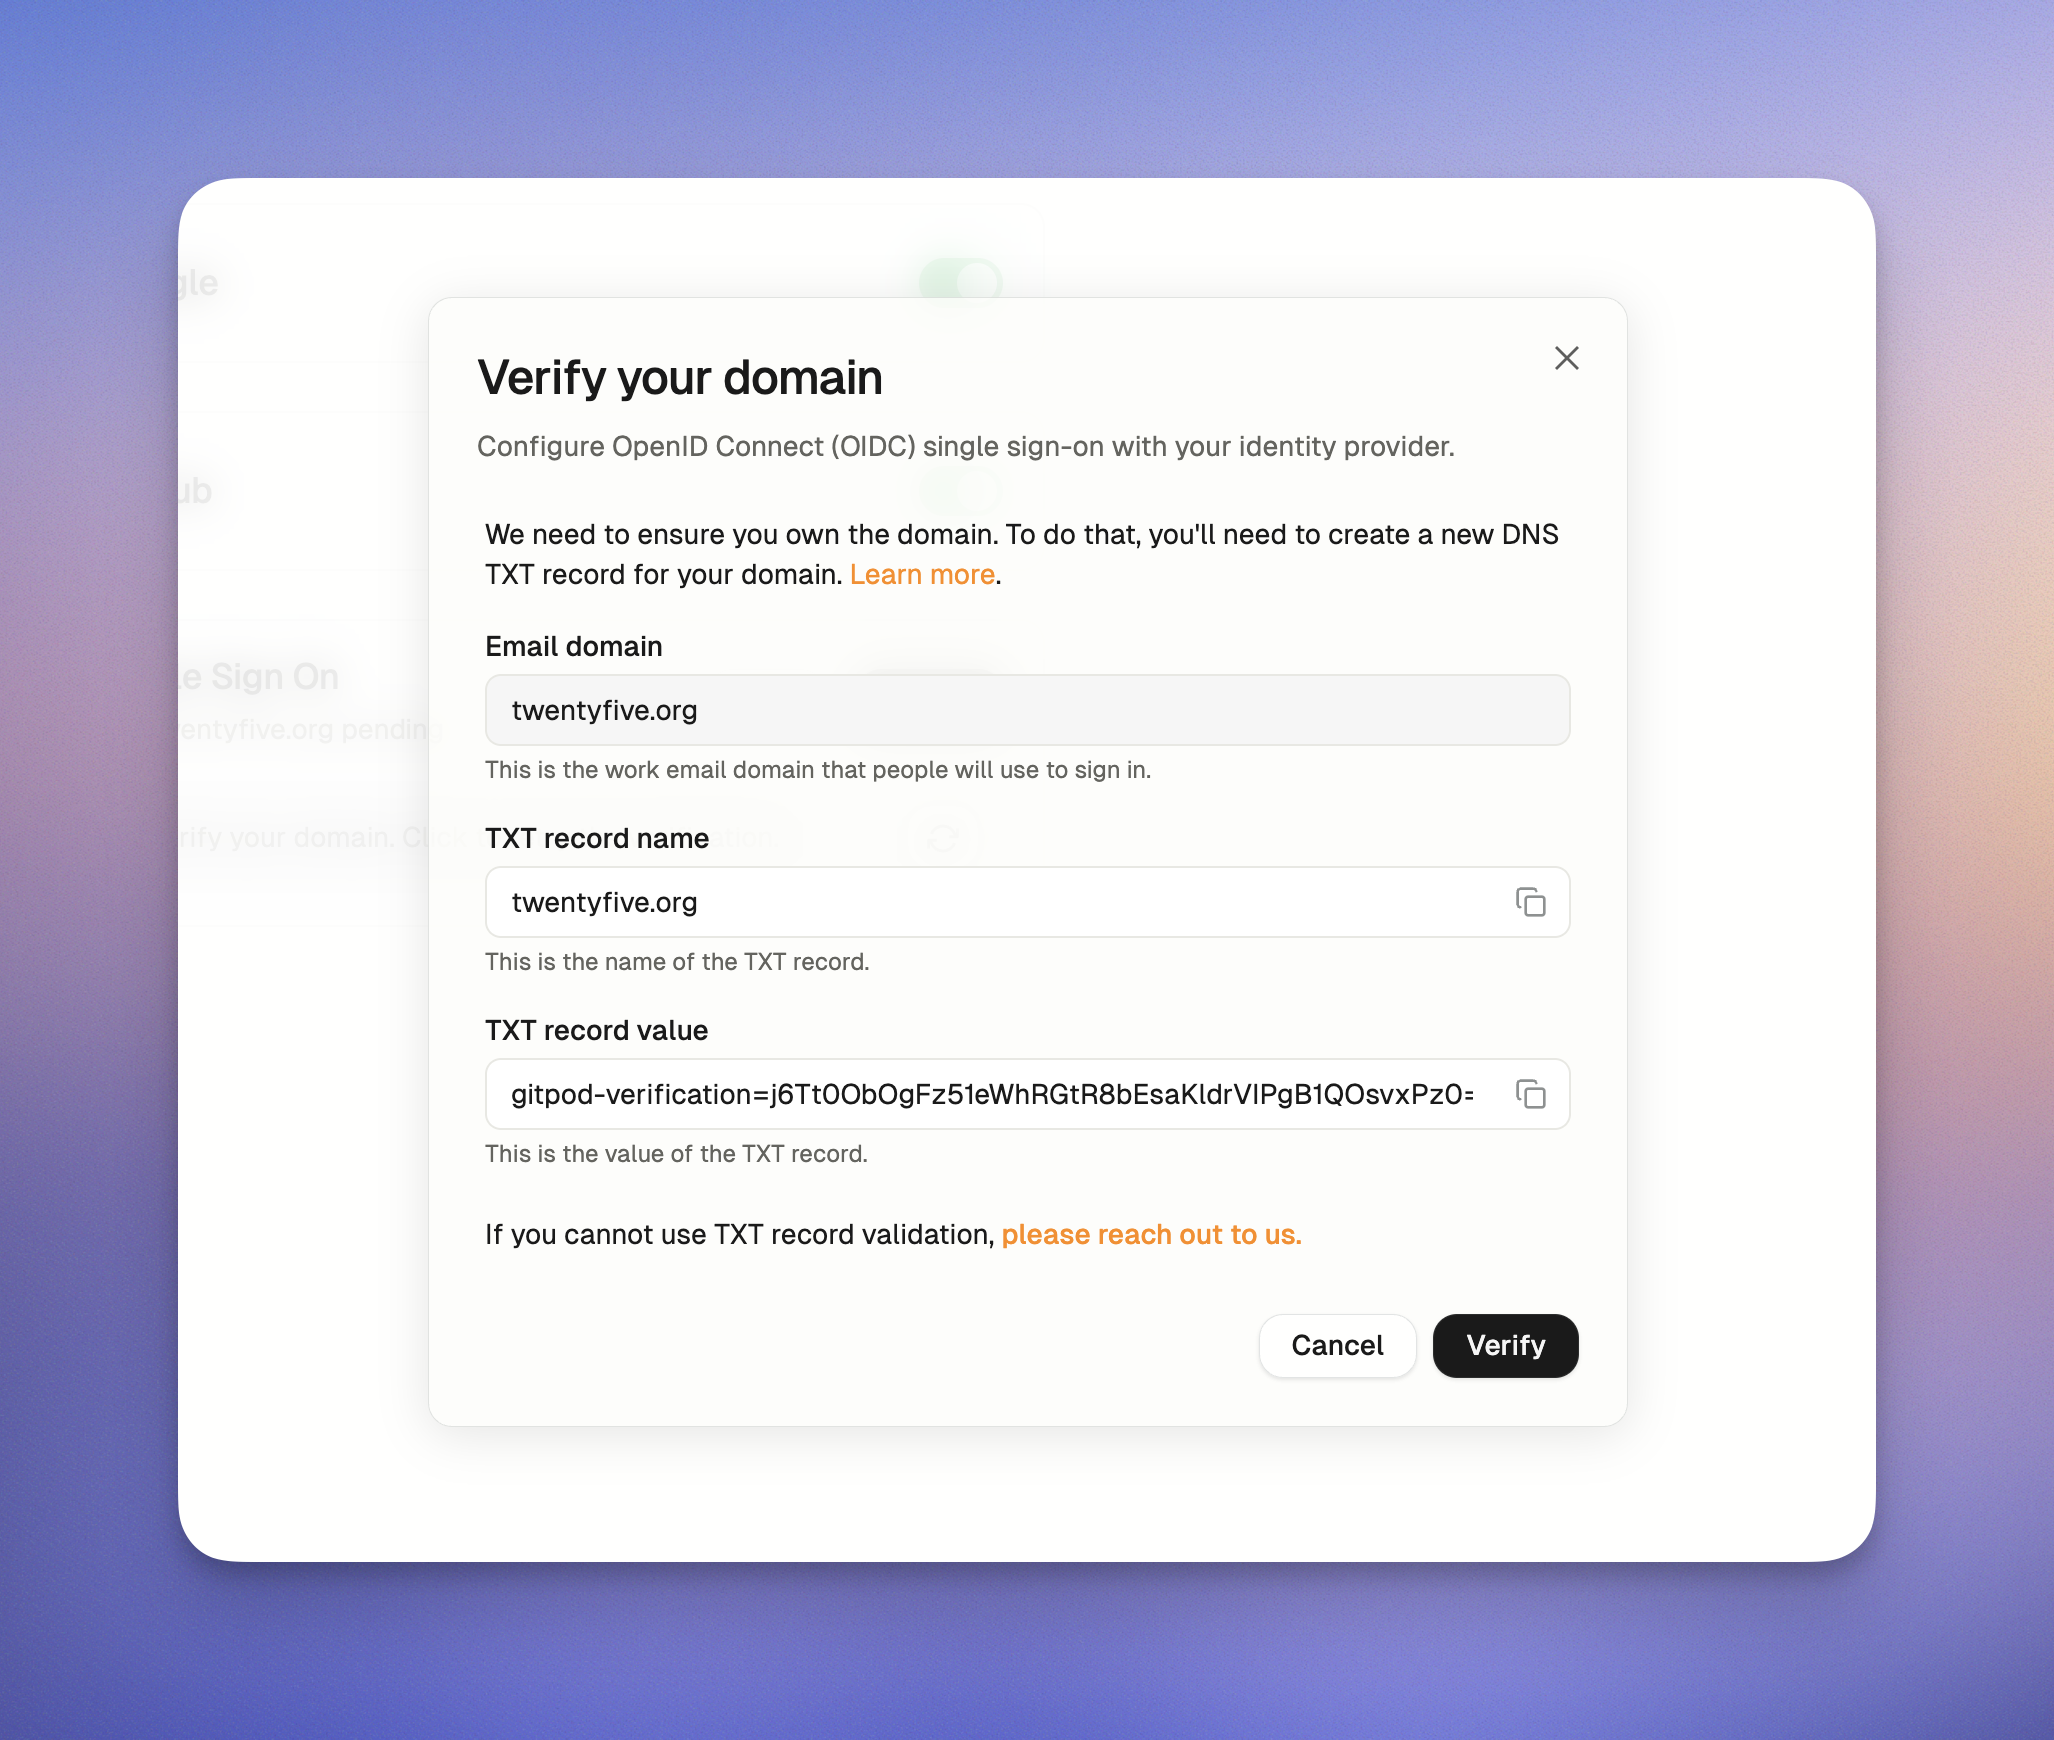 *Verify your domain*
> Please note that your email domain must be verified before the [Sign in with SSO option](#log-in-with-single-sign-on) can be used on the Login screen.
#### Check the status of your domain
Click **Verify** to check the status of your domain verification and return to the overview page. A delay in DNS updates is expected, so no worries!
You'll find the verification status on the *Log in and security* page. Once you've added the TXT record for your email domain, simply click the refresh button to update the status.
*Verify your domain*
> Please note that your email domain must be verified before the [Sign in with SSO option](#log-in-with-single-sign-on) can be used on the Login screen.
#### Check the status of your domain
Click **Verify** to check the status of your domain verification and return to the overview page. A delay in DNS updates is expected, so no worries!
You'll find the verification status on the *Log in and security* page. Once you've added the TXT record for your email domain, simply click the refresh button to update the status.
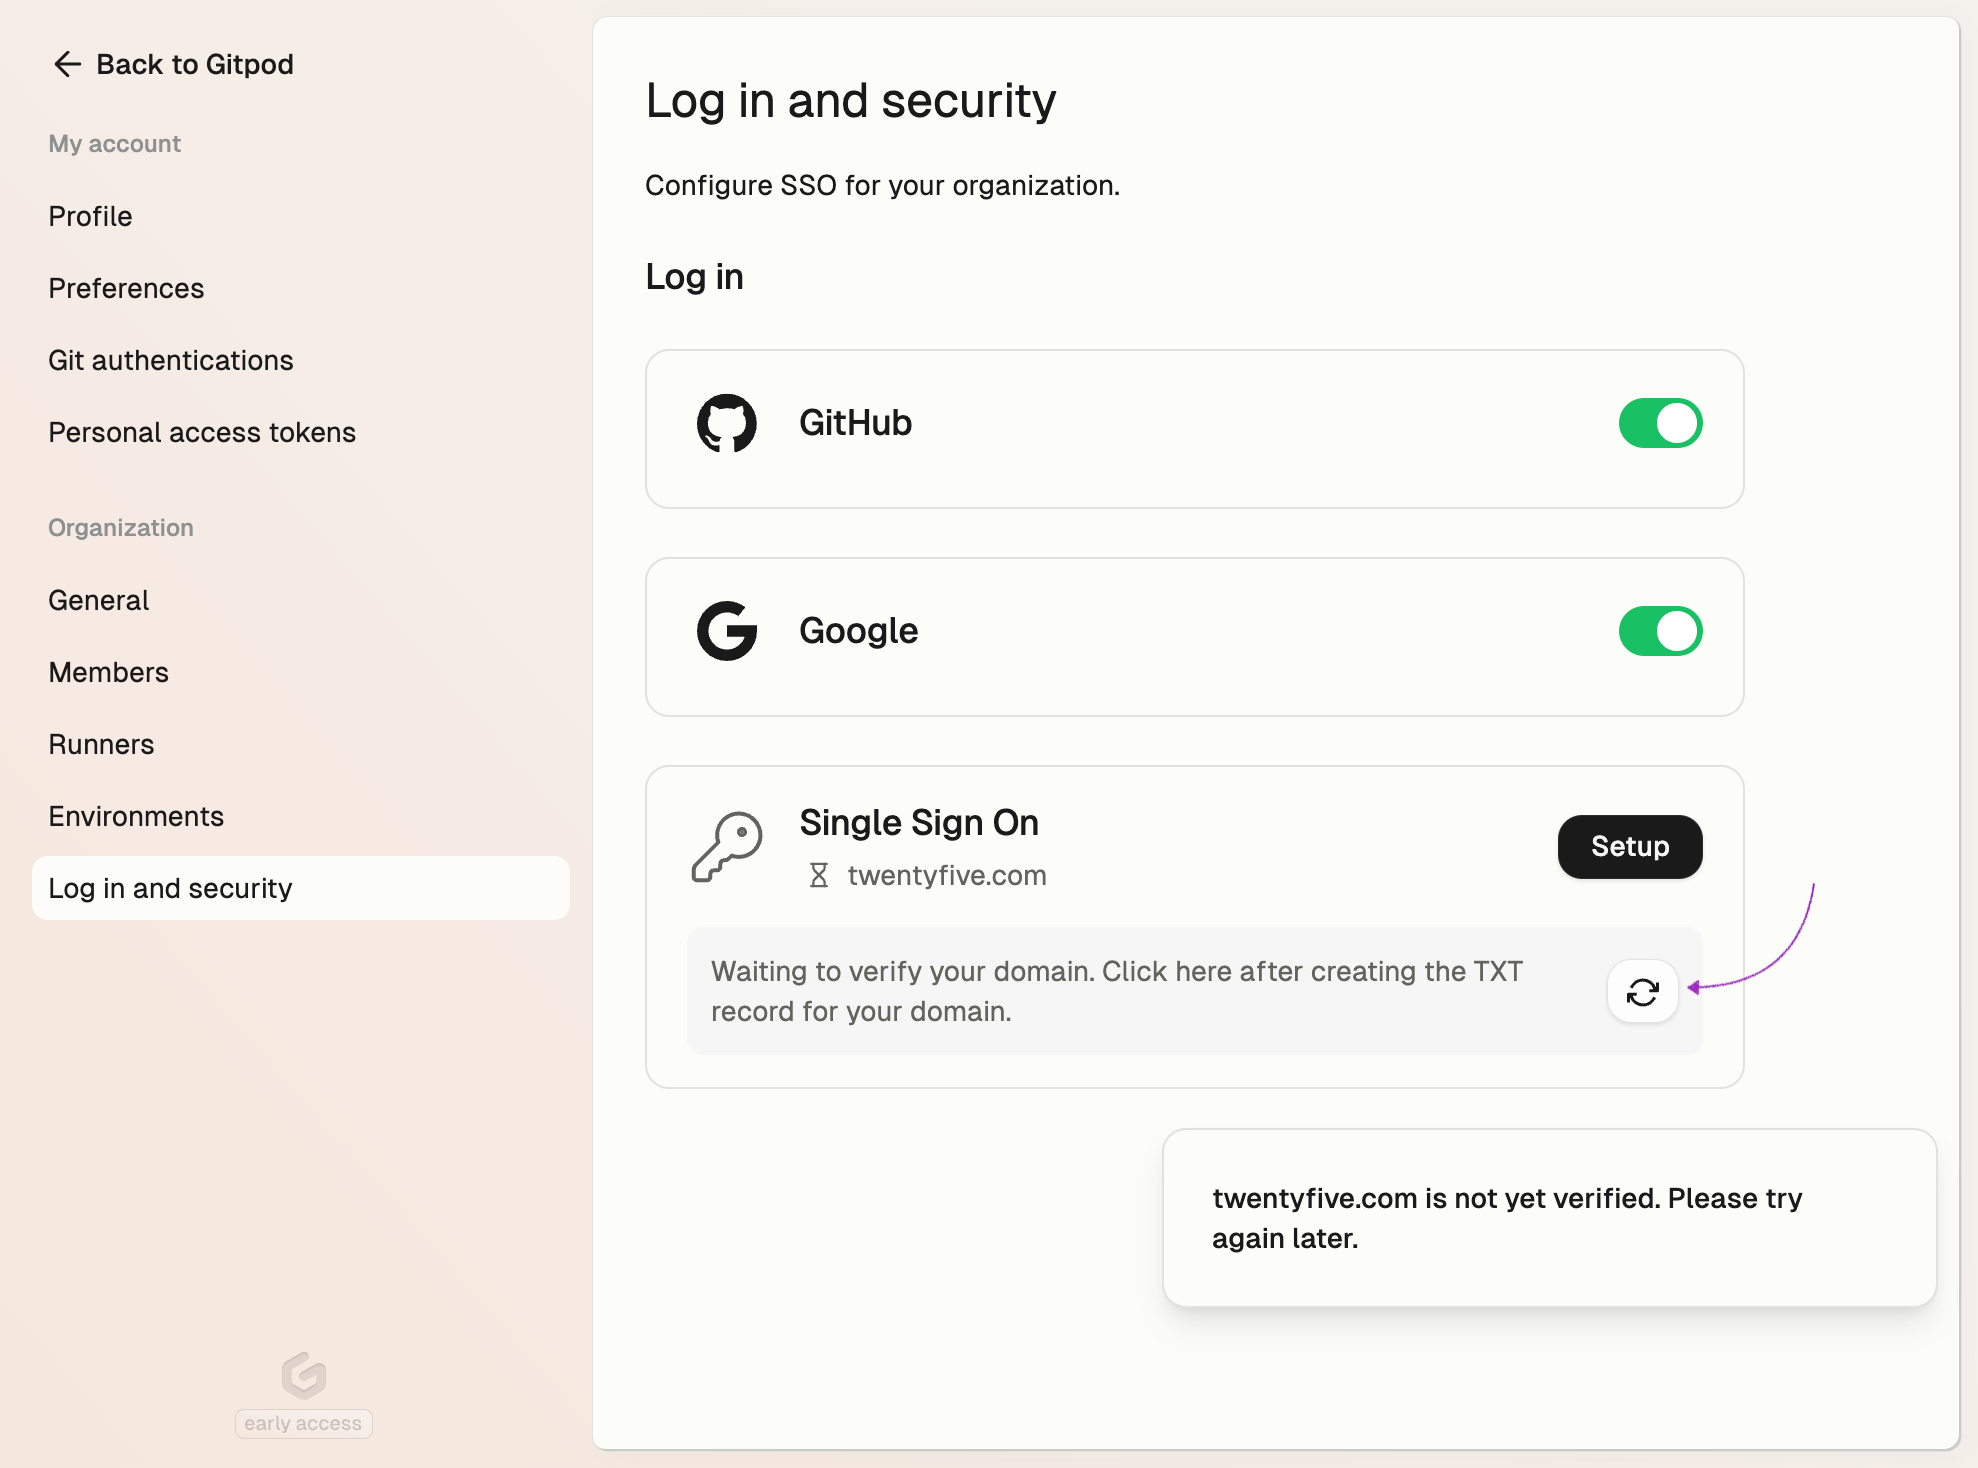 *Check domain status*
### Problems and solutions
While setting up SSO, some issues may arise due to misconfigurations or external factors. These can include problems with your Identity Provider settings, incorrect credentials, or network issues. To help you navigate these challenges, we’ve included an FAQ section below with solutions to common problems.
1. Error: *The redirect URI included is not valid.*
* Make sure to paste the correct redirect URI into the OIDC application with your Identity Provider, e.g. `https://app.gitpod.io/auth/oidc/callback`.
*Check domain status*
### Problems and solutions
While setting up SSO, some issues may arise due to misconfigurations or external factors. These can include problems with your Identity Provider settings, incorrect credentials, or network issues. To help you navigate these challenges, we’ve included an FAQ section below with solutions to common problems.
1. Error: *The redirect URI included is not valid.*
* Make sure to paste the correct redirect URI into the OIDC application with your Identity Provider, e.g. `https://app.gitpod.io/auth/oidc/callback`.
 *Invite URL error*
2. Error: *no such host*
* Make sure to paste the correct *Issuer URL*, e.g. `https://dev-16686455.okta.com`. You can also verify the URL by appending the OIDC Discovery path `/.well-known/openid-configuration` and open the resulting URL in you browser, e.g. `https://dev-16686455.okta.com/.well-known/openid-configuration`
## Log in with Single Sign-on
### Use your email address
Once you've finished setting up SSO for your organization, you'll need to log out before heading back to the Login page.
* Click the *Continue with SSO* button to sign in using your new SSO setup.
*Invite URL error*
2. Error: *no such host*
* Make sure to paste the correct *Issuer URL*, e.g. `https://dev-16686455.okta.com`. You can also verify the URL by appending the OIDC Discovery path `/.well-known/openid-configuration` and open the resulting URL in you browser, e.g. `https://dev-16686455.okta.com/.well-known/openid-configuration`
## Log in with Single Sign-on
### Use your email address
Once you've finished setting up SSO for your organization, you'll need to log out before heading back to the Login page.
* Click the *Continue with SSO* button to sign in using your new SSO setup.
 *Login page*
* Now enter your email address and click *Continue*. The domain of your email address **must match** the domain of your SSO configuration.
*Login page*
* Now enter your email address and click *Continue*. The domain of your email address **must match** the domain of your SSO configuration.
 *Email address*
### Use the invite link
* Go to `Settings > Members > Invite members` and copy the invite link for your domain.
* When you open the invite link while not logged in, you will only see the active login providers.
*Email address*
### Use the invite link
* Go to `Settings > Members > Invite members` and copy the invite link for your domain.
* When you open the invite link while not logged in, you will only see the active login providers.
 *Login on invite link*
## Managing Single Sign-on Access
Only *Organization Admins* are allowed to configure, modify, or disable SSO settings. Regular members will not have access to these options.
*SSO enabled*
#### Deactivating login providers
A deactivated login provider can not be used to join your organization. The existing login sessions are not affected by this setting.
If you need to deactivate a login provider:
* Go to *Settings > Log In and Security*.
* Click the toggle switch next to the login provider and confirm the action.
> To protect you from losing access to your organization, the one remaining login provider cannot be deactivated.
# PingFederate
Source: https://ona.com/docs/ona/sso/pingfederate
You can set up Single Sign-on (SSO) with PingFederate for your team.
This section helps you to create an OIDC application with PingFederate. The *Client ID*, *Client Secret*, and *Issuer URL* of this OIDC application are required to setup SSO in Ona. See the [Step-by-step guide](/ona/sso/overview#step-by-step-guide-to-set-up-sso) for the general instructions.
## Prerequisites
As prerequisites you will need the following:
* Access to your PingFederate instance
* Administrator permissions on PingFederate to create and configure OAuth clients
* Understanding of your organization's authentication flow requirements
## Create an OAuth Client
The OAuth client allows you to integrate with Ona using the OpenID Connect protocol.
Please refer to the [official PingFederate documentation](https://docs.pingidentity.com/pingfederate/12.2/administrators_reference_guide/pf_configuring_oauth_clients.html) for detailed configuration steps.
1. Log in to your PingFederate Administrative Console.
2. Navigate to **Applications > OAuth > Clients**.
3. Click **Add Client** to create a new OAuth client.
4. Configure the OAuth client with the following settings:
* **Client ID**: Generate or specify a unique identifier (you'll need this for Ona)
* **Client Authentication**: Select `Client Secret`
* **Client Secret**: Generate a secure secret (you'll need this for Ona)
* **Allowed Grant Types**: Select `Authorization Code`
* **Redirect URIs**: `https://app.gitpod.io/auth/oidc/callback`
* **Allowed Scopes**: Include at minimum:
* `openid`
* `profile`
* `email`
5. **Configure Token Settings**:
* Set appropriate token lifetimes based on your security policies
* Ensure ID tokens include necessary claims (`sub`, `email`, `name`)
6. **Save the Configuration** and note down:
* **Client ID**: The unique identifier you specified
* **Client Secret**: The generated secret
* **Issuer URL**: Your PingFederate base URL (e.g., `https://your-pingfederate.company.com`)
## Additional Configuration
Depending on your PingFederate setup, you may need to:
* Configure attribute mapping to ensure user information (email, name) is properly passed to Ona
* Set up any required authentication policies or adapters
* Configure session management settings
* Review and adjust any security policies that might affect the integration
## Troubleshooting
Common issues and solutions:
* **Invalid Redirect URI**: Ensure the redirect URI in PingFederate exactly matches `https://app.gitpod.io/auth/oidc/callback`
* **Missing Claims**: Verify that your PingFederate configuration includes the required OpenID Connect claims (`sub`, `email`, `profile`)
* **Authentication Failures**: Check PingFederate logs for detailed error information
For detailed configuration instructions and troubleshooting, refer to the [PingFederate OAuth Configuration Guide](https://docs.pingidentity.com/pingfederate/12.2/administrators_reference_guide/pf_troubleshooting.html).
## Continue with Ona Configuration
Once you have obtained the *Client ID*, *Client Secret*, and *Issuer URL* from your PingFederate configuration, continue with [Step 1. Configure SSO](/ona/sso/overview#step-1-configure-sso) in Ona.
*Login on invite link*
## Managing Single Sign-on Access
Only *Organization Admins* are allowed to configure, modify, or disable SSO settings. Regular members will not have access to these options.
*SSO enabled*
#### Deactivating login providers
A deactivated login provider can not be used to join your organization. The existing login sessions are not affected by this setting.
If you need to deactivate a login provider:
* Go to *Settings > Log In and Security*.
* Click the toggle switch next to the login provider and confirm the action.
> To protect you from losing access to your organization, the one remaining login provider cannot be deactivated.
# PingFederate
Source: https://ona.com/docs/ona/sso/pingfederate
You can set up Single Sign-on (SSO) with PingFederate for your team.
This section helps you to create an OIDC application with PingFederate. The *Client ID*, *Client Secret*, and *Issuer URL* of this OIDC application are required to setup SSO in Ona. See the [Step-by-step guide](/ona/sso/overview#step-by-step-guide-to-set-up-sso) for the general instructions.
## Prerequisites
As prerequisites you will need the following:
* Access to your PingFederate instance
* Administrator permissions on PingFederate to create and configure OAuth clients
* Understanding of your organization's authentication flow requirements
## Create an OAuth Client
The OAuth client allows you to integrate with Ona using the OpenID Connect protocol.
Please refer to the [official PingFederate documentation](https://docs.pingidentity.com/pingfederate/12.2/administrators_reference_guide/pf_configuring_oauth_clients.html) for detailed configuration steps.
1. Log in to your PingFederate Administrative Console.
2. Navigate to **Applications > OAuth > Clients**.
3. Click **Add Client** to create a new OAuth client.
4. Configure the OAuth client with the following settings:
* **Client ID**: Generate or specify a unique identifier (you'll need this for Ona)
* **Client Authentication**: Select `Client Secret`
* **Client Secret**: Generate a secure secret (you'll need this for Ona)
* **Allowed Grant Types**: Select `Authorization Code`
* **Redirect URIs**: `https://app.gitpod.io/auth/oidc/callback`
* **Allowed Scopes**: Include at minimum:
* `openid`
* `profile`
* `email`
5. **Configure Token Settings**:
* Set appropriate token lifetimes based on your security policies
* Ensure ID tokens include necessary claims (`sub`, `email`, `name`)
6. **Save the Configuration** and note down:
* **Client ID**: The unique identifier you specified
* **Client Secret**: The generated secret
* **Issuer URL**: Your PingFederate base URL (e.g., `https://your-pingfederate.company.com`)
## Additional Configuration
Depending on your PingFederate setup, you may need to:
* Configure attribute mapping to ensure user information (email, name) is properly passed to Ona
* Set up any required authentication policies or adapters
* Configure session management settings
* Review and adjust any security policies that might affect the integration
## Troubleshooting
Common issues and solutions:
* **Invalid Redirect URI**: Ensure the redirect URI in PingFederate exactly matches `https://app.gitpod.io/auth/oidc/callback`
* **Missing Claims**: Verify that your PingFederate configuration includes the required OpenID Connect claims (`sub`, `email`, `profile`)
* **Authentication Failures**: Check PingFederate logs for detailed error information
For detailed configuration instructions and troubleshooting, refer to the [PingFederate OAuth Configuration Guide](https://docs.pingidentity.com/pingfederate/12.2/administrators_reference_guide/pf_troubleshooting.html).
## Continue with Ona Configuration
Once you have obtained the *Client ID*, *Client Secret*, and *Issuer URL* from your PingFederate configuration, continue with [Step 1. Configure SSO](/ona/sso/overview#step-1-configure-sso) in Ona.